
Chroma Keying June 7, 2004
Chroma Keying in Final Cut Pro HD
Chroma Keying June 7, 2004
Chroma Keying in Final Cut Pro HD
Chroma keying is a really useful skill to add to your effects creation toolset. The only trouble is that it is rather a black art. That is, keys are rarely achieved with precisely the same settings and it takes skill and practice to do it well. However, it helps to follow certain basic procedures to be successful at it on a consistent basis. As long as your image is shot and lit correctly, you're halfway there towards succeeding at a convincing chroma key effect. This article is written and designed for you to achieve predictable results in keying using the Chroma Keyer filter in Final Cut Pro HD.
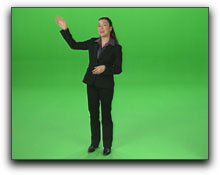

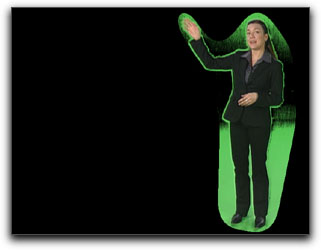
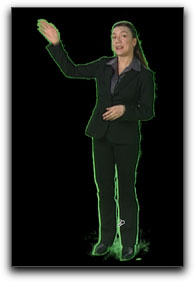
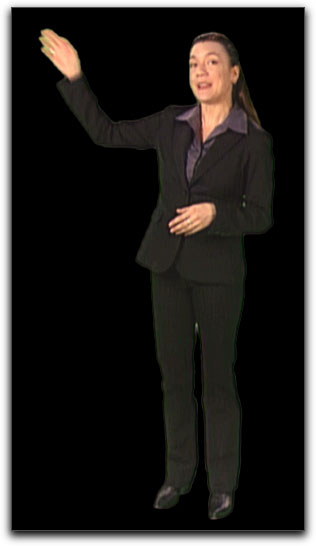
If you weren't already aware, chroma keying is the process of electronically "cutting out" a subject shot against a solid colored blue or green screen. Once the subject (in our case, a woman named Linda) has been removed from the background, you are free to place it on an upper track, say V2. This allows you to place a different background behind the subject, which opens up new possibilities for creating visual effects.
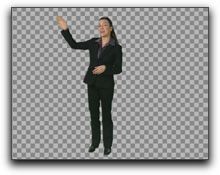
When you are removing the blue or green areas of the backdrop, what you are really doing is creating an alpha channel, (or matte) which will create an area of transparency around your subject.
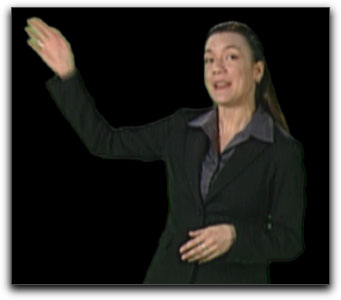
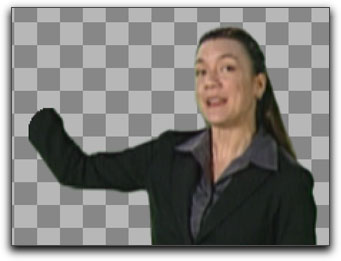
In this article, I'll be attempting to use the FCP Chroma Keyer on "Linda", which is one of the more difficult keying jobs that I have faced in the past few years. This was originally shot on Beta SP with a 3CCD camera that had a pro lens.
Sounds great, right? Not really. Although the source was of high quality, I found that Linda's shiny black outfit absorbed a good deal of spill from a set, which was strongly over lit. Also, Linda had 2 quick hand gestures, which made it difficult to maintain a good solid key for about 24 frames. Because of this, my key will need some troubleshooting, which will require some techniques that I'll share with you a bit later.
Let's get started, though, with the process of chroma keying a standard shot and I'll work along with you.
Creating a clean key begins before you even launch FCP. As I mentioned earlier, with chroma keying, you'll have to start with the highest possible quality video at the shoot. Perhaps, you have heard the phrase "garbage in=garbage out". This old adage really applies to chroma keying, as a higher quality clip will give you a smoother edge around your subject.
Although this article will not instruct you how to shoot for blue or green screen, I can offer up a few pointers. For more details, read the article by Charles Roberts entitled, "Chroma Key Basics for DV Guerillas Part 1". This will give you a broader view on this topic.
There are a few key points that I can share with you if you have any control over how the shoot is executed or are actually shooting it yourself.
After the shoot has wrapped and you have the footage in hand, you can begin to prepare it for keying. You'll first need to get it into Final Cut Pro at the best possible quality. Most people will probably be using miniDV or DVCAM. This used to be problematic because of the limited colorspace of 25 Megabit miniDV or DVCAM (which is sometimes referred to as 4:1:1 sampled footage), but now it is less of a headache with a new filter that was added to FCP 4, called Chroma Smoothing 4:1:1. If you have an opportunity to shoot the piece on a higher quality format, then by all means, do so. You'll get smoother edges around your subject when you begin to work on the key.
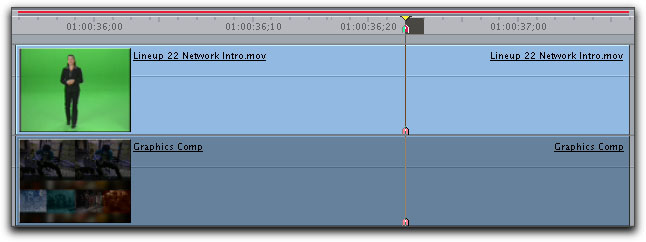
After the footage has been logged and captured into a bin, you can begin working on your chroma key effect. First, place any background footage onto V1 in the spot where you wish to start the effect. Then, edit the green screen shot directly over the V1 clip on V2. You should turn off the V1 clip temporarily so that you can work against the background of the Canvas. To do so, select the clip and type Control + B.
In the Canvas, I switch off between the black, white and checkerboard backgrounds as I adjust a key. These choices are available in the View pop up menu. Leave it set to Black for now.
Tip: Stretch out your Canvas to 100% size as you work. You'll see a more accurate representation of your work on your Canvas. Of course, your NTSC or PAL monitor should also be connected to your deck (or video capture card-or break out box if working with SD and HD), so that you can see the quality of your edges as you work. After you render and play your composite back, return the Canvas to "Fit to Window".
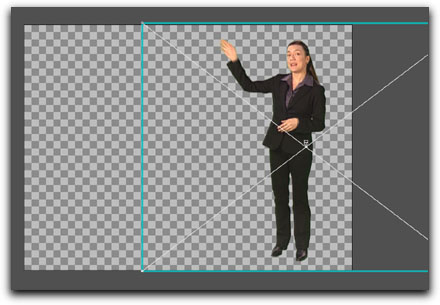
Scrutinize your footage to see if there are any light stands, boom poles, or other anomalies in the shot. After you've evaluated your shots, your next step is to crop or garbage matte out these items at a minimum. I like to matte out as much of the surrounding blue or green screen around the subject as possible. Why? You don't want to spend extra time trying to key out areas of the frame that the subject will never travel into. It's easier to key a subject this way too as there are fewer shades of green within the matted area. You can even keyframe the crop or garbage matte, if the subject moves around the frame a bit. For this, use as few keyframes as possible. Step through the frames and make sure your subject does not travel outside the area you've cropped or matted out.
To add an 8-Point Garbage Matte to the footage, do the following:
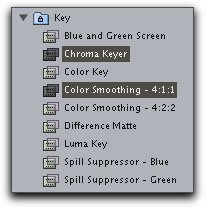
You're now ready to add filters to create the chroma key. You'll need two filters to get the job done properly: Chroma Smoothing and the Chroma Keyer. You should note that there are two flavors of the Chroma Smoothing filter. Use the 4:1:1 version if you are working with DV-NTSC. Use the 4:2:2 version if you are working with 4:2:2 formats, such as, DVCPro 50. It is important to note that you should apply the Chroma Smoothing filter first.
Here are the basic steps for chroma key filter application:
Tip: If you are using a Garbage Matte, it must lie below the Chroma Keyer filter in the Filters tab stacking order.
Start with the best possible source material

a. Place the playhead near the beginning of the clip and set keyframes by clicking the Add Keyframe button for each point.
Tip: If you do a lot of chroma keying, it helps to have a large monitor or dual display set-up so that you can drag out both the Chroma Keyer and the Filters tab.
b. Move the playhead to the end of the clip and reset the points (this will in turn add new keyframes automatically).
c. Move the playhead to the middle of the clip and see if the points need resetting.
d. Continue the process between any and every keyframe until the subject does not step out of the garbage matte throughout the clip.
Unfortunately, due to the nature of PAL's 4:2:0 color space, you will not use a Chroma Smoothing filter at all, as it will do you no good. Currently, there isn't a Chroma Smoothing filter for PAL users that I am aware of.

|
What is Color Smoothing?
The Color Smoothing filter "pre-blurs" the blue channel in the image just slightly and only horizontally. The reason that you'll want this pre-blurring in your image is that it will smooth out most of the "jagged edges" around your chroma keyed subject. Gone are the rough edges that you've seen when using DV-NTSC as source for chroma key effects in the past. If you still use FCP 3, there is a color smoothing filter available. Download a filter called H. Chroma Blur and another called Chroma Offset (Y/C Delay) from Adam Wilt. Got to: www.adamwilt.com/SteppyEdges.html. Even if you do have FCP HD, you may find them useful for certain situations. Check out Adam's site for the full scoop on how to use these filters. G Filters' "G Nicer" from www.nattress.com is also an excellent chroma smoothing filter. |
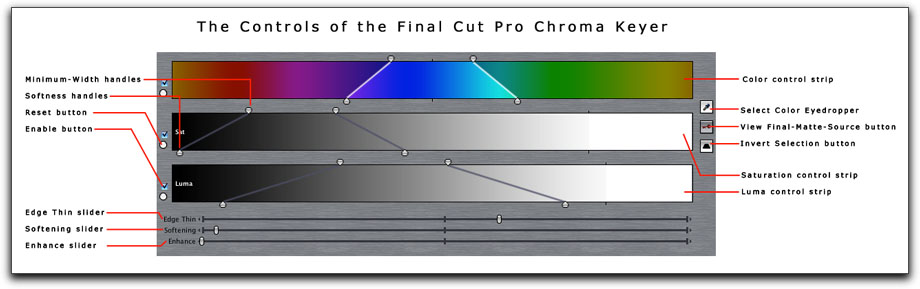
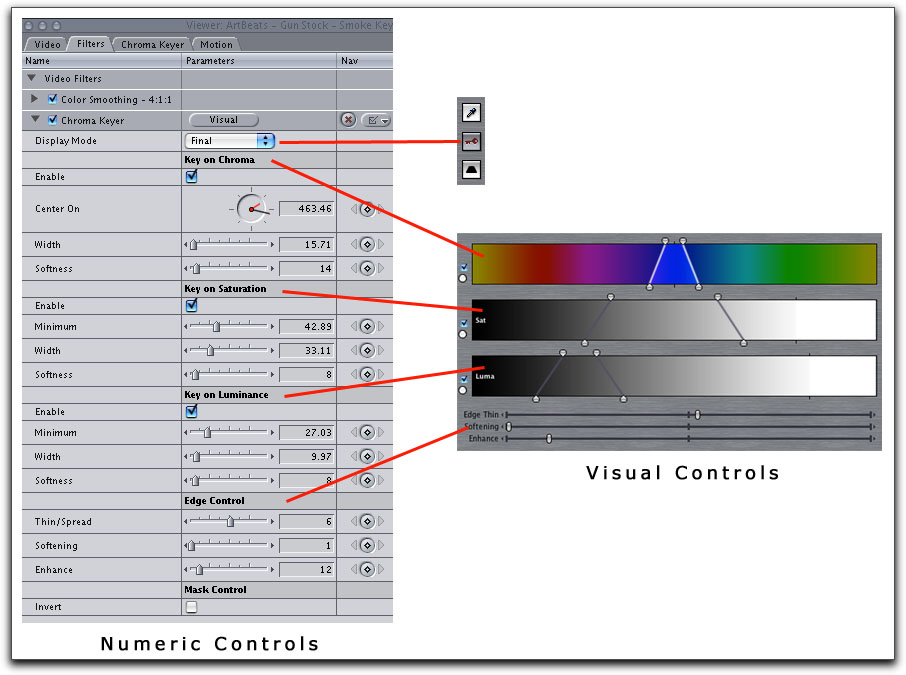
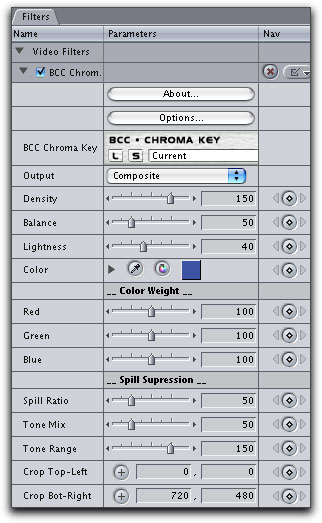
The goal of primary keying is to knock out most of the background using the Chroma Keyer filter. The Chroma Keyer has two primary interfaces: the visual and the numeric interface. They both work the same way, however, it is a good idea to start in the visual interface to use the Select Color Eyedropper, which is not available in the numeric interface.
You can easily switch back and forth between interfaces once you get moving on the matte, however. Here's how:
Once the basic matte is created, you can then work on fine-tuning the edge detail of the matte, which is where the real art of keying takes place. Since a matte is defined by the colors black and white in the alpha channel. You'll get started on this process by knocking out the remaining blue or green patches around the subject and any blue or green "halo" around the subject.
Monitoring the matte
To do get your matte looking good, you'll be finely adjusting the controls of the Color Control Strip, Saturation Control Strip and the Luma Control Strip. Before you start fine-tuning though, it is helpful to know how to see the matte as you adjust it.
I suggest that you drag out the tabs of both the visual interface and the numeric settings at the same time as you work. That way, you'll be able to manipulate either set of controls subtly as you check the matte. Perhaps you can see why having a lot of screen real estate is very beneficial when creating video effects!
As you adjust the controls, you'll be constantly switching back and forth to the affected image (against black, checkerboard or white) and to the black and white image of the matte. Check the image after each adjustment of the controls to see the progress of the matte. It's important to monitor the matte to see whether you are improving the matte or destroying it. You are improving the matte when it is defining the shape around your subject. You are destroying it when the matte is dissipating around your subject. If you see areas of gray within the main part of the matte, then you are also destroying it.
I use the Source/Matte/Final button (it's the one with the key on it) to switch back and forth quickly when monitoring either the matte or the final image. To engage each mode, just click on the button.
How to fine-tune the matte
You'll need to complete the following steps to fine-tune the matte created by the chroma key. Your goal here is to minimize any green or blue around the edges of your subject.
b. Click and drag either one of the bottom handles a bit to the right Đ they should both move simultaneously. This makes the tolerance softer so that the other shades of green will gradually be introduced to the matte.
c. Click on the Source/Matte/Final button twice and take a look at the matte. It's OK if it is not perfectly defined just yet. It's going to take a bit more work with the Saturation and Luma controls.
Tip: In both interfaces, you can use "gear down" behavior to make slight adjustments with the sliders for your key effect. Do this by holding down the Command key as you click and drag.
Primary Keying
Now that the proper filters are applied in the proper order, you can go about removing most of the blue or green background. For this, you'll use the Select Color Eyedropper.
Use the following technique to knock out most of the background:
Click on a green area near the subject with the Select Color Eyedropper


Adjust the controls in the Chroma Strip first.
a. Click and drag a handle at the top of the Color control strip to the left or right just a bit. Both handles should move in unison. This allows a few more shades of green (or blue) to be included in the selection.


|
Preserving edge detail in the matte
With the FCP Chroma Keyer, it's not too difficult to get a key working to about 95% effectiveness. That is, when inspecting your matte it is either black or white. That's great for a start, but at times, you need to bring out the grayscale areas of your matte to preserve the detail of certain items, such as clothing fringe, hair and smoke. These have to appear as semi-transparent in the comp, so they are represented by grayscale values in the matte. I find that adjusting the Softness sliders for all three control strips are most helpful for getting grayscale values back into your matte, especially the Key on Luminance controls. The Softness sliders are akin to the visual interface's drag handles located at the bottom of each control strip. |
Tip:It is sometimes helpful to switch off one of the enable buttons for the Sat or Luma control strips when fine-tuning the edges of the matte.
Great! So far, you've gotten a lion's share of the work done by shaping the matte with the controls. The next few steps will be primarily concerned with fine-tuning the edge of the matte, while preserving as much edge detail as possible.
At this stage of the game, there is a trade off between thinning your matte and preserving fine detail. At this point, hopefully you only need to adjust edge thinning and edge softness very slightly. If there is spill (color from the backdrop) in your effect after the keying is done, you can tame it with the Enhance slider.
How to use the Edge Controls
How to adjust the edges of the Matte
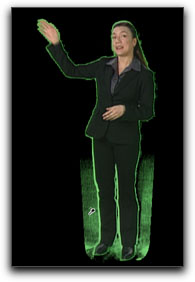
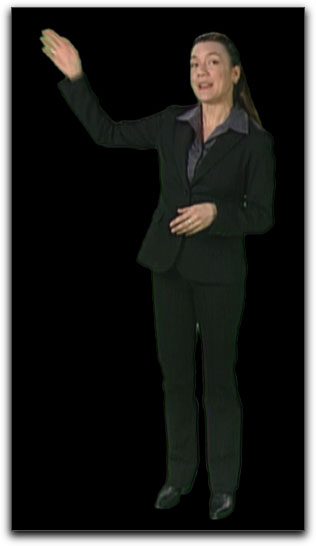
Congratulations, you've just completed the process of keying your subject from the background. You should see your subject completely separated from the colored backdrop. There are now a few details you can take care of to improve the subject and background.
You can add filters to the footage so that the subject and background match each other more naturally. I usually reach for the Color Corrector 3-Way and Gaussian Blur filters to get the job done. After all the layers are in place, make sure that everything blends together well. It is no accident that I chose to tint the background a green color. Tinting the background the same color as the green or blue backdrop is one way to hide problems with a poorly defined matte.
Color Correction
Chroma keying often alters certain color values, so it's a good idea to do a color correction pass to your subject (and/or your background). Typically, I will add a Color Corrector 3-Way to each clip to not only improve image fidelity, but also to look toward makings making the color and brightness values more evenly match each other.
You may want to blur the background slightly to give the composite the illusion of depth.
To do this:
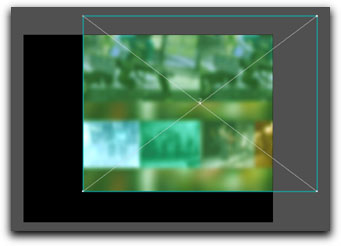
Here, you see the tinted the clip, to which I added a Gaussian blur filter. After blurring the clip a bit, I then offset the clip's wireframe (Note: place the wireframe on the X, Y axis using whole, even numbers in the Motion Tab). My intention is to make a "video wall" effect to play behind Linda.
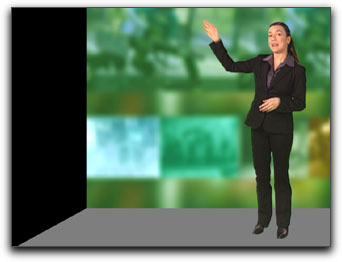
Now that both major elements have been color corrected, and the background is blurred a bit, you can put together the composition. In this example, we'll make a simple comp featuring Linda on a virtual stage introducing some flying bullet points.
In the following figures, I've built a simple virtual set for Linda. After color correcting, blurring and positioning the background, I can start placing the elements for the comp around the Canvas. I'll first fashion a "floor" and then bring Linda into the shot.
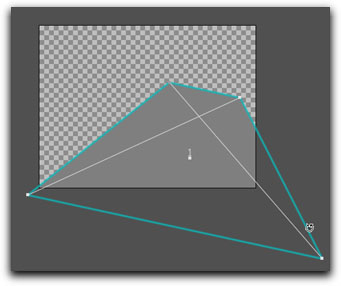
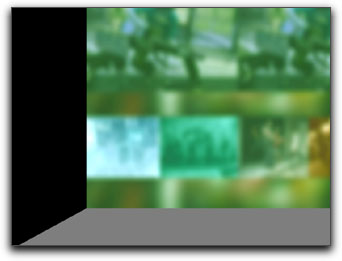
For the floor of the set, I just distorted and rotated a simple Color Matte and placed it on a lower layer so it appears behind the background layer.
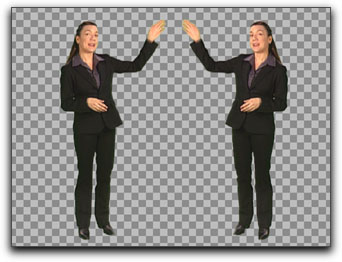
When you are putting together a composite featuring a keyed subject, keep in mind that you can rotate, scale or position it anywhere you like on the Canvas. You can even duplicate the clip on another video track to have multiple copies of the subject in the frame at the same time.
At this point in time, it's a good idea to bring your subject into the comp and do any final adjustment to the key, color correcting or placement of the image. Remember to check your clip in the Motion Tab to adjust placement with the Center (again, rounding off the X, Y integers to whole, even numbers) and scale parameters.
Add another color matte with a Matte>Shape Mask>Rounded Rectangle and 4 layers of text using Title 3D on top of that to complete the composite as seen below.
Keying is certain to test the limits of your patience, particularly when things are going wrong. Note my case of Linda and the difficulty of maintaining a matte during quick hand movements.
Here are some potential pitfalls that may happen to you, and some ways to solve them.
The source imagery is poor
For these kinds of issues, all you can do is crop or garbage matte out most of the problematic areas around the onstage area for the subject right inside FCP. Hopefully, by tweaking the Chroma Keyer's controls lightly, you can often find a zone where the unevenly lit backdrop or creases in the backdrop will disappear. If you have a backdrop that is very unevenly lit, see the next section.
Matte Problems
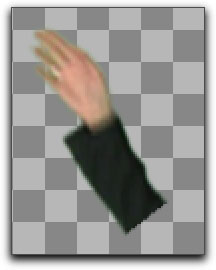
The only way to get around this problem is to stack the identical copies of the clip and garbage matte (or crop) out the two most wildly different lit areas of the clip. Then, apply a separate chroma key filter to each layer. You can now have separate, more accurate filter settings for each area.
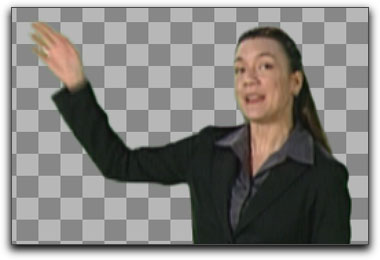
This is the technique I would use for the problem we had with Linda's fast moving hand. The rest of the key looks fine, so I just cut out the hand and a small piece of her arm on one layer and the rest of her on a lower layer. Disarming image, isn't it?
After separately keying each layer, I was able to get better results. As you can see, the final result in blending these two layers is seamless. You may find it interesting that many green screen composites are made up of more than a few layers with a different Chroma Keyer filter applied to each layer.
Note that the Matte Choker should lie at the bottom of the filter stack, but in front of a color corrector filter.
It is unnecessary to readjust the Edge Feather slider in the Chroma Keyer.
Color Correcting a composited key
If you needed to have 2, 3 or more layers making up your chroma key effect (for example, if you had an unevenly lit background), and a color correction is needed, then I suggest that you nest them first and then add the color corrector to the nest. As I mentioned, the goal of color correcting your keyed shot is to make the subject look as if really belongs into the background to provide a more convincing composite.
Here's how:
Using Other Filters and 3rd Party Solutions
Let's say that you've tried the methods that we've already discussed and you're still getting nowhere with your key, it's possible that the FCP Chroma Keyer and Chroma Smoothing filters just aren't doing a satisfactory job. In that case, you can try out some of FCP's legacy key filters, such as the Blue and Green Screen filter or the Color Key filter, but I cannot recommend them. The Spill Suppression filter can be useful for excessive spill on the interior area of the matte. as the Enhance slider only works on spill around the edges. Just make sure it lies below the Chroma Keyer and above any Color Corrector you may have.
If you have some extra bucks tucked away for FCP plug-ins, there are some very good ones out there. 3rd party plug-ins usually have more controls for both enhancing and repairing chroma key effects.
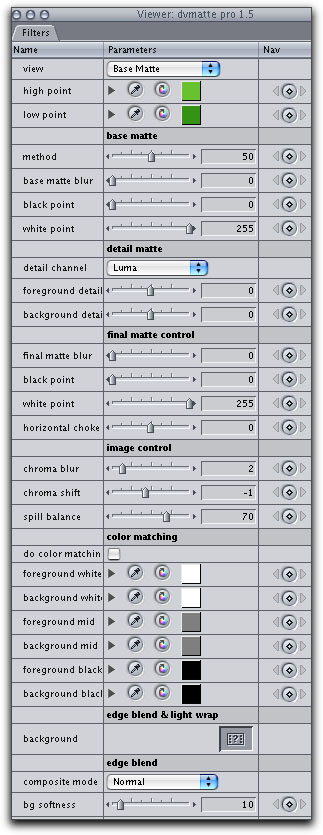
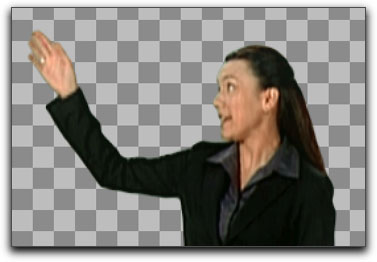
DVMatte Pro is the new kid on the block, but it is one of the better keyers available for FCP. It is conveniently laid out and fairly easy to use. You just start at the top of the filter and work downward. It essentially takes two color difference keys, one based solely on Luma making it very effective. I like the color matching tools and light wrap functions, as well. The filter ships with plenty of instructions including QuickTime movies.
Here, I've used DVMatte Pro on the Linda shot and even though I am a novice with the plug-in, I was able to get her hand keyed out fairly easily and without having to resort to any of the troubleshooting techniques I've already discussed. Chalk that one up to the helpful tutorial material that comes with DVMatte Pro.
Boris Continuum Complete has a number of filters that are very useful for keying. Their Chroma Keyer has its preset controls set for knocking out about 90% of any key, so it gets you "in the zone" right away. There is also a 2 way Keyer for when your talent shows up in a shirt that is nearly the same color as the blue screen. There are also a number of matte repair oriented filters, as well.
Of the two, I would say that DVMatte Pro has the more powerful keyer, but it's nice to have the matte repair filters in BCC. You never know when you may need them.
At press time, I should mention that the new program from Apple called Motion will be shipping with a copy of PrimatteRT by Photron¨. This is a high quality 3rd party keyer built right inside of Motion. That means you can jump in and out of FCP easily with the newly keyed effect courtesy of PrimatteRT's advanced toolset.
I have found that if you've got good source footage and a bit of patience in creating the matte, the Final Cut Pro Chroma Keyer works fairly well. The addition of a Color Smoothing filter adds to its effectiveness. Do a bit of color correction to enhance the look of the chroma key effect, as well. If your footage has a lot of problems, look into the possibility of purchasing a 3rd party keyer, or Apple Motion. It's nice to have a back up keyer anyway, if you need to do a lot of chroma keying.
By now, you should have the basics of chroma keying under your belt. I hope you have enjoyed this article. Good luck to you in creating great video effects with Final Cut Pro and may all your keys be clean!
Adjusting the matte's edges
Locate the Edge Controls. They're at the bottom of the Chroma Keyer's visual and numeric interfaces. Here's the way the Matte Edge controls work:
To adjust the matte's edges do the following:
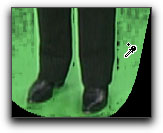
Adjust the Edge Thin slider to reduce any green haloing around the edges (image zoomed in to 200% for emphasis).


Blurring for Perspective

This problem can run the gamut, but is typically related to poor pre-production planning. I find the most common problems are that the background is unevenly lit or there are creases and folds in the material that makes up the backdrop.
If your backdrop is really unevenly lit, or if you have rapid movement within your clip (as with Linda's hand), then you may have trouble with keying your subject throughout the length of the clip.
The problem centers on having to select too wide tolerance for Chroma, Luma and Saturation, making it difficult to create a clean key (or alpha channel) for both the main subject and the problematic areas of the matte. As you already know, when too much gray gets introduced into the alpha channel, it ruins it.
You are still seeing fringe around the key
It's quite common that after you've gone though the above steps, you still have trouble with the edge showing a little of the colored background, as was the case with the shot of Linda.
If this is the case, you can continue to adjust the Chroma Keyer's controls (or reset them and work from scratch), you can also try adding a Matte Choker filter. Here's how to work with the Matte Choker:
Kevin Monahan is a film and video specialist and has been working professionally in radio, television and film for 15 years. He has recently written a book entitled, "Motion Graphics and Effects in Final Cut Pro". He is also an Apple Certified instructor for Final Cut Pro and Motion and teaches both privately and at the Bay Area Video Coalition (BAVC) in San Francisco, CA. Kevin co-founded the SF Cutters, the world's first Final Cut Pro User Group and runs the website www.fcpworld.com. For bookings or more information, contact Kevin by email at: Kevin Monahan (tellysworld@netscape.net.)
© 2000 -2004 Apple
Computer, Inc. All rights reserved. Apple, the Apple logo, Final
Cut Pro, Macintosh and Power Mac
are either registered trademarks or trademarks of Apple. Other
company and product names may be trademarks of their respective
owners.
All screen captures, images, and textual references are the property and trademark of their creators/owners/publishers.