
How To January 28, 2001
How To January 28, 2001
Chroma Key Basics for DV Guerrillas - Part 1
or "So you can't afford Betacam..."
So you can't afford Betacam. You are giving up one meal a week to afford that Final Cut Pro rig you've got and you certainly can't spring for more pro equipment. You're not going to be able to afford what the industry sets as the bottom line for professional keying. You are a DV Guerrilla and you want to make unbelievable things happen in your garage. You want to make your kids fly through the air next to an airplane. You want to sit in a chair next to yourself and have a short conversation. Is it possible?
Oh, sure. There's some limitations you really need to take into account and it will take a little cleverness and a lot of experimentation, but you can key quite well with a prosumer DV camera and FCP.
What's really involved here, though? If you have no experience at all with keying, let me say a few things first about that. Keying, whether chroma or luma, is the process of matting out specified colors in a frame of video. FCP can look at each frame, find every pixel containing the color you have chosen for a background key color and make that pixel transparent. Then whatever you have on the video layer underneath shows through. If you use Luma Keying instead of Chroma, FCP will instead select all the pixels in the frame that have a higher (or lower, if that's your game) brightness value than the specified Luma Key value.
Why use Chroma Key instead of Luma Key? Well, think about how specific the pixel choice would be with only grayscale values (essentially black to white or dark to bright) as opposed to color, or RGB, values. There's a lot more variation in color than there is in luminance (for your computer anyway, I'm not gonna start picking fights with B &W photographers), so its easier to set a very specific color value to key out without touching anything you don't want to key out. This is not to say that Luma Key isn't valuable, but it really comes in handier when you are trying to build gradient keys, say, a word that goes from semi-transparent to opaque smoothly across the frame. But that's a subject for another article. Let's stick here with making your kid chase a Boeing 747.
So, what do we have then? Keying means choosing a color for a background that FCP will get rid of, leaving your three year old googling around in whatever the video layer underneath it contains. How do we choose and optimize this background color?
For Chroma Keying, there are two standard colors in use today, blue and green. If you look in the Video Filters>Key>, in addition to Color Key, you will see Blue and Green Screen, which are simply Color Key filters preset for either of these two popular keying colors. Now, let's think for a second. We have been presented with a choice of Blue and Green for our key color. Why one and not the other? And furthermore, why not use Yellow instead, since it represents cowardliness and will leave the frame with it's tail between its legs?

Think this way. The color you choose will disappear from your frame. So you have to make sure that your SUBJECT doesn't contain that color. And further, remember that any secondary colors of a primary color from the color wheel will include some portion of the primary color (and we're talking DV Primaries here; that's Red, Green and Blue. I'm no painter...) Now, (hopefully) your child has some Red and various secondary tones in its flesh (and is breathing), which would eliminate Red as a likely background color. This leaves the only two Primary Colors, Blue and Green.
Which should you choose? There are a host of considerations, some technical, some practical. For technical reasons I won't really go into here (see footnote*), Green is really a better choice. Also, in practice, you'll find that specifically Green items are more rare in your subject's wardrobe surprises than Blue. You can't help it, people like to wear Blue stuff. And finally, if even a TRACE of sunlight falls on your subject, you will find them bathed in Blue light (daylight has tons of Blue light).
Now, on the other hand, if you can find a really nice Blue screen and/or wall from days gone by (check your local Cable Access Station) and you can control the lighting, there's absolutely no reason to avoid it. If you find thirty gallons of really saturated flat Blue wall paint in your garage, there's no reason to go drop more money to buy really saturated flat Green wall paint instead. I emphasize practical here, the fun is in working out the details. Other background information you should consider:
If you will be painting a wall for your screen, first look at your location. Will you be able to COMPLETELY block all light spill from the sun, street lamps, etc.? Chroma Keying is not difficult, but it depends on the color and strength of light, so you must be METICULOUS about what light is where and when.
Yes, you COULD go buy the most saturated Chroma Green paint that Rosco sells. But that wouldn't fit in with our ethos, would it? Those paints are better for Keying, but you can do just fine by going to Sherwin Williams and get the closest and cheapest thing you can get to flat primary Green (I think the crap I bought, which serves quite well, was called 'Irish Spring'). But you must get plenty. You will need at LEAST 3 coats not counting your primer. We need GREEN, not green!!!
Finally, how large an area will you need to paint? That will depend on your particular needs and information you will pick up later in this document. (the quick answer is as much as you can afford to light!!!)
Suppose some colleague tells you, "Oh, man, there's a roll of Chroma Blue paper back in the closet. Take it, it's yours." Should you? Absolutely. That paper's really expensive and quite good. But be aware that it can be much more difficult to light evenly and to hang without destroying. It's paper, after all. Every wrinkle will come back to get you when you get to FCP. A well painted wall (or cyclorama for the "This Old House" folks who're really slick with a hammer and joint compound...) never changes its shape or lighting characteristics.
OK, here's where I'm gonna start getting the email death threats. (cringe) You can achieve acceptable Chroma Key results without using a professional lighting kit (duck). Make no mistake here. I am not playing down the importance of good lighting, nor am I devaluing 1,000 watt lamps. I am merely stating that one who cannot afford expensive light kits can do admirably well using that old stand-by, the clip-on flood, especially if one is already using a lower res camera anyway.
A 150 watt clip-on light socket w/t hood and one 150 watt flood or spot runs about 10-12 bucks. Multiply this by 6 or 7 and diversify (say a couple of wide floods, a couple of wide spots and a couple of cute little narrow spots for keys, then maybe one low watt color corrected flood for a backlight) and you've got the tools you need to evenly light both your subject and your background separately and optimally for each use.
What's the trade-off? Well, using these 150 watt amateurs means lots less light. And remember, light is the key here. You will have to open the aperture on your camera a lot more to compensate for the lower level of light you recieve from these lamps*. Depending on the effect you are looking for, you will have to experiment quite a bit.
That said, the following are a few key points to keep in mind if you want to go this route: 1) Make sure that all the bulbs you purchase are of the same wattage and make. You'll never get it perfect with consumer bulbs, but you want to keep the color temperature (how yellow or blue the light is) as consistent as possible.
2) Cheaper doesn't mean safer. Quite the opposite. These work lamps are not designed for the job you will be using them for, so extra care must be taken with them. By the same token, a Lowell kit isn't really any safer if you use it like an idiot. Do not put high watt bulbs in a low watt socket. If you do not know what that means, ask the guy in the hardware store. Do not leave lights unattended; unplug when you leave them alone. Do not even THINK about attaching them to or putting them anywhere near anything even remotely flammable and/or fire sprinklers. Find cheap C-Stands or something else solid to anchor lights. Do not run 12 of them off of one electrical circuit. Do not move a high watt lamp that is on, and do not point it at anything while moving; hot bulbs can explode with very little movement and send shrapnel everywhere. All of these and more can cause fire and other catastrophes. Be Careful !!!
3) Look around for cheap or free bounce cards. To get good even lighting without shadows, you need diffused lighting. Pointing a light directly at the subject will give uncontrollable specular lighting. Find poster board, matte board, plywood painted white, anything white and bring it to your shooting space. Instead of directing your lights at the screen or subjects, bounce the light off the bounce card onto the subject and you will find that it spreads evenly and mixes with other light sources easily. I have a couple of big bounce cards that are just plywood 4x8 sheets painted white and hinged together to make a free standing bounce card. Total cost, 30 bucks, including the Eddie Bauer hinges ;0)...
4) Move the dang things around. Remember the Inverse Square Law of light. As distance from the light source doubles, anount of light making it to the subject is quartered. A combination of light lost through bounce card and distance gives you a pretty good set of controls for lighting values.
5) If bouncing the light kills too much light and you must use direct lighting, find other ways to diffuse the light. You could buy gels and scrims for a whole lotta bucks... or you could get another C Stand and suspend something cheaper in front. I find that bubble wrap works surprisingly well. Believe it or not, there's actually a discernable difference between wrap with different size bubbles (bigger bubbles let more direct light through), and two sheets of wrap kills more than one. Two or three UPS shipments and you've got a complete set of diffuser gels. Bubble wrap is plastic. It melts and it burns. Do not be a dope and attach it to your lights. Keep it in the light path but well away from the bulb.
6) Set up your space so that there is an appreciable distance between the screen and the subject, say 8-10 feet or more, depending on your space constraints. The more distance you put between these two will limit the amount of spill light and shadow between your keying screen and the subject. You'll want to dedicate lights specifically to fore or background. Remember the Inverse Square Law here again. After your eyes get good with this stuff, you'll be able to see the light drop off between the screen lit and subject lit zones.
Now, set up your lights and bounce card stuff, eyeballing it for now. Practice getting even lighting on the wall and on the subject. You'll have to tweak it again after getting your camera readings, but get it as close as you can. Practice is everything in lighting (humble yourself and take a CE class if you can). Every time you do this, you will get better. Eventually, you'll just mechanically set the lights up and when you check the exposures, you'll have ace'd it.
Take a look at the following lighting diagram for the desk shot on page 2. The area is about 20' from screen to camera and about 12' wide.
1) Camera Position
2) Ceiling mounted 100 watt key light with a bubble wrap diffuser
3) 150 watt flood bouncing off white wall onto subject
4) 150 watt flood bouncing off projector screen onto subject
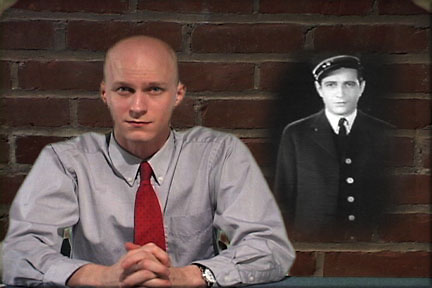
5) Subject (me!!!)
6) 60 watt backlight flood for edge definition
7) big free-standing hinged bounce card
8) big free-standing hinged bounce card
9) 150 watt flood bouncing off of (7) onto screen
10) 150 watt flood bouncing off of (8) onto screen
11) 10x10 painted green screen wall
12) white wall performing as bounce card
13) old projector screen rejuvenated as excellent bounce card.
You see how it works? Total cost of all supplies (not counting camera and tape of course): 100 bucks, including the paint and brushes. Goof around with lighting diagrams like this. The great thing about video is that with a calibrated monitor and your zebra stripes, you can see what works and what doesn't instantly.
When we get to the camera, we'll talk about fine tuning your lighting and setting the exposure.
OK, now here's where we start getting into expenses. Let's face it, the camera is the big budget buster. Even your FCP rig probably costs less than the camera. I said before that you don't have to have Betacam and a 700 line res camera to make interesting decent quality chroma keys. That is true. But you do need a reasonably high res camera that can gather light separately according to its color. If you don't have one yet, let's explore the bottom lines here for doing Keying.
The bottom line for our little DV Guerrilla Chroma Keying camera would be a 3 CCD camera that resolves at least 500 lines and which has manual exposure controls and zebra stripes. I'm not saying that you CAN'T do it with less, just that you can't expect the consistent results using a camera without these features. You really need the hi res, color and luma separation and manual control to put together the right image for subsequent Chroma Keying.
The good news is that those are not rare or especially expensive features these days. The range of consumer to prosumer cameras that sport these features runs anywhere from 1700 to 3800, depending on where you look and and what you're looking for. And remember that a lot of the price of the upper end models is in nice little extra features and optics. You'll have to decide how nice the toy you buy should be, but I'll say that I've had quite good results with a Sony TRV 900 as well as the Sony PD150 and Canon XL1. Try and get your hands on one and test the resolution before buying. Shop around. But remember the bottom line features:
(1) 3 CCDs
(2) 500+ lines res
(3) zebra stripes for checking exposure
(4) Fully manual exposure controls that include Aperture/Shutter Speed/White Balance/Gain
The 3 CCDs separate light into its color components prior to compressing it and recording to DV tape. The high resolution is necessary to achieve more detail in the image, producing better contrast on those all important edges that good Chroma Key depends on. The zebra stripes are a super convenient way to make sure that your footage is not only broadcast safe, but evenly lit and within the luma range you want. Finally, the fully manual controls allow you to set the exact parameters of your exposure, allowing you to make the settings for every Key match up in post. Remember that consistency is half the battle here.
Let's talk about those zebra's. You've seen them. Some of you may have even shut them off. Others may be dimly aware of what they are for. But make no mistake; do not under value the zebra stripes. This is your only real indication of lighting levels. NEVER TRUST A MONITOR. NOT EVEN THE VIEWFINDER. Any monitor that can be adjusted must be assumed to be uncalibrated. That is to say that the luma and chroma displayed by the monitor does not faithfully reproduce the luma and chroma of the image captured by the camera. Some of you may be thinking, "He's not talking about me, I can calibrate any monitor anytime anywhere by visual spec." All I can say is put five different folks who say this in a room together and you'll end up with five different settings and a big argument.
Why bother? Put your trust in the built-in Zebra stripes and White balance. Depending on the camera, Zebra stripes will appear wherever the exposure reaches either 70, 80 or 100 IRE. What does this mean? The IRE scale is a measure of luma values in a video signal. 100 IRE is the absolute white value in an NTSC monitor, and 7.5 is the absolute black value (in the good ol' USA anyway)*.
Why are some cameras set at 70 or 80, while others are set at 100 IRE (the Sony PD150 zebras are selectable at 70 or 100 IRE)? Well, for shooting on the fly, 70 or 80 are good luma values for facial tones. When you can't check the actual light values, zebras at 70 will generally be perfect for face shots. A camera that registers zebras at 100, on the other hand, will give you the correct value of white (100 IRE). Either of these zebras can give you a totally accurate evaluation of the light within the frame. If you aren't sure which IRE level your camera generates zebra bars at, consult the manual. Remember, if you get that wrong, your exposures will be off by several F Stops of aperture, either really really dark or really really light. Once again, you can't trust the monitor (not even the flip out), so use the zebras.
So why are the zebras so great? Why not just use a good old light meter (apart from the fact that a decent light meter cost bucks)? Well, zebras also give you a sense of the EVEN-NESS of lighting across the frame. If there is an area of shadow, it will appear as an area of broken zebras. Nothing could be simpler. So let's look at a step-by-step method for getting perfect exposure.
1) Get your lights set up. First, set up the lighting for the background. Take your time and try and knock out as many shadows as possible. When the screen looks pretty evenly lit, begin setting up your subject lighting. Don't worry about spill onto your background until you get the subject lit properly. When the subject looks good and is casting no unwanted shadows, check to see if foreground lighting has caused any noticable spills onto the screen. Remember that the ceiling mounted light (#2 in chart) is angled down (about a 45 degree angle) and diffused and is placed nearly twenty feet from the screen. Thus the only shadows it will create will occur below camera level and any light spill above this will be lower in value than the screen's own lights. Ya dig how it works? Also, remember that you want to get the DIRECTION and TEMPERATURE of the light correct for your key. In other words, if you will be keying yourself into a sunset beach at Maui, you'll want to have the subject light stronger and yellow/red on the sunset side and fade to sillouette on the other. So adjust your lights accordingly. Its important to think of your foreground and background lighting as different worlds to be kept separate.
2) OK, now that the lighting's pretty close, let's break out the camera.
Camera Placement: Try and keep the camera at least as far away from the subject as the subject is from the screen and farther away if possible, using zoom for composition wherever possible. Why? Because as footnoted earlier, it actually benefits us to use a lower depth of field. A camera zoomed in has a far lower depth of field, which means that very little beyond what the camera is directly focusing on will be in sharp detail. And remember that we actually don't want sharp detail in the screen. Detail (generally) means contrast or change in value, and we want the smoothest most even green background we can get. So an out-of-focus background that nonetheless has the right luma and chroma value is better than a sharp focus background where the camera records every tiny shadow and bump, ya dig? Also two things that will make your life hell in Keying. Avoid moving the camera during shooting at all costs unless you have a SUPER smooth fluid head, and even then, do it incredibly slowly. Motion blur keys really badly in DV and the new shadows you will pick up with every change in angle will kill you. Try organizing what you want to key into different takes where you will still be able to get the best camera angle and best lighting without motion shots. This sounds more difficult than it really is and frankly, you'll find the results look way more professional than if you just yank the thing into place in mid shot. Put some thought into this if you really intend to do this well. Storyboard your shots and your lighting diagrams. Don't learn the hard way (although everybody seems to).
Also, try not to shoot at extreme angles to your screen (I consider 90 perfect and anything 15 degrees beyond that out-of-bounds). Why? Because after spending all that time getting the lighting on the screen even, shooting at an angle will force you to be closer to one part of the screen than the other and, because of the Inverse Square law above, you can lose up to a couple of F Stops of exposure in some parts of the screen. Try it if you don't believe me. Your eye can't see this, because its a smooth gradient change, but the camera sure can. I carry a little pen-sized level with me and lay it flat on the flip out of my PD150 to test level with the ground. Quick and accurate.
3) Now, crank up your camera and compose the frame. Don't worry about the foreground exposure just yet, just compose the window correctly. Set the Shutter speed for 60 and Gain at Odb. Now, start opening the aperture (lowering the f stops) until you reach the Zebra stripes for the screen area (if your aperture is open all the way and still no zebras, add Gain until you see them, just don't forget to turn this back off. On many cameras, the Gain control is separate from the Exposure or aperture control). We won't leave it there, but for the moment, we want to make sure that all the green area is at the same luma level.
If you see areas where zebras are missing, go up or down a stop to figure if these areas are hotter or cooler. Adjust your lights until the whole green field contains zebra stripes. When you've achieved this, close the aperture down to get the green back into the proper exposure level. This of course will depend on where your zebras occur. For cameras with 70 or 80 IRE zebras, you only need to back down a couple of steps at most. For those with 100 IRE zebras, go at least four steps down. How can you test this to be absolutely sure? Take a white piece of paper (tan for 70-80 cams) and tack it to the wall. When you've got the f stop right for green, the paper will register as zebras. Basically you are just using two different references, the zebra IRE gauge in the camera to level the overall exposure and then the white reference to get the overall exposure into the correct luma range for green to actually be saturated green and not washed out. Read this process through a couple of times if this seems confusing. When you do it once, it'll make crystal clear sense.
4) Now that you have the screen set correctly, you can forget about it and light for your subject. First thing, put up another white reference paper where your subject will be, white balance it and see if it gives you zebras (for 70-80 bars, you can just stick somebody's face in there and see what it gives you). If so, white is already perfectly established, both for color temperature and for exposure. If not, or if you wish to achieve a particular light effect, add, take away and move lights until you get what you want. When satisfied, put the reference white sheet back up momentarily to make sure you haven't dropped or boosted your exposure too much to throw white off.
As a last caution, after getting the light just right for the subject, take a second to recheck the screen lighting. Its easy to accidentally spill light on your screen when setting up the subject light. Just stick the reference white card up, check for zebras. Then (after carefully noting the exact F Stop that you have settled on) raise the F Stop until you get the zebras on your screen. Is it still even? If not, go back through the whole process again (maybe pick up a beer, this is supposed to be fun, right?) If it was correct, roll the F Stop back down to the correct setting and lock it in (careful not to unplug camera or remove the battery, this might erase your carefully determined settings). Now you're ready to shoot!!!
You're the director so do anything you want with this stuff. Just remember to have a good time. I do have a few cautions about things that can affect your production, though:
Make absolutely sure that your subjects aren't wearing anything with any color even remotely close to green. Also make sure that they are not wearing stripes or patterns. This is generally a bad idea with video anyway, but even more so with chroma keying, because stripes and patterns cause a form of artifacting that generates color in the video signal which isn't really there. Your child might be wearing a black and white stripe shirt, but when you look at the tape, you'll see flickering rainbows stream through the pattern. Stick with monotone earth tones or blues.
Tie back hair if possible. Remember, the finer the detail, the more difficult to separate from the background keying color. The stuff on TV looks great because they are using MUCH higher res cameras. Your DV camera simply can't resolve a couple of strands of hair, even at really close quarters. DV Chroma Key requires sharp well defined edges. You can't ignore this or your key will look very bad. Besides, eighties hair is a thing of the past. (I bet you're wondering why I shave my head...)
Try to keep screen compositions to Medium Close Up or farther away. Keying imperfections that are obvious up close, disappear with a little distance. Just like the fact that you can't see zits on an attractive person across the street, isolated artifacting won't show (or at least be as noticable) if you reduce its size to minuscule proportions. You'll see once you're inside FCP.
If shooting talking heads, try and keep the camera lens level with the subjects nose and get tight focus on the eyes. You'll always see it if the eyes are out of focus. Remember to take a good look at the footage you are going to key the subject onto and try to come up with interesting techniques for getting around the 2 D look of flat lighting in the subject that is a dead giveaway of keyed effects.
Always get a few seconds at the head and tail of each shot without the subject or props in front of screen. This will be used as a Difference Matte in FCP if the Chroma Key gives unacceptable results. Between FCP and Adobe After Effects, there are a number of different options for getting a good key in video, and when one doesn't work well, another will (usually if you are in a hurry, its the last one you try). Difference Matte has saved my butt a few times, but it can't save your butt if you don't have a few frames to choose from.
In Installment 2, I will walk you through the Final Cut Pro keying process and chat about the merits of Adobe After Effects Production Bundle in comparison with Apple Final Cut Pro amongst other goodies.
copyright © Charles Roberts, 2000.
Charles Roberts AKA Chawla teaches Digital Video and Audio Production at Fitchburg State College in Fitchburg, MA. He uses his long tedious rendering times to generate content and tackle hard hitting issues on the discussion boards of 2-pop.