
September 24, 2007
Compressor 3 in Final Cut Studio 2
By Ken Stone
When Apple recently rolled out Final Cut Studio 2, we discovered that Compressors' interface had received a major overhaul. For those of us who have been using Compressor over the years, the new interface came as a bit of a surprise and, while Compressor is still the same application, the new interface does do things a little differently.
From FCP (FCE) To Compressor
There are several ways to move your finished project from FCP to Compressor. The first method involves exporting directly from FCP to Compressor. Set In and Out Points on the timeline or select the Sequence in the Browser, then from the File menu > Export > Using Compressor. This process might yield slightly better export quality than other methods (exporting as a QuickTime movie), because FCP hands off the video to Compressor in a unrendered state and Compressor renders the video and encodes in one shot. Exporting as a QuickTime movie requires FCP to first render the video using the sequence codec and then the QuickTime movie is re-encoded in Compressor. Encoding the video twice, once in FCP and then again in Compressor can lower final quality a bit. Even so, not everyone uses the direct 'export Using Compressor' process because, during the export, FCP is locked up and not available to the user until the export is completed. It also seems that exporting using this process takes longer than exporting from FCP as a QuickTime movie and then encoding in Compressor.
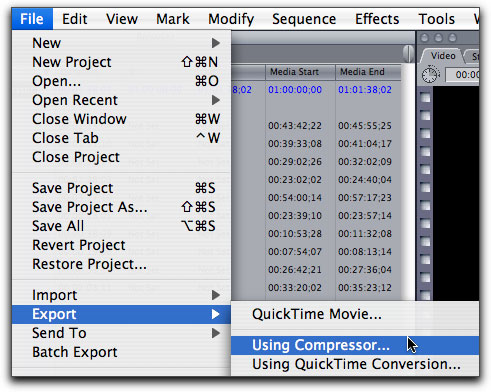
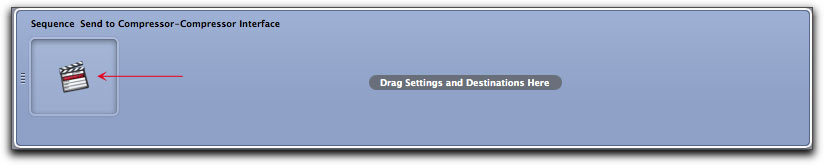
If you choose to use 'Export Using Compressor', Compressor will launch and the FCP Project will be automatically added to the Compressor Batch window.
The other method of moving from FCP to Compressor, which does not lock up FCP, is to export as a QuickTime Movie (not 'Using QuickTime Conversion). Because of time considerations and the fact that using this method allows you to return to work in FCP almost immediately, many people prefer this process.
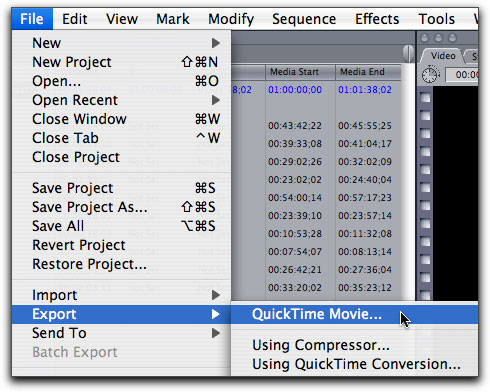
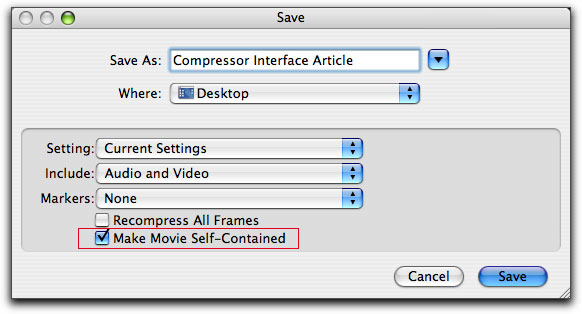
When you choose this method you will be presented with a Save dialog box, which offers two options for export. Shown below in the red box is 'Make Movie Self-Contained'. When this box is checked, FCP will export an exact, full quality clone of your project. This process does take awhile (but not nearly as long as 'Export to Compressor') and does produce a large file. If you are moving your FCP project to a different Mac you'll want to use this process. Since starting with FCP 1, I have found that Self-Contained QuickTime movies are rock solid and even though they take some time and disk space, this is my preferred method of export from FCP. The other option would be to uncheck the 'Make Movie Self-Contained' box. This will create what we call a 'Reference Movie'. This export does not contain any video, but rather simply points back to the video files. Reference Movies are generated quickly and use a much smaller amount of disk space. I do believe that the stability of Reference Movies has improved over the years. As to which one to use, it's your call. A last point, be sure that the 'Recompress All Frames' box remains unchecked.
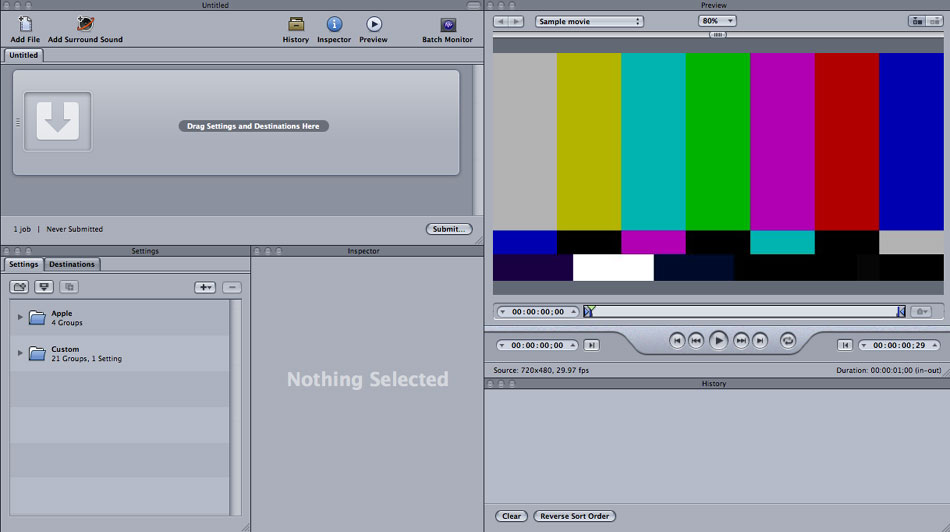
The Compressor Interface
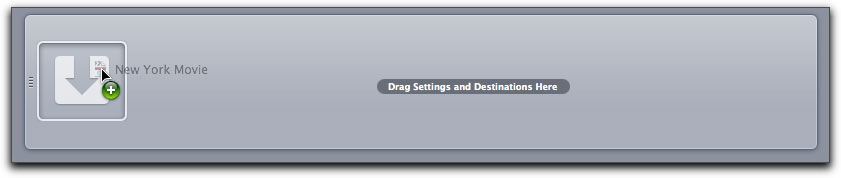
If you have exported your project from FCP to Compressor, the project will show up in the Compressor Batch window automatically. If you Exported your project from FCP as a QuickTime movie, either self-contained or reference, you will need to add the project to the Batch window. The easiest way is to drag your FCP project into the Batch window.
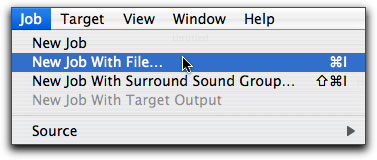
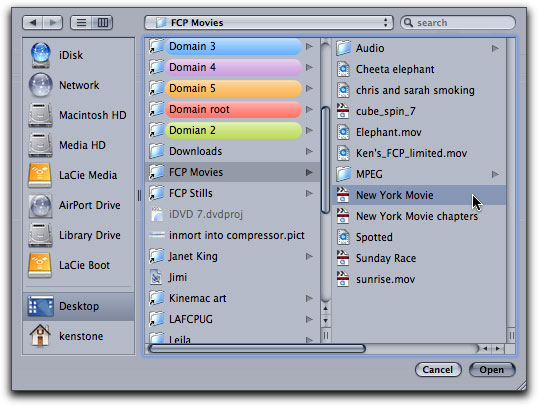
You can import your QuickTime movie through the Job menu > New Job With File.
This will open a Finder window in which you can navigate to your FCP movie.
Once the movie is in the Batch window 'movie well', you can use the slider just below the well to scrub through your movie.

The next chore is to set a Destination for the Compressor final output, where you want the job saved. These options are found in the 'Settings/Destinations' window. As shown below, I have selected the Destinations tab in the window and twirled down the 4 Destination options.
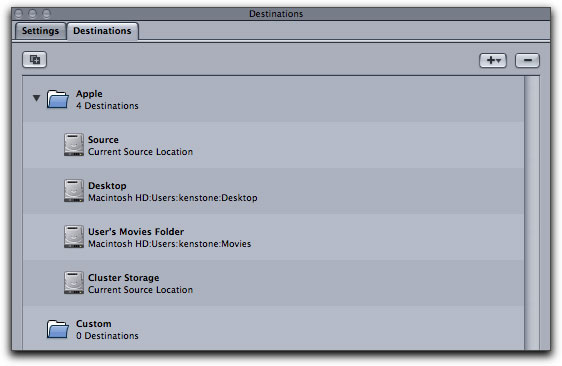
Typically I like to save my Compressor output to my Desktop. To accomplish this, click on the Desktop icon in the Destinations window and drag it up into the Batch window.
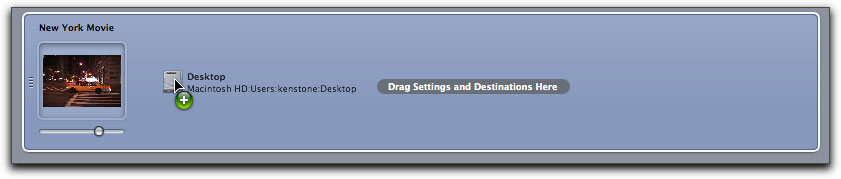
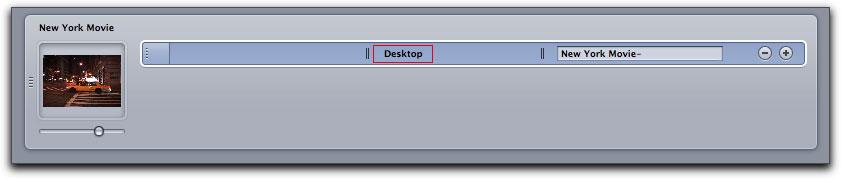
Desktop will now be set as the destination for this jobs output.
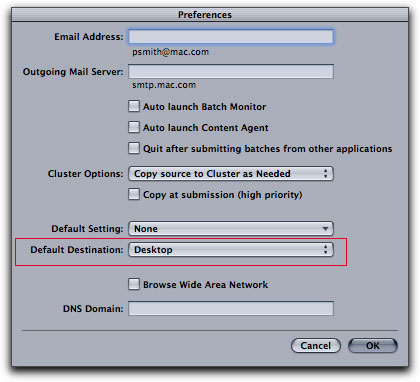
If you are processing a number of jobs and want to save to the Desktop, dragging the location into the Batch window for each job can be a real bore, but there is another way. Open the Compressor Preferences and set the 'Default Destination' to Desktop. Now you will no longer need to set the Destination. When you add a Preset for the job to the Batch window, Compressor will set the destination to the Desktop for you automatically.
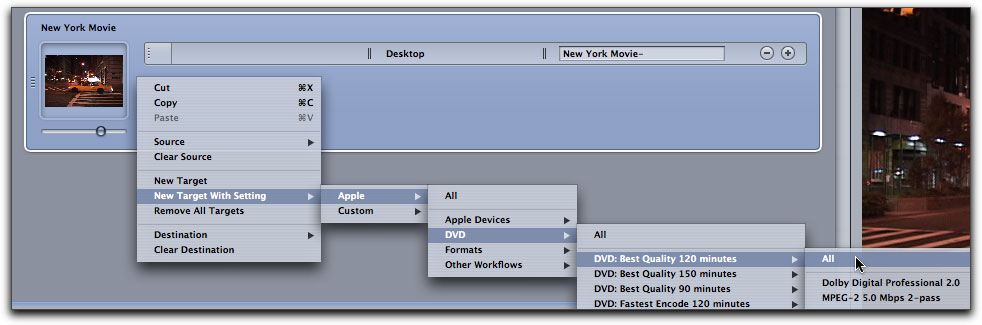
Next we need to add a 'Preset' to the job in the Batch window. In this example, I want to encode as MPEG 2 for DVD authoring. As shown below, I have selected the Settings tab and twirled down the 'Apple' folder and then the 'DVD' folder.
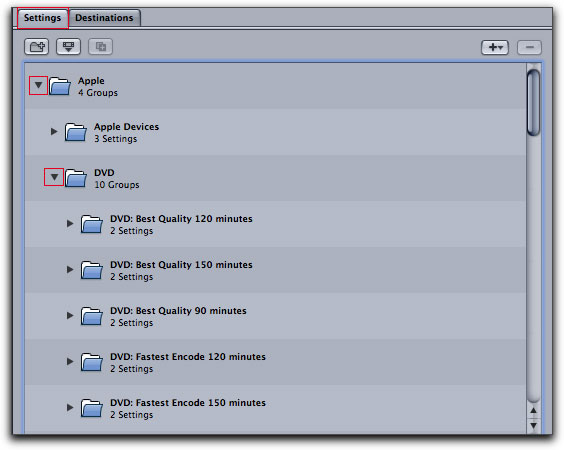
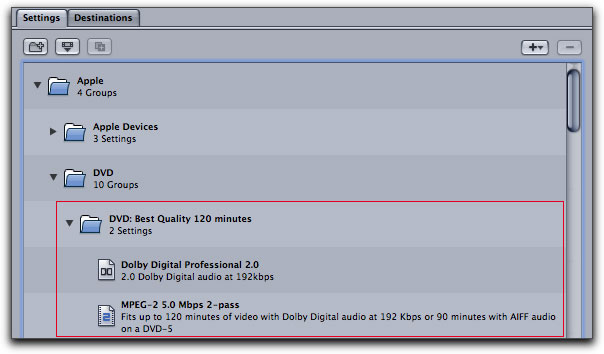
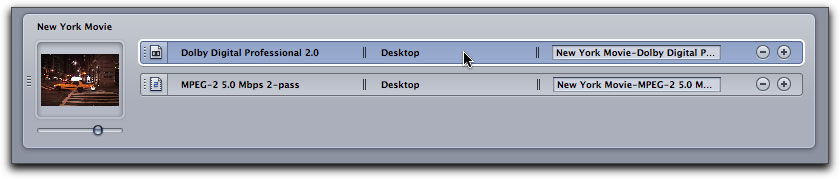
For this job I have chosen to use 'DVD Best Quality 120 minutes'. In earlier versions of Compressor, included in the Presets, were two audio options, AIFF and ac3 (Dolby 2). As you can see below, the AIFF preset is no longer available leaving us with only the ac3 Dolby Digital Professional 2 encode option. This is actually a good thing as Dolby audio takes up only 1/8 the amount of space as AIFF audio. With less space taken by audio, we can assign a higher encode rate to the job for better quality. AIFF presets are still available in Compressors.
To add a Compressor Preset to the job in the Batch window, click on the Preset folder of your choice and drag it up into the Batch window and into the job.
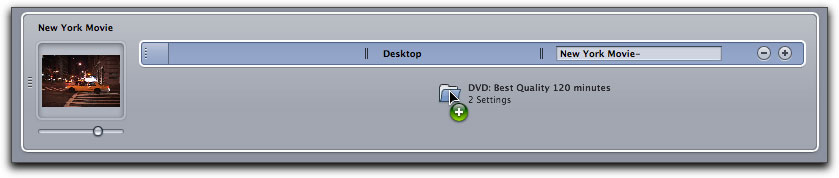
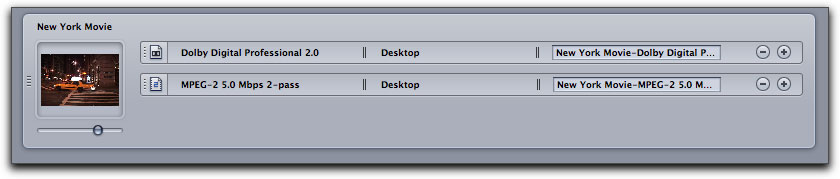
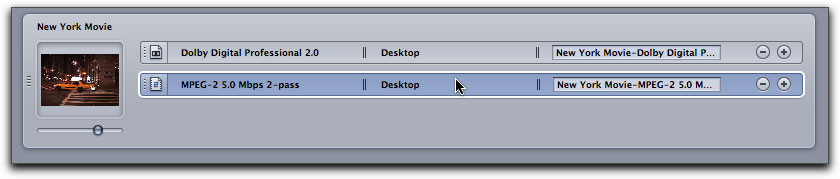
Below the Preset folder has been added to the job in the Batch window.
Finding the correct Preset in the Settings window requires a lot of twirling down and scrolling to find the Preset you are looking for. There is another, slightly less cumbersome way of adding Presets to the job. Move your cursor into the blue area of the job in the Batch window and control (right) click. This will present you with a contextual menu. First slide down to 'New Target With Setting' from there you can then select your preset.
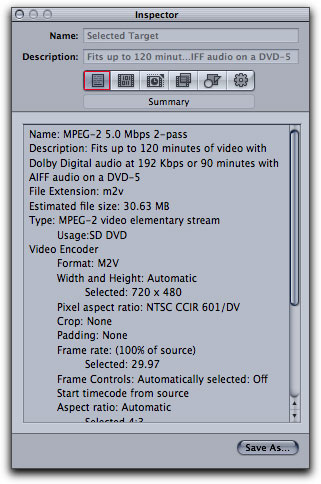
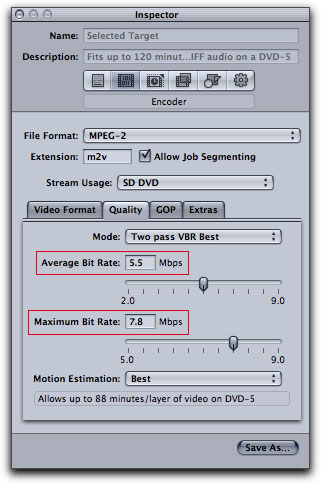
Okay, we have added the FCP movie to the Batch window, set a 'save to' destination and picked our MPEG 2 and ac3 (Dolby) preset, but there is a little more to do. My FCP movie is 98 minutes in length, too long for the 90 minute preset, but smaller than the 120 minute preset which I have chosen. The trouble is that I am loosing some quality because 120 minutes is larger than I need. In order to get the maximum quality out of the preset I have chosen, I am going to adjust the bit rate settings to match the actual length of my FCP movie. To do this we will work in the Inspector. Select the MPEG 2 section of the job in the batch window.
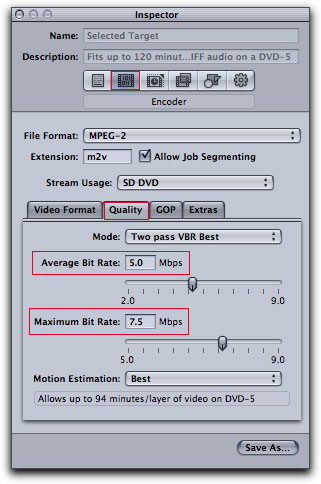
The MPEG 2 selection will now be displayed in the Inspector window which opens in the Summary tab (below left). As shown below center, I have selected the Encoder tab and then the Quality tab. As you can see, this preset uses an average Bit Rate setting of 5.0 and a Maximum Bit Rate setting of 7.5 as its default settings. Using this free Bit Budget to calculate the average and max Bit rate settings for my 98 minute FCP movie, I get 5.5 average 7.8 max bit rates, which I have entered into the Inspector, below right. Of course, if the length of your movie is close to the duration (but not more than) of the preset, you can use the encode settings 'as is'.
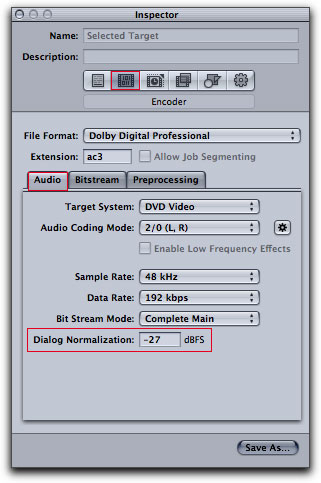
There is one other area of presets that we need to look at, although I have discovered that many people are either unaware of these needed adjustments or just don't bother. These two adjustments have to do with the ac3 (Dolby) audio encode preset. Select the ac3 (Dolby) in the Batch window.
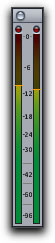
The Inspector will now reflect the ac3 (Dolby) preset. As shown below left, select the Encode tab and then the Audio tab. At the bottom of the Inspector window you will see 'Dialog Normalization' which is set to -27 as default, but the default setting of -27 is not appropriate for most of our ac3 (Dolby) encoding tasks and we will need to change it. The point of Dialog Normalization, (audio volume is measured in decibels, dBs), is not to normalize the audio volume within a track but rather to normalize the audio volume levels between different tracks. This will help maintain the same audio volume from track to track during playback. The dB number that you enter into this box is determined by the 'peak audio levels' that you work with in FCP. For example, it is common practice to use a -12 dBs peak audio level when working with DV video in FCP, as shown by the FCP VU meters, below center. The peak audio level you chose to work with will be the dBs number entered into this box. In my example of DV video, audio volume is adjusted in FCP to peak at -12 dBs, so -12 dBs is entered as the setting, below right. To disable the Normalization process, to avoid changing the levels that were set in FCP, enter -31 into the box. This, in effect, turns off Dialog Normalization.
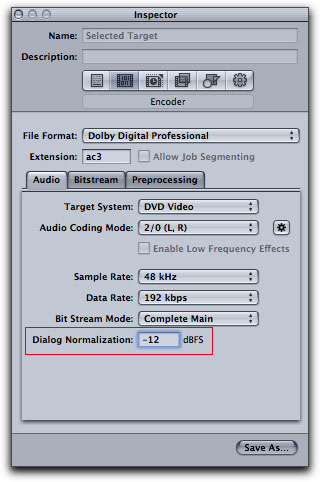
Why a Normalize process? Let's say that you work in FCP and you set audio peaks to -12. However, when it comes time to author your DVD you have additional tracks that you need to encode for the DVD. It is possible that these additional tracks have had their audio peaks set at levels other than -12, say -20. It could also be that you don't even know what peak levels were used on these extra tracks. If you were to author your DVD without compensating for the tracks' different volume levels (different peaks), when played back, the volume level would change from track to track, very annoying. In my example, by entering -12 in the Normalization box, Compressor will adjust the tracks that are not -12, to -12. Thus, when the DVD is played, all tracks will play at the same volume. If all your peak levels are the same for all tracks, say -12, entering -12 into the Normalization box would achieve the same results as entering -31 (turning Normalization off), because all tracks have the same peak values, so there is nothing that needs to be Normalized.
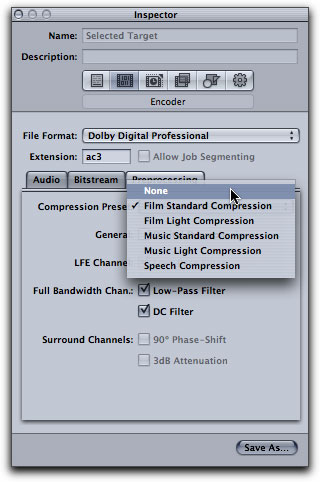
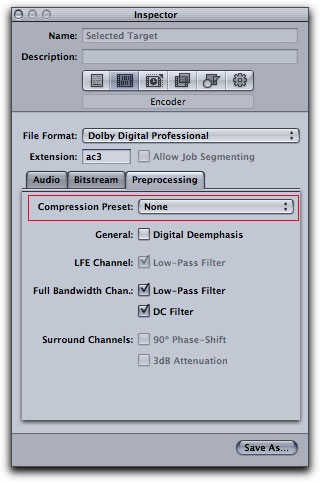
One last item to change in our ac3 (Dolby) preset. In the Inspector window, with the Encode tab still selected, click on the 'Preprocessing' tab, shown below left. The 'Compression Preset' defaults to "Film Standard Compression", but this setting is not what we want for DVD authoring. Click on the 'Compression Preset' drop-down and set to 'None'.

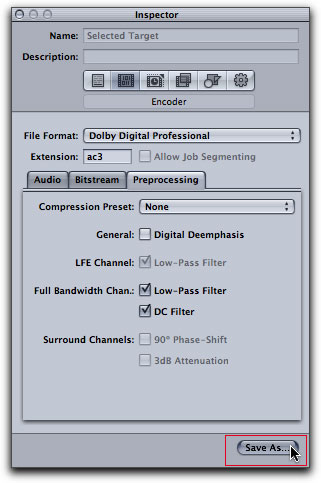
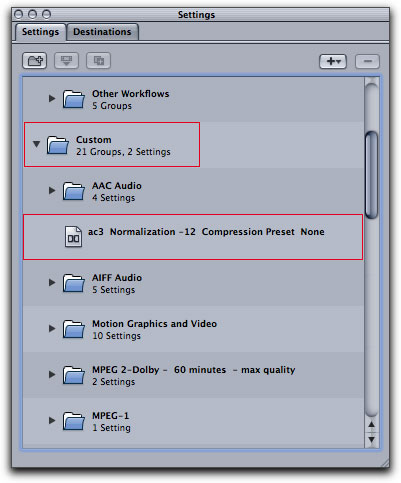
As you can imagine, if you are doing a lot of MPEG 2, ac3 (Dolby) encoding, redoing the ac3 settings in the Inspector each and every time would be a drag. After adjusting the ac3 (Dolby) to match my requirements, I can save it as a Custom preset by clicking on the 'Save As' button at the bottom of the Inspector window. I then name it with my special settings.
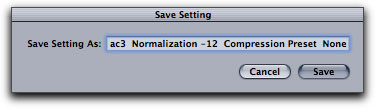
The next time that I need to apply ac3 presets to a job, I can select my custom ac3 preset found in the Custom folder. Of course, you can build an ac3 preset with Normalization set to -31(turns Normalization off) as well.
Submit
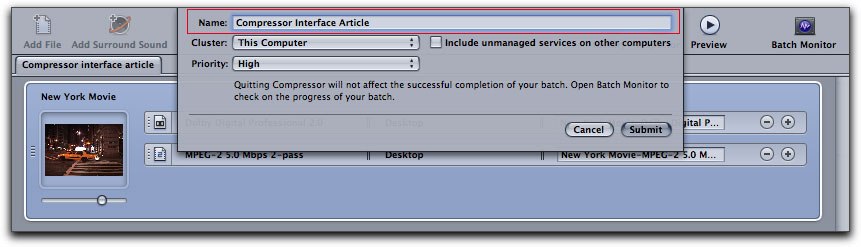
We have finished adjusting our preset parameters and are now ready to submit our job for processing. Return to the Batch window and click on the 'Submit' button. You will be presented with a dialog box that is used when you have a 'Cluster' of Macs, access to several networked Macs, to distribute the encoding workload to. As most of us are working on just one Mac, the only setting that you might want to change is 'Name'. When you change the name in this box, it does NOT change the name of the final output files from Compressor. The name that you enter here will only be displayed in the History window and is meant only to help identify which jobs are being processed as reflected in the History window. Click on 'Submit' in this dialog box and the encoding process will begin.
The History window is where we view the progress of the encode process. Twirl down 'Today' to display your job as it is encoded. Notice that the name of the job, as shown below in the History window, "Compressor Interface Article" is the name that I gave the job in the first 'Submit' dialog box, (above). A cool thing about the History window is, that once a batch has completed encoding, a little magnifying glass will appear to the right of the batch's entry, green box shown below. Clicking on the magnifying glass will take you to the output media in the Finder.

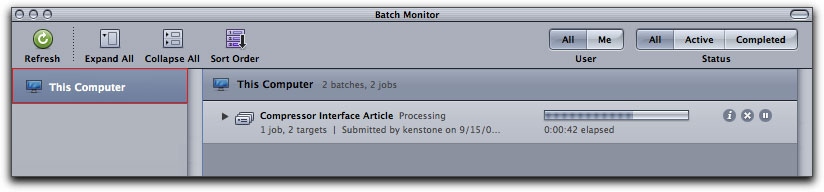
Another way to monitor the progress of your job is to click on the 'Batch Monitor' icon in the Tool bar at the top of the Batch window.

After you have opened the Batch Monitor window you will need to click on 'This Computer' to display the encoding information and progress bar.
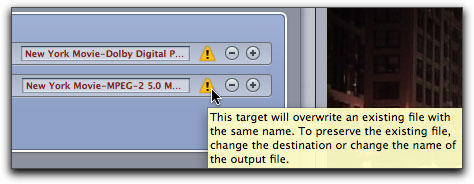
After processing has been completed, look back at the Batch window, our job now displays 'warning signs' and the job names for both ac3 (Dolby) and MPEG 2 have changed to red.
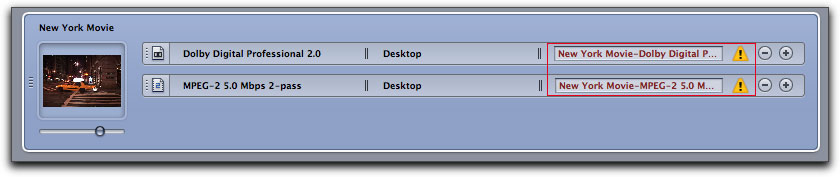
This change in appearance warns us that the job has been processed and that if the job is re-submitted, the existing encoded files will be over-written.
Moving the finished encoded files from the desktop to another location and then clicking in the blue job area of the Batch window, will restore the job to it's original state, the job names will change back to black text and the warning symbols will disappear. You are now ready to start over.
Preview window
The Preview window has not changed much from previous versions of Compressor. When you select an item in the Batch window, the Preview window will update to display the item you have chosen. You can scrub through or play your media using the controls at the bottom of the window. While there are a number of different options for displaying your media in the Preview window, the window defaults to source (unaffected) view on the left and output (setting applied) on the right. There is a white line running down the center of the window which you can drag left or right to view different sections of the media with the settings applied.
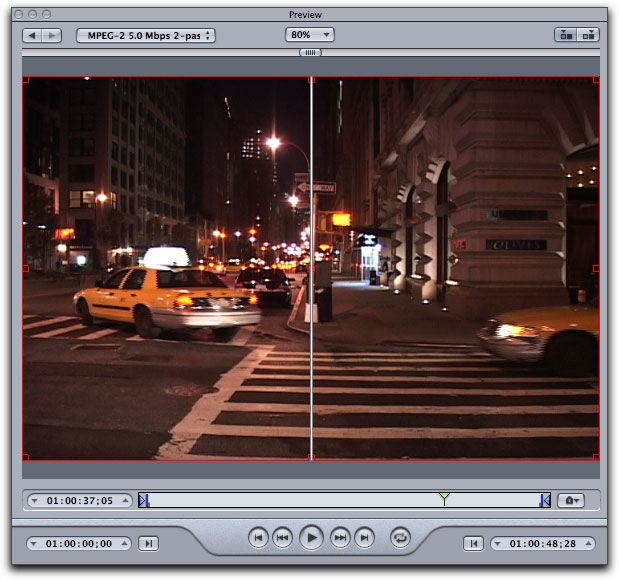
The Preview window now runs in real time (mostly), but what it previews is limited. It will dynamically display changes you make in either the Geometry tab, (i.e. cropping), or in the Filter tabs, (i.e. Brightness and Contrast) in the Inspector window. However, the Preview window does not display the media with the encode settings that you have applied via presets in the Batch window. So, if you need to see the final results of your media with the encode settings applied, in this case MPEG 2, you will need to submit the job and then check out the finished results. This is a major shortcoming, as it would be very helpful to be able to view the quality of your media with different encode settings (bit rates, etc), before you submit your job for processing. If you need to experiment and test different encode settings and then review the final results of the encode, export a very short section of your movie from FCP as QuickTime and then test in Compressor. When you have found the best encode settings, export the entire movie from FCP.

After Processing
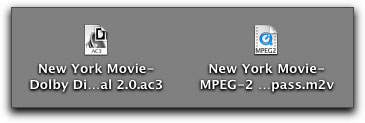
When Compressor has finished its encoding work, creating the MPEG 2 and ac3 (Dolby) files, it will place the files on the Desktop, ready to move into DVD Studio Pro. While the example in this article is about MPEG 2 encoding for DVD authoring, the process employed would be applicable to any of the many different types of format presets found in Compressor, i.e. MPEG-1, MPEG-4, H.264, etc, etc (there are a lot).
Notes
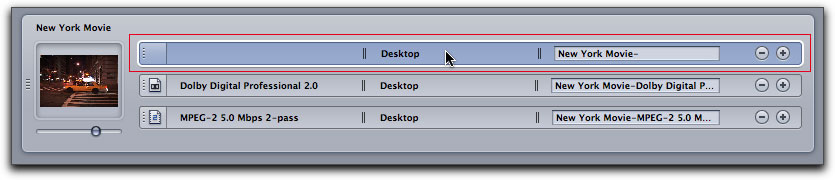
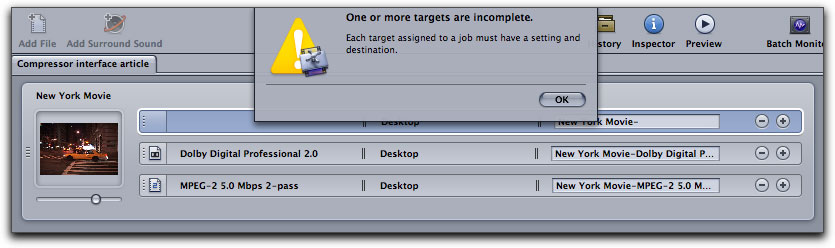
On several occations when working in the Batch window, I found that after applying the MPEG 2 and ac3 (Dolby) presets to the job, the Batch window contained three items, not the expected two, as shown below. The extra item has no presets applied and is redundant.
If you attempt to Submit the job with this extra item, a warning message will be displayed. To fix this, simply select and delete the extra item, then Submit.
It is not my intention to cover all of Compressor 3 in this article, it would take a book or a DVD tutorial to do this. As the interface in Compressor 3 is new, I wanted to provide a quick walk through of the new interface. Hope this helps.
Enjoy,
--ken