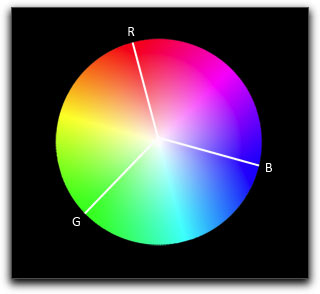
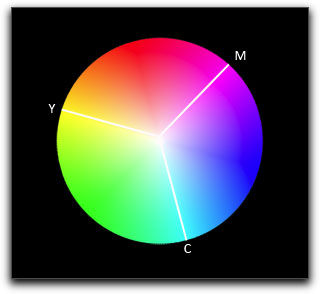
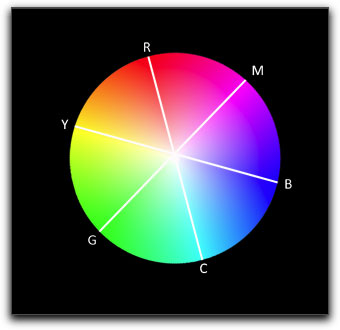
A color wheel and the Vectorscope present two different views of exactly the same thing, the color wheel uses colors and the Vectorscope uses white pixels, called traces, to display the different colors and their saturation. Both show the three Primary colors, Red Green and Blue (RGB) as well as the three Secondary colors; Magenta, Cyan and Yellow, which are created when any of the Primary colors overlap. As you can see below, the Secondary colors, Magenta, Cyan and Yellow fall between the Primary colors, Red Green and Blue. Just as with the Waveform monitor, the Vectorscope will run in RT (real time).

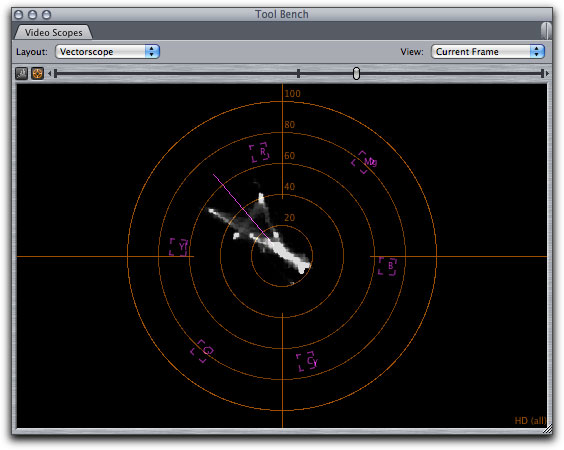
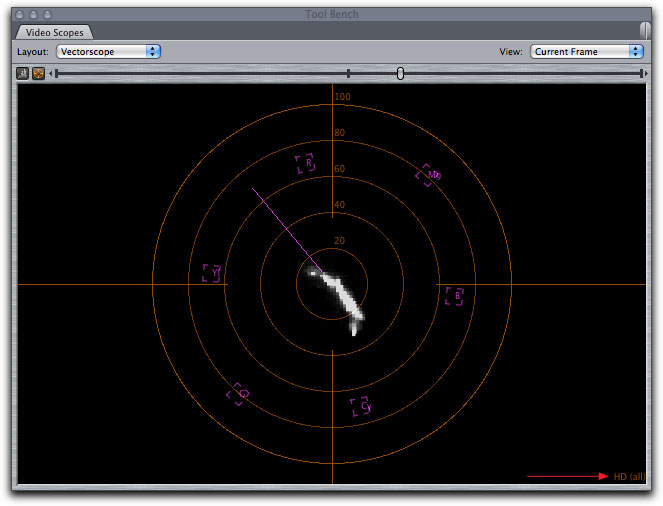
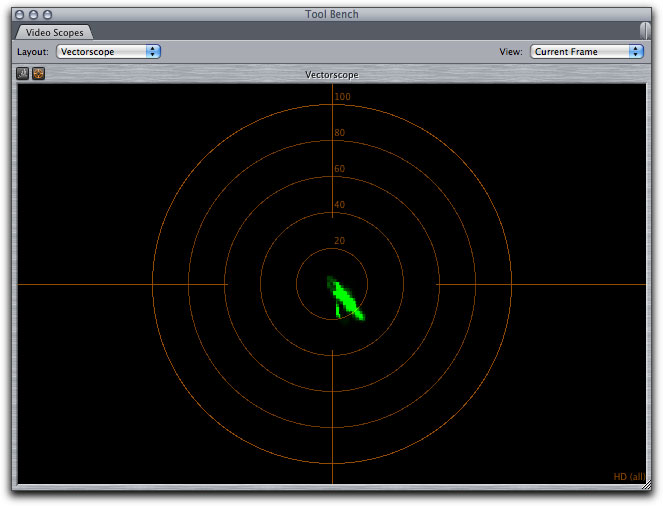
The Vector scope has six purple targets (brackets) with letters, abbreviated color names, that represent each of the primary and secondary colors. While the center of a color wheel is white, shown above, the center of the Vectorscope (below) is not white, but rather the center represents the absence of color and saturation. The exact center of the Vectorscope represents no color, zero color saturation. As you move outward, away from the center of the scope, the colors become more saturated, more intense. There is a straight purple line, at the 11:00 o:clock position, that runs from the center of the Vectorscope towards the outer edges of the scope. This straight line is the 'flesh tones' line and is used to adjust the color (hue) of any talent that might be in the shot. All skin tones should fall closely along this line, regardless of race. As shown below, the color in the video is not very saturated.

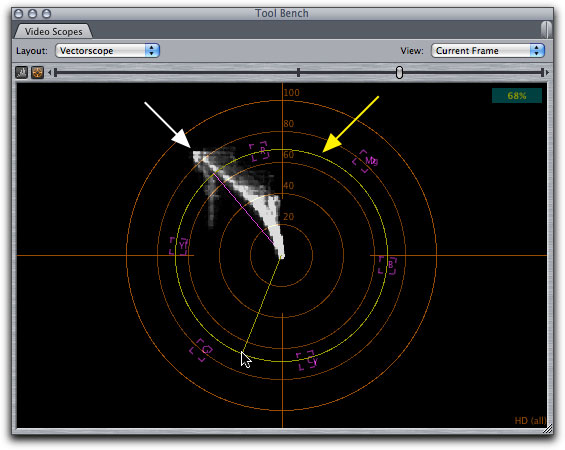
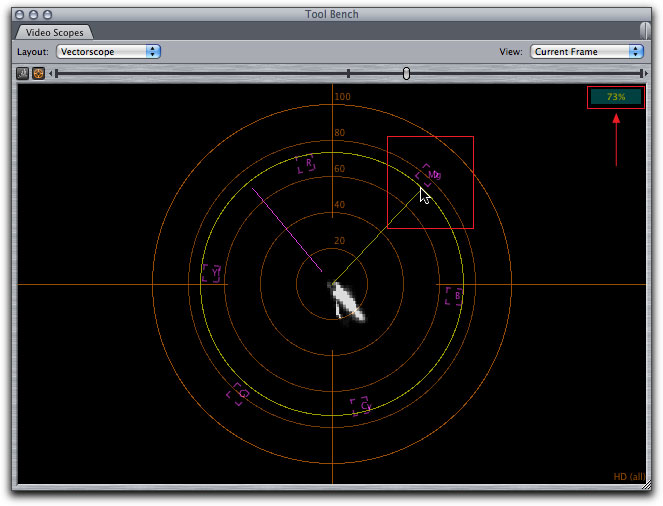
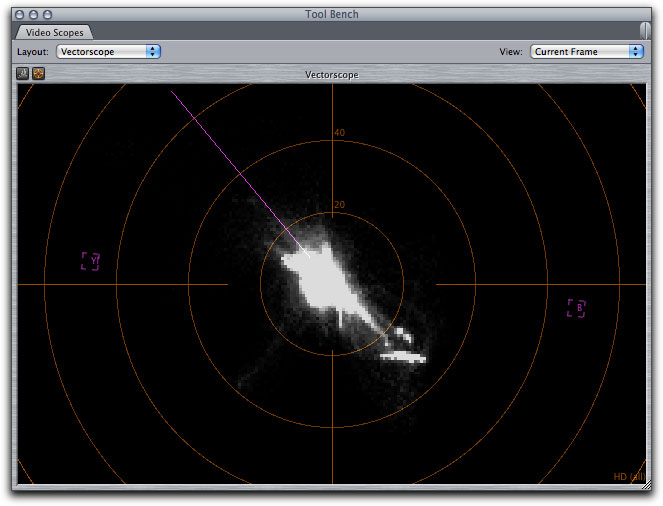
About the targets, those purple brackets with the color initials inside (white circles above). The center of each target represents the maximum color saturation or Broadcast Safe limit for that color. The distance of the target from the center of the scope varies a little from color to color. No colors should be further away from the center of the scope than the center of their targets. The target is the Broadcast Safe boundary. If you place your cursor into the Vectorscope, it will display as a yellow circle that you can position in the scope. As you move the yellow circle in the scope, you will see a percentage reading in the upper right hand corner of the Vectorscope window. In the example below, you can see that the trace goes well beyond the center of both the Yellow and Red targets, shown by the yellow circle positioned in the center of the two targets. In this case, the Vectorscope shows us that the color is way too saturated and is not safe for broadcast.
My next example, shown below, was shot late in the day during the Winter. The wall of the museum is shaded from any direct sunlight and is bathed in bluish Northern light, it has a very strong blue color cast to it. Reading the Vectorscope is fairly easy to do. If you look at the direction of the traces in the scope you'll see that they point between the color Cyan and the color Blue. Looking at the Canvas window we can see that, in fact, the colors do fall between Cyan and Blue. The other information that we derive from the Vectorscope is about color saturation. Looking at the scope we can see that the traces remain very close to the center of the scope, denoting very little color saturation.
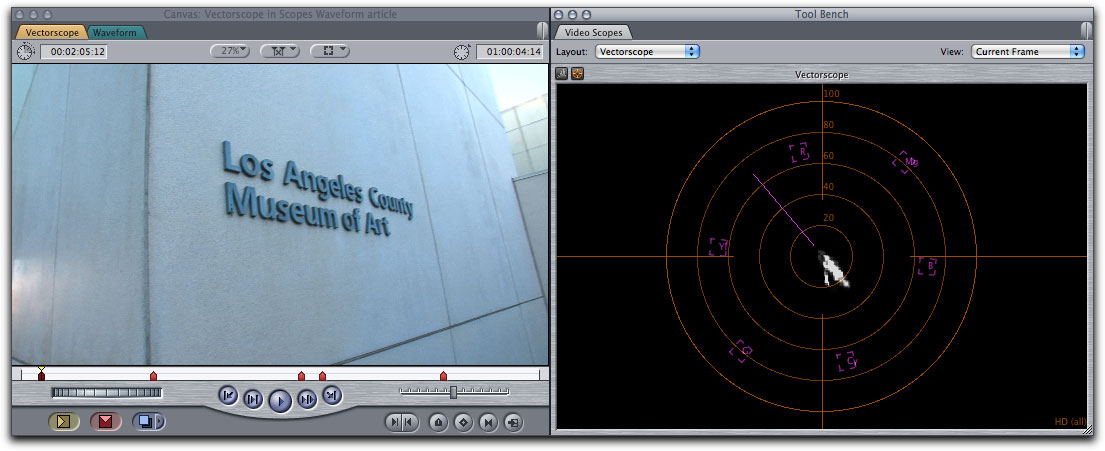
As shown above, there are two main trace lines in the scope, the longer, more saturated of the traces (further away from the center), falls almost exactly between Cyan and Blue targets and the second, smaller, less saturated trace, points more towards Cyan target. Because my chosen example is very simplistic, comprised mostly of just two colors (two shades of blue), we can easily discover which trace line belongs to the museum wall and which trace to the lettering on the wall. After loading the clip into the Viewer window, click on the Motion tab and spin down the 'Crop' section. Now, crop all four sides so just that the lettering on the museum wall shows. The point here is that the scopes only read that part of the image that has not been cropped out, giving us the ability to select just one area of the image and analyze that one area in the scopes.
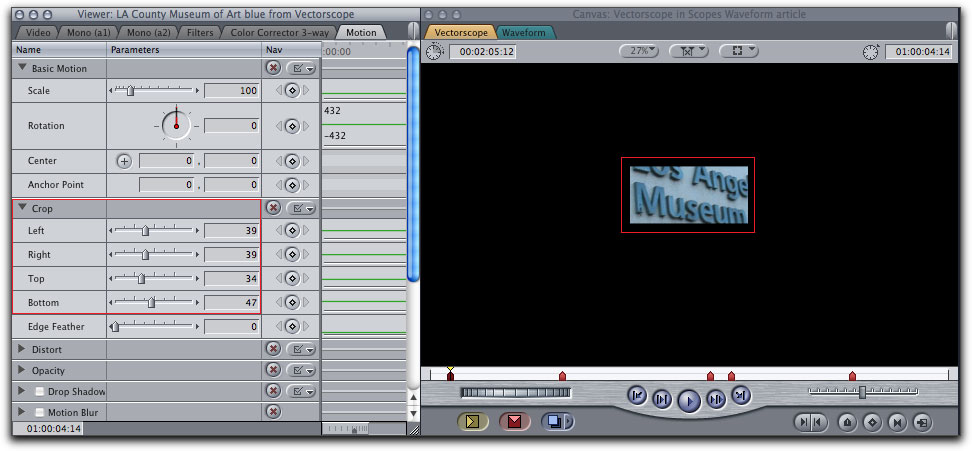
Below left is the Vectorscope before cropping, below right, after cropping the image in the Viewer, leaving mostly just the lettering on the museum wall. We can see in the Vectorscope on the right, that the longer more saturated trace is left. This makes sense because the color and saturation of the lettering looks stronger than the color of the museum wall. So the smaller, more Cyan trace is the wall itself. The color of the wall is less saturated than the lettering, so the trace that represents the wall does not extend out as far as the trace from the lettering.


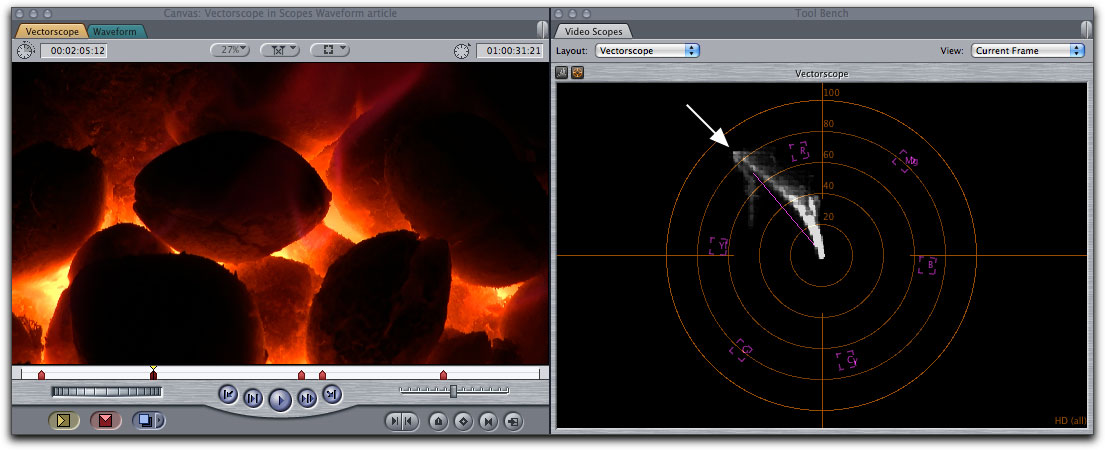
For my next example I have chosen a shot that is overly saturated. Looking at the Vectorscope, below right, we can see that the main trace is almost at the outer edge of the scope and well past the purple targets that mark the Broadcast Safe boundary. This video is not safe for broadcast and looking at the position of the trace in the scope, between Yellow and Red, we can tell that it is the orange part of the image that is too hot.
One last example of cropping to isolate parts of the video image for analysis. Shown below is a shot from the Carnival ride at the Santa Monica Pier. Looking at the Vectorscope we can see that there is red in the shot that is heavily saturated as we have traces running into the Red target. We also have heavily saturated yellow that runs to the yellow target. There is also a fair amount of blue in the shot but it is not as heavily saturated as the red and yellow.
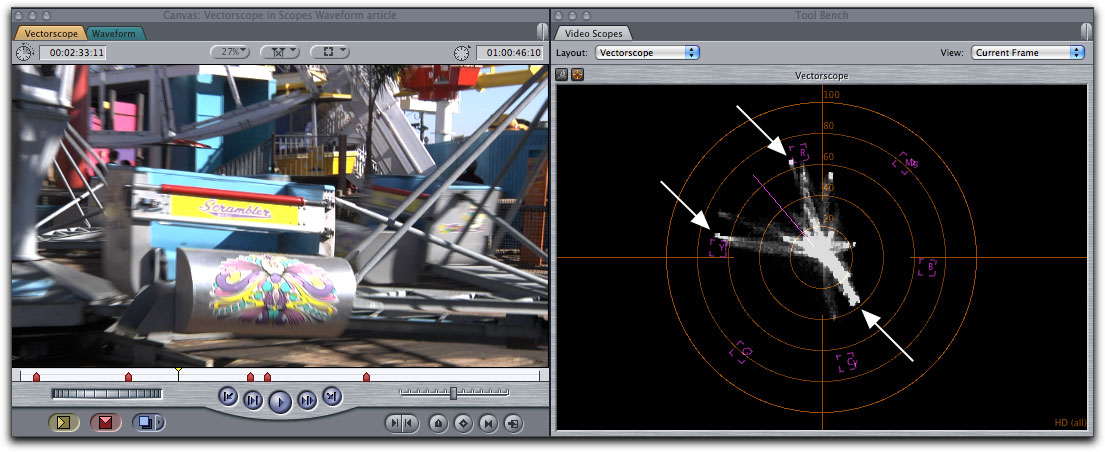
After loading the clip into the Viewer, I have cropped the image down and isolated part of the ride's car. You can clearly see the three colors in the video, yellow, red and blue, in the Vectorscope. Note that the red trace in the Vectorscope points directly towards the red target, this color is almost pure red.
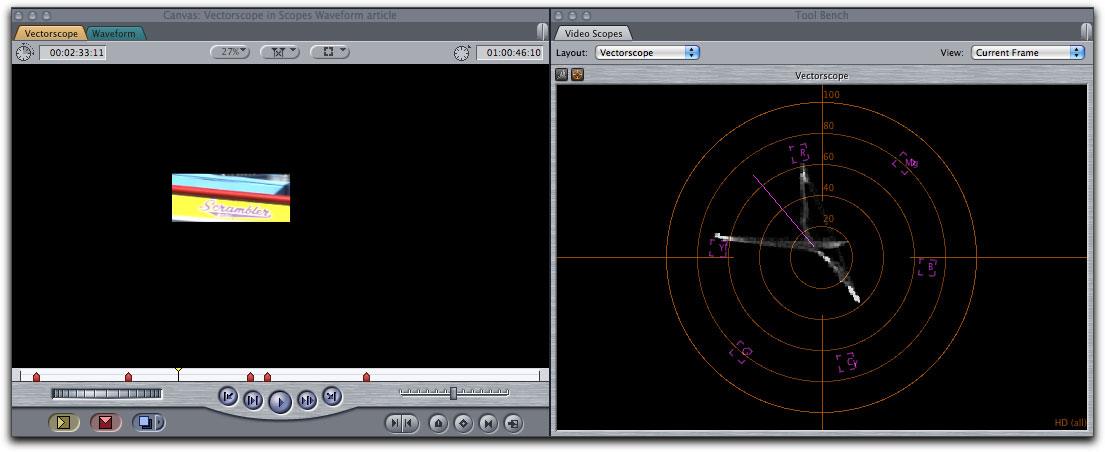
In this same video clip there is a car from a different ride in the upper right portion of the video. When I crop for this car and look to the Vectorscope, the red trace for this car does not point directly to the red target, but rather it is shifted ever so slightly towards yellow producing a somewhat more orange red.
The point here is that we can not really judge the true value of colors or the amount of their saturation by eye, by looking at the computer monitor or even a calibrated broadcast monitor. Using the Vectorscope and employing the crop tool, we can get very accurate information about the color in our video and make accurate adjustments as necessary.
Setting up the Vectorscope
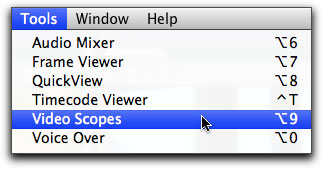
Before we start to work with the Vectorscope, lets open it up and look at it's features. With some clips on the timeline, from the menu bar > Tools > Video Scopes. This will open up the scopes in a four-up display floating window. If you have already read the Waveform monitor article, then you can skip this section as the window controls for the Waveform monitor are the same for the Vectorscope.
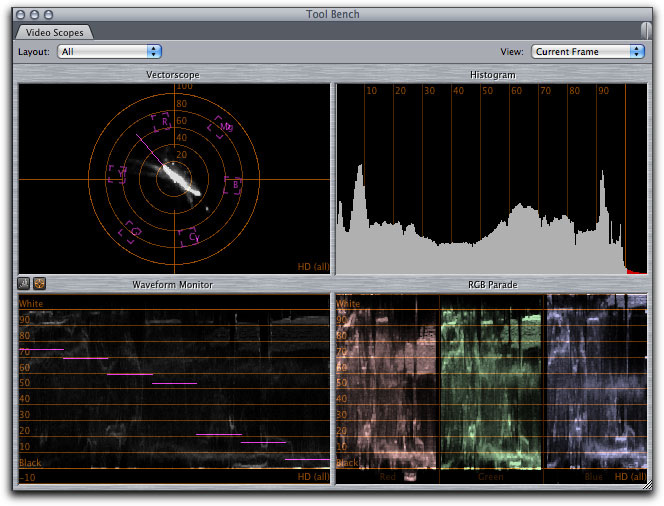
In the Video Scopes window, click on the 'Layout' drop-down menu and select Vectorscope.
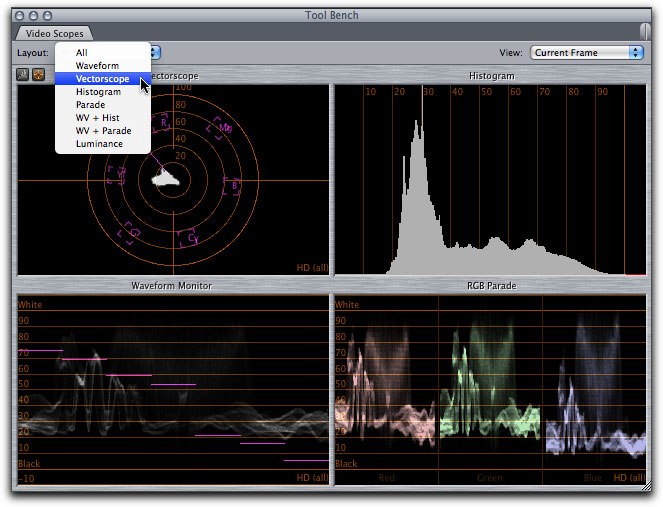
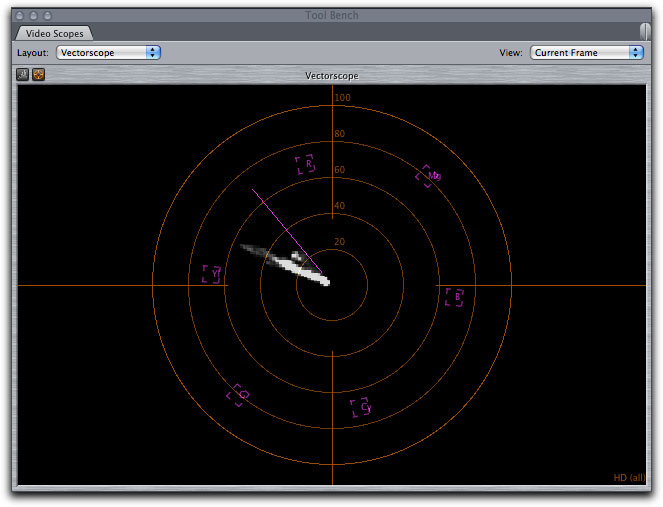
The Vectorscope now fills the entire window.
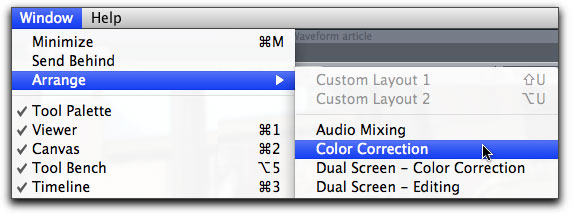
Sometimes, when I just need to work with a few clips, I'll drag the floating Waveform monitor window over on top of my Browser window. If I'm going to be doing a lot of work, then I go to; Window menu > Arrange > Color Correction.
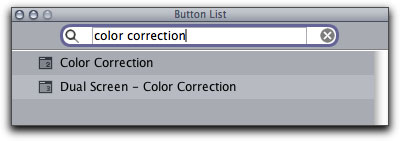
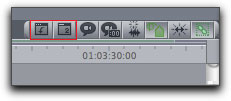
In 'Button List' there are buttons for Color Correction screen layouts for both one and two monitor setups. I have added two buttons to my timeline, the single monitor Color Correcting layout (it has the number 2 in the button) and the 'Load window Layout' button (curved arrow) which I use when I want to return to my own FCP window layout.
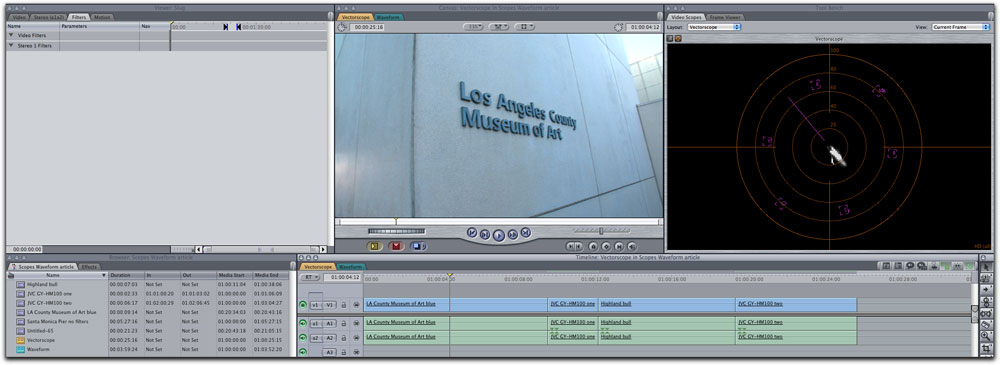
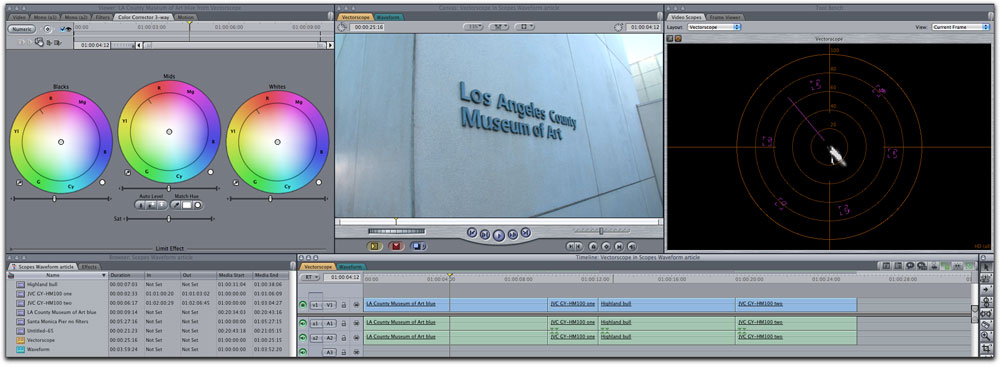
The FCP Color Correcting window setup is shown below. The Viewer window is on the far left, and as I have not yet applied the 3-way color corrector to my clips, the filter tab is empty. The Canvas window is in the middle and the Vectorscope is on the right. Browser and Timeline are below.
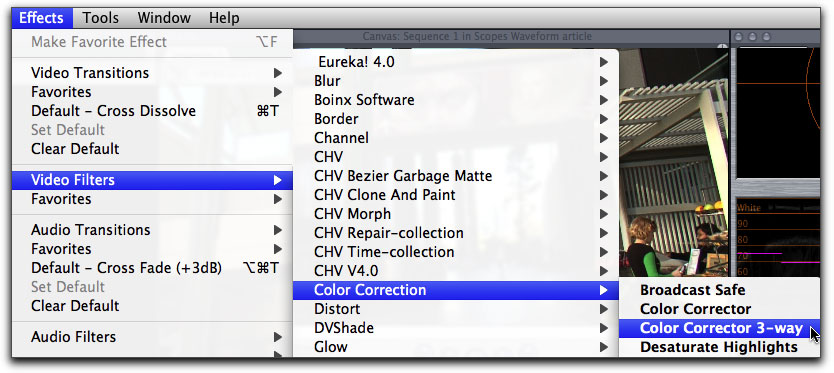
To add the 3-way Color Corrector filter, select the clip on the timeline and from the Effects menu > Video Filters > Color Correction > Color Corrector 3-way.
Below I have added the 3-way color corrector to my clip, after double clicking on the clip to load it back into the Viewer window, the 3-way filter now shows in the Viewer window.
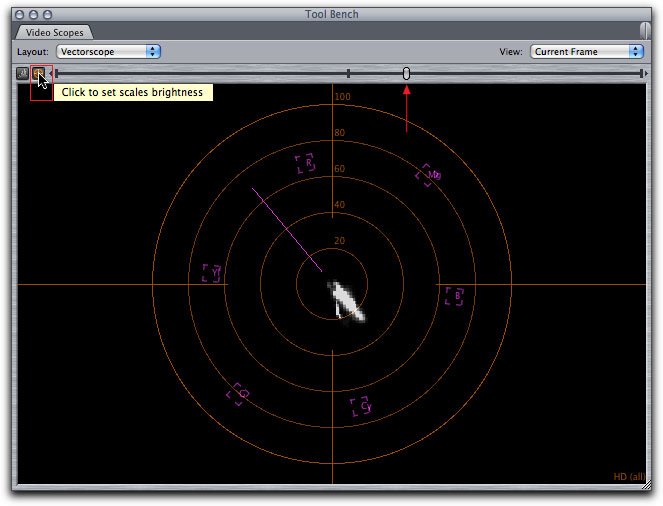
Just beneath the Layout drop-down menu, in the Vectorscope window, are two small buttons. Clicking on the button on the left 'display brightness' turns on a slider that controls how bright the traces (the white pixels) appear. I like to turn my brightness up, makes judging the Vectorscope easier.

To the right of the brightness button is the orange 'scale brightness' button, when clicked produces a slider that controls the brightness of the orange circular scale lines that denote the percentage of saturation.
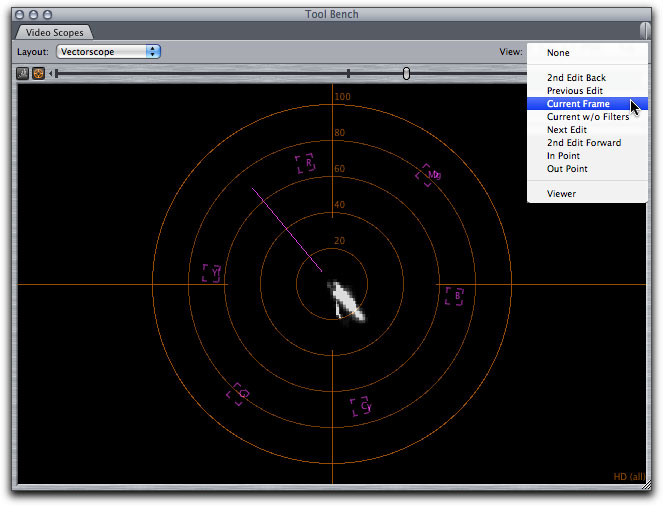
Upper right of the Vectorscope is the View drop-down window with a number of different options. I have this set to 'Current Frame', which uses the playhead in the timeline for frame selection.
If you place your cursor into the Vectorscope, it generates a yellow circle that reads out the scale values of the position that you have placed the cursor. You can use this to ascertain the color saturation of any of the traces in the Vectorscope, these values are read out as percentages that show in the upper right hand corner of the scope.
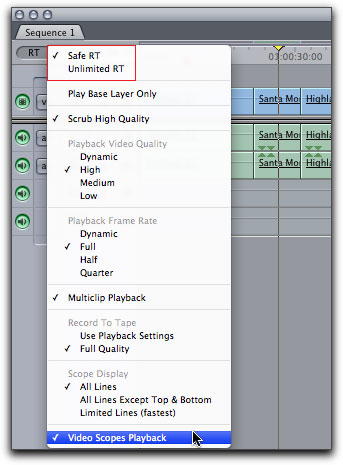
There is one last setting. In the timeline RT drop-down menu you must enable, 'Video Scopes Playback'. Additionally in the 'Scope Display' section, there are three options that control how the traces are displayed in the Vectorscope when you are not playing back, when your playhead is stationary. 'All Lines' analyzes all of the pixels on all of the video scan lines. This is a very comprehensive analysis and affords the most visual information for us to base our decisions on. This is the setting that I use. 'All Lines Except Top & Bottom', this option excludes the top and bottom 9 scan lines which are reserved for special signals like 'Closed Captioning' that might confuse the Vectorscope analysis if included. 'Limited Lines (fastest)', uses only 32 lines for evaluation, looking at the center portion of the video image. During RT playback there is only one display mode, which is the same as 'Limit Lines', because of the demands placed on the processor when running RT playback.

The Vectorscope, shown below left, during RT playback displays 'Limit Lines' mode, the only option. The very lower-right corner of the Waveform monitor indicates the scope display option that is selected in the RT drop-down menu, in this case (HD) 'All Lines'. Your choice of RT 'Safe' or 'Unlimited', below right, will depend on your processor speed and the video you are working with.
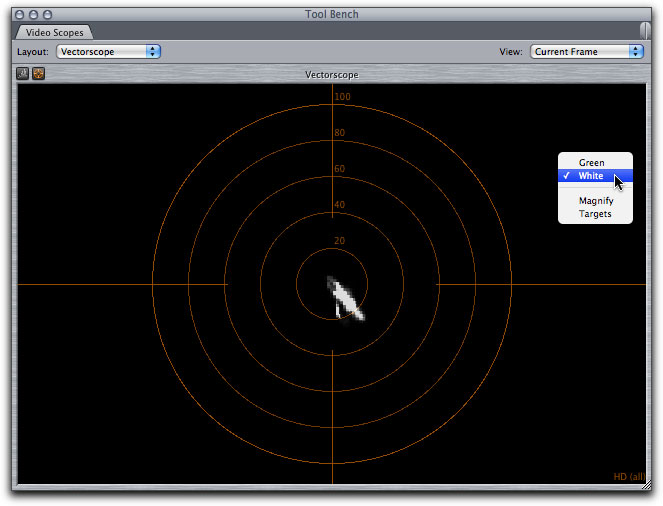
If you control (right click) anywhere inside the Vectorscope window you will get a pop-up menu. You can change the display from white to green, turn the purple Targets off and Magnify the center portion of the scope. Shown below, the traces are White and Targets are turned off.
The Vectorscope shown below, green selected.Targets off.
The Vectorscope with Magnification turned on.
Notes
- The 3-way Color Corrector, the Scopes (below left), and the color wheel (below right) use the same color presentation method, showing the Primary and Secondary colors in the same manner, using a circular display.

- Regardless of the 'Scope Display' method you choose in the timeline RT drop-down menu; 'All Lines', 'All Lines Except Top and Bottom' or 'Limited Lines(fastest)', during RT playback, the scopes will always default to 'Limit Lines (fastest)'.
- The ability of FCP to playback the scopes in RT (real time) depends on both the processing power of your Mac and the format of the video being played. If, after turning on 'Video Scopes Playback' in the timeline RT drop-down menu, you get a red render bar in the timeline, you will not be able to have RT playback. However, 'Option p' from the keyboard will cause FCP to step through your video, one frame at a time, rendering each frame as it goes and updating the scopes as well.
- Depending on the video format you are working with, the purple targets for the Primary and Secondary colors in the Vectorscope may be at different distances from the center of the Vectorscope. For example HD video, most of the targets fall around the 80%. With NTSC, the targets fall much closer to the outer edges of the Vectorscope, much closer to 100%.
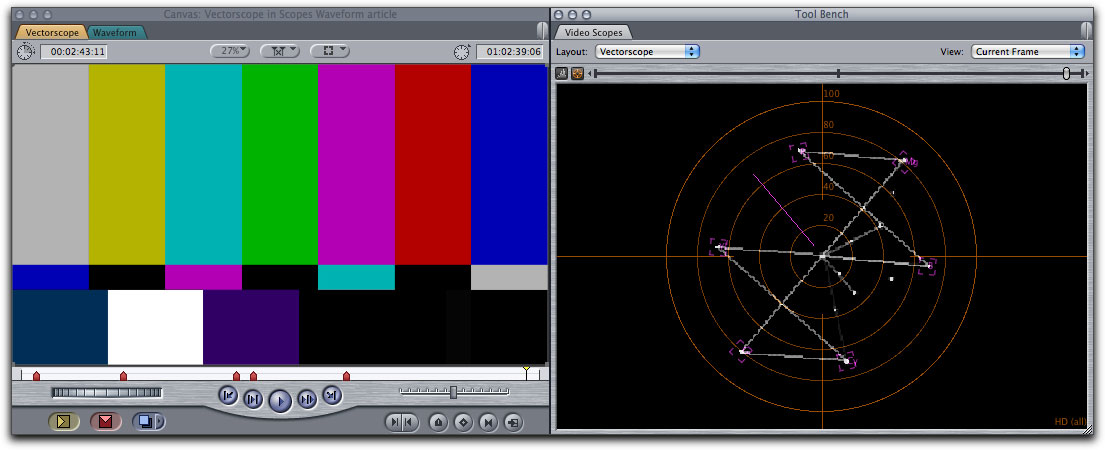
- The image below shows color bars displayed in the Vectorscope. Color Bars are used with the vectorscope to calibrate incoming video. Each color in the color bars should hit each of the purple targets exactly in the center. This process is used primarily for analog video capture, capture through a capture card, not really for digital video.
- Primary color correction is used to adjust the luminance and balance the color of the image as a whole. Secondary color correction is used to correct individual colors. Secondary color correction is also use to change one color to another or to create what is known as the 'Pleasentville' effect (everything in black and white except for one item that would be in color.
- I demonstrated using the crop settings in the Motion tab to isolate part of the image, so that only that part of the image will be read by the Vectorscope. While it is possible to get a rough crop of the area using the crop tool, it is really not possible to perfectly isolate something in the image. If it is really important to do so, you can use any matte tool to more accurately isolate part of an image. You can also turn on 'Image + Wireframe' in the Canvas window and use the Crop tool to achieve the same results.
- The Vectorscope is the only scope that offers the magnify feature.
- This article is not intended to teach Color Correcting, but rather how to use the FCP Scopes. If you want to learn Color Correcting, I might suggest that you look at Color Correcting in FCP by Andrew Balis which is excellent, for FCP 6, but still completely relevant.
Enjoy,
--ken