September 7, 2009
By Ken Stone
As the years have passed, Final Cut Pro has become increasingly more capable. With its modern feature set, FCP can work with just about any type of media and for just about any type of distribution. For years now, FCP has been used in film work as well as both SD and HD broadcast. But FCP is just an editor, and so, when it came time to distribute our finished work, it was always necessary to leave FCP and do our final distribution encoding elsewhere, like in Compressor.
Different people had different ways of getting work out of FCP. In the past, we could use 'Export Using Compressor', FCP handed off the video to Compressor one frame at a time, tying up FCP for the duration. We could also export from FCP as a QuickTime self-contained (or reference) movie that we would then move into Compressor, into DVD Studio Pro, or into third party software for a final encode.
With the release of FCP 7, several things have changed. First off, the 'Export to Compressor' has been replaced with 'Send to Compressor'. The main advantage being that when Send to Compressor is used, FCP is no longer tied up. As soon as you have passed off your video to Compressor, you can return to FCP and continue to work immediately. I can't begin to tell you what a huge improvement this is, however, we are still sending our video to Compressor, where we need to pick an encoding Pre set and then make adjustments to the settings. For some encoding work, this is completely acceptable, as it gives us access to 'Optical Flow' technology in Compressor, which is critical for high quality transcodes of codecs, frame rates, frame size and even de interlacing.
But the Internet and its different distribution channels are changing everything. It's not just that we have numerous ways of distributing our video across the internet, like YouTube and MobleMe, we also have mobile devices, the iPhone, iPod touch and iPods, and authoring and burning DVDs both SD and Blu-ray and lets not forget Apple TV. It's true that we can send our video to Compressor, which has pre sets for these different distribution methods, but then, after encode, we are still left with the necessary chore of publishing the finished work.
FCP 7 introduces "Share" and while it might appear to be a new feature it is actually more than that. It's a bit like an application within FCP, that not only makes preparation and encoding of our video one click easy, but it also distributes or publishes our work, completing the final step for us, automatically.
Selection
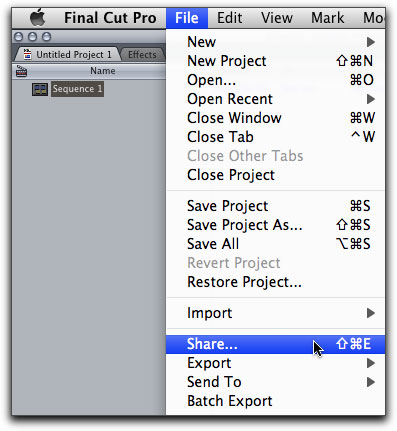
There are several ways to select video in FCP for Share. You can select a Sequence in the Browser or the active sequence on the timeline, or you can set In and Out points in the timeline or in the Viewer window. Caution, if you select a clip or multiple clips in the timeline, the export process will include all clips on the timeline, not just the ones you selected. With your selection made, select Share from the File menu.
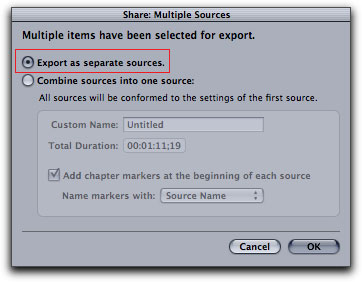
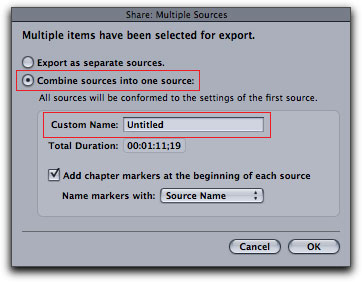
There is another way to select for Share. In the Browser you can select a single clip and Share. You can also select multiple clips in the Browser and after you select Share, you will be presented with a dialog box. If you choose 'Export as separate sources', below left, each clip will be exported as a seprate file and will retain the name of the file as seen in the Browser. You can also choose 'Combine sources into one source' and you are given the chance to name the exported file, below right.
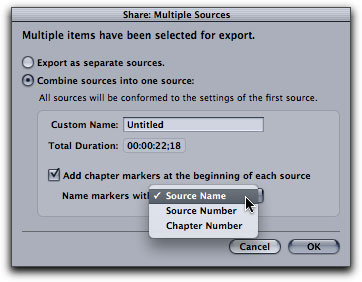
'Combine sources into one' also offers 'Add chapter markers', which is on by default, and will insert a Chapter marker between each clip and between different sequences. You can choose the naming option of; Source name, Source number and Chapter number.
Actually, the selection process is even more flexible. In the Browser you can select groups of clips, sequences, sequences and clips, and bins (bins can contain sequences and clips). In other words, you can select any items that reside in the Browser, mix and match is okay. If your selections in the Browser have different frame rates or different frame sizes, then Share will take the frame rate and the frame size of the first clip in the selection and will apply that frame rate or size to all of the remaining items (clips and sequences).
Share Window and Job Actions
At the top of the Share window is The Destination Folder which is where Share will place your encoded files when you choose 'Export' from the bottom of the window. You can also click on the 'Choose' button at the top and navigate to any folder. If you select a Job Action that publishes your video for you, Share will publish your video and it will still place the encoded file into your chosen Destination folder, in this case, on the Desktop.
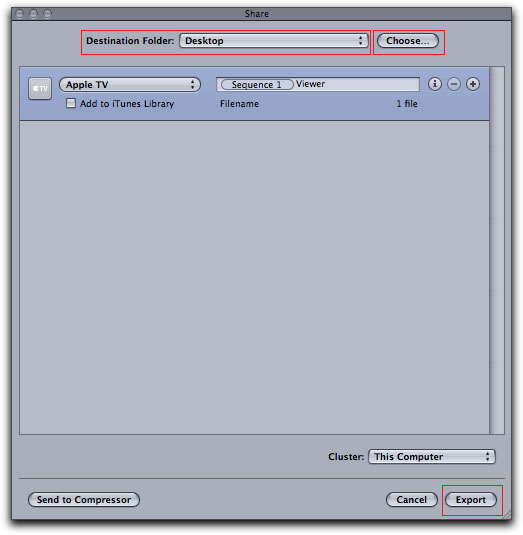
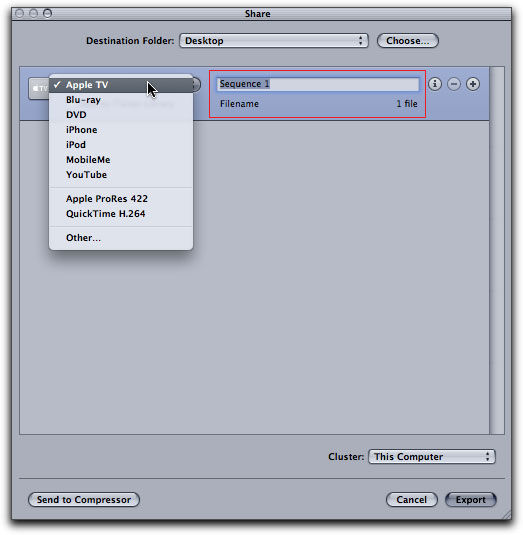
The Share window has a Output type drop-down menu, which offers a number of different delivery formats for you to choose from; Apple TV, Blu-ray (and red laser DVD 5 and 9 Blu-ray), DVD, iPhone, iPod, MoblieMe, YouTube. Additionally there is Apple ProRes 422, QuickTime H,264 and Other. Other will allow access to any and all of the Presets, Custom presets and encoding formats that are available in the Compressor Preset window. To the right is the File name box, where you can enter a name for the exported file.
Just beneath the Output type drop-down menu, is a check box, that when checked, enables a 'Job Action'. A Job Action is the publishing or distribution part of the Share process. As different Output types are picked from the drop-down menu, the Job Action will change to reflect the chosen Output type. When Job Action is checked, a drawer slides open on the right. The drawer will be used to enter specific information relating to the Job Action. If you don't want Share to distribute your video for you, leave this box unchecked.
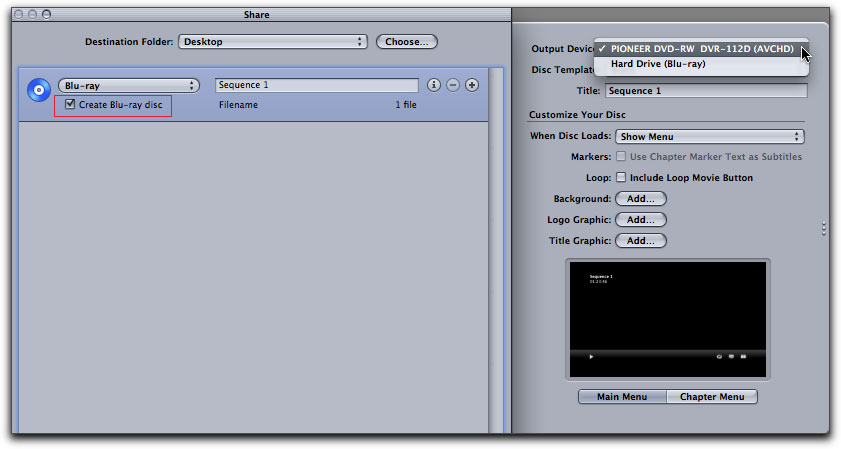
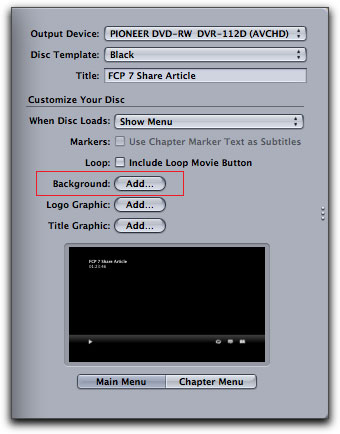
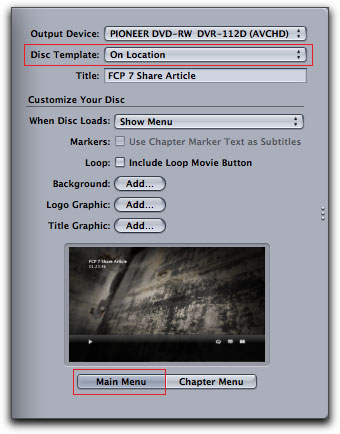
When you select Blu-ray with a Job Action 'Create Blu-ray disc', there are several options that become available in the drawer. In the Output Device, if I had a Blu-ray burner attached to my Mac, it would show up here for selection. Another option is my SuperDrive 'Pioneer-DVD-RW (AVCHD)' which will burn an AVCHD red laser Blu-ray video to a DVD-5 or 9, single or dual layered disc. The last option is the Hard Drive which will create a Blu-ray Disk Image that can be burnt at a later time. There is a choice of five different menu templates. You can enter a title and instruct the disc to either open with a menu or auto play the movie with no menu. You can also instruct the disc to loop playback. Additionally, you can add a background image for the menu, add a logo or add text from an application like Photoshop.
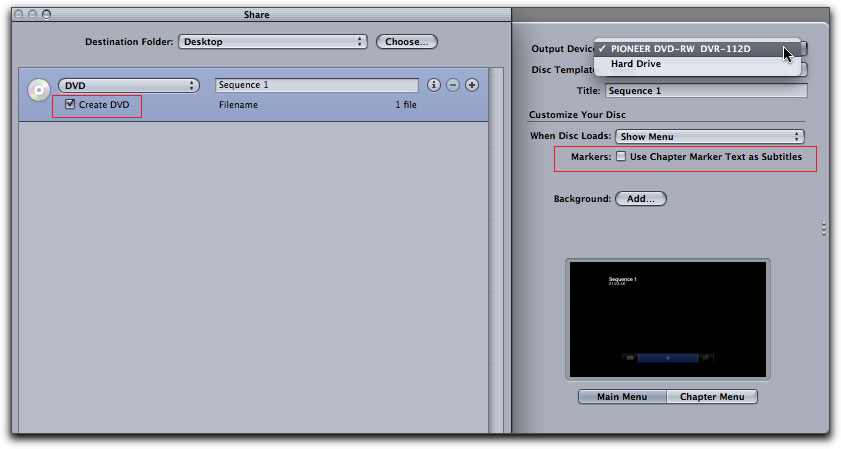
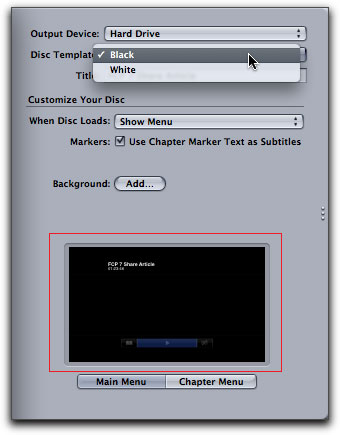
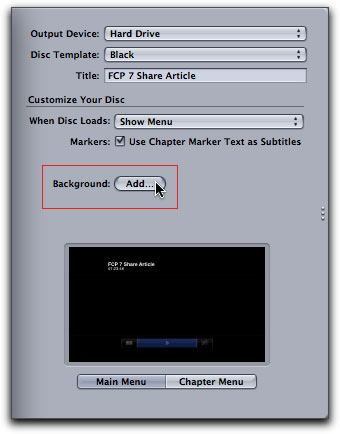
Choosing to create a SD DVD offers two Output Device options, first is the Superdrive, which will burn the disc, the second option is the Mac hard drive, which, when chosen, will create a Disk Image. If you have a third party burner attached, it will show up here as well. There are only two stock menu templates with the Job Action 'Create DVD', Black and White, but you can still add your own Background art to the menu. You can give the disc a title. 'When Disc Loads' causes the player to either 'Show menu' or Auto play the disc, skipping the menu. In the Job Actions for both Blu-ray (above) and SD DVD, there is a feature called 'Use Chapter Marker Text as Subtitles', more on this later.
Share Blu-ray and DVD menus
The menus offered for Blu-ray and DVD are very limited.
There are only two menus for standard definition DVDs, black and white and there is no art work associated with these menus. The top part of the menu carries the Title of the disc and the disc duration. The center portion of the menu is either all black or all white. The bottom section has the Play and Chapter menu buttons.
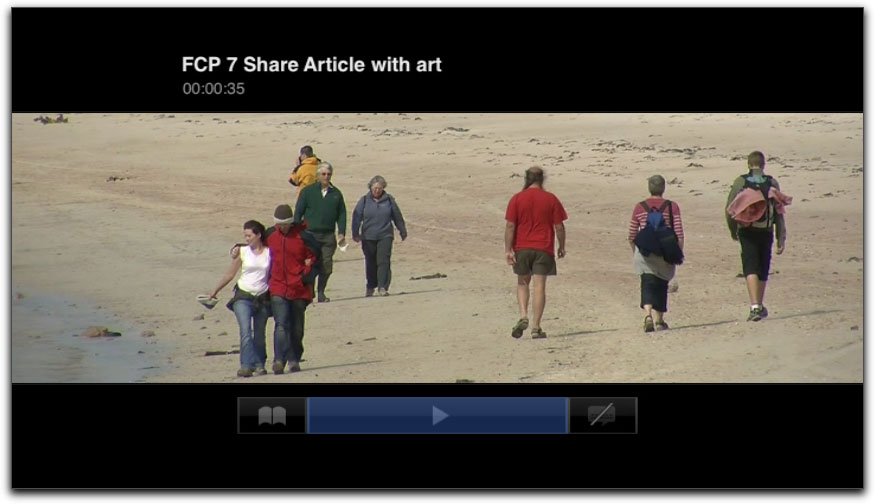
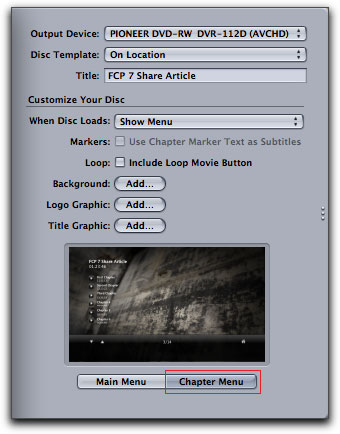
The Main menu as displayed in the Apple DVD Player is shown below. As you can see, the center section of the menu is completely black. At the bottom of the menu is the Chapter Menu button, red box below.

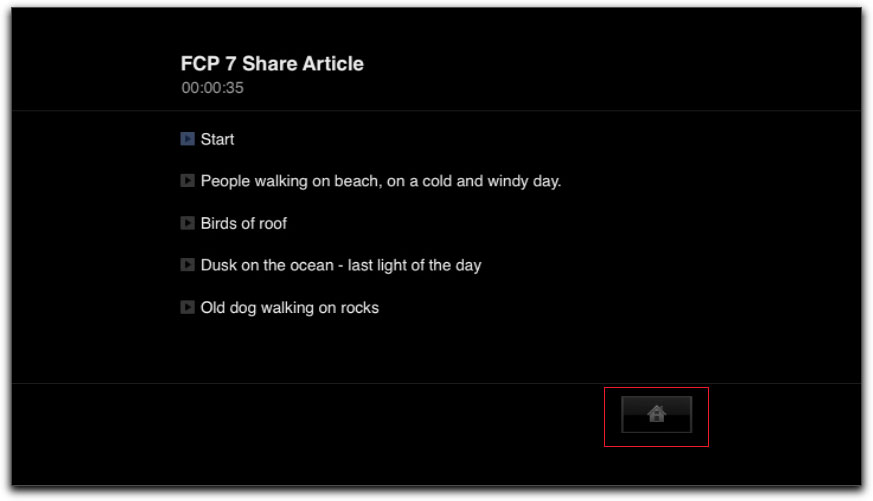
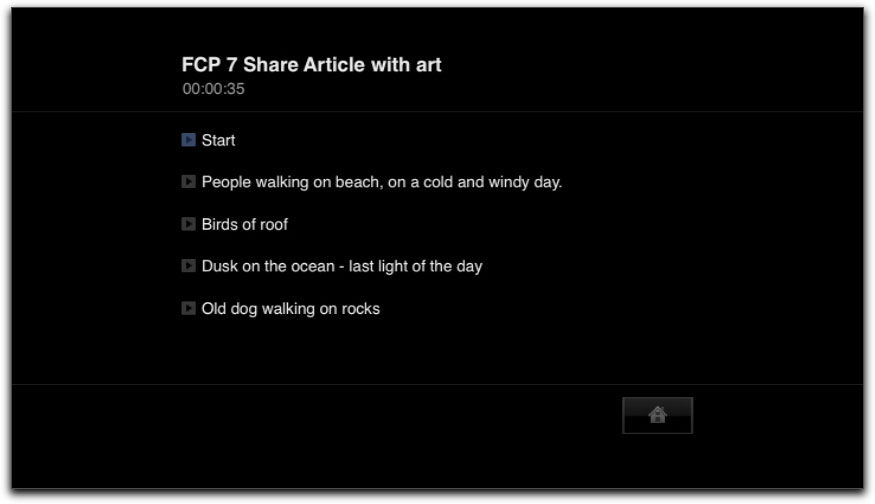
The Chapter menu is shown below, the 'Return to Main menu' button, red box.
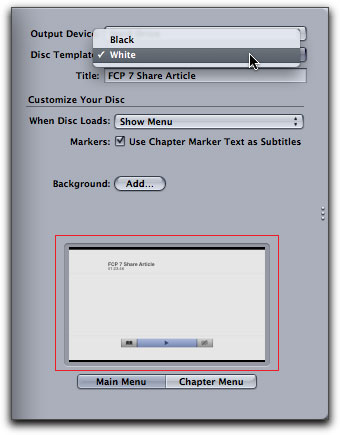
Fortunately there is an 'Add Background' for both types of disc, Blu-ray, below left and DVD, below right.
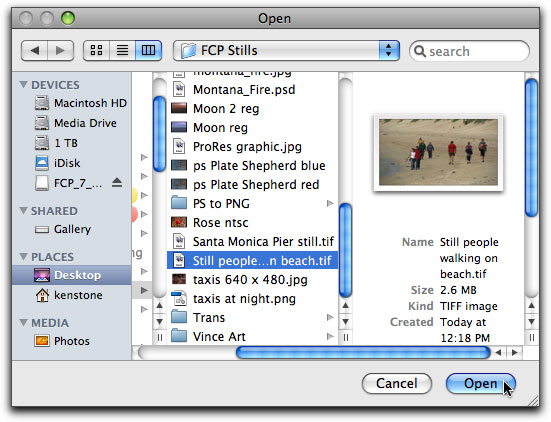
Click on the Add button and navigate to the still image that you want to use as a background. I like to take a still from the video on my FCP timeline.
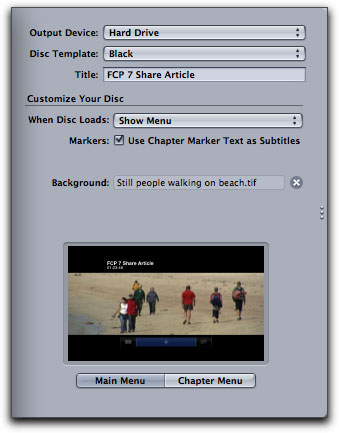
As you can see below, the still image has been added to the center portion of the menu.
The Main menu as displayed in the Apple DVD player.
Sadly, the Chapter menu gets no art.
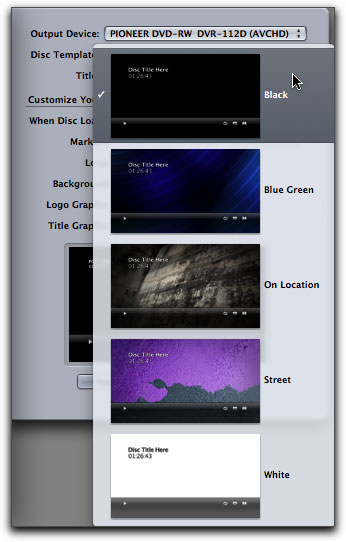
There is a larger selection when choosing a menu template for Blu-ray discs. Three of these templates, Blue Green, On Location and Street, are 'motion menus', that is to say, that the art is animated. You can see the animated effects in the preview window, in real time, below right. Too bad that the Preview window is so small.
Another nice thing about the menu templates for Blu-ray, the templates (art) is displayed in the Chapeter menu as well.
Unfortunately, there is no way to play Blu-ray discs on a Mac, so I can't show you what the Blu-ray templates look like, but the preview window will give you some idea.
Back to the Share Window and Job Actions
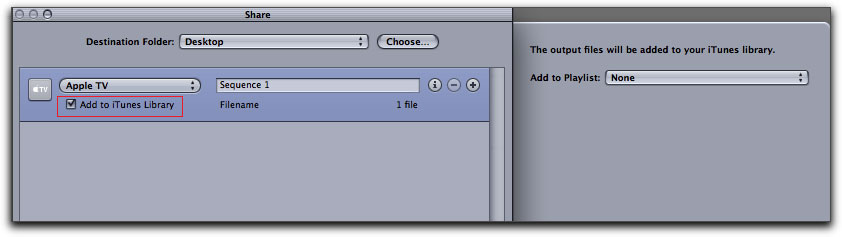
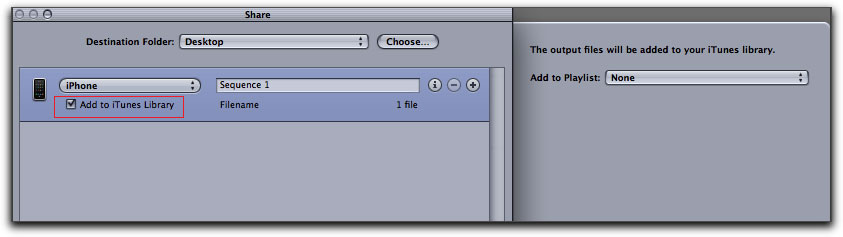
The Job Action for both the iPhone or iPod adds the video to your iTunes Library and the only option is to have it added to a specific Playlist as well.

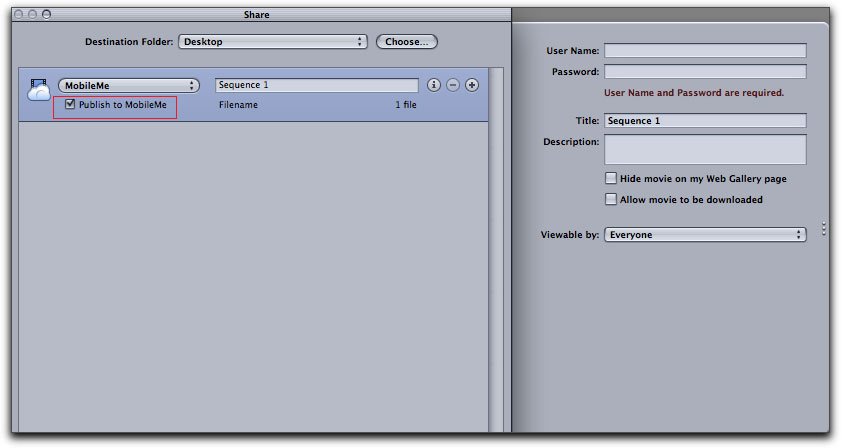
When the 'Publish to MobileMe' Job Action is selected, you are asked to enter your MobileMe account information. You only need to add this information once.
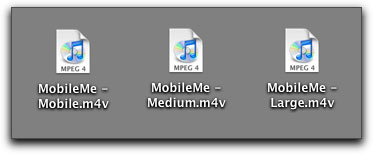
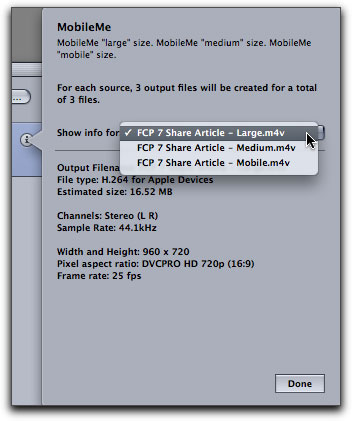
When we hit the Export button for MobileMe, Share generates three different versions of the video, small, medium and large. I am working with 1280 x 720 video on the FCP timeline. The small version of the MobileMe file is 480 x 270, the medium is 640 x 360 and the large version is 1280 x 720.
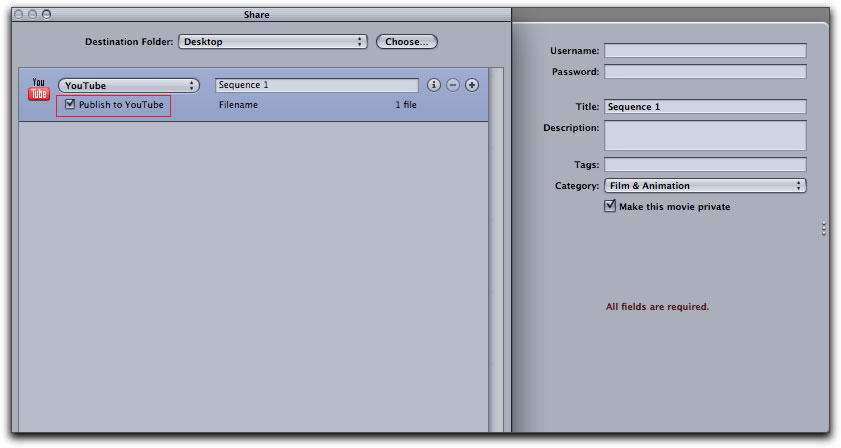
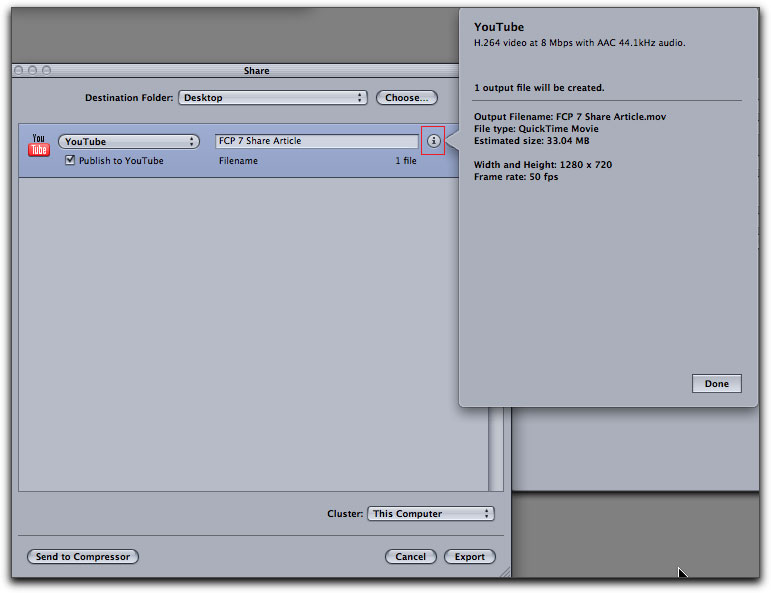
Like the Publish to MobileMe, Publish to YouTube requires that you fill in your YouTube account information. The YouTube version exports at the same frame size that is on the FCP timeline, in this case, 1280 x 720.
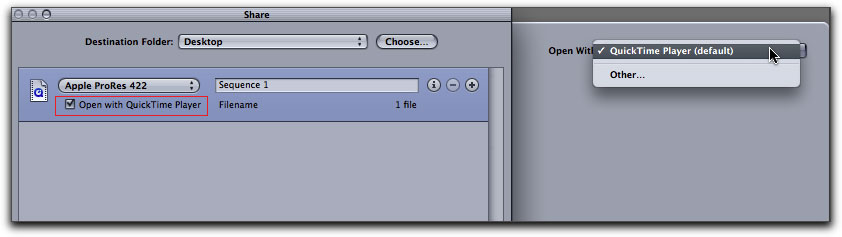
When exporting either Apple ProRes 422 or QuickTime h.264, the only Job Action option is selecting which application to open the file with, the default is the QuickTime player. When exporting as ProRes or QT H.264, the exported file will have the same frame size and frame rate as the media on your FCP timeline.

Use Chapter Marker Text as Subtitles
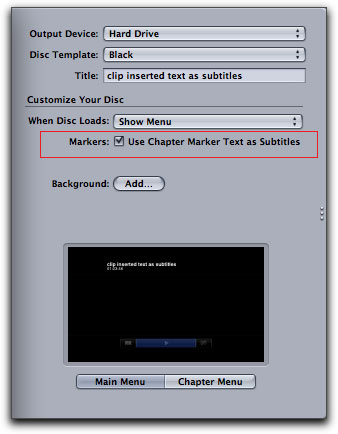
There is a new feature that adds an interesting twist to authoring Blu-ray and DVD discs. Both formats use Chapter Markers in the normal way, however, in the authoring settings is, "Markers: Use Chapter Marker Text as Subtitles". Placing a check in the box turns this feature on.
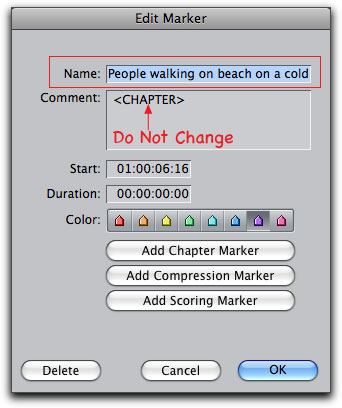
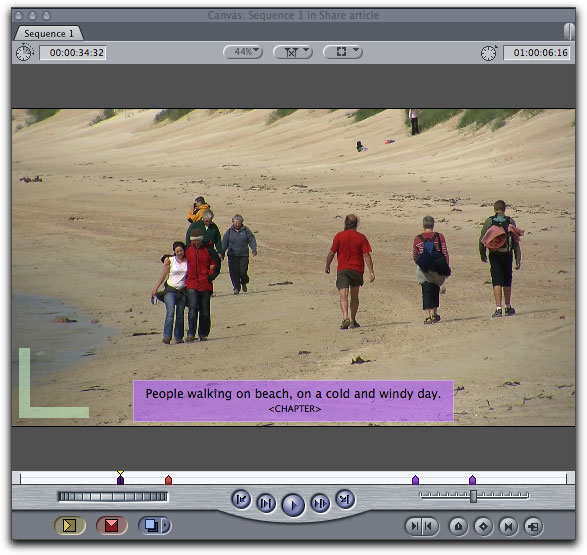
When working in FCP, we apply Chapter Markers in the regular fashion, hit the 'm' key twice on the keyboard to open the Edit Marker window, then click on the 'Add Chapter Marker' button. if you plan on using the subtitle text feature, you will add your text into the "Name" box and NOT in the "Comment" box. The Comment box will have the word <CHAPTER> (inside brackets), leave this exactly as it is. The 'Use Chapter Marker as Subtitles' works with both Blu-ray and standard definition DVDs, but it does not work with red laser, Blu-ray AVCHD, DVD-R (5 and 9s) discs.
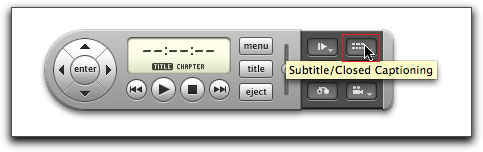
In order to view your subtitles, you are going to have to turn on subtitles on your DVD player remote control.
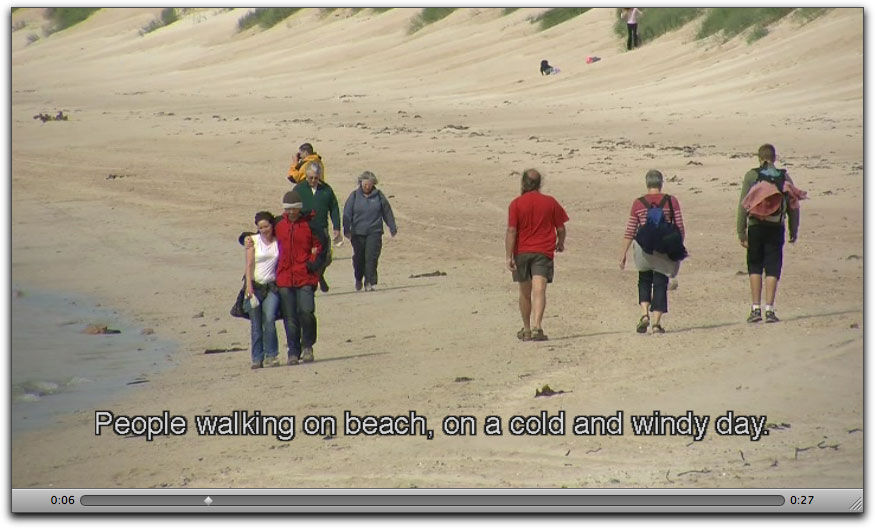
Below, marker text as subtitles is shown in the Apple DVD player (Chapter markers still work normally with this process). I need to point out that when you use this feature, the subtitle text will remain on screen until the next Chapter Marker is reached. If you have a Chapter Marker with subtitles that displays on screen for a specific clip and then there are several different clips that follow before you get to the next Chapter Marker, your subtitle text will stay on screen through all of those clips, until the next Chapter Marker is reached.
The Share window - Info, Batch Processing and Other
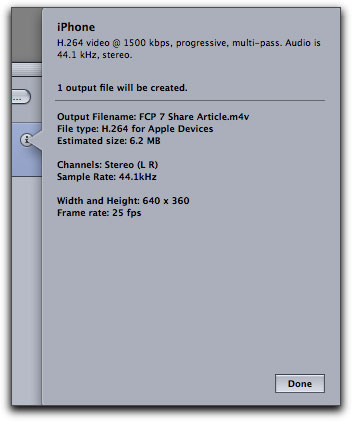
In the Share window there is an 'i' button, which, when clicked, displays all relevant information about that Output type and encode settings.
The 'info' for iPhone and MoblieMe is shown below.
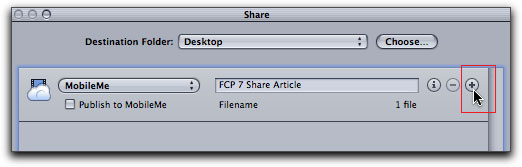
If you have a completed FCP project and need to distribute it in several ways, the Share window can act like a Batch window in Compressor. Each time you click on the 'Add' button, you will be given the option of selecting your Output type and Job Action. If you want to remove a Output type from the Share window, just click on the minus sign (-) for that Output type.
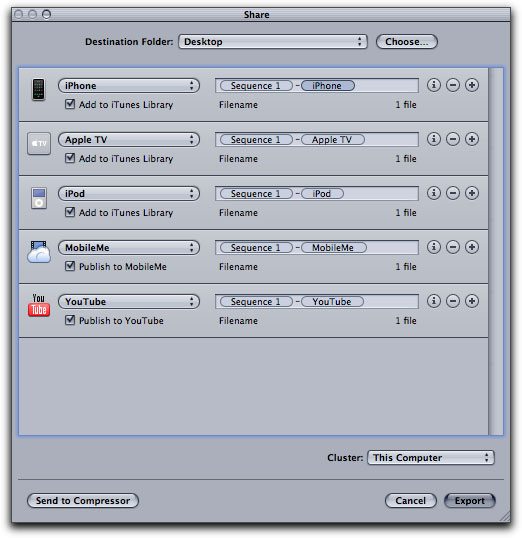
The Share window with a number of different Output types selected. Note that the Job Action has been activated for all of them. When the Export button is clicked, all of the jobs will be encoded and then published automatically. This is Batch processing.
From the Output type drop-down menu in the Share window is one last option, 'Other'.
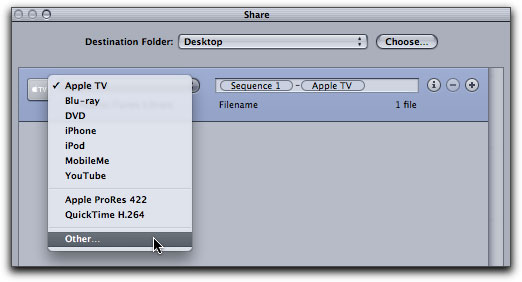
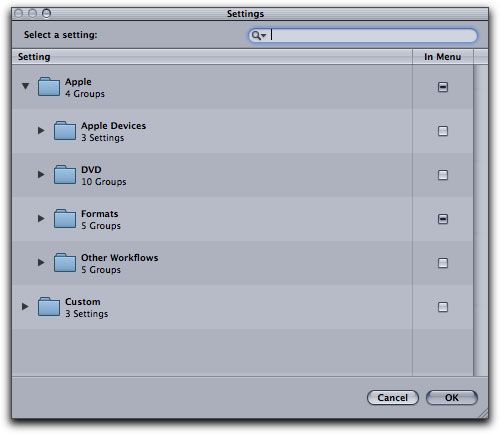
Even thought it's not very obvious, when we are working in the Share window interface, we are really accessing and using Compressor to do the encoding work. 'Other' opens the Compressor Presets window. This gives us access to all of the codecs, Presets and Custom Presets that Compressor has to offer.
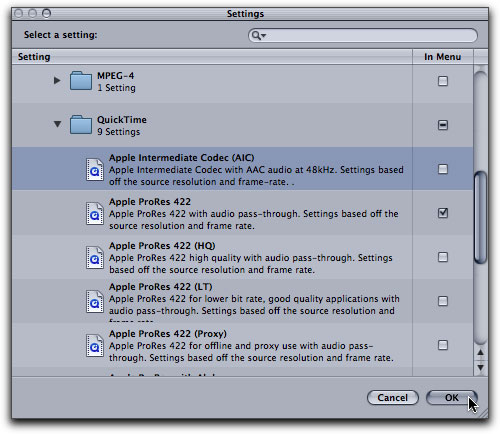
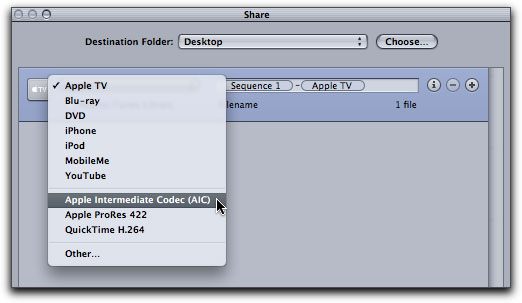
If needed, we can use a codec from Compressor just one time. Find the codec you want to use, select it and hit OK. In this case I want to Export my FCP project into the Apple Intermediate codec.
This will add the codec to the Output type in the Share window.
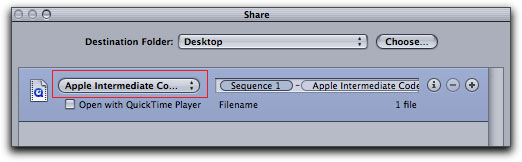
When you come back to the Share window at a later time you will see that the Apple Intermediate Codec does not show in the Output type drop-down menu.

Going back to 'Other', after locating Apple Intermediat Codec in the QuickTime folder, I have placed a check mark in the box next to its name.
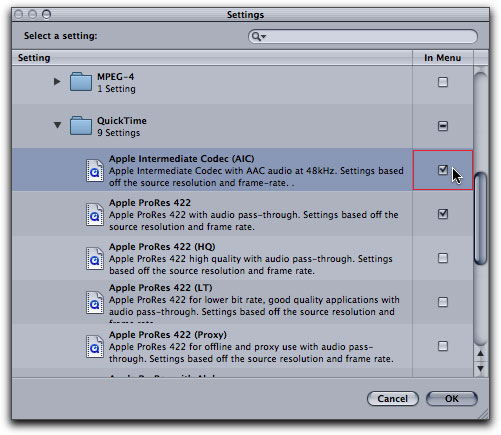
Placing a check mark on the Apple Intermedia codec (or any codec or Preset) will cause it to permanently be added to the list in the Output type drop-down menu. To remove the codec, go back to 'Other' and uncheck the box of the codec. This is an excellent feature as you can add as many codecs to the Share window as you need. Additionally, you can create a custom presets in Compressor and then add them to the list in the Output type, so that it will always be available to you, right from inside the Share window.
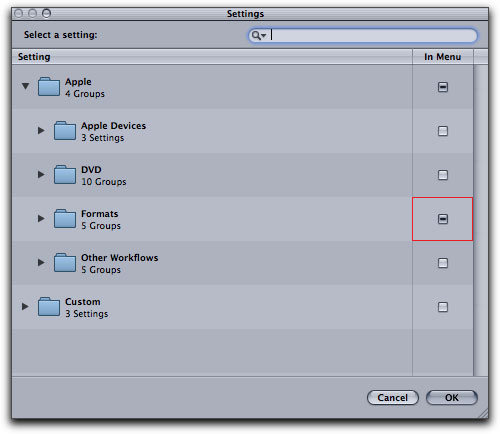
A point of interest. In the FC Studio installer (other installers as well) and also in the 'Other' option in the Share window, there can be a 'dash' inside some check boxes for certain folders. When you see a 'dash' in the box, it means that something inside that folder is selected. Took me a long time to figure that one out.
Conclusion
Share is a major addition to FCP 7, for it gives us the ability to not only encode video right off the FCP timeline, but to publish or distribute the video at the same time. Fill in the MobileMe or YouTube account info just once and from that point on, Share, which has a built in FTP client, will automatically upload your files for you. Share will also encode your video to ATV, iPod, iTouch and the iPhone, and place the encoded files into iTunes for distribution to your Apple devices. There is also the option of accessing all of the Compressor Presets, including Custom Presets that you have created and then giving those Presets a Job Action. If you like Share in FCP, then you'll be happy to know, that Share is also in the Motion application in Final Cut Studio 3.
We now have very quick access to both the ProRes 422 and H.264 codecs. For those of us who need to burn DVD 'samplers' or 'screeners' from the FCP timeline for our clients, there is no longer the need to export to Compressor or DVD SP. We can create these discs right from inside FCP.
And of course, we now can burn Blu-ray discs from FCP. All that is needed, is a third party Blu-ray burner (currently about $350). No need for additional third party Blu-ray authoring software and no need for third party Blu-ray burning software. Another feature that I am very interested in is the ability to use my built-in SuperDrive to burn AVCHD red laser Blu-ray video to very inexpensive DVD-5 or 9, single or dual layered disc. Yes, Blu-ray is still a bit crazy, but at least, with FCP 7, we are now in the game.
Enjoy,
--ken
copyright © www.kenstone.net 2009
are either registered trademarks or trademarks of Apple. Other company and product names may be trademarks of their respective owners.
All screen captures, images, and textual references are the property and trademark of their creators/owners/publishers.