July 16, 2007
Using Compressor 3 and DVD SP
By James Fields
The following walk through is for working with HDV video, edited in FCP, for final delivery as a Standard Definition DVD. To start off this tutorial you need to know what I am working with.
The footage used in this article footage was shot with a JVC HD110U in a 720P 30 format. The following workflow will work with any HDV Footage from any camera. I have also worked with footage from a Sony V1U shot at 1080i, with the same excellent results.
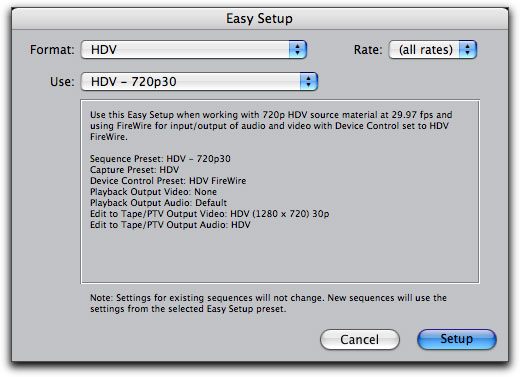
We start by choosing the format we will be working with using Easy Setup, then opening a new project. I chose HDV 720P 30 as this matches my camera the best. I don't use AIC, I don't up-convert, I use the native format as this is going to a SD DVD and no matter what, it will still look better than if I had shot it in SD 60i.
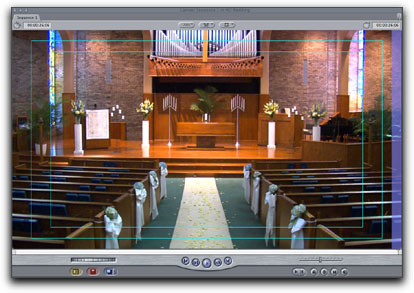
Here is an example of a typical project of mine that is being edited in 720P 30 shot on the JVC GYHD 110U.
Once you are done editing, and you are ready for export, it is time to prep your project for Compressor.
Export
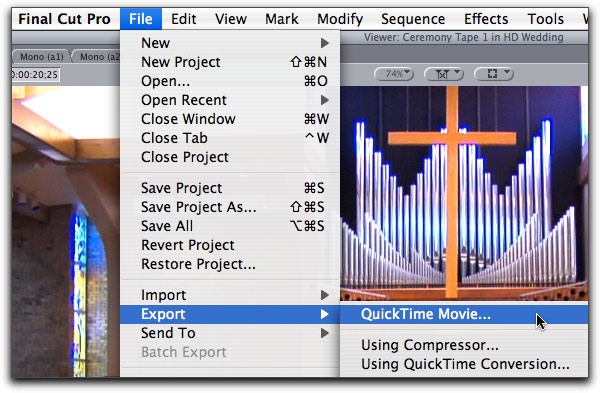
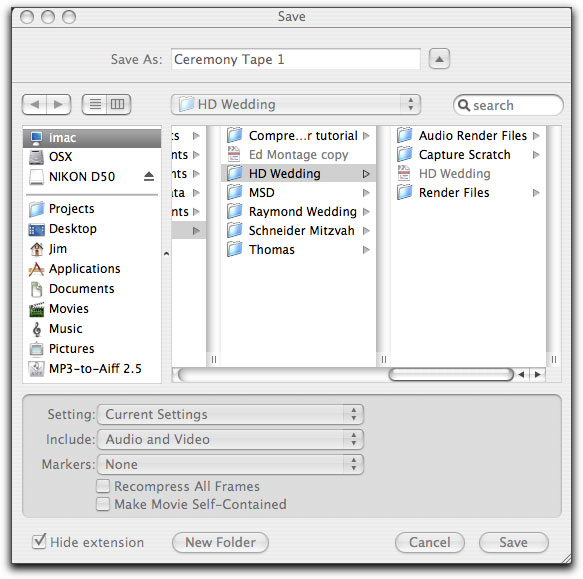
Set your in/out points on the timeline or select the Sequence in the Browser. From the Menu bar select "file/export/quicktime movie".
Settings should be left at 'Current Settings'. Include 'Audio and Video'. Select 'Markers' as appropriate and leave the 'Recompress All Frames' box uncheckled. If you are not going to be moving this export to another Mac you can leave the 'Make Self-Contained' box unchecked. Next choose your destination for that file.
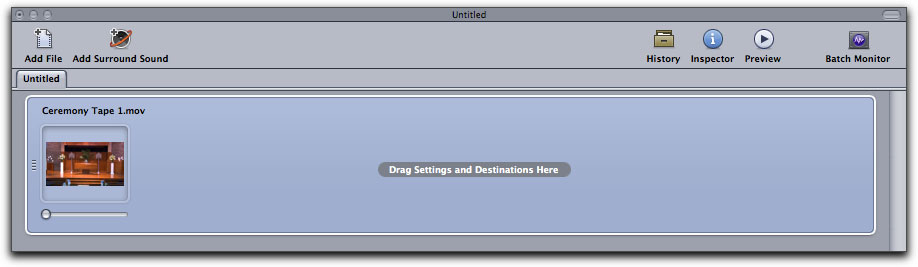
Now open Compressor 3
From the Finder, drag your QT file into the Compressor Batch window.
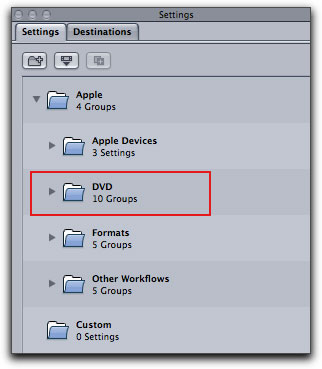
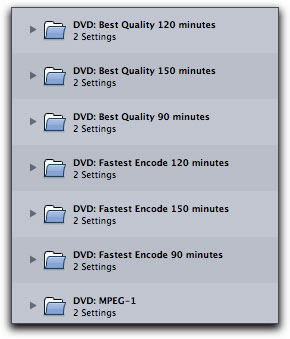
Next thing to do is choose a format. Obviously if you want to go to DVD there is only 1 option. In the Setting window you will see the DVD section with 10 Groups, inside are the different encoding options.
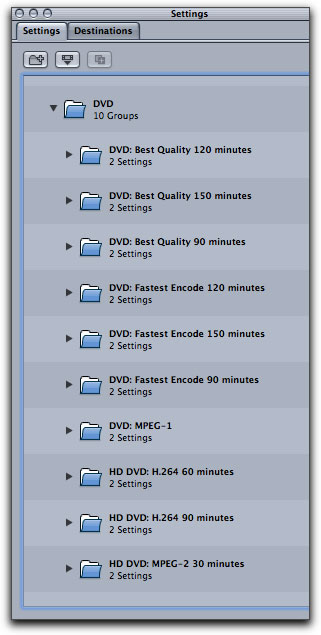
Fastest encode is a Single pass VBR. VBR means Variable Bit Rate. Single pass is just that, Compressor makes 1 pass, analyzing and compressing at the same time. Yes it is fast, it is, however, not my personal choice.
Best Quality uses a 2 Pass technique in Compressor. The first pass analyzes the video and the second pass, using the analysis, does the encoding. The finished export file will be no bigger, it will, however, go through Compressor twice effectively doubling the total processing time. I use 2 pass, or Best Quality for all my work. I can see the difference in quality between Fastest and Best every time.
Choose the setting that reflects the length of your project; 90, 120, 150 minutes. The longer the duration of your video, the lower the bit rates Compressor will use to encode and therefore, the lower the final quality.
Drag your setting that you choose to the file you brought into Compressor.
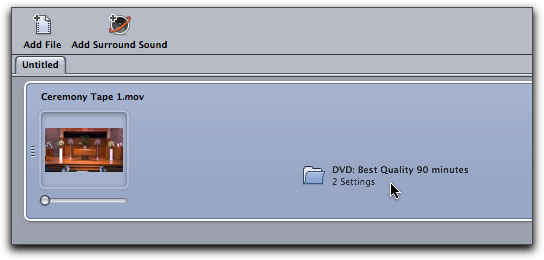
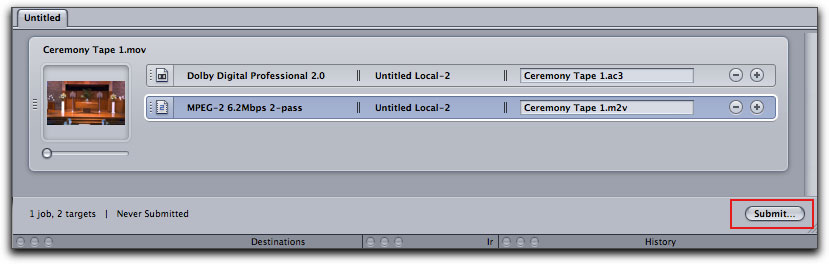
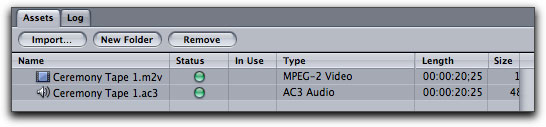
You will see 2 settings show up, the MPEG 2, and the AC3 file. In addition, "Source" and the output file name will be displayed. You will change the destination (default is Source) and you can change the output file name if you like. However keep the file ext the same.

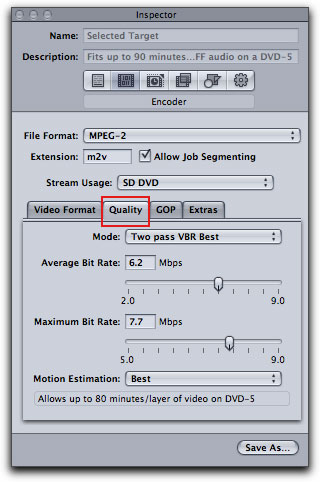
When you select the MPEG 2 file in the Batch window, in the Inspector, the Summary tab opens to show all of the settings that will be applied. The Description line in the Inspector shows the maximum duration of video that you can use with this setting. It will also give the usable duration depending on which audio codec you chose. AC3 audio uses considerably less space than AIFF and the difference is reflected. It is also important to remember that while 'DVD-R' DVDs say that they are 4.7 gigs in size, after formatting they are really only 4.3 gigs in size.
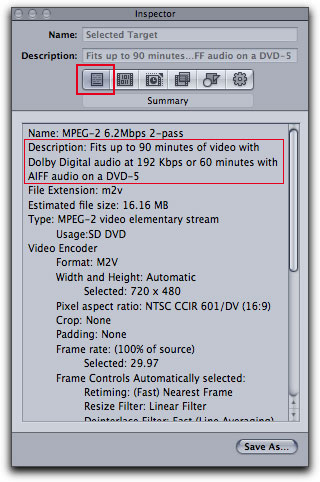
Width and Height is Automatic now. In Compressor 2 You had the choice of either 16:9 or 4:3 when choosing your format. Now you get 1 choice and you need not panic. It will still export your 16:9 file as a 16:9 file.
The second tab in the Inspector, Encoder, is where you can make adjustments to your encode settings. Notice it is SD, that the aspect ratio is 16:9, and of course since I shot Progressive, my footage is progressive.
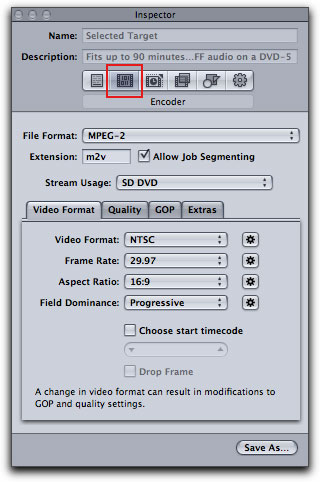
The Quality tab allows you to change the quality of your compression to fit the file to your disc. You can use this Bit Budget to calculate exact average and maximum bit rate settings.
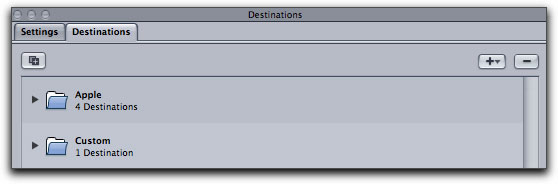
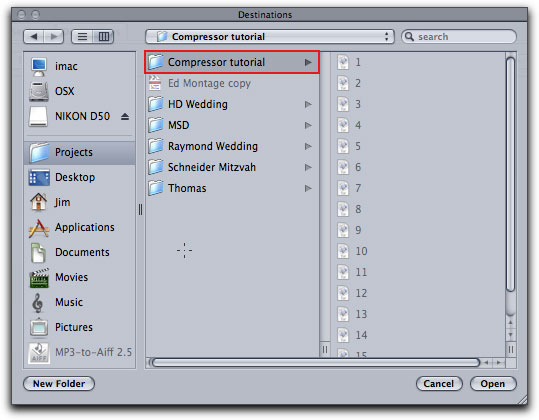
Once you are done it is time to tell Compressor where to Save your encoded files to. Click your destinations tab.
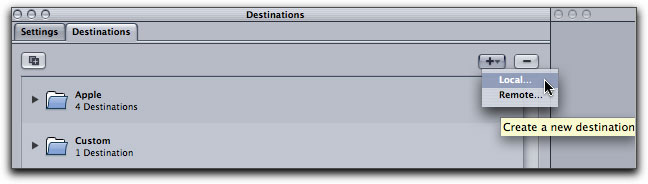
Choose a new local destination.
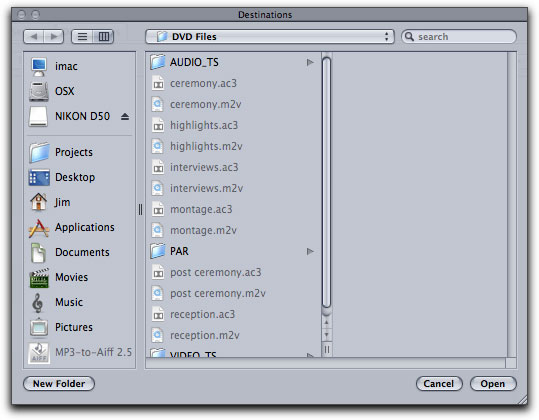
I prefer to have a folder inside my project folder for the DVD Files I am exporting, that way when I backup my project, everything is in one spot.
This Destination will now show up and will remain as the default for all encoding tasks until you change it.
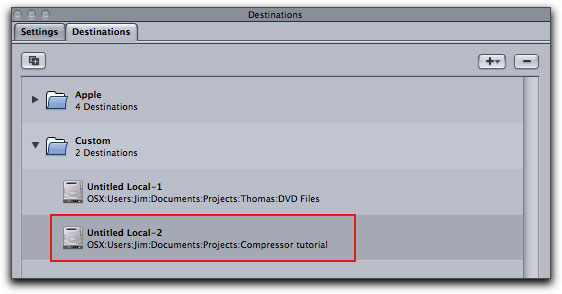
Drag that Icon to each of your files in Comp, and it will set the source.

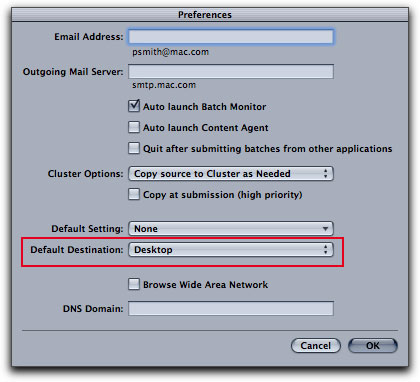
While I like to keep all of my files together for organizational purposes, some of you will prefer to export the finished encoded files to your Desktop. There is an easy way to set your Desktop as your default Destination for all encoding tasks. Open DVD SP Prefs and select Desktop as the default.
Hit Submit.
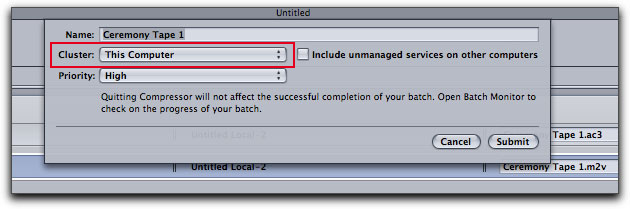
You will then be prompted with this drop down box. I have a few Macs here and as of right now, I have no idea how to Distribute Processing for Compressor. Leave your Cluster as This Computer, do not check the 'Include unmanaged services' box, go ahead and hit Submit.
When I click Submit, the Batch monitor widow does not open automatically, you must click the Batch Monitor button to open the window. However, after opening, nothing is showing up in the Batch Monitor,
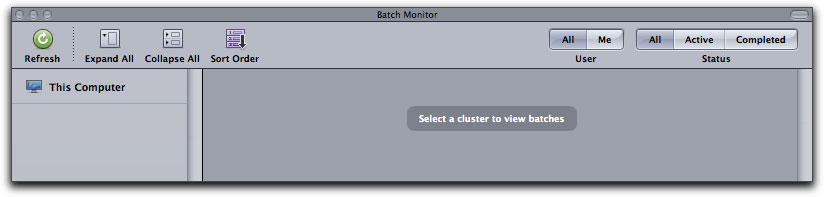
Clicking on "This Computer" and your export and progress bar will show up.
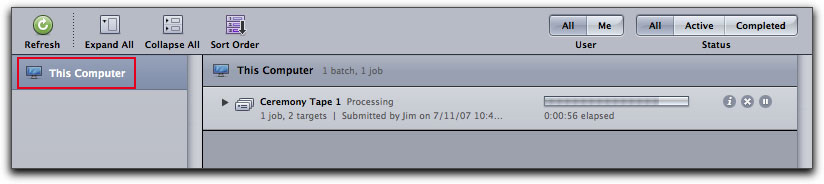
Let it do it's job.
Remember, depending on your system, memory, drive speed, angle of the moon, or most importantly, if the client is waiting in the lobby, this might take some time. If it is due next month, it will no doubt blaze through very quickly....
When the encoding is complete launch DVD Studio Pro, Import your freshly converted HDV to SD 16:9 Footage to your bin, or drag it into the Asset window from the Finder.
Drag that file to your timeline, set up your DVD, and test it out with Simulator.
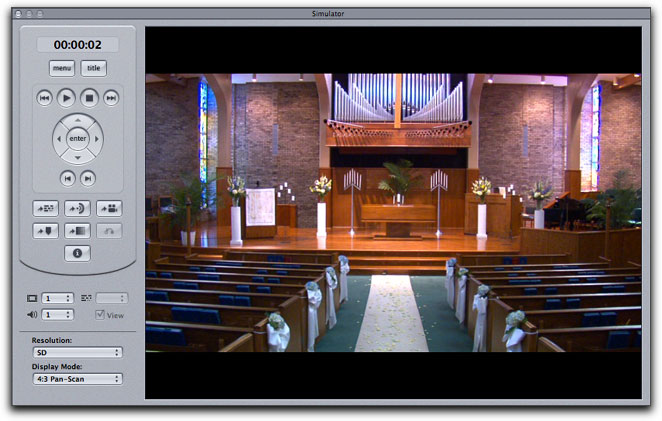
You now have a "letterbox" SD DVD from your HDV raw material.
James Fields started in this industry editing small videos for friends, and graduated to full time editing 3 years ago. After working for a company in Dallas he ventured off to work on his own company Black Mug Media, specializing in HD weddings in Dallas/Fort Worth, as well as commercial events. He and his wife's big break came when they were invited to film a concert event for Dramarama back in February 2006. That project has led to multiple concerts with 80's bands such as Animotion, When in Rome, Gene Loves Jezebel, and of course Dramarama. Their company is now involved in shooting television pilots and shows in Dallas.