June 13, 2005
By Ken Stone
Replicator
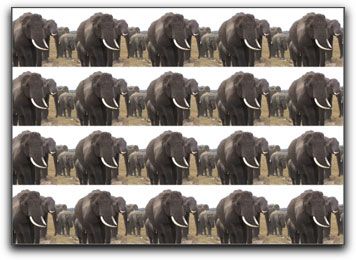
One of the more interesting new features added to Motion 2 is the 'Replicator'. The Replicator does just what its name implies, it will make multiple copies (tiles) of any object or art that you can place in Motion, i.e.., video, photos, shapes, text or any objects found in the Motion library except for Particles emitters. I have placed a 720 x 480 freeze frame into the Motion canvas window and scaled it to 20%. The Layers tab shows a single photo has been added.

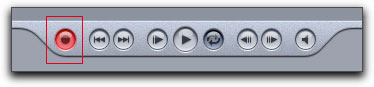
Click on the Replicate button in the tool bar.

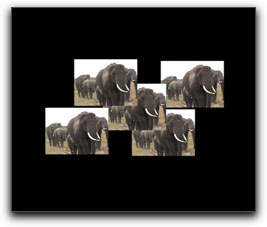
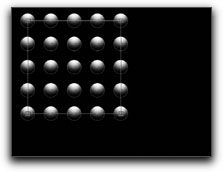
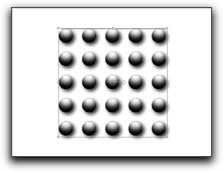
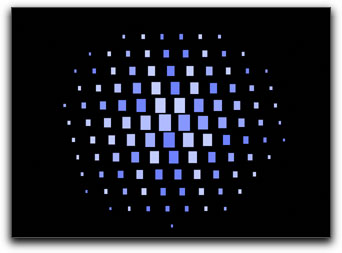
Replicator will generate a pattern of repeating objects (tiles). Replicator defaults to the Rectangle shape, shown below. You can choose any one of a number of different shapes. Each shape presents varied effects with the replicated image.
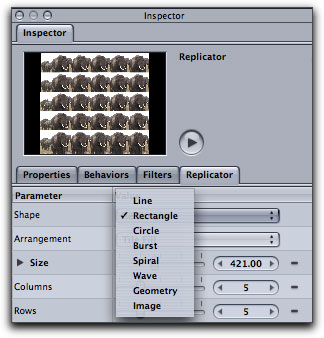
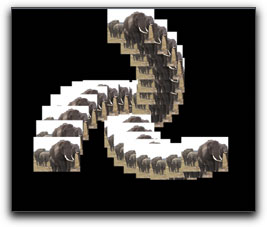
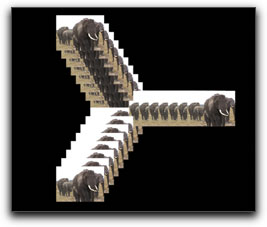
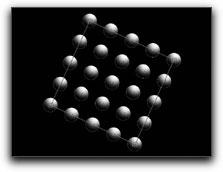
Some of the other Shape options are shown below. Selecting a shape is just the starting point.
|
|
|
| Spiral | Burst | Wave |
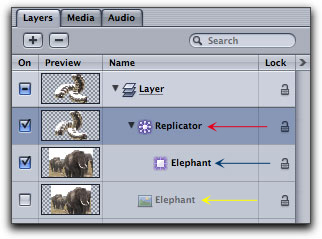
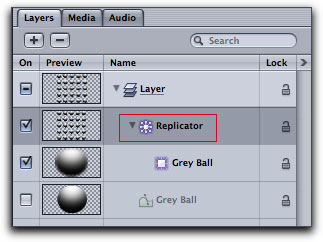
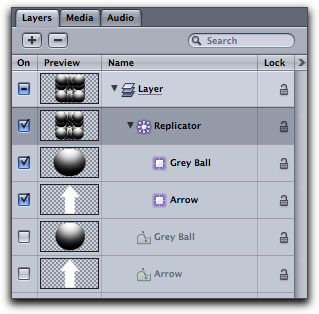
When an object has been replicated, the Layers tab updates to reflect the change as does the Timeline. Two new items have been added. A replicator object that controls the onscreen pattern as a whole, red arrow below, and a cell object that controls the individual replicated elements in the pattern, blue arrow below. As well as adding two elements, the original (source) object is now turned off, yellow arrow below.
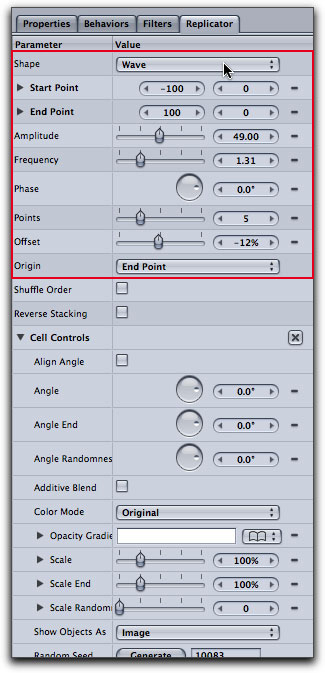
Once a shape has been selected the Replicator tab in the Inspector will change to reflect the different parameters that are available for that particular shape, the parameters differ from shape to shape.


Clicking on the cell object in either the Layers tab or Timeline produces a Replicator Cell tab in the Inspector which has its own set of parameters for changing aspects of the cells.
Animating Replicator
Okay, so you have placed a piece of art into the Canvas and clicked on the Replicator button which fills the canvas with tiles of the original art and then click on 'Play'. As the Timeline plays, the art just sits there, nothing is moving. This is because there is no inherent animation when you replicate an object. To animate your replication it will be necessary to keyframe the different parameters to achieve motion. The only time that there would be animation is if the art you are using is an animated QT movie. In this case each cell would display motion, like a bird flapping its wings, but the replicated cells themselves would be stationary.
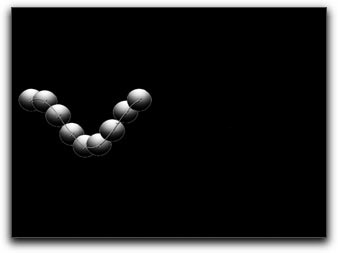
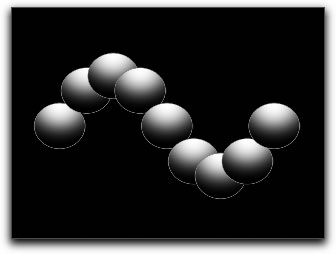
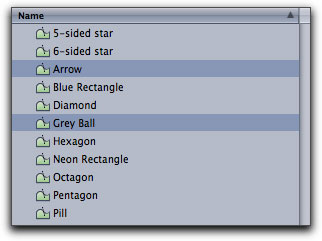
So lets set some keyframes in Replicator. I am going to use the 'Gray Ball', found in the Shapes folder in the Motion Library.
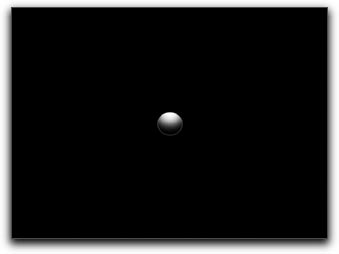
|

|
| Gray Ball - size reduced to 22% | After clicking on the Replicator button |
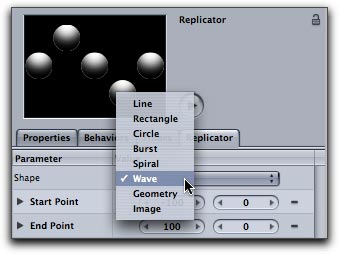
|
|
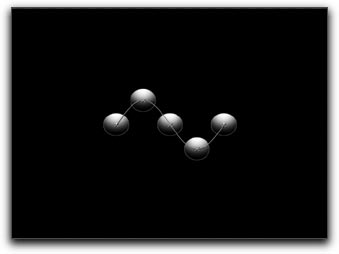
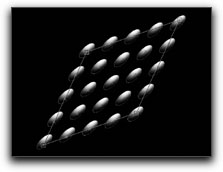
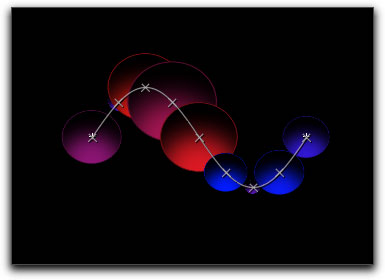
| Select the Wave shape | Wave shape applied |
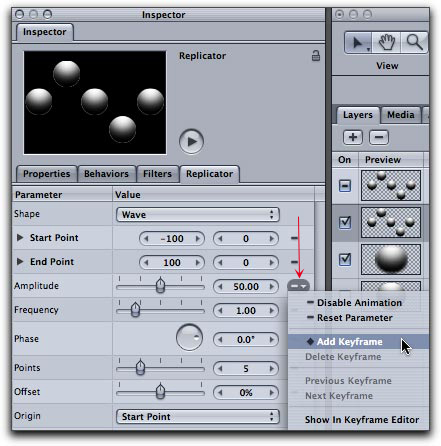
I am now going to begin keyframing my Wave, which has six basic parameters to work with, Amplitude, Frequency, Phase, Points, Offset and Origin. As the names of these parameters are not always that descriptive, I suggest that you experiment with each one, to see on screen, the effect that it applies to the cells before you begin to keyframe. Starting with Amplitude, which controls the height and depth of the wave, move your playhead to the beginning of the Timeline and click on the keyframe drop-down, red arrow below, and set a keyframe (keyboard shortcut - Option click the drop-down icon) . Keyframing in Motion is different than in FCP. In Motion you always add a keyframe first, then change the parameter. There is another, more FCP like way, to add keyframes in Motion, by using the 'Record' button, more on this at the end of this section.
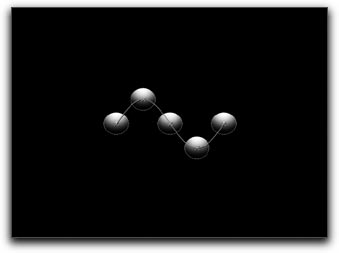
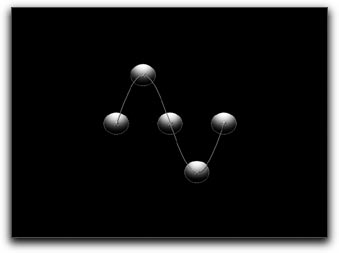
Move to the end of the Timeline and add a second keyframe, adjust the Amplitude to 100. Now, as you play the Timeline the replicated cells will animate by changing the Amplitude over time.

|

|
|
|
| Default Amplitude setting of 50 | Amplitude setting of 100 |
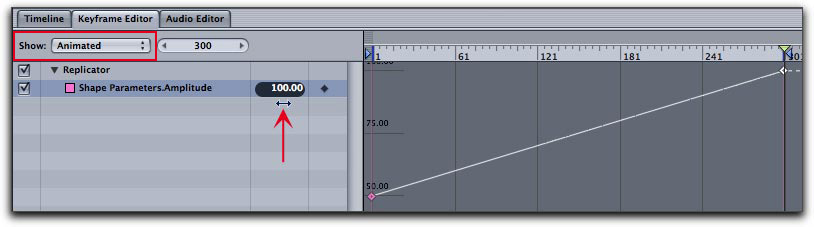
Once you have set a first keyframe for any parameter you can do additional keyframeing of that parameter in the Keyframe Editor as opposed to keyframing in the Inspector. Click on the Keyframe Editor tab in the Timeline, in the 'Show' menu, select Animated. Once you have set a keyframe you can drag the keyframe earlier or later in the timeline as well as move it up or down to change the parameter setting. This is a particularly helpful way to adjust the parameters while you are playing your Motion project in Real Time. You can also enter a numeric value for your parameter by placing the playhead over the keyframe then click and hold on the numeric setting, left hand side of the Keyframe Editor. Your cursor will turn into a left-right arrow which you can drag to change the value, red arrow below. In addition, you can double click on the numeric value and enter a new value via the keyboard.
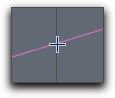
To add additional keyframes, hold down the Option key and place the cursor over the keyframe line. The cursor will turn into a plus sign, click to set a new keyframe.

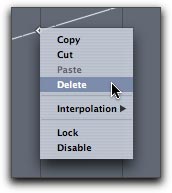
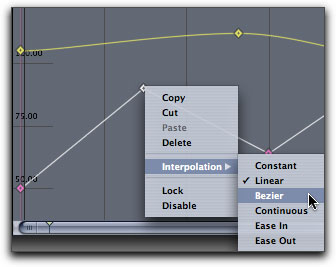
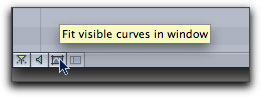
To remove a keyframe, place the cursor over the keyframe, control click and select delete. Control clicking on a keyframe provides access to Bezier and Ease In and Ease Out. If you find that while working in the Keyframe Editor some of the keyframe lines disappear off the graph, you can click on the 'Fit visible curves in window', below right, to bring the lines back into view.
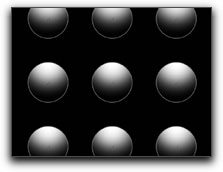
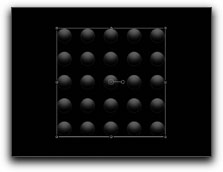
The Wave Shape defaults to 5 cells (tiles) which looks a little thin to me. I have increased 'Points' from five to nine in the Replicator tab in the Inspector. I am not going to animate 'Points' as the look is jerky when additional cells are added over time.

|

|
|
|

|
| Default Points setting of 5 | Points setting of 9 |
So far, the only parameter that has been animated is Amplitude, we are going to add to this by keyframing 'Offset' which will animate a new starting and ending position for the replicated art. Move your playhead to the start of the timeline. In the Offset parameter, set a keyframe and then move the slider to -80%. Now move the playhead to the end of the timeline, set a keyframe and give it a value of 80%.

|

|

|
|
|
|
|
| Default Offset setting of 0% | Offset setting of -80% at start of Timeline | Offset setting of 80% at end of Timeline |
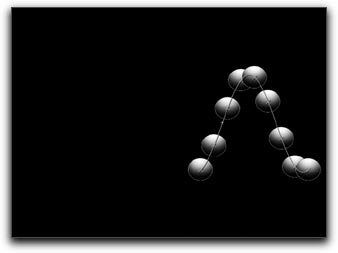
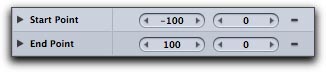
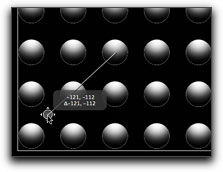
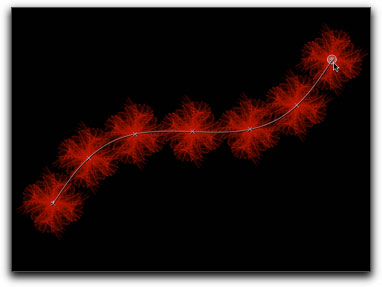
There are several other parameters available for the Wave Shape, one of which is 'Start Point' and 'End Point'. Modifying Start and End points will change the position of the first and last cell in the Wave, either left or right and up or down. When the Start or End point is changed the entire Wave adjusts accordingly. The value on the left of Start Point (-100) will move the first cell of the Wave left or right along the horizontal axis, stretching or squeezing the Wave. The value to the right of Start Point (0) will raise or lower the first cell in the Wave on the vertical axis. The same holds true for changing the End Point. You can modify either of these two points or both.
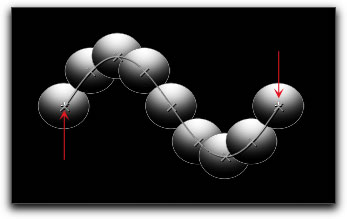
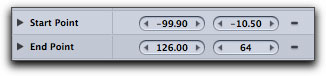
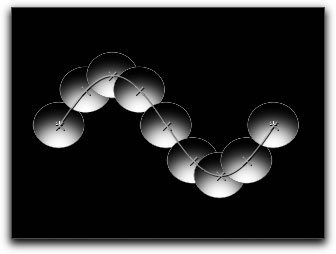
Keyframeing Start and/or End Points is rather cumbersome as there are four different settings to work with. There is an easier way. If you'll look in the Canvas window at your Wave, you will see two plus (+) signs, one in the first cell and one in the last, red arrows below, and yes, they can be hard to see. If you click on either one and drag the plus sign around you can change the parameters just as you would in the Inspector. As you drag, the numeric values in Start and End parameters settings will change dynamically reflecting the new positions, lower right.
Using the Record button for keyframing
New keyframing options have been added in Motion 2, for all those of us who really prefer working FCP style. Double-click the record button to open the Recording Options dialog, then check the "Record keyframes on animated parameters only" checkbox. Then turn on the Record button and leave it on all the time. This will let you work exactly as you would in FCP - you add a keyframe first to a given parameter, then anytime you adjust that parameter later, it will add keyframes to it since Record is on, but it will not add keyframes to parameters that you haven't started animating yet.

The Record button has some advantages over manually setting keyframes in basic cases like this. For example, Record will automatically set a keyframe at the beginning of the object, giving you an additional shortcut to basic keyframing. For this tutorial, all you have to do is turn on Record, move to the last frame, then adjust the Amplitude parameter to create 2 keyframes and a ramp between the original value and the new value. If you want to start the animation at some point other than the in point of the object, you can still add a keyframe manually at the frame you want first.
Modifying the Replicator as a whole
We have been modifying and animating the behavior of the repliaction art through the Replicator tab in the Inspector, there is still an additional level of modification that we can work with. We can alter and refashion the replication as a whole using the additional parameters found in the Properties tab when the replicator is selected in the Layers tab.
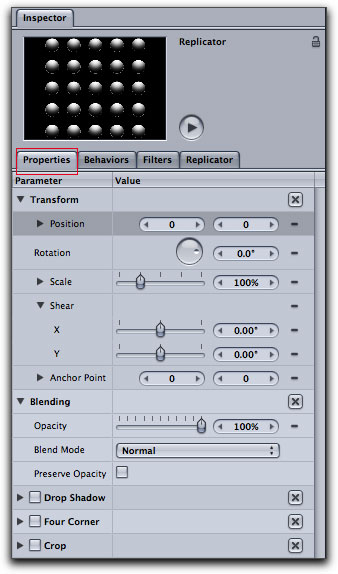
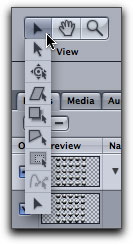
There are two different ways that you can set the parameters for your replication. The first is by selecting one of the Transform tools found in the Motion tool bar or you can use the tab key to cycle through the different tools in the tool bar. These tools will be used in the Canvas by dragging the corners of the Motion bounding box. If the bounding box is not visible, command + forward slash from the keyboard, will toggle this feature on and off. The second method is by using the value controls in the Properties tab which has the additional benefit of being able to keyframe these values at the same time.
Transform
|
|
| Position | Rotation |
|
|
|
| Scale | Shear | Anchor Point |
Blending
|
|
| Opacity | Blend Mode - Overlay |
|
|
|
| Drop Shadow | 4 Corners | Crop |
Cell Controls
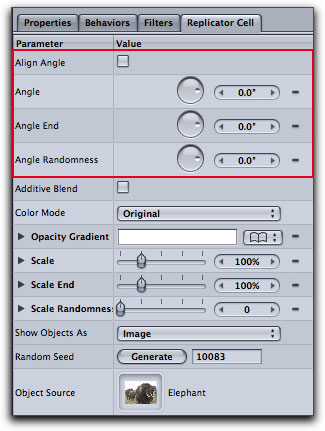
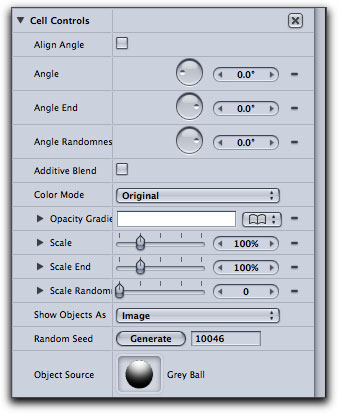
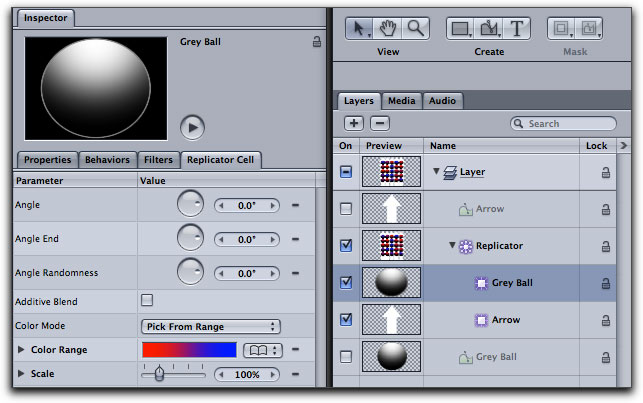
In addition to modifying the Replicator parameters you can change the cell parameters as well. The Cell parameters settings should be just below the the Replicator parameters in the Inspector, if not, click on the Cell (Grey Ball) in the Layers tab. The Cell parameters include a number of parameters, below right.
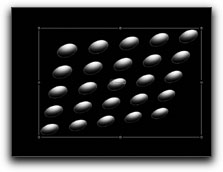
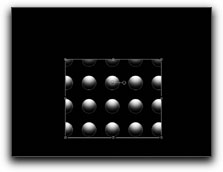
When changing a cell parameter, the change will effect each cell individually but not the overall Wave. Below I have changed the Angle to -180. What this does is rotate each cell in place. As my Gray ball art has highlights, rotating the cells repositions the highlights. Below left is the default setting, highlights are on the top of each cell, after changing Angle to -180 the highlights are now on the bottom, below right. When this parameter is keyframed, each cell will rotate over time.
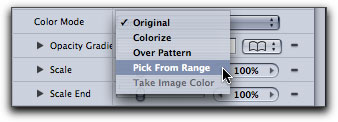
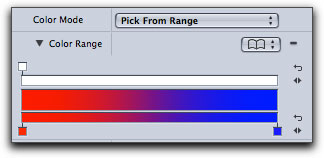
In 'Color Mode' we can change the colors of the cells as they play out on screen, in either a predetermined manner or randomly from a Range of colors that we select. There is also the ability to change the opacity of the cells over time. There is detailed information in this Color Mode article. I have chosen to demonstrate Color Mode using 'Pick From Range'.
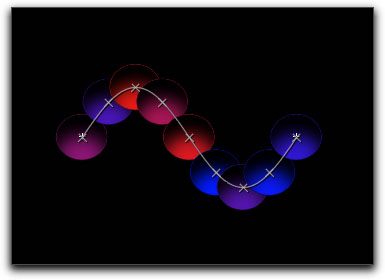
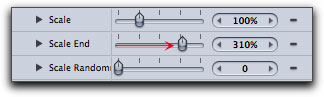
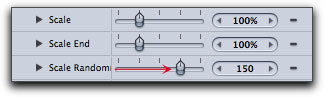
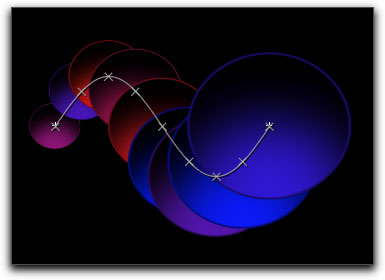
In addition there are three 'Scale' parameters to further enhance the look of your replication. The first, 'Scale' increases or decreases the size of all cells. The other two, shown below, adjust the size relative to position of the cells in the Wave.
|
|
|
|
|
Replicator Library
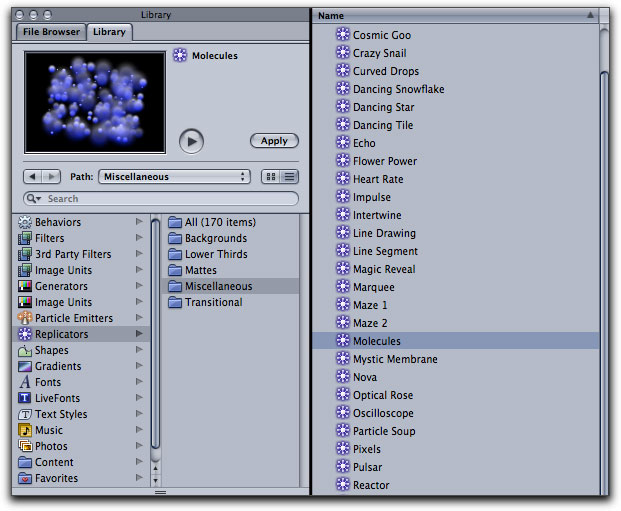
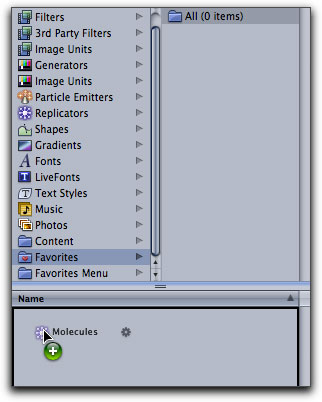
While you can create your own replications, Motion 2 provides a Replicator library with 170 prebuilt replications divided into five different categories. Unlike replications that you build yourself, replications from the library are already animated ... instant gratification. As you click on each preset an animated preview appears in the Preview window. To load a preset into the Canvas you can click on the 'apply' button or drag the item from the Library into the Canvas or into the Layers tab where you can drop the item onto a layer of your choice.
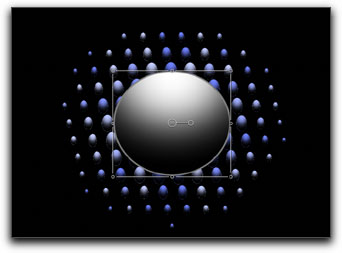
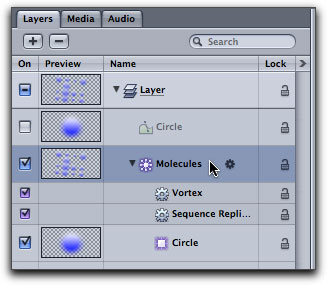
Once you have applied a Library Preset to your Motion project you can modify it using all the same parameters that are available to you when you build a replication from scratch. Some of the presets found in the Library are amazing and with some tweaking of parameters you can highly customize a preset. In addition, if you find a preset that you really like you can change out the built in source image to one of your own. This process, while quite easy is not really intuitive. I am starting with the Disco Ball from the Replicator Library.
First you must bring the replacement art, either your own or from the Motion Library into your project. Do this by dragging your replacement art into the Layers tab and drop it on the 'Layer' that the Replicator resides in. This will add the replacement art to your project which will float above the replicator art in the Canvas.
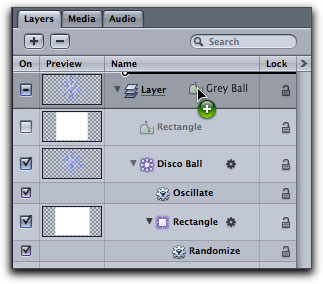
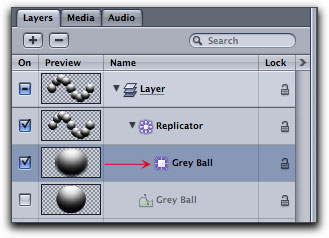
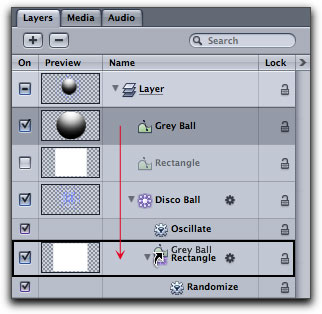
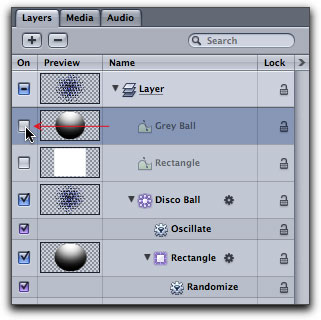
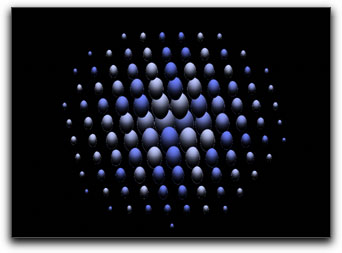
Now, click and drag the replacement art (Gray Ball) onto the replicator cell in the Layers tab, when the cursor becomes a curved arrow, release the mouse button. Go back to the replacement art in the Layer and uncheck it to turn it off.
You can also Save your modified replicator. Select the 'Favorites folder in the Library then click on the Replicator in the Layers tab and drag into the window at the bottom of the Library. You can change the name of the preset once it is in the Favorites folder. Your new Favorite can be found in > User > Library > Application Support > Motion > Library > Favorites.
More on Replicator Presets later on.
Replicator - Using more than one cell
You can have as many different source objects, replicator cells, in a Replication as you want. You can add several different cells at the start or add additional cells even after you have replicated the first cell. To use more than one cell in your Replication select the items in the Motion Library and click on Apply, they will be added together to the Layers tab. If you are selecting from different Libraries in Motion you can select and Apply each one in turn. You can also add elements from the Finder by dragging each on onto the Layer in the Layers tab.
While both items are still selected click on the Replicator button, both items will now be included as cells in the Replicator.
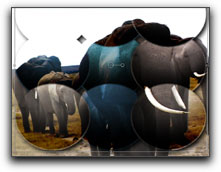
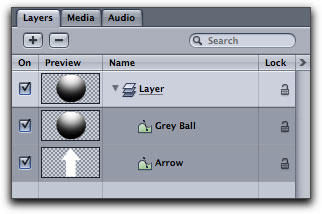
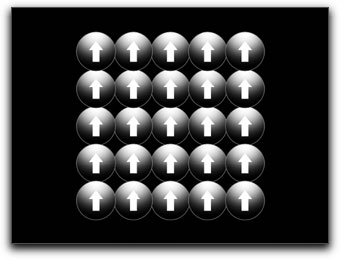
Yikes, doesn't look like much. There are several things that now need to be done. The size of the source cells needs to be reduced. Select the Gray Ball source item in the Layers tab and in Properties, reduce the size. Now select the Arrow in Layers and reduce its size.

So where are the Arrows, hidden behind the Gray Balls. Drag the Arrow replicator cell above the Gray Ball cell in the Layers tab so that both will be visible.
That's better
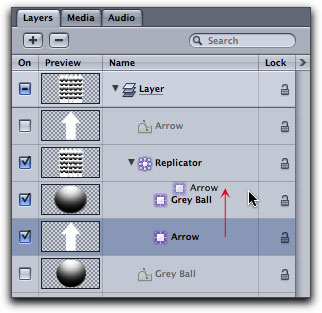
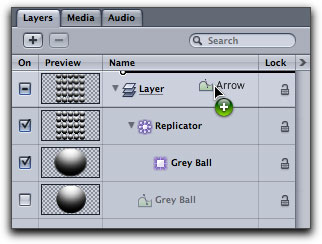
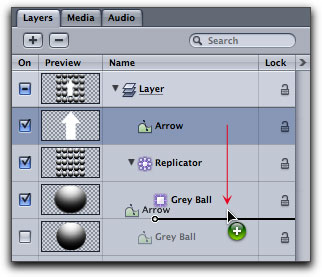
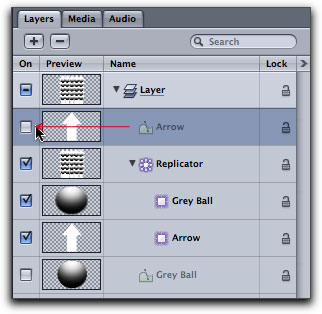
To add additional cells after you have replicated a first cell you will first need to add the new source cell to the project. Do this by dragging the item onto the Layer in the Layers tab. Then drag the Arrow down into the replication section in the stack. Lastly uncheck the source Arrow cell to turn it off. Alternately, after you've brought the item into the Layers tab, you can also add it as a new replicator cell by dragging it directly onto the Replicator object itself. This is the same as dragging it into the replicator cell section in the stack.
You can modify the parameters of each different cell independently by selecting the cell in the Layers tab then clicking on the Replicator Cell tab in the Inspector for access to the cell parameters. Working with parameters in the Replicator tab in the Inspector will affect all cells in unison.
Video Wall
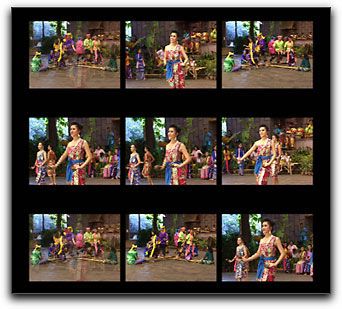
I'm sure that we have all see it on TV and even in the movies, the entire screen is filled with a video clip repeated over and over again in columns and rows, video tiles as it were, all playing at once. We can use the Replicator to achieve this effect.
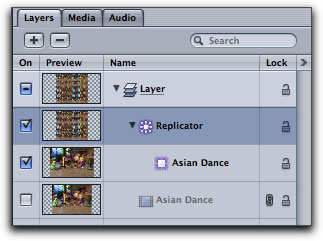
To build a video wall we first need bring in a video clip into our Motion project.

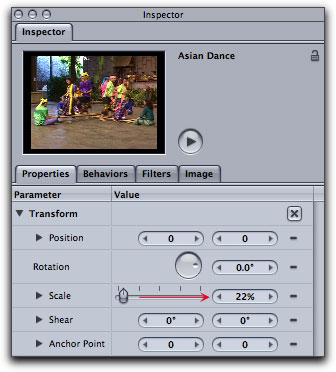
As a QT video clip fills the entire Motion screen it is necessary to reduce the video clip in size in order to fit a number of them on screen. I have reduced the size of my video clip to 22% as a starting point. Later on we can change the size to polish this effect.
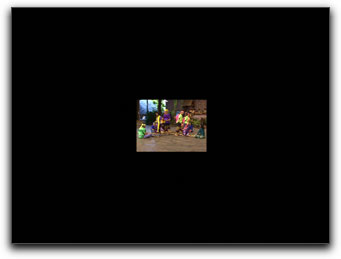
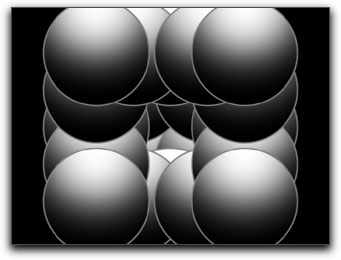
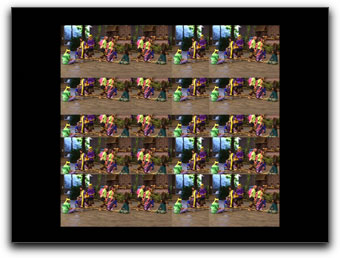
Click on the Replicator button in the Motion Tool bar. As Motion defaults to 5 columns and 5 rows for a replication, the replicated video clips will overlap each other. An interesting effect but not what we're after.
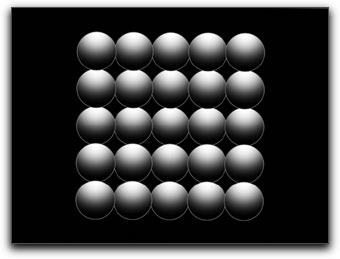
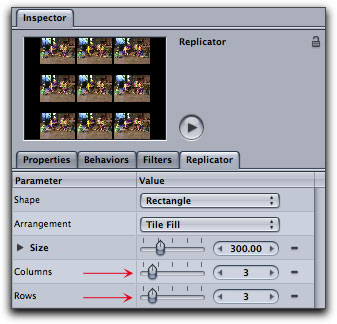
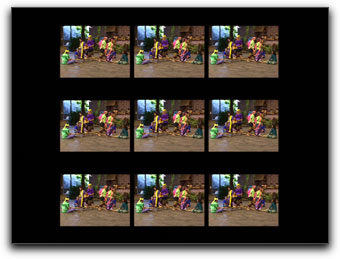
In the Replicator tab in the Inspector I have reduced the Columns and Rows setting to 3 each. The video is now more properly tiled on screen. You can increase the number of columns and rows but you will need to reduce the size of the replicator cell in the Properties tab of the Inspector.
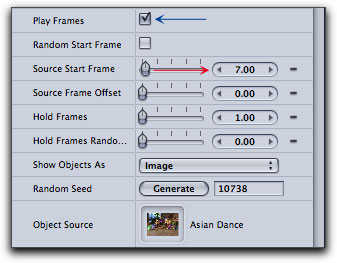
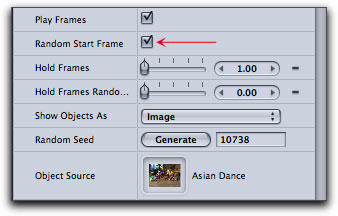
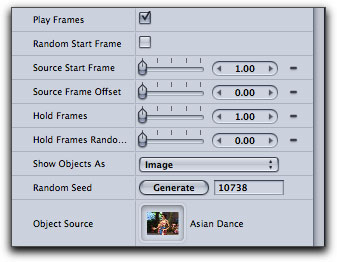
Once you have your video properly tiled there are a number of parameters that will will control how the video plays out on screen. The first Parameter 'Play Frames' is an on/off switch, blue arrow below. When checked all the video tiles will play out on screen. When unchecked the video tiles will display a still image on each of the tiles. The 'Source Start Frame' parameter, red arrow below, will set the frame that your video will start playing from or if Play Frames is disabled this parameter will set which frame is permanently displayed on screen, not unlike a Poster frame.
At this point, when the video wall plays, all of the tiles will play in unison, each starting from the same frame, either the first frame of the clip or the Start frame as set in 'Source Start Frame'. When the 'Random Start Frame' parameter is checked, Motion will randomly pick different start frames for each of the different tiles causing the different tiles to play 'out of sync'. If the Play Frames parameter is turned off, then the still images (poster frames) for each tile will be randomly chosen. When 'Random Start Frame' is check the parameters available is reduced as the 'Source Start Frame' and Source Frame Offset' parameters will not be available.
In addition there are several other parameters that control the playback of the video tiles. Source Frame Offset alters the start frame by the Offset amount once the video starts playing. Hold Frames will cause frames to be repeated based on the value entered, Hold Frames creates a staccato slow-mo effect and choosing Hold Frames Random will randomize the Hold Frame value.
Further modifying your Replication
Up to this point we have been modifying our replicated art using the parameters in the Replicator Tab, Properties tab and the Cell tab. This is not the ending point of what we can do with Replicator as we can use a number of other Motion features to further enhance our work.
Behaviors
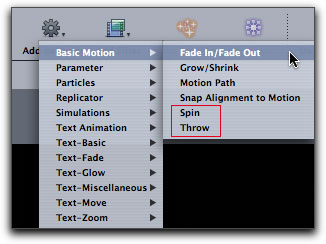
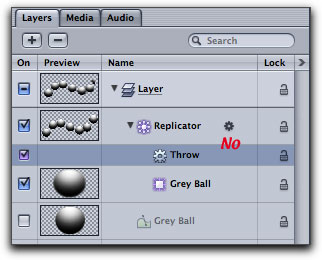
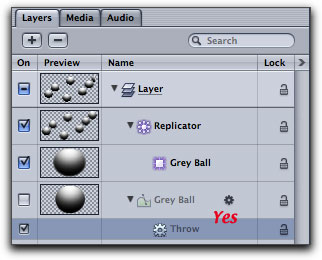
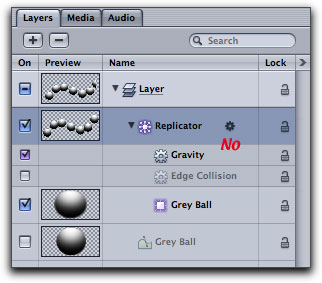
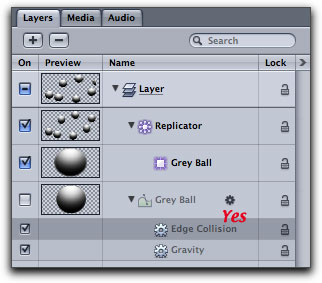
You can apply Motion Behaviors to your replication, however, there is a caveat. Some of the Basic Motion behaviors like Spin and Throw, when applied to the replicator object, will negate or turn off any animation keyframing work that you have done, particularly animation that involves position or rotation. To get around this you can apply Spin and Throw to the source art which will apply the effect, yet keep the animation work that you have done. The other Basic Motion Behaviors work properly when applied to the replicator object.
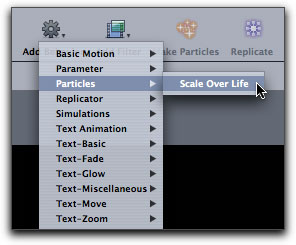
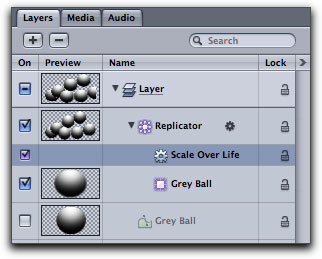
Particles > Scale Over Life from the 'Add Behavior' menu works properly.
Simulations from the 'Add Behavior' menu display some of the same characteristics as 'Basic Motion' behaviors in that they do not always work on the replicator but do work on the 'source' object (art).
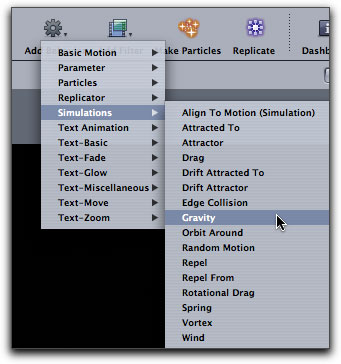
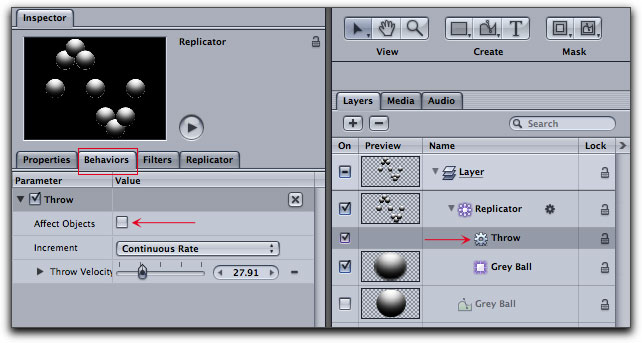
There is another way to workaround this Spin and Throw issue. By default, the Throw and Spin behaviors have the 'Affect Objects' checkbox turned on, so instead of applying to the replicator object as a whole, they are actually affecting the individual objects inside the replicator. This conflicts with the keyframing which is also trying to affect the individual objects in the replicator. To avoid the conflict, you can simply turn off the 'Affect Objects' checkbox in the Behavior tab of the Inspector for Throw or Spin. This rule also applies to any simulation behavior that has the Affect Objects checkbox turned on.
Filters
You can apply filters to either the replicator object or the 'source' object (art). When applied to the replicator object all elements will be effected as a whole. When a filter is applied to a 'source' object, only that one object will show the effects of the filter. If you are using more than one 'source' object (cell) in your replication, different filters can be applied to each different 'Source' object.
Particle Emmitters
While Particles and Replications have some commonality in that they both use video, photos, shapes, text or any objects found in the Motion library to create cells and even share some of the same parameters, they really are different animals. Particles are animated, they are emitted and have a birth rate and life span. Replications have no inherent animation, but are simply multiple copies of the source cell. So the question is, "Can you replicate Emitters?". The answer is a qualified yes. Why would you want to use particles as a source cell for replication ... because particles are animated and offer exciting motion effects. However, having said this, it is important to know that not all Particle Emitters can be successfully replicated. So, how do we know which ones work and which ones don't, trail and error.
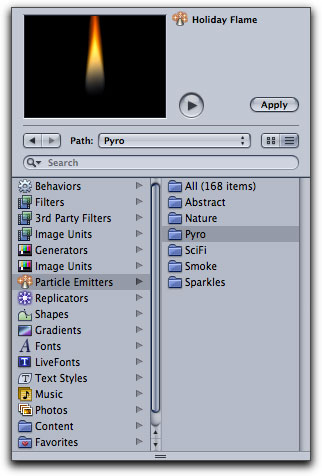
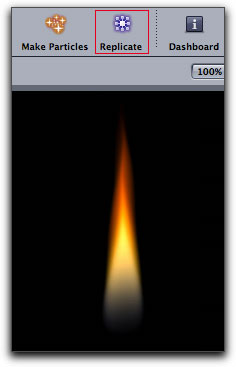
In the Motion Library I have selected Particle Emitters > Pyro > Holiday Flame and then clicked on Apply to load it into the canvas. Once you have applied a particle emitter to the canvas check the Replicate button in the Motion tool bar. If the button is active you can successfully replicate the particle. Those particles that can not be replicated will have a 'grayed out' Replicate button.
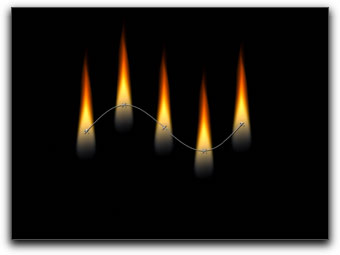
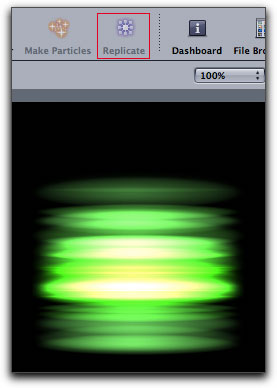
After replicating the Holiday Flame, I have set Shape to Wave, shown below. Each flame (cell) dances on screen as the timeline is played.
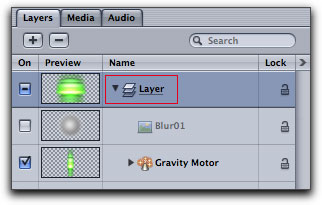
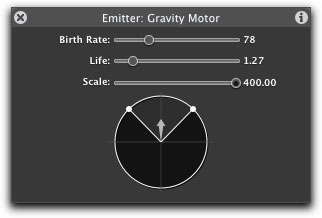
When I choose the Gravity Motor in the Particle Emitters > SciFi section and apply it to the canvas you can see that the Replicate button is grayed out.
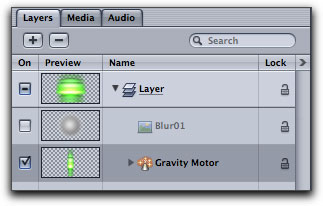
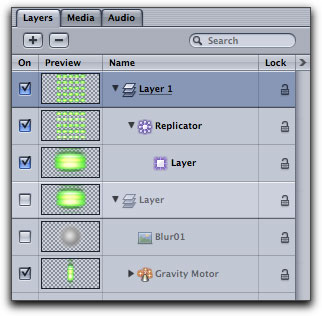
Even though the Replicate button is grayed out there is a way to replicate Gravity Motor. If you select the Layer in the Layers tab, below left, the Replicate button now become active and replication is possible. After replication, you can see that a new layer (Layer 1) has been added to the stack in the Layers tab, below right.

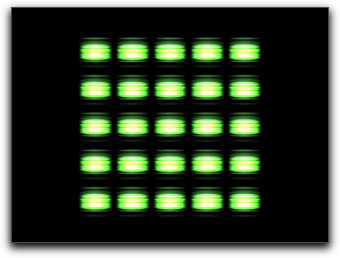
As shown below, Gravity Motor has been replicated, even the Dashboard is operational.
It would seem that we can replicate everything found in the Emitter Library, but you will find that a few of the items don't display properly on screen after replication. Still, most work well.
Replicator Library Presets - Redux
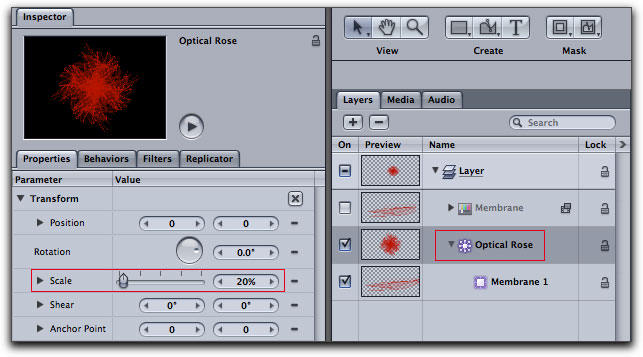
As I mentioned earlier, Motion provides us with 117 prebuilt animated Replicator Presets, many of which are fantastics animations, good to go. So this begs the question, 'Can you replicate a Replication Preset?'. Again, the answer is a qualified yes. I have selected Optical Rose from the Replicator Preset Library and applied it to the canvas. Selecting the Optical Rose cell, I have reduced the size to 20%. As you can see below right, the Replicate button in the Motion tool bar is grayed out.

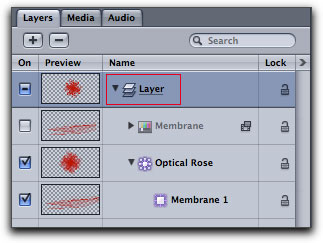
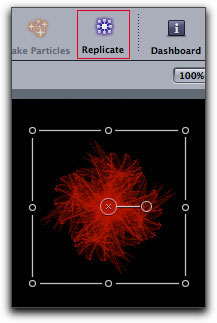
Using the same technique as we did when applying Behaviors to a replication, we can select the Layer in the Layers tab, the replicate button now becomes active and we can replicate the Optical Rose.
After replicating the Rose you can see that an additional replication layer has been added to the stack in the Layers tab. The Replicator 'Shape' defaults to Rectangular with 5 columns and 5 rows.
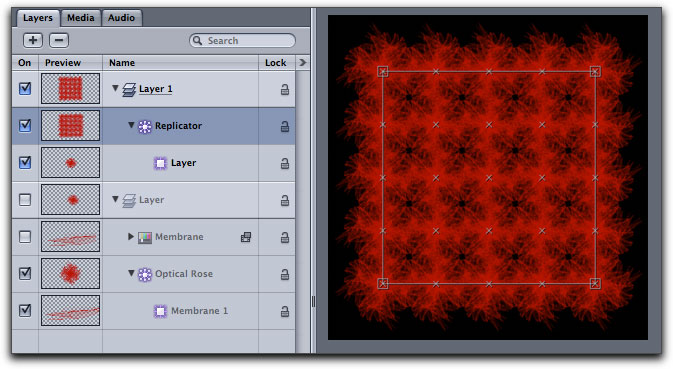
In the Replicator tab I have changed the 'Shape' to Wave, added a few pints (more roses) and dragged out the start and end points.
I qualified my statement that you can replicate a Replicator Preset, because, while you can animated this replication much as you would any other, there are some limits. As these animated Presets are prebuilt, the keyframing work that went into them is not accessible to us. If you open the Keyframe Editor tab in the timeline, none of the keyframing work is displayed. In addition, some Motion features like 'Color Mode' do not work on a replicated Replication. Still, this is a pretty powerful ability, adding what we can do with the Replicator.
Once again I find myself surprised by the depth of Motion. What seemed to be a rather straight forward new feature, Replicator can be a very powerful tool that has access to all of Motions' creative features. Replicator adds to Motions' ability to uniquely create innovative and exciting animations.
Enjoy.
--ken