
November 7, 2005
By Ken Stone
I bought my first CD burner about 11 years ago. It was a 2X burner that costs $700 and it shipped with Toast burning software. Blank CDs were $12 apiece. I had little choice as my Mac came with a 500 meg hard drive and I had to find a way to store my Photoshop files. My how things have changed!
Over the years the cost of burners and blank disks have dropped dramatically and for sometime now the Mac has shipped with the "Superdrive" CD/DVD burner. Toast has been the de facto burning software since the beginning and has evolved in to a multifaceted 'Swiss Army Knife' application handling all types of burning needs for the Mac. It does seem that Toast is the only game in town but with the release of Panther and now Tiger OS systems, disk burning from the Finder and Disk Utility has been greatly improved.
Even though the cost of blank disks have dropped to well under a dollar apiece, it makes no sense to burn a small file onto a blank, leaving most of the disk empty. In the case of burning backups, it's more efficient to burn multiple backups to one disk as opposed to burning a new disk each time. With the Mac's Disk Utility we can burn Multisessions to a single disk. The Multisession feature only applies to CDs, you can not create a Multisession DVD.
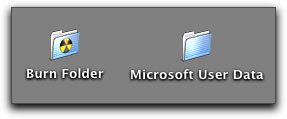
You can do Multisession burns from any folder on your Mac including the Finder's 'Burn Folder'.
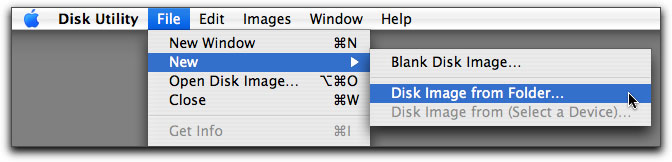
1. Disk Utility does multisession burning by creating a new Disk Image for each burn. Open Disk Utility. From the File menu > New > Disk Image from Folder.
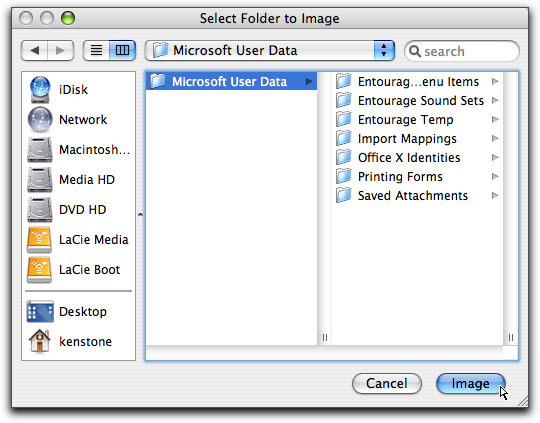
2. This will open the 'Select Folder to Image' dialog box. Navigate to the folder and select. Click the 'Image' button.
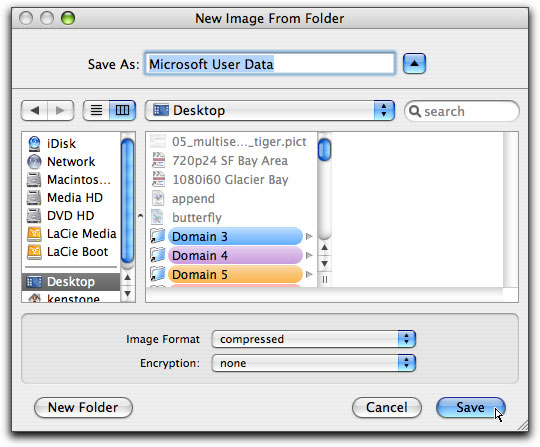
3. This will open the "New Image From Folder" dialog box. Select a destination to save the file to (Desktop) and click on the Save button.
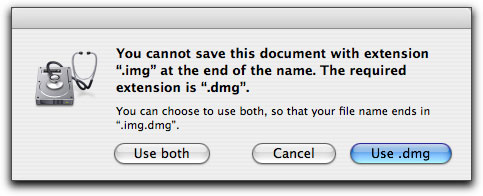
Note that while some instructions tell you to add ".img" to the name of your disk, if you do you will receive the error message shown below. Either add ".dmg" to the name or use just the name, Disk Utility will add the appropriate extension for you.
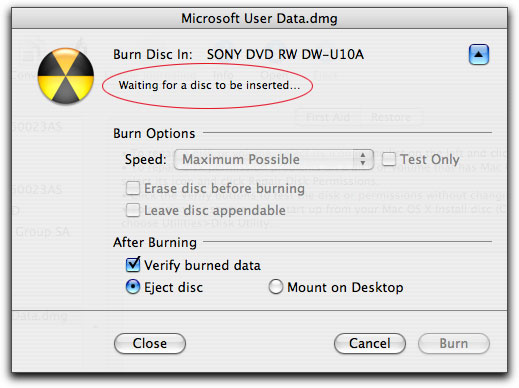
4. Disk Utility will then proceed to create a Disk Image (.dmg). When done, the new Disk Image will appear in the left hand column of the Disk Utility window. Select the Disk Image, then click on the Burn button.

5. The burner door will open and you will be asked to insert a disk.
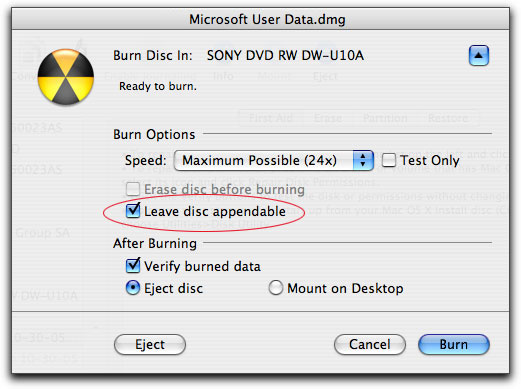
6. After you insert a disk the Burn dialog box will change. Place a check mark in the "Leave disc appendable", this is what enables you to do multisession burns. Click burn.
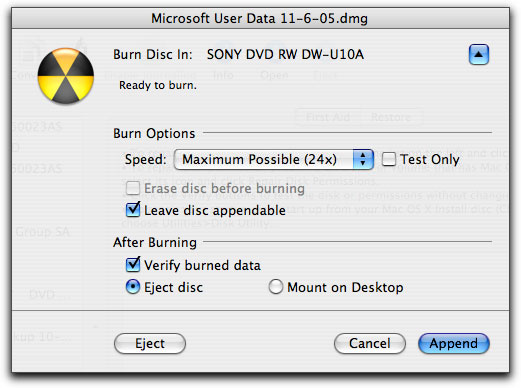
7. To add additional burns to your disk repeat the above process. The only difference that you will see will be that the final Burn dialog box will have an "Append" button rather than a "Burn" button. You can add additional sessions until the disk fills up.
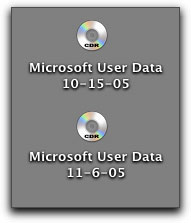
When you insert a disk that has multisession burns into your optical drive, a disk icon will appear on your desktop for each individual session. It is important to name each session properly when doing multisession burning in order to be able to locate the files that you are looking for.
True, Toast offers a more elegant approach to disk burning, but using the Finder and Disk Utility in Tiger offers us a reliable and stable way to accomplish the same chores without the need for additional software.
Enjoy.
--ken
copyright © www.kenstone.net 2005
are either registered trademarks or trademarks of Apple. Other company and product names may be trademarks of their respective owners.
All screen captures, images, and textual references are the property and trademark of their creators/owners/publishers.