September 15, 2008
By Philip Hodgetts
I consider pre-processing to be as important as the encoder settings. Getting them right makes the job of the encoding engine much simpler and therefore better results are obtained at reduced bandwidth. In fact, the pre-processing is probably more important than the encoder settings that the encoder is going to work with, whatever you give it: the classic "Garbage In, Garbage out".
Because I like both of these two tools; Apple's Compressor 3 (Final Cut Studio 2) and Telestream's Episode Pro, the screen shots in this article will be shown for both applications. The basic pre-processing for video ahead of the encoder is to:
- De-interlace or Reverse Telecine
- Crop out Action Safe (Only if going smaller than 640 x 480)
- Black restore/White Restore
- Correct Gamma
- Format without Letterbox
De-interlace
You have got to deinterlace. No second guessing here, no prevaricating. Just do it. Computers, LCDs, Plasma and Projection TVs are progressive. We need out of interlace, so if you can't shoot progressive and stay progressive, you have to de-interlace.
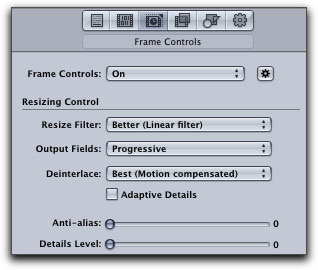
Bonus is, it makes the material a lot easier to encode and scale so it works to our advantage. Compressor, with its optical flow technology, can do a really awesome job of de-interlacing but it comes at a time penalty: at better or best settings, Compressor can be slooowww.
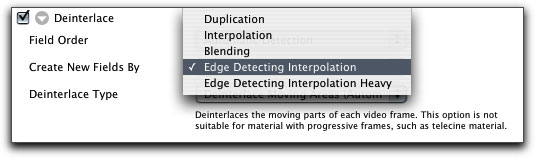
Using Interpolation will maintain sharpness. The hidden setting for De-interlace Type shows Adaptive - so only the moving parts are de-interlaced maintaining all the resolution in the static parts of the image. Interpolation attempts to recreate the missing information by inferring what it should be from the surrounding pixels.
|
|
| De-interlace Episode | De-interlace Compressor |
Ground rules for 24P
If you're going to shoot 24 fps there are a whole lot of issues that go along with it. Problem is, it's a great frame rate for Internet and podcast video! If you want the 24P look, you have to work in 24p throughout the editing process. You cannot work with 24P (usually 23.976 of course) that has regular pulldown applied in a 29.97 sequence. You cannot reverse telecine that footage and it will look bad when encoded for the web. It will also be very much harder to encode and require more bandwidth!
- Get the frame rate correct 24P = 23.976P
- Shoot advanced pulldown and remove it or shoot 24P native to digital media.
- Remove pulldown on capture to NLE or as a process before starting editing.
- Do not add pulldown for web distribution
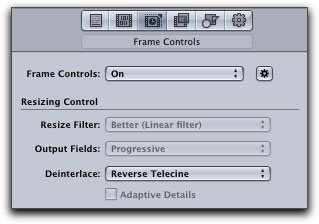
Inverse Telecine if given 23.98P source with pulldown added to make it 29.97 fps interlaced
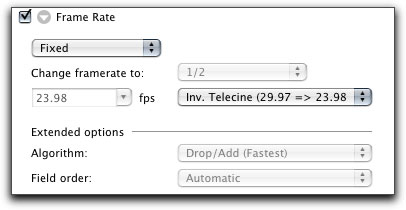
When 23.98 (aka 24P) footage is distributed on regular video - all tape formats and some solid state formats - pulldown is added to make the 24 fps source fit on a 30 fps distribution system. If your source material has pulldown, remove it using these settings in Compressor or Episode Pro.
NOTE: This will only work if the material has a consistent cadence (pattern) to the pulldown. If that pattern changes on edits, then there is little that can be done to "repair" the situation. The risk of broken cadence on edits is why all 24P source must be edited in a 23.98 Sequence, not a regular NTSC 29.97 fps Sequence. (PAL users have no such problems.)
|
|
| Reverse Telecine Settings in Episode Pro | Reverse Telecine Settings in Compressor |
Stay Progressive
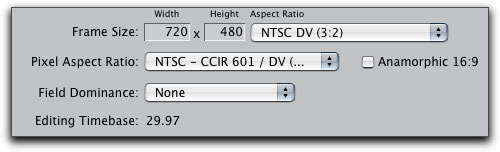
If you start with a progressive format, stay progressive throughout the edit. I've already discussed the issues surrounding 24P but even 30P source can become interlaced when renders are made if you use the default settings in Final Cut Pro. Make sure you change the Sequence Setting to 'None' for Field Dominance, otherwise the progressive footage will "acquire" interlace on renders like this wipe.
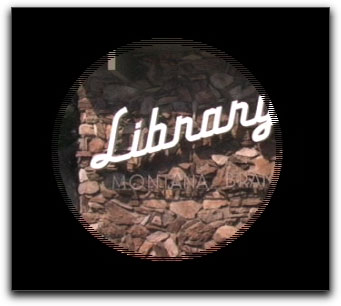
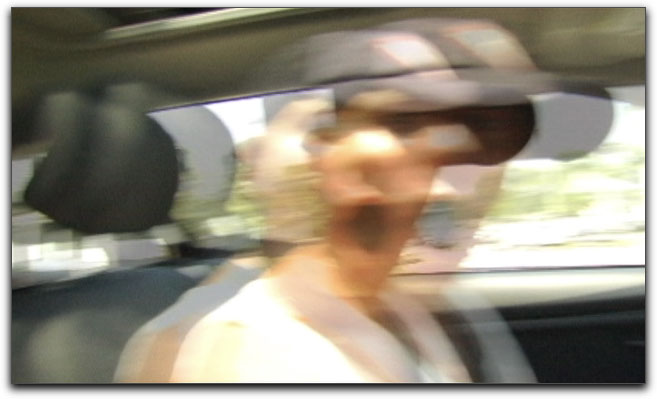
This 30P source is now interlaced because the Sequence Setting was incorrect. This program would have to be de-interlaced with some loss in resolution.
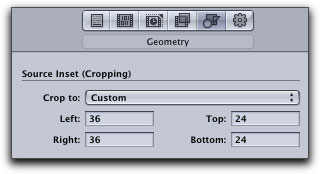
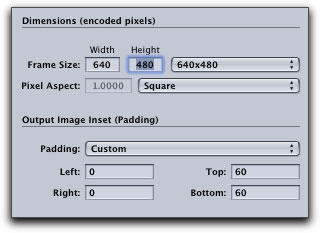
Crop to Action safe if encoding smaller than 640x480 (or 640x360)
The area outside Action Safe in a video signal is not intended to be seen. It is generally lost out of the edges of a CRT display (and many modern LCD screens deliberately throw this part of the image away.) Since it was never intended to be seen, deleting this outer edge from the image reduces the amount of image to be encoded, allowing us to allocate more bits to the "real" image.
Black Restore
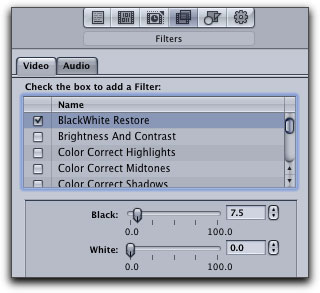
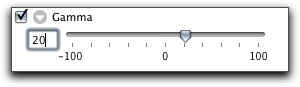
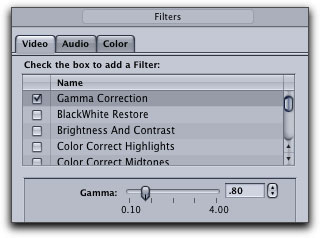
The default value for Black Restoration is 0, which corresponds to Same as Source. If you raise the threshold value to 20 (in Episode Pro) the filter will treat everything between value 0 and 20 as black. Compressor's scale is in percentage, which neatly translates to IRE - also a 0-100 display.
Black Restore is most valuable for reducing noise. The darkest areas of an image are filled with random video noise where there hasn't been enough light to expose the sensor. This is usually a random pattern and very difficult to encode. Worse still, because it's fine detail, the encoder wants to spend bandwidth on encoding the noise. Double fail!
The solution is to force all the near-black noise to be truly solid black. The balance is to do this without significantly changing the contrast of the image. Best results are if you enlarge the preview and view a noisy part of the image. Adjust the Black Restore until the noise just merges into true black. You may need to adjust brightness or contrast afterwards, always being careful not to re-introduce the noise by lifting the level of those darkest tones. Black Restor is necessary on all but the best-lit video.
|
|
|
Black Restore in Episode Pro with typical settings. Episode Pro shows true pixel values and settings from 10 to 25 will be typical. A setting of 20 in Episode would match the 7.5% setting in Compressor |
Black Restore settings in Compressor for typical source material |
White Restore
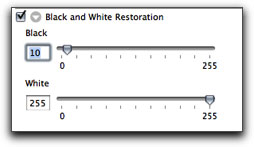
White Restoration works the same way as Black Restoration. But since white is at the other side of the spectrum from black you must lower the threshold from the default White value 255 for the filter to start working. For instance, setting the White value to 230 will cause the filter to set all pixel values between 230 and 255 to white having the effect of lightening the image.
White Restore can be used to lighten very dark images without affecting Black level (Black Restore). There is no comparable noise in the highlight parts of an images, so White Restore tends to be of lower value than Black Restore.
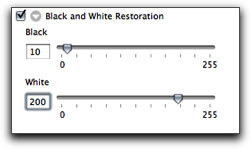
White Restore in Episode Pro. The result of "crushing the whites" is shown in the image below.
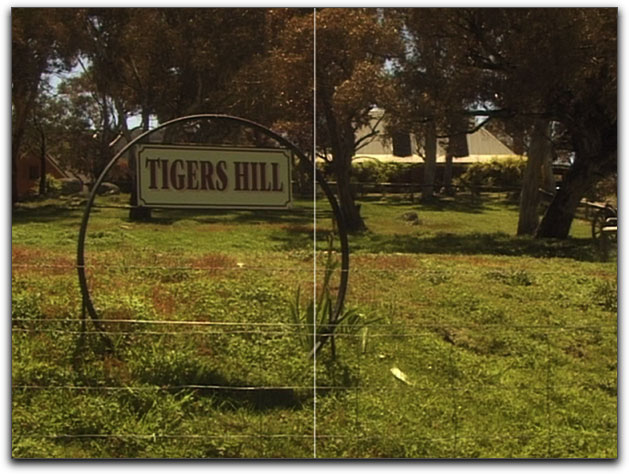
Original image on the left. With White Restore set to 200 you can see high much lighter the image is
while the blacks have stayed black, unlike using Brightness.
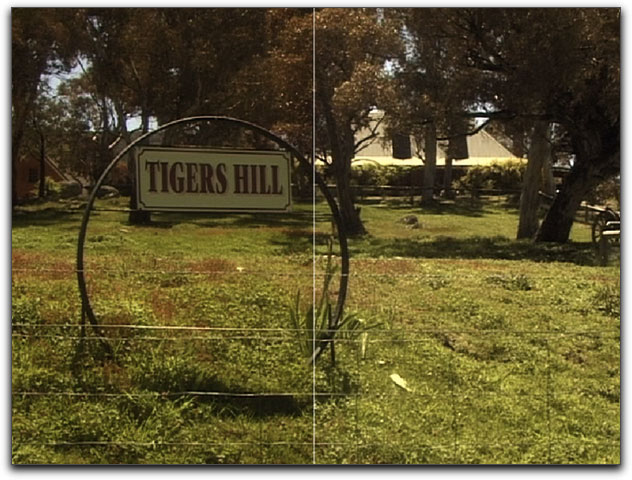
Gamma Correction
Probably the most misunderstood type of pre-processing. We use it because video displays, Mac Displays and Windows displays all have different expectations of the gamma of the image, and will display it too light or too dark if we get this wrong.
Gamma adjust is almost always essential when encoding because video screen gamma and computer screen gamma are different. Video gamma is usually 2.5 while computer gamma varies between 2.2 (PC) and 1.8 (Mac). More on the difference between platforms and matching them in an old article of mine. There is also an excellent explanation of gamma at Wikipedia.
Gamma adjustments are interesting because, unlike Brightness and Contrast, Gamma does not change the black or white point: they remain constant. What Gamma does is affect the rate-of-change between black and white as you can see on these three images.

|
|

|
||
| Normal Gamma | Increased Gamma (Darker) | Decreased Gamma (Brigher) |
Here's the problem. Few encoding tools ever show gamma using the same scale, nor do the scales in Episode Pro (pus or minus 100) or Compressor (default "1" down to .1 up to 4) have any relationship to actual gamma values.
As there is no perfect setting, my compromise here is just a tiny bit light on my Mac screens but will be a tiny bit dark on PCs, while approximating the display that would have been on a true TV or video monitor.
|
|
Compromise Gamma Setting in Episode | Compromise Gamma Setting in Compressor |
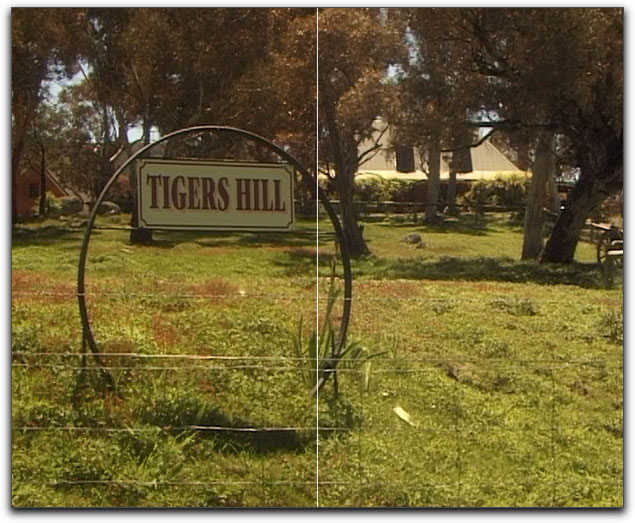
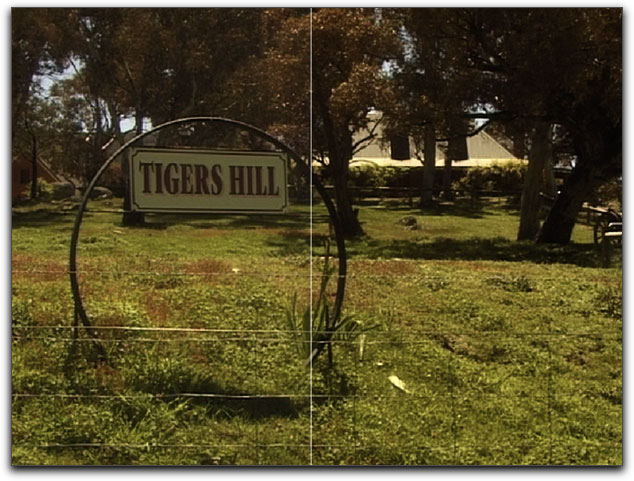
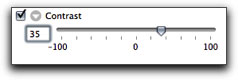
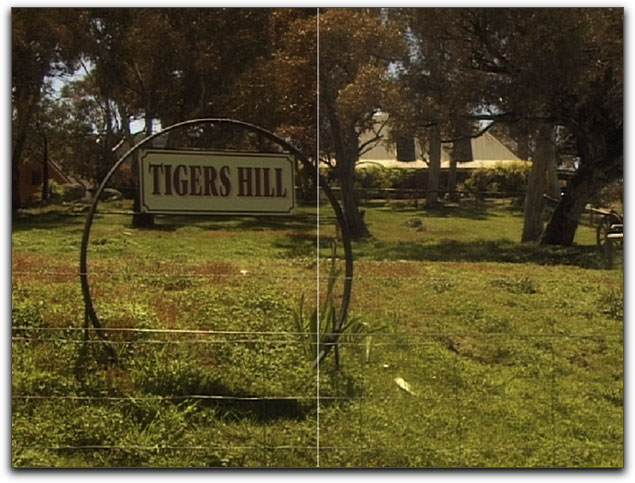
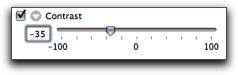
Contrast and Brightness
Sharpness is not only about actual detail. Perceived sharpness is largely dependent on contrast range. Contrast can be increased slightly to improve the perceived sharpness if used carefully.
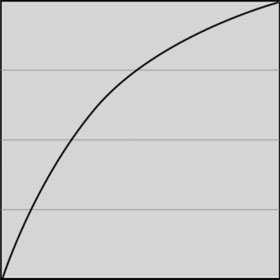
Contrast makes the line from darkest to lightest, if it were on a graph steeper as contrast increases (usually clipping near white to white) and flatter as contrast decreases.
Brightness, by way of comparison would move the whole line up the graph or down the graph as it is increased or decreased (respectively). These two controls affect each other so adjusting one almost always leads to adjusting the other.
Contrast increases can be used, as noted, to give the illusion of a sharper image, or Contrast and Brightness can be used to correct deficiencies in the image. Brightness alone has no application to pre-processing other than image correction.

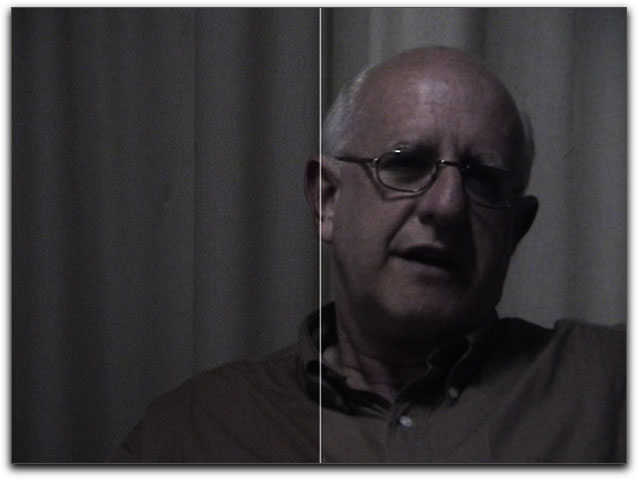
|

|

|
||
| Normal Contrast and Brightness | Decreased Contrast, no change to brightness | Increased Contrast, no change to brightness |
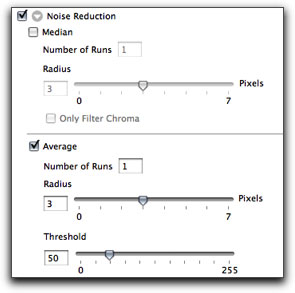
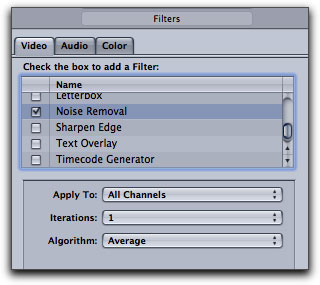
Noise Reduction
Noise is the enemy of encoding. Noisy footage is hard to encode and will alway require more bandwidth than a clean signal. As explained earlier, this is because noise is seen as detail and the encoder will try and preserve this fine detail at the expense of image content we want to keep!
Sharpening
Encoding usually reduces sharpness, so it can help to artificially increase the sharpness on clean, well lit images. Sharpening noisy video will reduce the quality even further and should be avoided. Either Sharpen or Reduce Noise, do not attempt both with adult supervision!
Tip: If you're encoding material for YouTube, MySpace et. al. where they re-encode the video, adding a little "too much" sharpness on the master file you upload, can visibly improve the end result. Like Dolby B on compact cassettes, by first increasing the sharpness, when they reduce it again the image looks correct.A side effect of sharpening is to create some changes in image levels that need to be compensated for with Gamma and (sometimes) HSL or Contrast.
The sharpening algorithm in Episode Pro is, to my eye, better than the one in Compressor but use what you have.
Sharpening works when it's subtle (unless preparing for upload to YouTube et. al.).
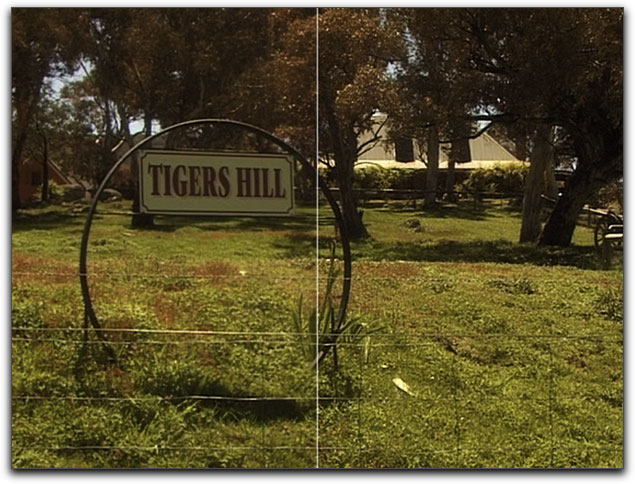
Format without Letterbox - even if the source is letterboxed
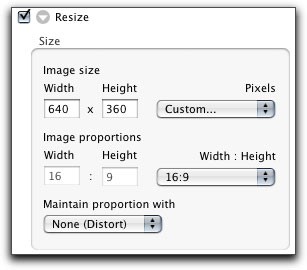
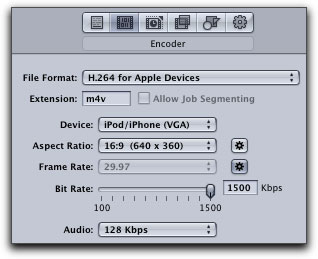
If the source is 16:9

|
|
16:9 is set in Episode in the Resize Filter | 16:9 setting in Compressor - set in the Encoder |
If the source is already letterboxed
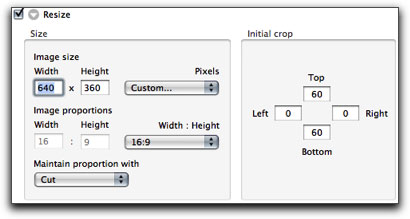
If the source is already letterboxed, you will need to crop off the letterbox to return the image to the native 16:9. There is only one reason to have letterboxed 16:9 and that exception is coming up next.
16:9 should always be encoded for the web with no letterbox or pillarbox..
With the exception of YouTube
YouTube currently displays all video as 4:3 so if you upload true 16:9 video, it will end up squeezed in from the sides to fill the full height. For upload to YouTube you need to add letterbox to convert the 16:9 to 4:3.
You could do this in Final Cut Pro by nesting the 16:9 Sequence into a 4:3 Sequence - Final Cut Pro will automatically (and sometimes annoyingly) letterbox the 16:9. This method requires an additional render in Final Cut Pro, so instead, add letterbox in Compressor or Episode Pro.
Summary
- De-interlace or Reverse Telecine
- Stay Progressive if you start progressive
- Black restore/White Restore
- Correct Gamma and Contrast
- Format without Letterbox
- Unless going to YouTube
- Reduce video noise or Sharpen
Philip Hodgetts is a noted speaker, writer, commentator, journalist and broadcaster. He is the author of The HD Survival Handbook (a complete reference to all things HD) and co-developer of Assisted Editing . He is President of Intelligent Assistance
copyright © www.kenstone.net 2008
are either registered trademarks or trademarks of Apple. Other company and product names may be trademarks of their respective owners.
All screen captures, images, and textual references are the property and trademark of their creators/owners/publishers.