December 5, 2005
By Ken Stone
You have created your masterpiece in FCP with Chapter markers, encoded the video and in DVD SP created your DVD menu with a 'Play All' button and a 'Chapter Index' menu button. After burning a DVD everything works as advertised. However, there is one issue which seems to be an inconvenience. When selecting a Chapter to view from the Chapter index menu, after that chapter has finished playing, the next chapter begins to play automatically. This process continues until all of the remaining chapters have been played out. Upon completion you are returned to the main menu (not Chapter index menu). This is the way it works.
"But I want to be able to play one chapter and then have it return to the Chapter index menu so I can choose another chapter to play." DVD SP does provide a means to achieve this. This feature is called 'Stories'. When we create 'Stories' in DVD SP, each chapter is treated as a self contained chapter, enabling us to set an End Jump at the end (of each story), so that when the chapter (story) has finished playing we will be returned to the Stories menu. You can do this chapter by chapter or you can group any number of chapters, in any order, into a single Story. All you need to create Stories is a video track with chapter markers, you do not need to create or use a Chapter Index. The only limitation is that you can only use chapters to build stories from a single video track.
Before we start in with Stories, lets go over the basics of setting up a 'Play All' and 'Chapter Index' DVD project.
Chapters in DVD SP - A quick review
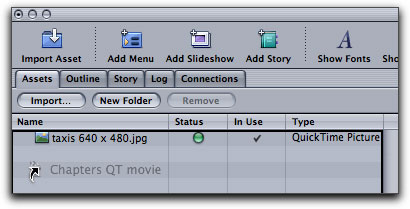
Once you have finished your FCP movie with Chapters markers in place, you can export to Compressor or as a QT (not with Conversion) self contained movie. When the export has been completed drag the audio and video exports into the Assets tab in DVD SP, shown below.
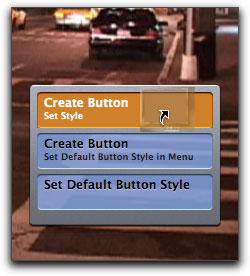
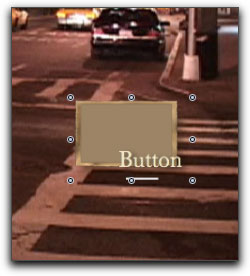
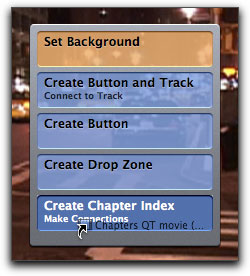
With your assets in place you'll need to select a template for your DVD menu. In this case, rather than use a stock template I have applied a still image (Taxis) to the Canvas and set it as my background (Set Background). In order to create a Chapter Index you must have a button in the Canvas to apply the 'Create Chapter Index' to. If you use a stock template you will have plenty of buttons on screen. Because I'm not using a template I will need to first create a button in the Canvas. In the Palette window I have selected a button from Shapes > Apple > Buttons and dragged it into the Canvas window choosing 'Create Button' from the drop palette.
Now that there is a button in place in the menu, drag the video track (the audio track will come along for the ride) from the Asset window down onto the button and select 'Create Chapter Index make connection' from the drop palette.
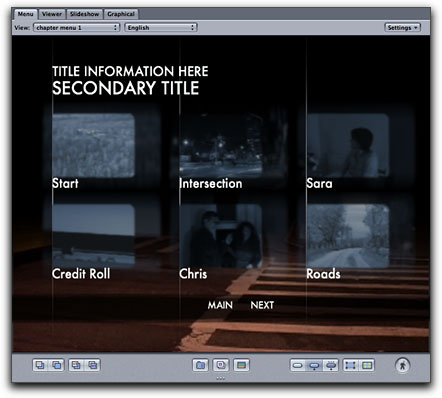
You will then be prompted to 'choose Template or Layout Style' and you will want to select an 'Index' template. This new menu will display a chapter button for each chapter. Most of the stock Index templates come with six buttons. If you have more than six chapters in your video, DVD SP will create an additional Index menu for the additional chapters and create a 'Next' button to link to the additional menu(s). You do not have to keep the background of the Chapter Index menu, you can replace it with a still or motion video.
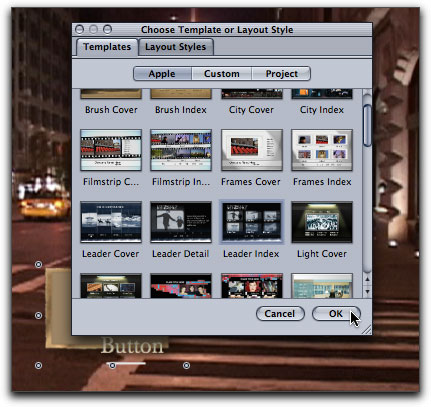
For my Chapter menu I have selected Templates > Apple > Leader Index. Upon selection DVD SP will create the Menu with buttons that will link to each of the chapters. There will also be a 'Main' button for returning to the Main menu. In this case I have more than six chapters so there is also a 'Next' button for navigating to the additional Chapter Index menu(s).
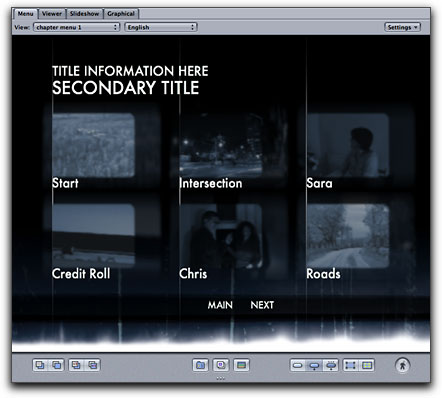
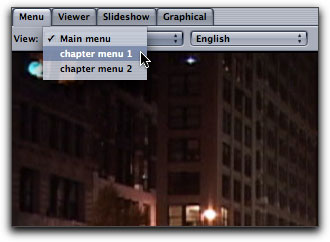
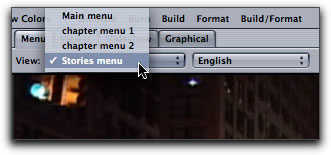
If the Canvas window does not switch to the new Chapter Index menu automatically, select the new menu from the menu drop-down window. As you can see below, I have renamed each of my menus.
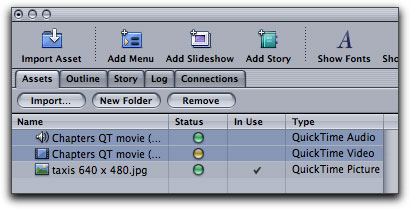
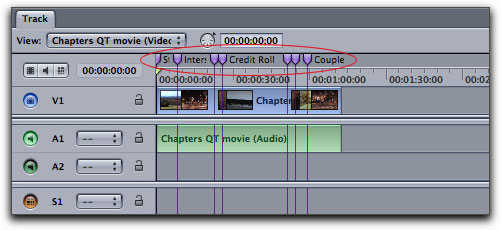
After creating your Chapter Index menu the audio and video tracks will now show up in the DVD SP timeline, showing the Chapter markers.
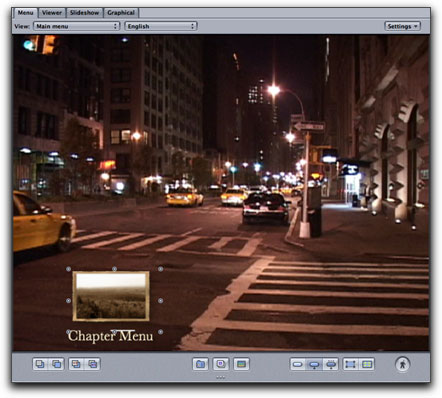
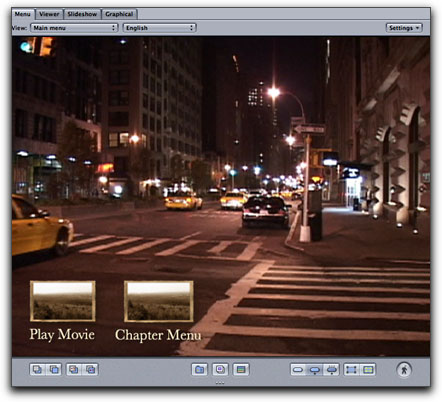
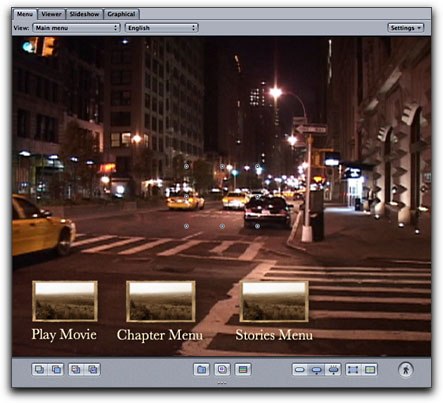
Back at the Main menu I have changed the name of the button to 'Chapter Menu'.
We now need a new button that will play movie. Option drag the first button to create a new second button.
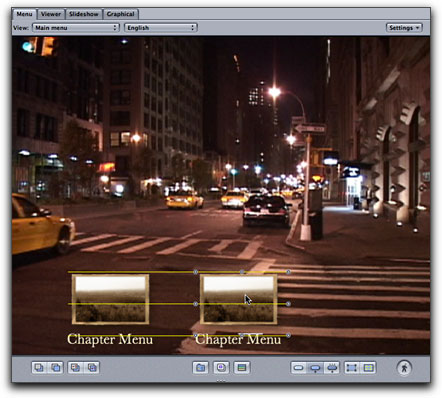
Selecting the button in the Canvas opens the button in the Inspector. I have renamed the button 'Play Movie' and targeted the button to the video track.
Both buttons have been renamed. We now have a menu with two buttons. The Play Movie button will start at the beginning of the track and play through to the very end of the video and then return you to the main menu. The second button, Chapter Menu, leads to the Chapter Index menu. Clicking on any chapter will play that chapter as well as all chapters that follow (not just that one chapter). When done, DVD SP will return to the main menu. This is standard fare.
Stories
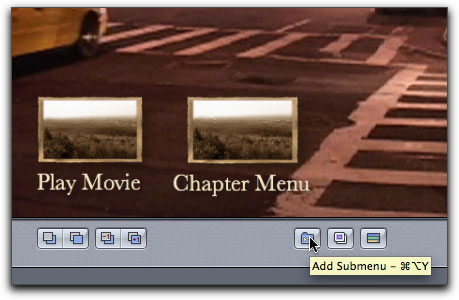
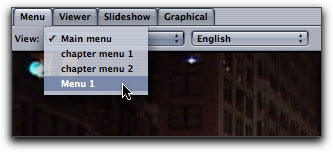
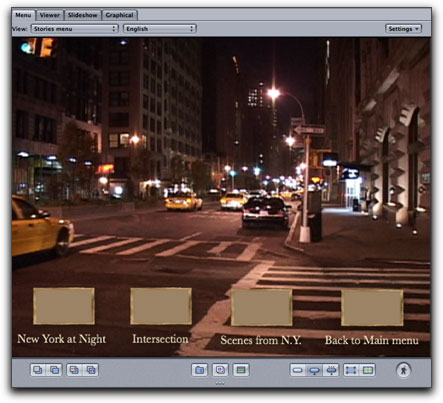
As I am going to want to have a separate Stories menu I will create this first. From the bottom center of the Canvas window, click on the 'Add Submenu' button. This will create a new menu page called 'Menu 1' as seen in the menu drop-down. Select this menu to open in the Canvas window.
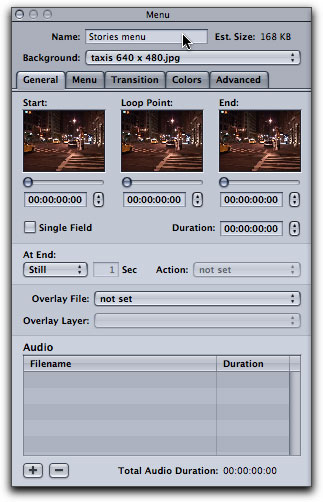
With this new menu open in the Canvas, in the Inspector tab, give this menu a proper name. I have also added my Taxi background. We will build our Stories first and then come back to the Stories menu, add buttons and link to the different Stories.
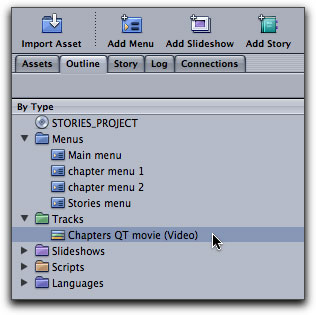
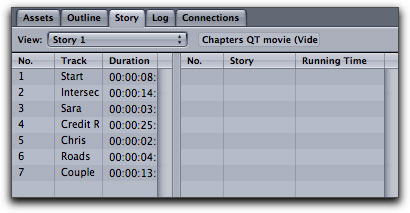
To creatre our first story open the Outline tab and select the track that you want to work from. Remember that you can only use chapters from one track at a time. Later you could select a different track with chapters and create Stories from it. It's just that you can not mix chapters from different tracks. With the track selected, click on the 'Add Story' button. This will add 'Story 1' in the Track section of the Outline tab.
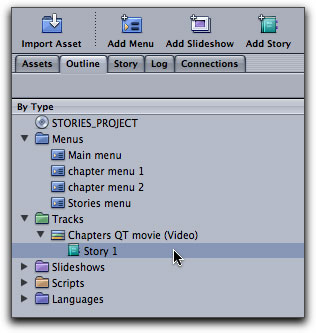
Now, click on the 'Story' tab. You will see all of the chapters for the selected track in the left column.
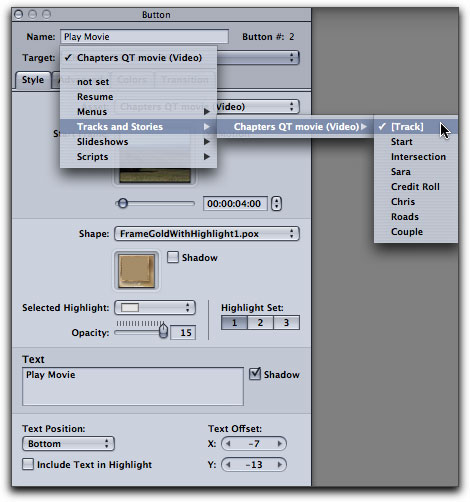
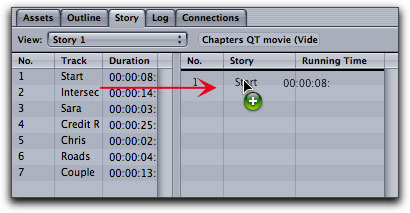
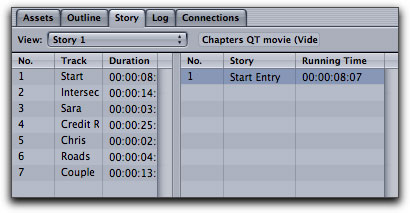
As we want to create a story for each chapter, I am going to drag the first chapter 'Start' from the left column into the box on the right. Click on the Story in the right column to display the Story Marker in the Inspector.
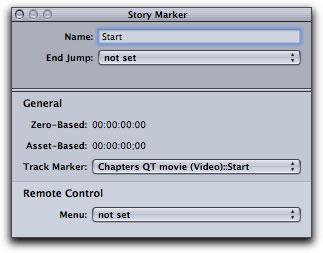
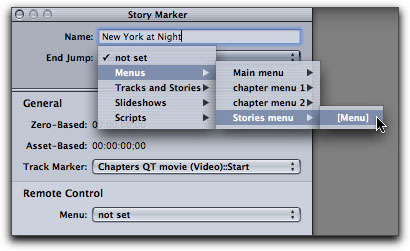
In the Inspector I am going to rename my story 'New York at Night'. You will note, below left, that 'End Jump' is not set. This is the reason that when playing from the Chapter Index menu, when one chapter has finished it automatically starts to play the next chapter, because no 'End Jump' as been set. In this case, when the chapter has finished playing we want it to return to the Stories Menu so we will set the 'End Jump' to the Stories menu.
To create the next story from the next chapter, return to the Outline tab, click on the 'Add Story' button (story 2 as been added, below left), then click on the Story tab and drag the next chapter to the right. Select the Story in the right column to display the Story Marker in the Inspector and set the 'End Jump' back to the Stories menu, just as before. You will continue to create a new story for each chapter that you want.

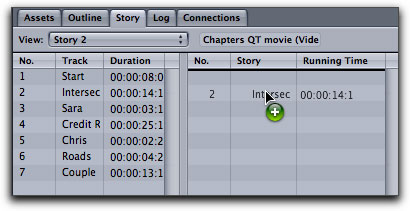
This process, of creating stories, is not reserved for single chapters. You can add any number of chapters and in any order, to a story. To reorder the chapters, click and drag the chapters in the right column.
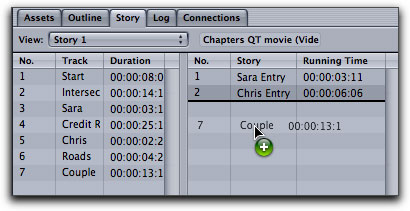
I have created three stories, two of one chapter each and one comprised of three chapters. You can use the same chapters over and over again in different stories. Now that I have my Stories I am going to return to the Stories menu, add buttons and link them to the Stories.
After adding the first button, control click on the button and target 'New York at Night' - story .
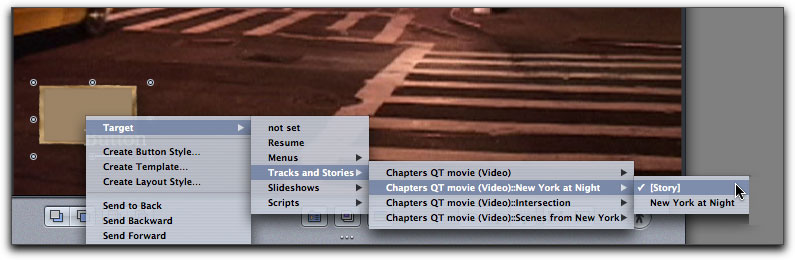
Option drag the first button to create a second button, set the name for the button and control click to target this button to your second story. Repeat the process for each of your stories. You will also want to create a 'back to main menu' button (target Main menu) on your Stories menu. When you have finished your Main and Stories menu will look something like this. Please excuse my choice of buttons, I wanted them to be obvious.
Conclusion
At first, working with Stories might seem a bit laborious, but after you work with it for awhile you will find that creating Stories can quickly and easily be done. This is a powerful feature allowing you to create different versions of your video from just one video track that has chapter markers. As I stated earlier, some people do not like the way that the Chapter Index works, always playing through to the very end of the video track. Using Stories avoids this issue, in fact, if you use Stories you can dispense with the Chapter Index altogether.
Enjoy,
--ken
copyright © www.kenstone.net 2005
are either registered trademarks or trademarks of Apple. Other company and product names may be trademarks of their respective owners.
All screen captures, images, and textual references are the property and trademark of their creators/owners/publishers.