
October 27, 2008
Taming the Wild Blu, yonder...
Blu-ray for data storage and archival backup.
By Bruce Nazarian, "the digital guy"
Have you been waiting for the promise of Blu-ray Disc to be fulfilled, but you're not sure if Blu-ray Video disc production is in your future? Well, have no fear! You can start using Blu-ray Disc technology right now, inexpensively, for data storage. All you need is your Mac, an external BD burner, and the right software.
A quick overview...
If you've used DVD recordable (DVD-R) or DVD rewriteable discs (DVD-RW, +RW) to store data, you're already familiar with 95 % of the procedures you need to know.
Simply add a suitable Blu-ray Burner to your system (we'll tell you more about this in a later paragraph), substitute Blu-ray Recordable (BD-R) or Rewriteable (BD-RE) media for the familiar DVD-R or -RW discs, and you're pretty much there.
Why go with Blu-ray?
Well, for one thing, gigantic storage space. Blu-ray Disc media come in two sizes - BD-25 (25 GB) and BD-50 (50 GB). Compared to the 4.7 gigabyte or 8.5 gigabyte storage space of DVD, Blu-Ray allows you to store much larger files on fewer disks. In many cases, you can easily store files of a size that will not fit on a single DVD, and you can store them without breaking them into pieces.
Yes, Blu-ray Discs will be a little more costly than DVDs, but your files will be in one place rather than spread across several discs.
Finally, what about the "I can't mount Blu-ray Discs on my Mac" question? Don't sweat it - with the method I will show you, you'll be burning and mounting Blu-ray Discs like a champ! (Toast provides the UDF compatibility)
Ready to go? Great! Let's begin at the beginning:
It all starts with Software
Even if you already have a Blu-ray Disc drive, it won't function properly without the right software. In this case, the right software is Roxio Toast 9.02, and it will set you back $99* (*currently, available online at $79.99 with a mail-in rebate).
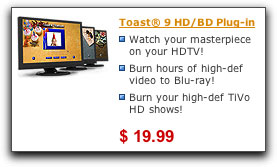
You will also want to acquire the Toast HD/BD plug-in, which extends the program's capabilities. That's another $19.99, and the $20 rebate you get by purchasing online at the Roxio Store (www.roxio.com) will offset the cost of the plug-in.
If you already own Toast 8, you can upgrade to Toast 9 online for only $59.99. If you own Toast 7 or previous version, the upgrade price is the same as the purchase price - currently $79.99.
If you're in a hurry, there's a downloadable version; you can pay online with a credit card and within a few minutes you can be downloaded and ready to go. If you have time, you can choose to purchase the CD-ROM version.
Don't forget to purchase the HD/BD plug-in as well, since you will need that to use Blue ray. And once you have purchased the basic version, be sure to download and install the Toast 9.02 updater. You will find it in the Roxio.com support area, under Support > Software Updates > Toast.
Now, you need a Blu-ray Burner.
There are a number of confusing drives out there, many seem to have Blu-ray Disc capability, but look deeper - only SOME are actually Blu-ray Disc burners, others are only ROM drives! Due to different hard drive heights and Mac internal optical drive configurations, I would advise putting any new BD drive in an external mount kit, and connect it using Firewire or USB2. An external Firewire, USB or eSATA-compatible case can be had for usually under $100. Which one you choose depends on which interfaces your computer has available.
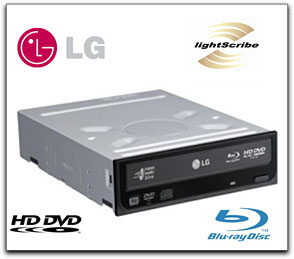
If you don't mind wrangling a bare drive, and putting it in a case yourself, an economical choice is the LG GGW H20L Super Multi Blue Burner, currently selling online for $165 to $399. It offers 6X Blu-ray Disc burning, which speeds up data transfers a bit.
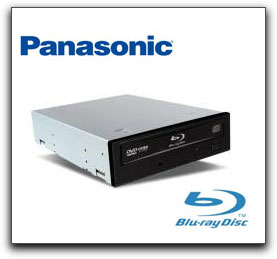
Another possible choice is the Panasonic SW-5583. At around $350, it's a little pricier choice than the LG, but it only offers 4X Blu-ray burning, I've used this one, it is a solid performer.
|
|
|
|
LG GGW H20L
|
|
Panasonic SW-5583
|
External Blu-ray Disc burners
If you prefer to plug-and-play, external Blu-ray Disc burners are also available.
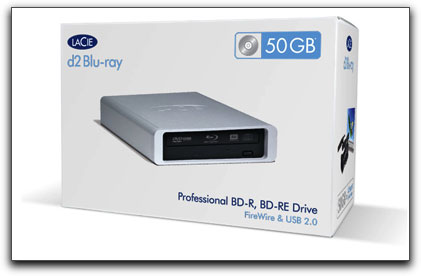
LaCie makes the "d2" in a stylish and solid metal case, that does Blu-ray Disc, DVD, and CD.
A new entry just on the market as of Mid-October '08 is from AMEX, which is a very tiny model perfect to use with a Mac Book Pro. When you are examining the drive, be sure to look for the Burner (it's the more expensive one - around $369)
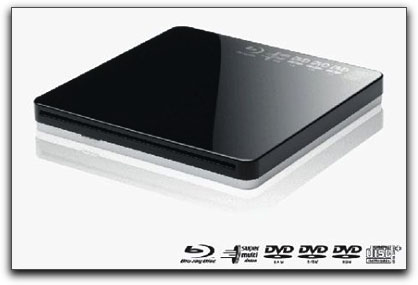
The AMEX Blu-ray Burner (USB connect)
Blu-ray Disc Media
As we explained at the beginning of this tutorial, Blu-ray Disc media is available in both recordable and rewriteable formats. Just as with DVD, the -R format is a write-once format that cannot be erased. The Blu-ray Disc re-writable format is called BD-RE, and it works just like DVD-RW or DVD-RAM. You can record on the disc over and over. Blu-ray Recordable discs are available in both 25 and 50 GB sizes, while BD-RE seems to be limited to 25 GB currently.

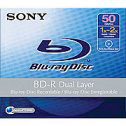
Blu-ray Disc recordable media
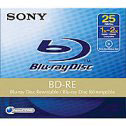
Blu-ray Disc re-writeable media
You will find there are literally a thousand online stores selling Blu-ray Disc media, so I suggest you make a quick Google search and find one with prices and delivery terms you like. If you'd like to see a sample of what media is available, check out www.meritline.com, or www.discmakers.com.
Once you have a disc or two on hand (and I'd recommend using BD-RE discs to begin with) you're ready to put all these pieces together.
Installing Toast 9
If you haven't already installed Toast 9 on your hard drive, take a moment now and do so. If you already installed the basic Toast 9, update the application by installing Toast 9.02 over 9.0. Locate the Toast 9.02 updater you downloaded, double click it to open, then drag the Toast 9 Titanium folder onto the applications folder alias conveniently placed in the installer window.
NOTE: the Toast 9.02 installer will also say "Toast 9 Titanium", but the folder will contain the updated application.
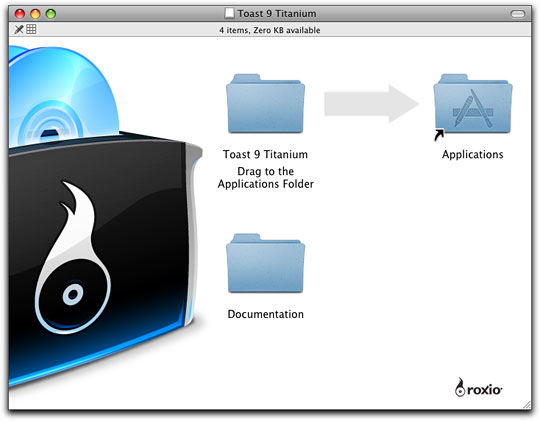
Drag the Toast 9 folder to the Applications folder alias next to it.
To confirm it's the 9.02 version you have, double-click the Toast 9 Titanium folder to reveal the Application Icons, then select Toast Titanium and do a "Get Info" (Cmd-I).
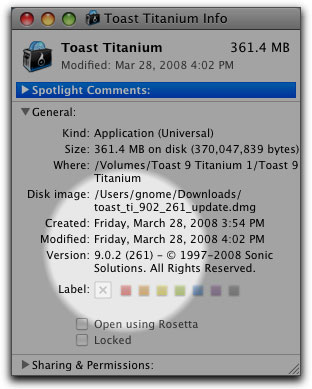
The Info Pane should confirm version 9.02 :
Finally, be sure to install the HD/BD plug-in before you continue with this tutorial.
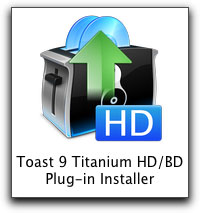
Install this Plug-in to use Blu-ray!
Once you've got everything set, launch Toast 9 and double-check for the proper version number in the "About Toast 9 Titanium" splash screen:
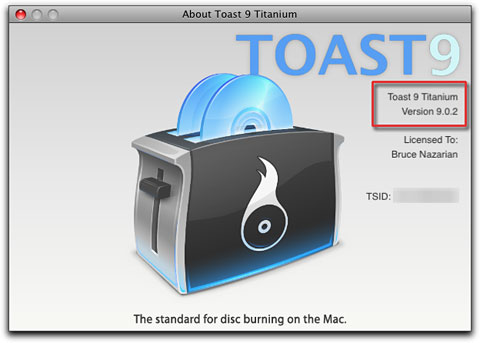
If the version number is correct, you're all set!
Using Toast 9 to make Blu-ray data discs
Now that you have all the important pieces together, software, drive and media, it's time to learn the process, and you will find it's incredibly simple. As I mentioned earlier, if you have burned a CD or DVD, you know 90 percent of what you need to know.
To begin with, let's examine the functions shown in the Toast main window:
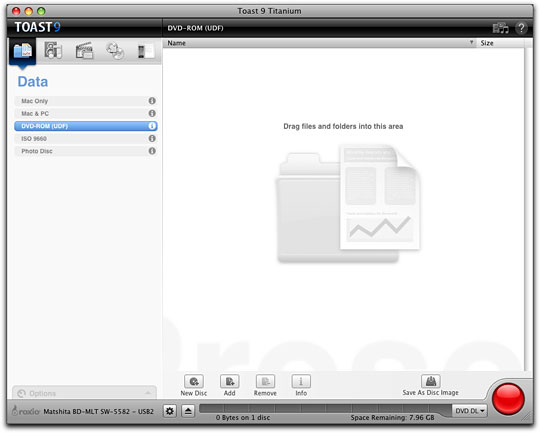
Toast Main Window
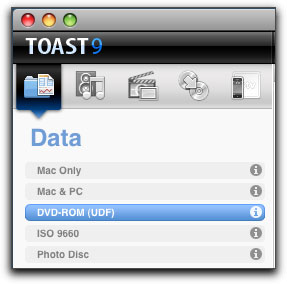
Select a format
In the upper left corner of the main window, you will see Toast 9's mode selectors. These selectors control the kind of disc that Toast will create. To make a Blu-ray data disc you will select data mode, and specifically UDF mode (called DVD-ROM) as shown below:
Toast Mode Selectors
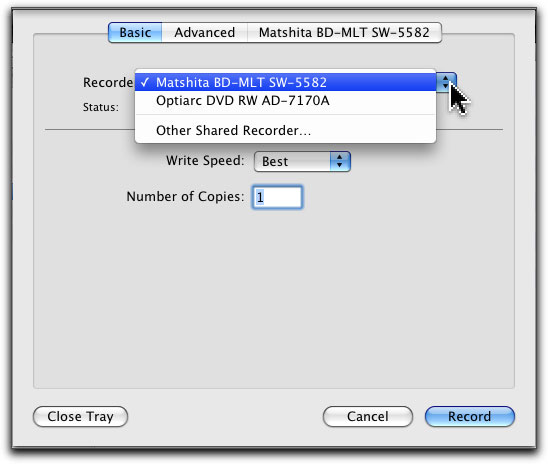
Select a target drive to burn to
In the lower left corner of the Toast Main Window, you will see the Drive Selector controls, which allow selection of the various drives attached to or installed in your Mac. In my case, it shows the Optiarc internal DVD burner, and the external Panasonic SW-5582 Blu-ray Disc burner attached via USB. This drive is part of a Primera Bravo SE Blu, but it can be accessed by Toast, as well as the software supplied by Primera. Select your Blu-ray burner, as shown, then confirm it is shown as the target drive, next to the tiny Roxio logo.
Select Recorder Settings to check the specific settings for that drive.
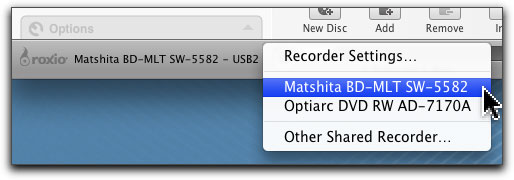
Toast Drive Selector Controls
Select a data size, to keep track of your payload
In the lower right corner is the Media Size Selector, which allows you to see how much room is available for a particular type of media. NOTE that this does NOT change formatting! This is done by choosing a disc type in the Data Mode selector.
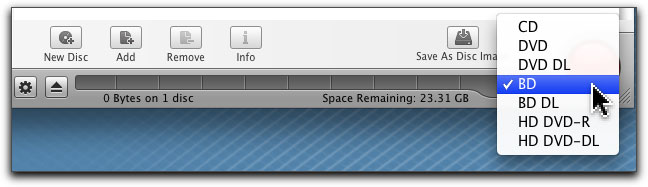
Toast Media Size Selector (25GB Blu-ray Disc being selected)
Make a new Disc
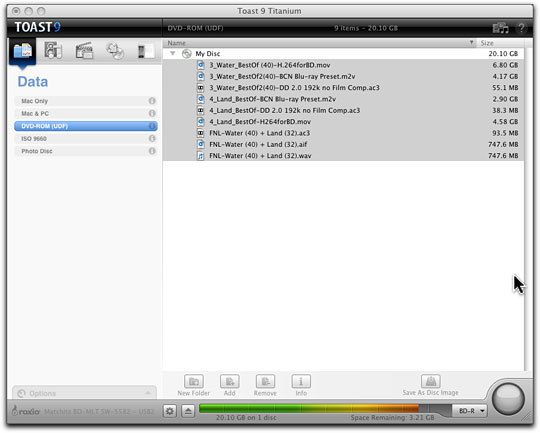
Once you have selected the DVD-ROM (UDF) format in the Data mode selector, you're ready to load up the Toast window with the files you have selected for backup. For this experiment, I've selected about 20 GB of various video files to use as a test.
To make a new disc:
1 - Click the "New Disc" tool in Toast

New Disc Tool, at bottom of Disc window
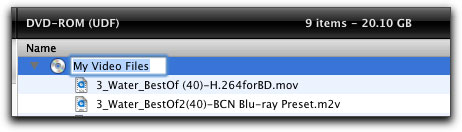
then enter a name in the Disc Name field that appears afterwards:
Toast disc Naming field, appears after creating a "new disc"
You can also just drag files directly into the empty Disc Window, and a new disc will be created automatically, with a default "My Disc" name.
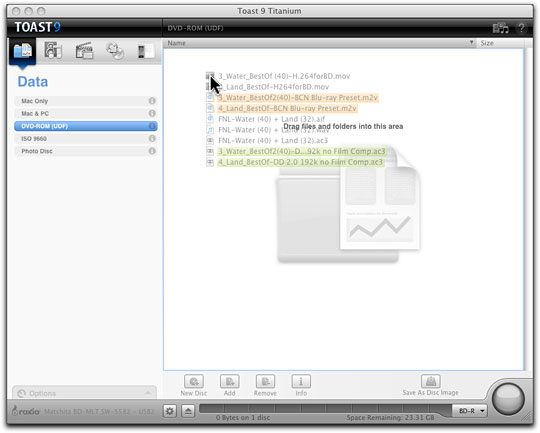
Drag files directly onto the empty Toast Disc Window, then release
Adding files to your disc
Once you've created a new disc, add the desired files into the new disc by dragging into the disc window... Remember if you dragged files without creating a new disc first, Toast created a new disc for you automatically; be sure to name the disc to something relevant!
A new "My Disc" is created when files are dropped into an empty Toast window
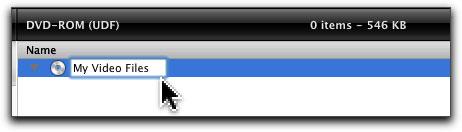
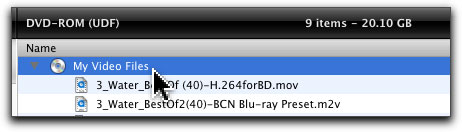
Renaming your Disc
You can rename the disc at any time; just click the "My Disc" name field, and enter a new disc name, then click away or press "Enter".
Click on the disc name field to open it
Edit or replace the existing disc name
Press "Enter" or click away to close the disc name field
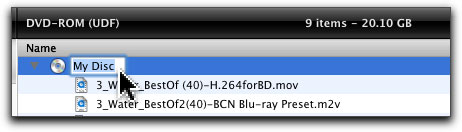
Organizing your files in folders
If you need to add folders to organize your data, click the "New Folder" tool, to create a new empty folder inside of Toast.
NOTE: this does NOT create a folder in the Finder - ONLY inside of Toast.
Once you have created one or more new folders, you can drag files around inside of Toast to place them into the desired folder(s).

Click to create a new folder

Rename the folder just as you did for the disc name
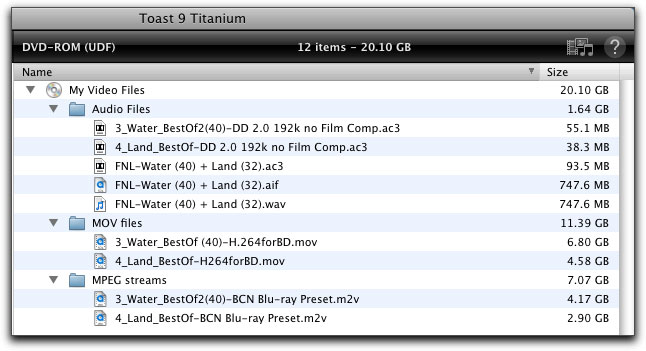
Files reorganized into folders created in Toast.
Burning a Disc
Using BD-R media
Next step is to burn the files to your Blu-ray Disc media. You can use BD-R or BD-RE media, and the procedure is almost the same for both. If your -RE media contains data, you should use Toast to erase the media. We'll show you that in the next paragraph.
If you are using BD-R, you will want to get it right the FIRST time, since BD-R media is written PERMANENTLY, and not erasable once written!
Click the Burn Button, lower right corner, and the Disc Burn dialog for the selected drive will drop down over the disc window. If you need to change target drive, you can do so from the Recorder pop-up.
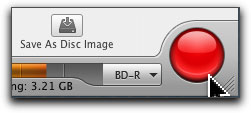
Toast's Burn button - it's big and red so you don't miss it!
Toast Record dialog
If there's no media in the drive, place a blank BD-R disc into the drive at this time, then click the "Close Tray" and "Record" buttons, in that order. The drive tray will close, the drive will "sniff" the disc, and if acceptable, will mount it. Your disc will begin to be burned shortly after that.
Using BD-RE media
BD-RE (re-writeable) media that's brand new will record immediately, like BD-R. You can follow the steps in the paragraph above for BD-R. If you've already used it, though, there's one additional step needed first - erasure!
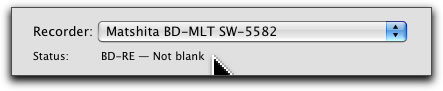
BD-RE media not blank will need erasure first!
If Toast reports the BD-RE media is "not blank", you can remedy this quickly using Toast's Quick Erase function. Select Recorder > Erase...
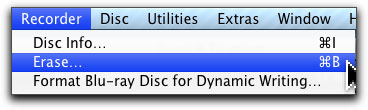
The "Erase" function is in the Recorder menu
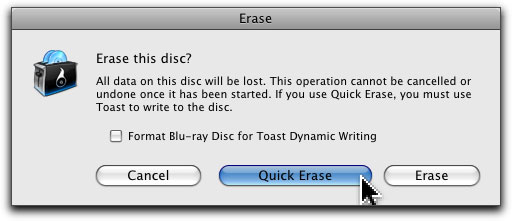
Select "Quick Erase" in the Erase dialog to quickly wipe the BD-RE disc clean.
Selecting Quick Erase will wipe the BD-RE disc directory
Once successfully erased, the success dialog will appear:
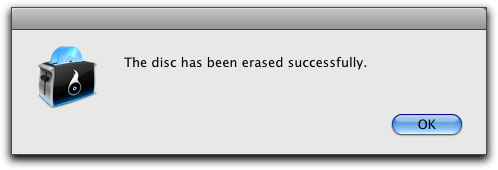
Erasure success! BD-RE is now ready to be written!
During the Burn
Once you light off the disc burn, Toast will go through a few distinct steps in order to create the disc. First up is mounting the media. Toast will display "waiting" while the disc is being spun up, and is being read to verify the type and if it is empty.
Waiting
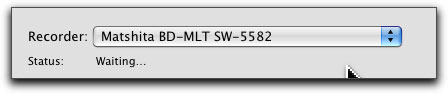
Toast reports "waiting" while spinning up a disc
Formatting
Once the disc has been verified as suitable, Toast will report "formatting", the very first thing it does to the media.
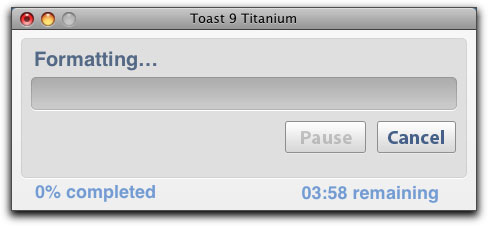
Formatting starts the process
Writing
Once formatting is finished, Writing of the data will begin. Toast will report "Writing", and will give an indication of the time remaining in the burn.
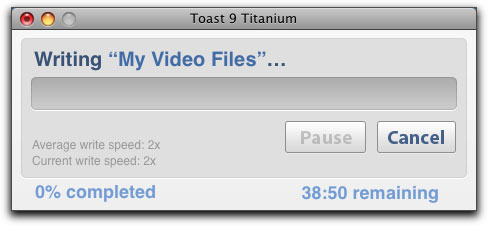
Writing your disc
Verification (if desired)
When the writing phase is finished, a dialog will appear offering to verify your disc burn. DO IT! Toast will report "Verifying".
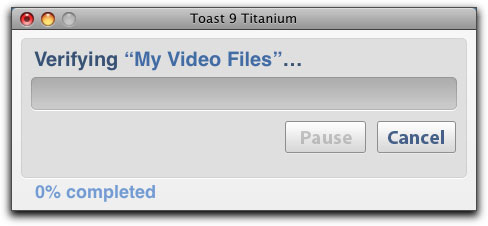
Verifying your newly-created Disc
Stopping Verification (if you dare)
IF you are VERY brave (or are in a BIG hurry) you may elect to STOP verifying your disc burn. I don't recommend this, since there's no way to tell Toast to verify the disc "after the fact". If you feel you have to, you can click "cancel" in the Writing dialog, and you'll get the following dialog:
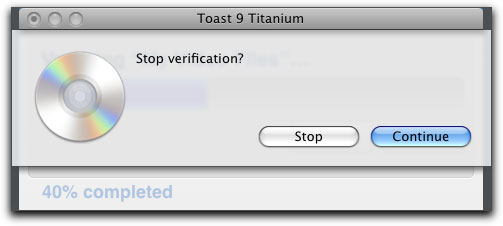
Stop Verifying? Be careful if you do.
If you click Stop, verifying is cancelled, and Toast will confirm that:
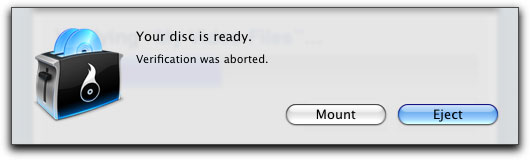
Disc ready, but verification NOT completed.
Once burning, or burning with verification is complete, or if you have elected to stop verification after burning, you can choose to eject the new disc, OR you can mount it immediately on your Mac's desktop in order to check it out! Toast gives your Mac the ability to mount Blu-ray Data Discs, even though you will not be able to play Blu-ray Video Discs.
The Disc is finished - now what?
Once the disc is ready, time to explore and enjoy a your new creation!
If you selected "Mount" the disc, check your desktop and you should find your new disc mounted there, waiting to be investigated! If you took the disc out after the burn was complete (possibly to examine it), place it back into your Blu-ray Drive, give it a few moments, and it should mount right up on your desktop, just as if you had clicked "Mount" when the burn finished. Toast has given your Mac the ability to mount UDF-formatted Blu-ray media! Cool, eh?
Your new disc, mounted on the Mac desktop
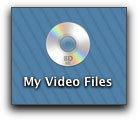
Remember the original contents we loaded into Toast? If not, here it is again:
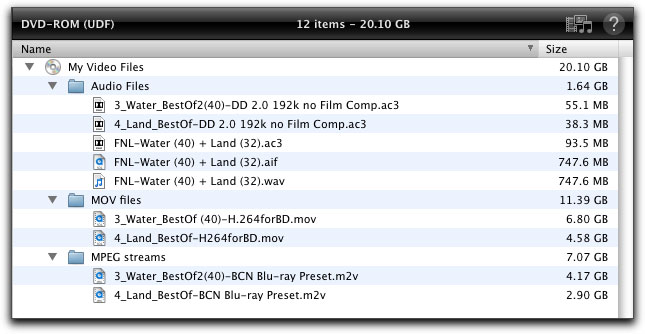
Original Toast file payload
Double-click the Disc icon on your desktop, and your disc should now open up, where you can verify it's a faithful clone of the original file layout:
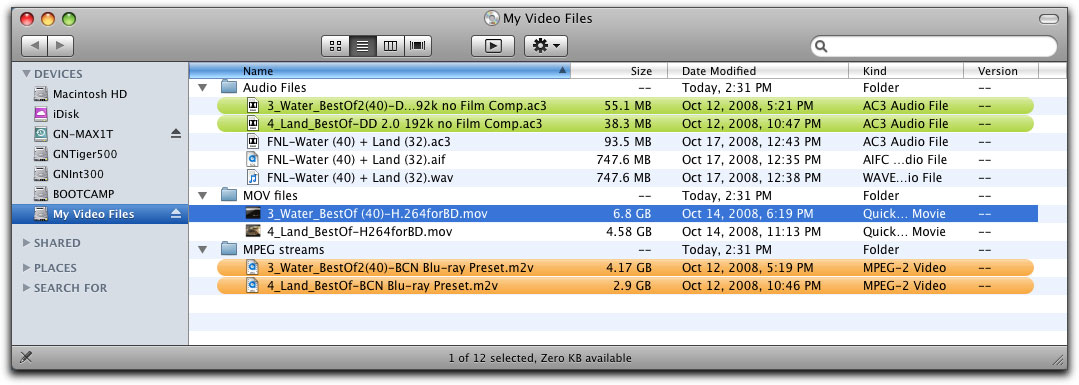
Finished disc, with files visible
You will also find the folders just as you created them, if you view by folders:
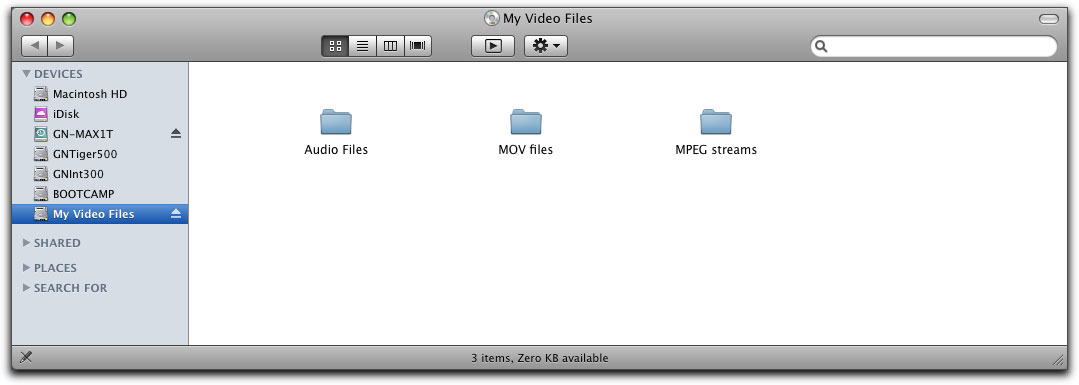
Finished Disc, seen in Folder view
Checking the Disc Info for the new Blu-ray Disc, you can clearly see it's UDF, and the media is recognized as BD-RE.
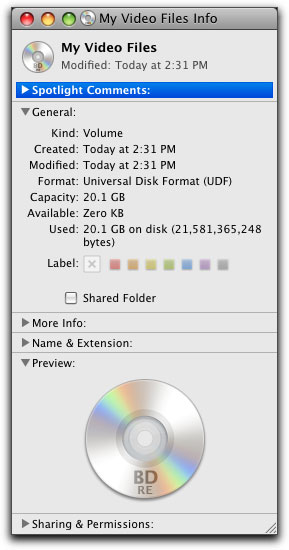
Disc Info pane for your new disc
If you used BD-RE, you can erase and re-use this disc many times. However, for more permanent archives, you might find BD-R to be a better solution, as that media cannot be accidentally erased.
So, can I play Blu-ray Video Discs now?
Sorry ;-( not yet - there's LOT more than a drive required in order to actually play back a Blu-ray Video Disc on a Mac - perhaps this will be remedied soon - but you ARE one step closer - you CAN mount them on your Desktop, and LOOK INSIDE!
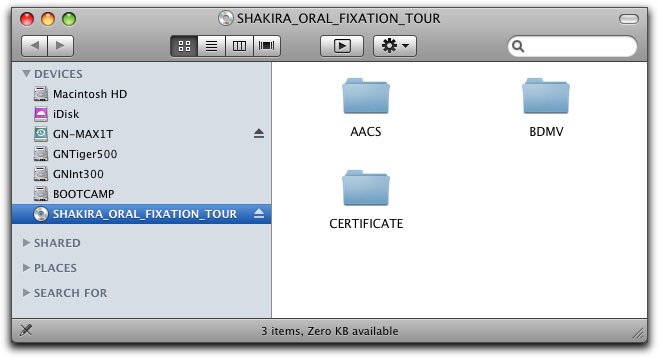
Inside Shakira's Oral Fixation Blu-ray Disc
Dynamic Writing
If you've burned lots of data CDs, you are no doubt aware of 'multi-session' - basically, the ability to burn more than one 'disc volume' onto a CD-R.
Multi-sessions depend on the CD-R remaining un-finalized until after the last disc session has been created and burned.
While tempting to want to do this on a bigger disc, like a Blu-ray data disc, it's just not possible with that format (or with a DVD-R/RW for that matter).
BUT - don't be completely discouraged...
If you are using BD-RE media, Toast allows you to format it for "Dynamic Writing", which prepares the BD-RE disc for use in a multi-write method, kind of like a slow hard drive.
Once formatted for Dynamic Writing use, the BD-RE can be mounted on
the Mac desktop, and files can be dragged onto it, as if it were a hard disk.
Hope this helps you explore your new software, and make efficient backups!
Making a Blu-ray Video Disc!
The really good news is, now that you have Toast 9.02 and the BD-HD plug-in, you are set to make simple Blu-ray Disc video titles, which WILL play back on most, if not all, Blu-ray Disc players! You can even make small BDMV projects and record them to DVD-R discs, to inexpensively explore the workings of Blu-ray Disc.
I'll cover that in the next installment of this series.
In the meantime, you are more than welcome to come visit my website, www.Recipe4DVD.com, where I have lots of DVD goodies available for your assistance. You can also find me on www.2-pop.com, where I am a forum guide on the DVD forum, and also on the DVD Association's website, www.DVDA.org.
If you need authoring assistance with any DVD, Blu-ray Disc or data project, you will find information on my consulting services, and a contact form on www.recipe4dvd.com.
Taming the Wild Blu, part 2...
About Bruce:
Bruce Nazarian, "the Digital Guy", is an award-winning DVD Producer and Author, and current President of the DVD Association. He specializes in consulting and digital media production for video, audio, DVD and the Web. He is CEO of Digital Media Consulting Group, Inc., his DVD and media production company in Las Vegas, and webmaster of his own DVD info site, www.Recipe4DVD.com, and the DVDA website www.DVDA.org. He is also a forum guide for the DVD Studio Pro forum on 2-pop.com, where he helps solve DVD authoring problems for many folks.
Bruce has toured the world as speaker, demonstrator and instructor for DVD authoring tools including DVD Studio Pro from Apple, and Sonic Solutions DVD Authoring systems, where he was the factory-certified trainer. An active DVD evangelist, he is an in-demand presenter and trainer who has appeared at numerous trade shows and taught DVD authors and producers on five continents.
Bruce is the author of two editions of "DVD Studio Pro - the Complete Guide for Authoring with Macintosh" (McGraw-Hill), and is the creator of DVD Companion Pro-Pack
TM
products, used by DVD authors world-wide.
[Top]
copyright © www.kenstone.net 2008
© 2000 -2008 Ken Stone. All rights reserved. Apple, the Apple logo, Final
Cut Pro, Macintosh and Power Mac
are either registered trademarks or trademarks of Apple. Other
company and product names may be trademarks of their respective
owners.
All screen captures, images, and textual references are the property and trademark of their creators/owners/publishers.


