
November 3, 2008
Taming the Wild Blu, part 2...
By Bruce Nazarian, "the digital guy"
In part one of this journey, we covered how to use Blu-ray Discs for data storage. In this article, the second part, we'll build on what you learned in Part 1, and show how to create simple Blu-ray Video Discs using your Mac.
A quick review...
If you are not yet familiar with the hardware and software requirements for making Blu-ray Discs on your Mac, please review the previous article, which covers how to purchase and install the hardware and software required for Blu-ray data Disc creation. As a quick summary, you'll need Toast 9.02 with the HD/BD plug-in, a Blu-ray burner, and some appropriate recordable media.
One new requirement: you will need a Blu-ray Disc player!
While you can easily make a Blu-ray Video Disc on your Mac, and burn it to a BD-R/RE or DVD-R/RW disc, the one thing you currently cannot do is play back any Blu-ray Disc directly in the Mac OS. Yes, I know, you can play HD DVDs, but that's now a dead format. There are significant differences in the underlying data and formatting between HD DVD and Blu-ray Disc, so playback of one format doesn't easily facilitate the other! There are LOTS of fundamental differences between software HD DVD and Blu-ray Disc players - if in doubt, look at the utterly chaotic set of standards that exist on the PC for the software playback of both DVD and Blu-ray Discs!
Between the content protection decoding requirements, and the increased CPU horsepower needed to play back 1080p on computers (and the additional constraints of the HDCP High Definition Content Protection system inherent in the HDMI format) there's a whole new breed of hardware required in order to do Blu-ray Video Disc playback on ANY computer, let alone the Mac.
Much is being written about this "oversight", and we are hearing many loud moans about how it would be nice to have Blu-ray Disc playback on the Mac, but let's get real here: You WILL need to BUY (or borrow) a suitable external Blu-ray Disc player in order to view the fruits of your Blu-ray Video Disc labors.
So, as they say, just "get over it" and understand that as of today (late 2008) "that's the way it is". It may change in the future, but so far, the only hint lurking on the horizon is the rumor that Mac OS 10.5.6 may finally include Blu-ray Video Disc playback in the Core OS (perhaps in early 2009). I say: "don't hold your breath"
A Blu-ray Disc is A Blu-ray Disc is a Blu-ray Disc... right?
Wrong! And that's where the fun begins. One of the MOST frustrating aspects of trying to author a Blu-ray Video Disc is that there are THREE different levels of players on the market, and they don't all play every one the discs on the market.
Luckily, Toast makes simple Blu-ray Video Disc titles, so you shouldn't have to worry about needing an exotic player. But, let's take a moment to sort out the player chaos for you:
The Three Faces of Blu-ray Video Disc players:
The first generation of Blu-ray Disc players released to market (called "Profile 1.0" in some marketing material) used Version 1.0 of the Blu-ray specification (we'll call it the "BD spec" from here out). These players provided for simple playback of High Definition video in the Blu-ray Disc format, but did not include many of the features that eventually came to life in the BD spec.
The second generation of Blu-ray Video Disc players (called Profile 1.1, or "Bonus View") included the ability to display PIP video (Picture-in-Picture), a function of the "secondary video plane" capability in the BD spec. A few other niceties were added as well, but PIP was the big daddy addition.
The third generation of Blu-ray Video Disc players (called Profile 2.0, or "BD-Live") include an Ethernet jack (RJ45) that allows network connectivity, and either enabled, or prepared to enable, Internet connectivity for BD-Live. BD-Live allows Blu-ray Video Disc players to connect to servers on the Internet, and exchange information in real time. BD-Live players can also download additional content to be placed in the player's on-board transient storage (RAM or USB memory device).
We discussed these player differences here and now so that you understand not all Blu-ray Video Discs are alike, just like players. Commercial Hollywood Blu-ray Video Disc titles are generally authored to take advantage of many of the "higher-order" functions of the BD spec, like BD-J interactivity and BD-Live! But in order to create Blu-ray Discs that utilize these functions, you need a program more powerful (and expensive) then our friendly ole' Toast 9. But don't hold back. For its price, Toast is AMAZINGLY powerful, and best of all, makes real Blu-ray Video Discs that CAN play on Blu-ray players. In addition, Toast lets you burn small Blu-ray Disc projects onto DVD recordable media, which can save you a ton of money while you are learning, or if you have a small project that you want to distribute for BD playback.
So, what Blu-ray player should I buy?
It's hard to say which player might be right for your particular needs, but as with DVD players, the balance is between price and capabilities. Many Blu-ray Disc players also playback DVD as well, so the time might be right for an upgrade.
If you're looking for a full-featured Blu-ray player that includes all of the format's capabilities, you could start by looking at the SONY Playstation3.


SONY Playstation 3 and its add-on Blu-ray Disc remote control
The PS3 has been the leader of the pack in terms of which SONY device has been getting the fastest firmware updates, but you may not care for the rounded top form factor (I know I didn't). You will also need an additional-cost remote control in order to play Blu-ray Disc movies on the PS3, so that might be something to consider. If you're also a gamer, the PS3 is your hands-down choice.
Another option would be a full-featured (Profile 2.0) player from SONY, or Panasonic, or other manufacturer. Currently, the Sony BDP-S350 is showing availability for around $199, which is a GREAT price for a Profile 2.0 player! (The S350 comes from the factory at Profile 1.1, but it only takes a few minutes to upgrade it over the internet via its own built-in firmware update routine).
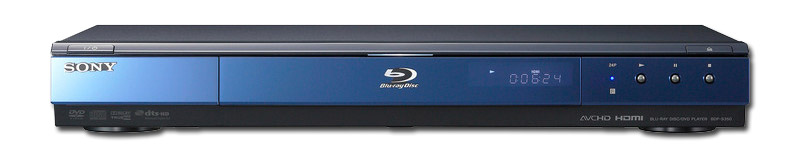
SONY BDP-S350 - updateable to Profile 2.0 "BD-Live" capability
The Panasonic DMP series include two models, the top line DMP-BD50/55, and the more modestly priced DMP-BD30/35. But one has to read the specs carefully - the lesser-priced BD30/35 model does NOT seem to include playback for DVD-R/RW discs - wow - what prompted THAT omission? In retrospect, the top line BD50/55 might be the better choice for someone who prototypes video discs on recordable media. The only drawback is it's a little more expensive than the SONY S-350.
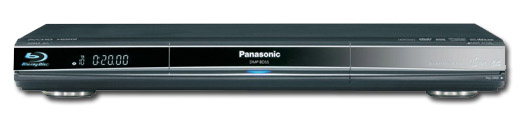
PANASONIC DMP-BD55K - includes Profile 2.0 "BD-Live"
Cheaper Players - a good alternative?
If you only anticipate needing playback of simple Blu-ray Discs that don't use BD-Live Internet connectivity, you might be a candidate for purchasing a very inexpensive Profile 1.1 player. There are some incredibly cheap ones on the market today, including the Insignia NS-BRDVD. A quick scan of Froogle.com shows this drive also selling around $199. But at that price point, I'd probably buy the SONY BDP-S350, which CAN be upgraded to full Profile 2.0 (or wait to see if the Insignia shows up on sale during the holidays for $150, or perhaps even $99).
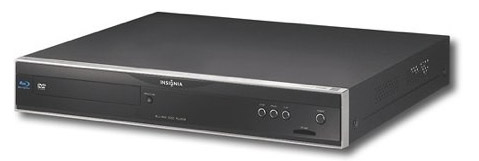
INSIGNIA NS-BRDVD -Profile 1.1 player
What Media can I use for Blu-ray Disc?
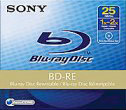
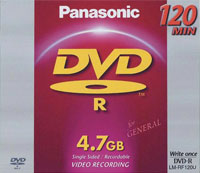
As we explained in the previous tutorial, Blu-ray Disc media is available in both recordable and rewriteable formats. BD-R and DVD-R are write-once formats that cannot be erased, while BD-RE works just like DVD-RW or DVD-RAM. You can record on a BD-RE disc over and over.
|
|
|
|
BD-RE re-writeable media
|
|
DVD Recordable Media
|
One very cool feature of using Toast 9, though, is that it can burn small Blu-ray projects on DVD-Recordable media, and they can be played back on a standard Blu-ray player!
Verifying the Toast 9 version number - very important
When you're ready to get started, launch Toast 9 and double-check for the proper version number in the "About Toast 9 Titanium" splash screen:
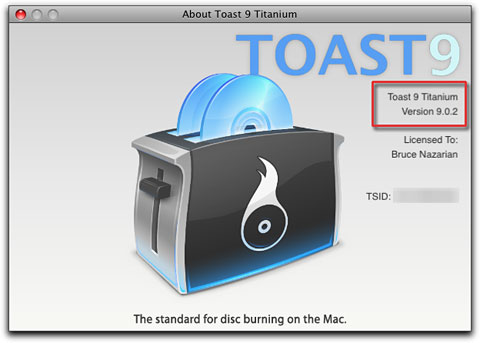
Toast 9 splash screen
If the version number is 9.0.2 or above, you're all set! If not, take a moment and download the current version from Roxio.com. Also make sure you have installed the Toast HD/BD plug-in; you'll need this in order to burn Blu-ray Discs. Also make sure when you install Toast that you activate the Blu-ray disc functions, or you won't be able to mount a Blu-ray disc to look at it. (you still won't be able to play it, but you can mount it, if you activate this function)
Using Toast 9 to make Blu-ray Video discs
To get started, make sure you have checked the "Show Blu-ray video projects" option in Toast's General preferences tab. (type Command-Comma)
Now, let's examine the functions shown in the Toast main window:
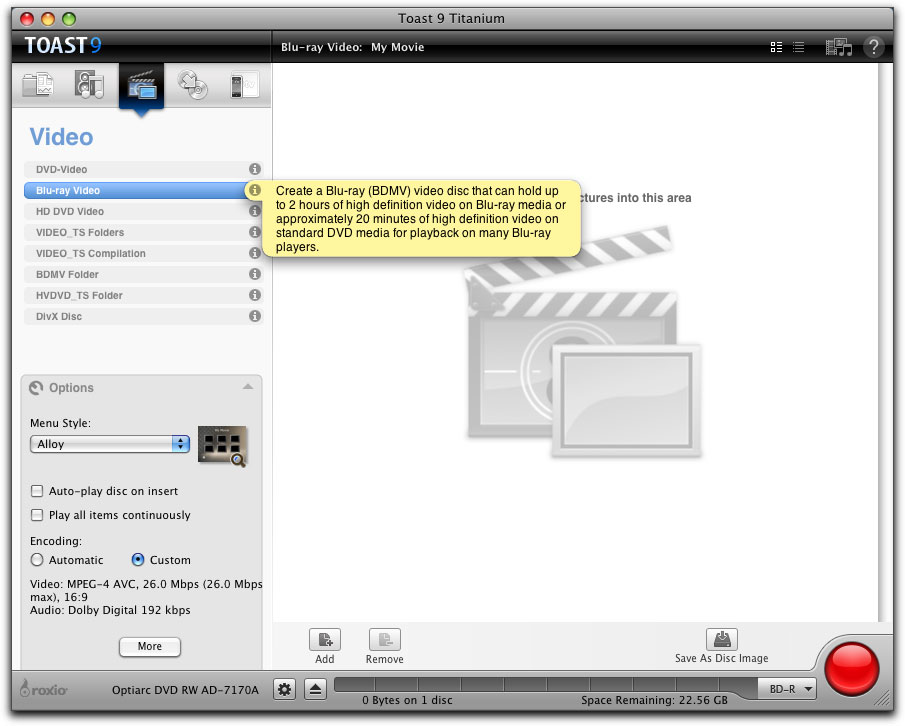
Toast 9's Main Window with Video mode selected
Selecting a disc format
In the upper left corner of the main window, you will see Toast 9's mode selectors. These selectors control the kind of disc that Toast will create. To make a Blu-ray Video Disc you must select Video mode , and specifically Blu-ray Video .
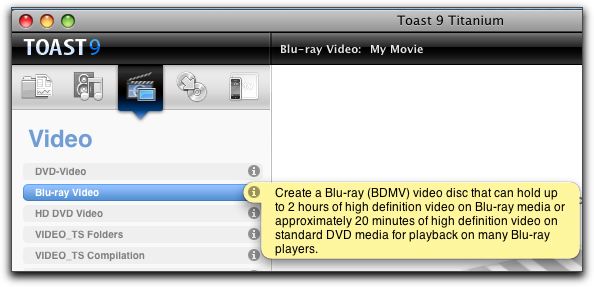
Toast Blu-ray Video Mode Selector
NOTE: there are TWO different Blu-ray modes in Toast - only ONE of them, Blu-ray Video will create a Blu-ray Disc from one or more movie files! For this tutorial, do NOT use the BDMV folder mode - that's used to transfer an already-authored Blu-ray project's folders to an optical disc! (We'll cover than in a future tutorial)
Select a target drive to burn to...
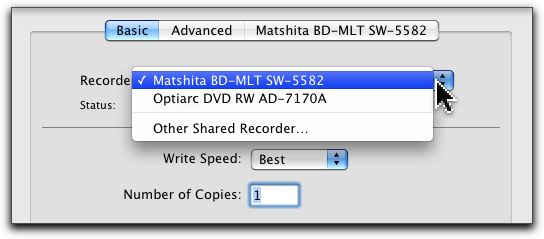
In the lower left corner of the Toast Main Window, you will see the Drive Selector controls, which allow selection of the various drives attached to or installed in your Mac. Select the desired burner from the pop-up, and confirm it is shown as the target drive, next to the tiny Roxio logo. (You can select a Blu-ray Disc or DVD burner, but your program length will be limited if you use DVD media)
Select Recorder Settings to check the specific settings for that drive.
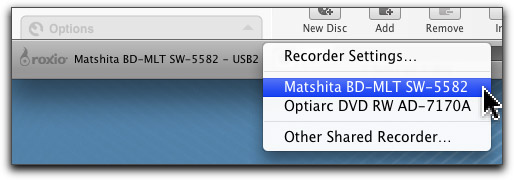
Toast Drive Selector Controls
Select a data size, to keep track of your payload
In the lower right corner is the Media Size Selector, which allows you to see how much room is available for a particular type of media. NOTE that this does NOT change formatting! This is done by choosing a disc type in the Mode selector .
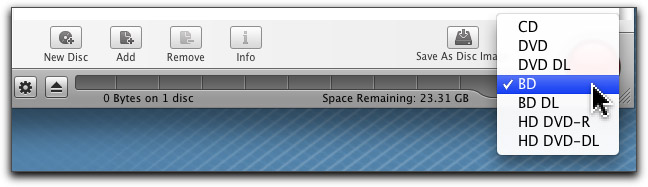
Toast Media Size Selector (25GB Blu-ray Disc selected)
Authoring a new Blu-ray Video Disc
Creating a Blu-ray Video Disc involves a process called "authoring", just like DVD. Toast makes authoring a Blu-ray Video Disc very simple, because it offers only a few of the many options possible within the Blu-ray Disc format. This makes the authoring process faster, and less confusing.
Toast 9 allows you to author a simple Blu-ray Disc that uses still-frame menus with buttons, much like DVD. The big difference between using Toast for data and Blu-ray Video Disc authoring is that for data, you just burn the files to the disc media of your choice. But to build a Blu-ray Video Disc you have to encode, author and build a BDMV folder, processes very similar to making a DVD.
Start by adding a movie
Since the fastest path to a Blu-ray Video Disc is directly from a movie file, let's show that workflow first. We'll create a quick one-movie auto-play disc that you might use to show off a short movie, or trailer.
Once you have selected the Blu-ray Video format in the Data mode selector , you're ready to load up the Toast window with the movie files you have selected for authoring.
For this experiment, I've selected a short 720p HDV movie to use as a test.
To begin a new Blu-ray Video Disc:
Drag the Movie file into the empty Toast Disc Window.

First, Drag a QuickTime movie file into the Toast Window
Once the file is dropped, it will appear in the window as a small thumbnail image, with the file details shown below.
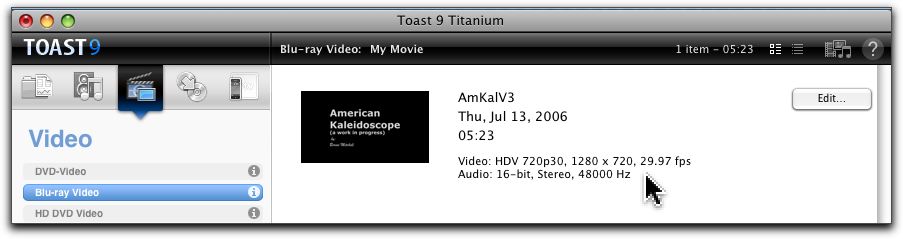
First movie file added into the play list showing its details.
A new Blu-ray Video Disc has been created automatically, with the default "My Movie" name. You can change this name by clicking on the "My Movie" text in the title bar, and editing the current name, as shown:
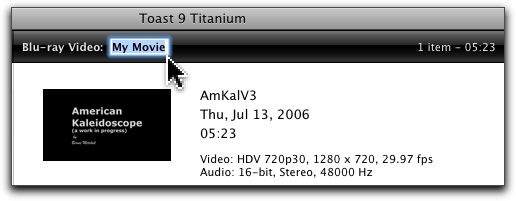
Editing the default Blu-ray Video Disc title.
Editing the Movie Data
Once a movie has been placed into Toast, the Text info and Video data (Chapters, Button Picture, etc.) can be edited by clicking the "Edit" Button for that movie entry.
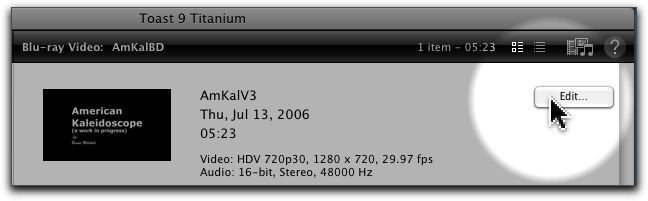
Click to edit the movie Text or Video data.
Editable Movie Data includes the Movie Text and the Chapter points.
Text data is pretty self-explanatory. Click 'Use Defaults" to restore the original filename, date and length, if changed.
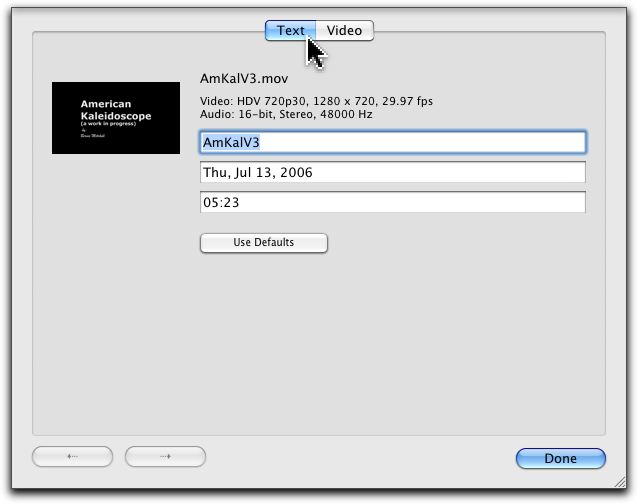
Editing the movie Text data.
Video data includes the ability to set the Button Picture (Poster Frame) shown in the thumbnail (as well as in a Menu Button).
You can set the Button Picture (the Poster Frame) by scrolling through the movie using the play head (the inverted triangle over the play timeline), or by playing the movie and grabbing the current frame while playing, or while paused. The round control directly under the movie timeline (where the playhead is) allows you to set an in and out point to designate a segment of the movie to be used, instead of the entire movie. Please consult the Toast documentation on how to use these controls properly.
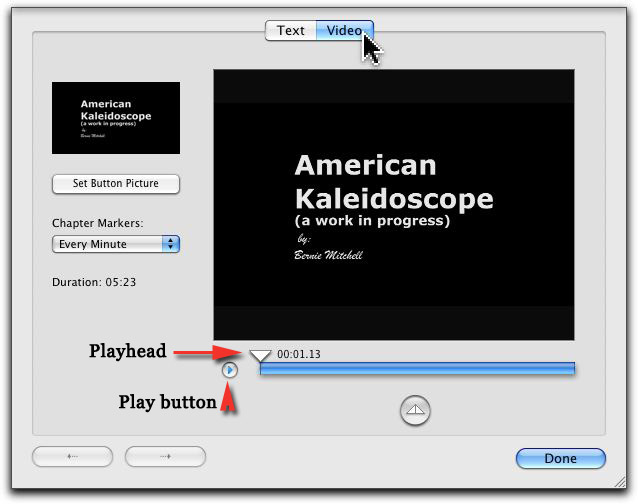
Setting the Button Picture and Chapter Markers.
You can also set the Chapter Marker locations by making a selection from the Chapter Markers: pop-up menu. You can set them to specific intervals, but not specific locations.
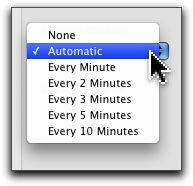
Chapter Marker selector.
If your movie was created using Final Cut, any DVDSP Chapter markers embedded into the .MOV file (and exported) will be picked up by Toast and used to define Markers. (My experience dictates, though, that the chapter markers actually created are located a few seconds earlier in the final Blu-ray Disc then the locations at which they were actually created. Not exactly a desired behavior.
Settings in the Options panel
Custom settings are available in the Options panel, which can be found at the lower-left corner of the main window, just above the Roxio logo and target drive indicator. Click the tiny triangle to open the Options panel:
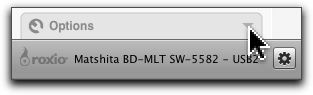
Click the triangle to open the Options Panel.
Once the Options panel is open, you can select preferences as to how you want your disc to behave, and a menu theme, if desired.
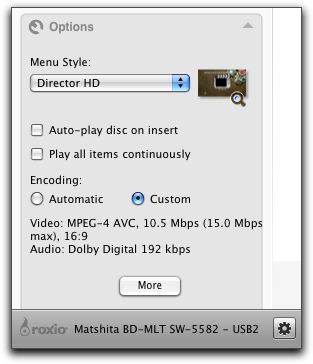
The Options panel - click More to view the settings window .
Menus? Yes - Menus!
With the Options panel open, you can see the pop-up Menu Style selector with its tiny thumbnail showing the currently selected menu style. To change the menu choice, click the pop-up menu selector and choose a different theme. Clicking the magnifying glass will enlarge the menu image so you can see it better.
Auto-play and Looping
You can set up your disc to auto-play, which bypasses the Menus, and you can select continuous-play mode, in which all the movies play continually in the sequence you authored them.
NOTE: Both of these settings have some serious issues, so be warned!
I'll outline the issues at the end of this tutorial.
Encoding settings
Like DVD Studio Pro, Toast 9 lets you use un-encoded QuickTime movie files for your Blu-ray Disc, and will encode them into either the MPEG-2 codec or H.264 (AVC) codec, usable with Blu-ray Video. You can experiment with encoding in each different codec to see which one does the best job of balancing disc size vs. running time.
Note: Toast does not encode into VC-1, but AVC offers similar encode rate advantages.
Toast offers two ways to set the encoding and codec selection: automatic, or custom. You can select between automatic or custom in the open Options panel, but you can't adjust the encoding settings for either one until you open the Settings window.
For a simple approach, you can set the Encoding to automatic , which will set a VBR setting for the chosen video codec, and will create Dolby Digital AC3 stream for the audio. This setting has "good, better, best" options in the Settings window.
If you are familiar with encoding and wish to exert control over your settings, set Encoding: to custom in the Options panel. The extensive custom Encoding parameters are also available in the Settings window.
To open the Settings window, click the "More" button in the open Options panel.
The Settings window will then drop down on top of the Main Window.
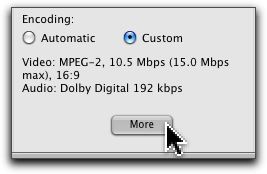
Click "More" to open the Settings window .
Adjustments in the Settings Window
Encoding settings
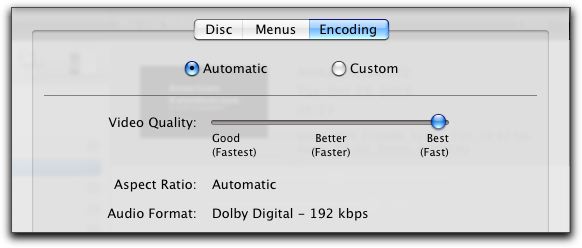
The Encoding panel - Automatic settings.
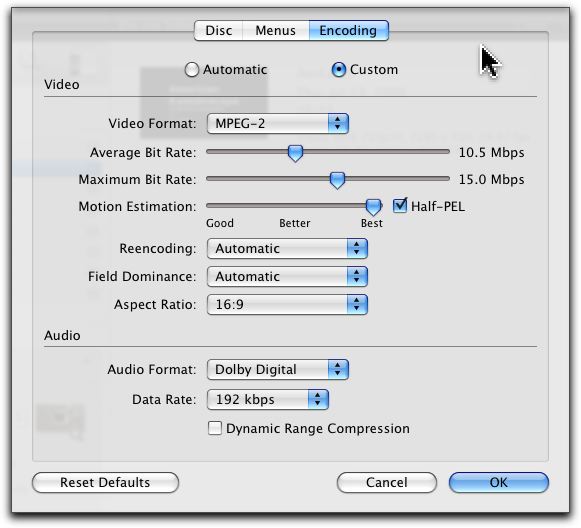
The Encoding panel - Custom settings.
If you select the Automatic settings, your encoding options are limited to a quality slider. The aspect ratio will automatically be derived from your movie source, and the Audio will default to Dolby Digital (AC3) at 192 Kbps.
TIP - the codec used in "automatic" is actually determined by the codec selected in the "custom" settings panel, described below. To force the selection of a specific codec, set Encoding mode to "custom", choose your desired codec, then switch back to "Automatic".
If you select the custom settings, you get complete control of the aspects of your encode.
These include Codec, encode rate, aspect ratio, and many others. Please consult the Toast documentation for a more detailed explanation of how these controls work, and feel free to experiment with them, as you did when learning DVD encoding. You will find they behave in a similar fashion.
Disc settings
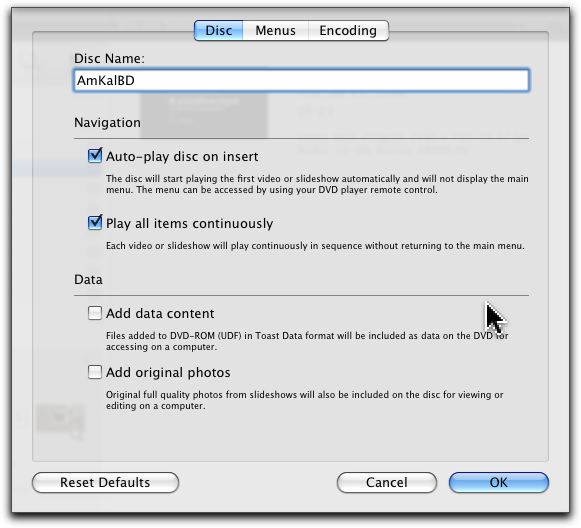
Disc settings deal with general behavior or overall items like the disc name; In addition to changing the name of the disc itself, you can also set the auto-play and continuous-play preferences, just as in the Options panel. There are also some data options, but ignore those, as they are not relevant for Blu-ray Disc.
Disc settings.
Making an Auto-play disc
If you want to make a simple auto-play disc, select "Auto-play disc on insert". This will bypass the menu display, and will immediately begin playback of the first movie. The menu will still be available when the Menu button is pressed on the remote control.
Making a looping disc
Selecting "Play all items continuously" will do just that - it will cause the movies to play over and over in the sequence they were authored.
Menu settings
Toast comes with a number of both 4x3 and 16x9 (called HD) menu templates. The buttons can be set to a specific fixed number, or left set to automatic, where a new button will be created for each movie loaded into the Main Window. You can also set the button colors as you choose, and drag and drop a still image onto the Menu thumbnail to replace the theme's menu graphic with your own custom image.
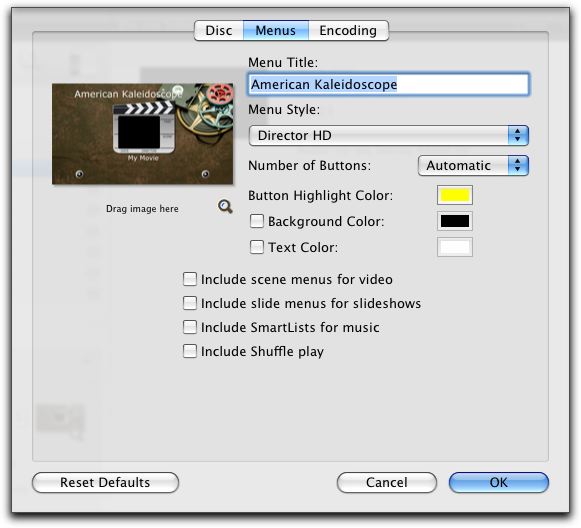
Menu Settings.
Encoding, Building and Burning the Disc
Next step is to finish your Blu-ray Video Disc. Before you start a burn, make certain you have enough free space on your Macintosh HD (the boot volume) to hold the additional files that will be created during encoding and muxing, the two phases coming up next.
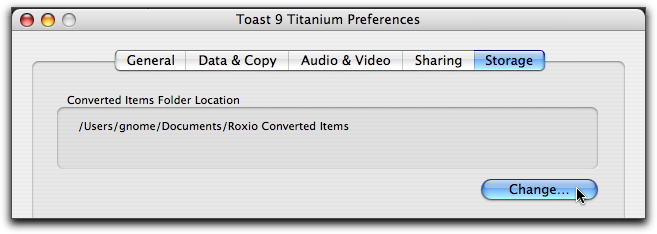
If you don't have a lot of space left on your boot drive, you can set Toast's preferences to store the Converted Items somewhere other than in your user folder. Open Toast Preferences (Command-comma) and select the Storage tab, then click Change to select a new storage location.
You can use BD-R or BD-RE media, and the procedure is almost the same for both. If your -RE media already contains data, you should use Toast to erase the media. We'll show you that in the next section.
You can also burn short (20-30 minute) Blu-ray programs onto DVD-R recordable media, which can play back on Blu-ray players! That can certainly cut the cost of creating short demo or trailer reels. I recommend you use BD-RE media to experiment, to avoid making expensive coasters (or use cheap DVD-R discs) .
Starting the burn process
Click the Burn Button , lower right corner, and the Disc Burn dialog for the selected drive will drop down over the disc window. If you need to change target drive, you can do so from the Recorder pop-up.
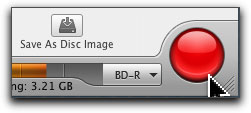
Toast's Burn button - it's big and red so you don't miss it!
Toast Recording dialog window.
Using BD-R or DVD-R media
If you are using BD-R, or DVD-R you will want to get your program created right the FIRST time, since -R media is written PERMANENTLY, and not erasable once written!
Place a blank BD-R pr DVD-R disc into the drive at this time, then click the "Close Tray" and "Record" buttons, in that order. The drive tray will close, the drive will examine the disc media, and if acceptable, will mount it.

Bottom of Toast Recording dialog window, showing function buttons.
NOTE: Unlike creating a Data disc, there are a few steps required before your
disc will begin to be burned.
(Read Encode and Mux, next section)
Using BD-RE media
BD-RE (re-writeable) media that's brand new will record immediately, like BD-R. You can follow the steps in the paragraph above for BD-R. If you've already used it, though, there's one additional step needed first - erasure!
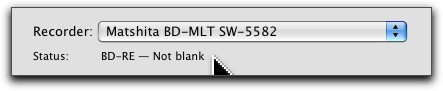
BD-RE media not blank will need erasure first!
If Toast reports the BD-RE media is "not blank", you can remedy this quickly using Toast's Quick Erase function. Select Recorder > Erase...
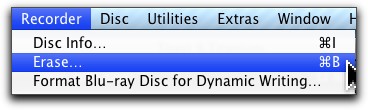
The "Erase" function is in the Recorder menu.
Select "Quick Erase" in the Erase dialog to quickly wipe the BD-RE disc clean.

Selecting Quick Erase will wipe the BD-RE disc directory.
Once successfully erased, the success dialog will appear:
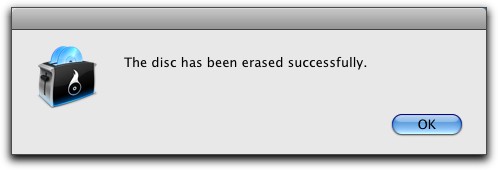
Erasure success! BD-RE is now ready to be written!
Before Burning happens: Encoding and Muxing
Once you begin the disc burn, Toast will go through a few additional steps in order to create a Blu-ray Video Disc. But first up, as with burning a data disc, is mounting the recording media. Toast will display "waiting" while the disc is being spun up, and is being read to verify the type and if it is empty.
Waiting
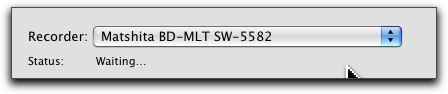
Toast reports "waiting" while spinning up a disc.
Encoding for Blu-ray
Toast allows you to use un-encoded .MOV files as the video source for your Blu-ray Video Disc, but the video must be encoded into the proper format for use in a finished Blu-ray Disc. Once you initiate the burn, Toast will encode each video clip you authored, using the settings you provided earlier in the Options panel and Settings window. (If you are using video streams already encoded to the proper specs, this step might be skipped).
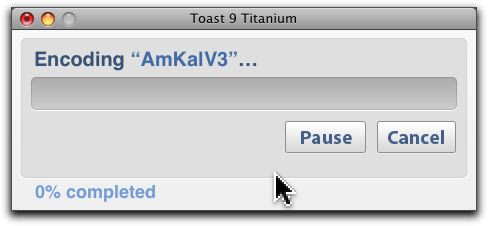
Encoding the video files.
The encoded files will be placed into the Roxio Converted Items folder, either in your user directory, or in its new location, if you have moved it elsewhere.
Documents/Roxio Converted Items.
You will notice in the image below that I've encoded two different movies, and the AmKalV3 movie was encoded once as MPEG-2 (.m2v) and once as AVC (.264).

Roxio Converted Items folder.
Creating the BDMV folder
In order for the Blu-ray Video Disc to play, the files must be organized into the proper structure within the disc. During the burn phase, Toast will create a temp folder within your Converted Items folder to hold the BDMV folder while the burn takes place. Then, like with DVDSP, Toast will build or multiplex ("mux") the proper files and folders in the Blu-ray Video Disc format that makes up the finished Blu-ray Video Disc. This folder will disappear once the disc has been burned.
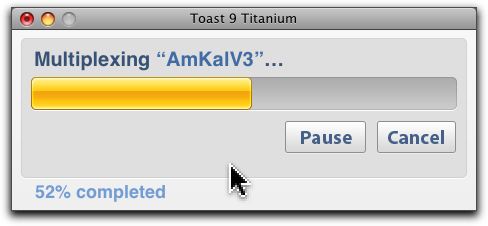
Muxing the disc.
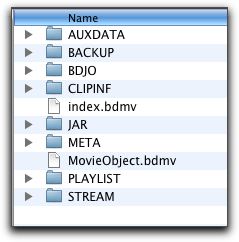
Muxing creates the BDMV folders and their contents.
Formatting
Toast may report "Formatting", if this is required for the media you have chosen.
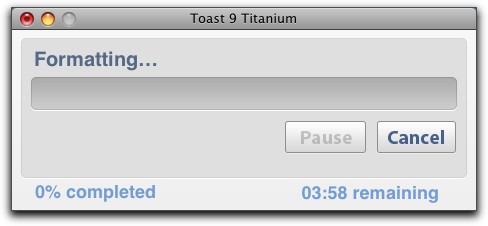
Formatting starts the process.
Cache Load
Once Toast is ready to burn, it will pre-load its RAM cache.
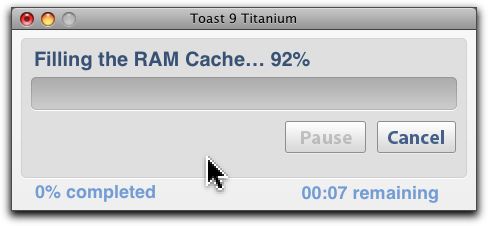
Loading the Ram cache.
Lead-In
Prior to actually writing the finished data, a Lead-in must be written to allow the player to properly synchronize the playback data.
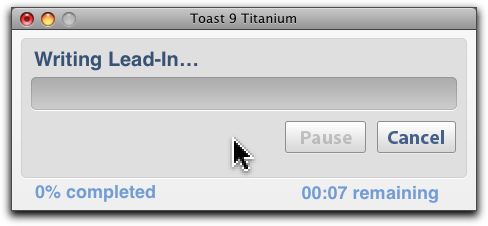
Writing the Lead-In.
Writing
Once the Lead-in is finished, Writing of the actual Blu-ray Disc data will begin. Toast will report "Writing (discname)", and will give an indication of the time remaining in the burn, and the speed of the burn.
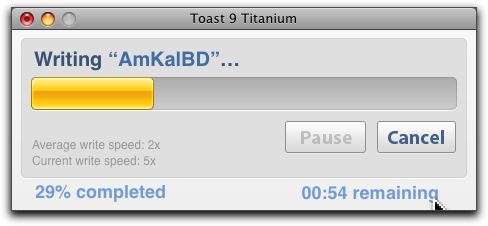
Writing your disc.
Writing the Lead-Out
When the writing phase is finished, a dialog will appear indicating the "lead-Out"is being written. ON a short disc, this is used to pad the data to the size required by the spec. Just hang tight - it's required, but should only take a few minutes to complete. DO NOT abort at this point - you're literally almost done!
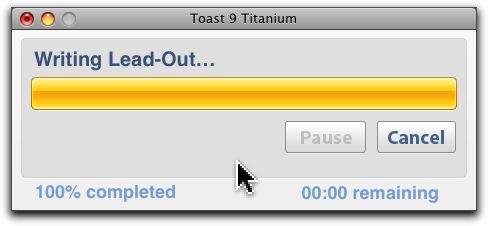
Writing the Lead-Out.
The Disc is finished - now what?
Once the disc is ready, time to enjoy your new video creation!

Disc ready - eject it to play it in your Blu-ray player.
You can choose to eject the new disc, OR you can mount it on your Mac's desktop in order to check out its internal structure!
Remember: while Toast gives your Mac the ability to mount Blu-ray Video Discs on the desktop, you will not be able to play them back. For that, you need your Blu-ray Disc player.
Playing your new Blu-ray Video Disc!
All that's left now is to place the new Blu-ray Disc in your Blu-ray player and spin it up! Depending on the specific player you own, you may be able to play Blu-ray Disc project recorded on DVD, but most if not all Blu-ray players should accept BD-R and BD-RE equally well. (You may find the occasional player that doesn't like BD-RE, and that's hopefully only a temporary thing. Most layers should allow for a firmware update by disc, or via the internet (if your player has Ethernet connectivity).
I've done all of my testing for this tutorial using a SONY Blu-ray player-S350, which was originally a Profile 1.1 player, and has since been updated (online) to full Profle 2.0 (Blu-ray Disc-Live) capability.
That player has successfully played discs on BD-R and BD-RE media, as well as Blu-ray projects burned on DVD-R media, something unique to Toast 9!
WARNING! Be aware of these quirks!
While the menu and loop functions in Toast 9 are nice features, they currently don't quite work exactly as advertised (oops!) The loop function (play all items continuously) seems to have a random repeat glitch in it that causes a portion of the program to be repeated before the disc loops back to the beginning.
Menus currently have a strange quirk in that the built-in menu theme images don't display when the menu is displayed; all that can be seen in the button highlight - no background, and no button picture.
I've been in touch with Roxio about both of these issues, and they have assured me they will get back with some answers shortly. Once nice thing - Roxio does have a nice online support forum, where both experienced users and Roxio employees post answers to questions. You can find it online at www.roxio.com. Be sure to register there, so you have take advantage of downloadable software updates as they become available!
What next?
Further adventures in Blu-ray Video Disc will require an authoring tool more substantial than Toast. In the near future, I'll try to get a tutorial together using Adobe Encore CS 3 or 4. Both can do Blu-ray Video Disc authoring, and encoding.
In the meantime, you are more than welcome to come visit my website, www.Recipe4DVD.com, where I have lots of DVD goodies available for your assistance. You can also find me on www.2-pop.com, where I am a forum guide on the DVD forum, and also on the DVD Association's website, www.DVDA.org.
If you need authoring assistance with any DVD, Blu-ray Disc or data project, you will find information on my consulting services, and a contact form on www.recipe4dvd.com.
About Bruce:
Bruce Nazarian, "the Digital Guy", is an award-winning DVD Producer and Author, and current President of the DVD Association. He specializes in consulting and digital media production for video, audio, DVD and the Web. He is CEO of Digital Media Consulting Group, Inc., his DVD and media production company in Las Vegas, and webmaster of his own DVD info site, www.Recipe4DVD.com, and the DVDA website www.DVDA.org. He is also a forum guide for the DVD Studio Pro forum on 2-pop.com, where he helps solve DVD authoring problems for many folks.
Bruce has toured the world as speaker, demonstrator and instructor for DVD authoring tools including DVD Studio Pro from Apple, and Sonic Solutions DVD Authoring systems, where he was the factory-certified trainer. An active DVD evangelist, he is an in-demand presenter and trainer who has appeared at numerous trade shows and taught DVD authors and producers on five continents.
Bruce is the author of two editions of "DVD Studio Pro - the Complete Guide for Authoring with Macintosh" (McGraw-Hill), and is the creator of DVD Companion Pro-Pack
TM
products, used by DVD authors world-wide.
[Top]
copyright © www.kenstone.net 2008
© 2000 -2008 Ken Stone. All rights reserved. Apple, the Apple logo, Final
Cut Pro, Macintosh and Power Mac
are either registered trademarks or trademarks of Apple. Other
company and product names may be trademarks of their respective
owners.
All screen captures, images, and textual references are the property and trademark of their creators/owners/publishers.


