
August 31, 2009
Batch Templates and Job Actions
By Ken Stone
Recently Apple rolled out Final Cut Studio 3, which updated Final Cut Pro to 7 and Compressor to 3.5. While this article is about Compressor 3.5, it is important to note that, in FCP 7, there is a new command, 'Send To Compressor', which replaces the previous 'Export Using Compressor' function. In the past, when we used 'Export Using Compressor', FCP handed off the video to Compressor one frame at a time, tying up FCP for the duration. This is no longer the case. As soon as you 'Send To Compressor', you can return to FCP and continue working immediately, even working on the Job that you just sent to Compressor. Very good news.
Some of the Compressor 3.5 new features are; Batch Templates, Blu-ray encoding and burning, Red laser Blu-ray AVCHD encoding and burning to DVD-R discs (5's and 9's), improved Droplets, Cluster-based reference file encoding, Image sequence support, Job actions, Auto-detect settings, Enhanced networking for distributed encoding, and Faster frame controls rendering.
Up until now, Compressor was just a work station along the way to our final goal of distribution. After encoding our video in Compressor, it was always necessary to move the files into DVD STudio Pro, or FTP them to our web server or drag them into iTunes, well, you follow my drift. With the introduction of Batch Templates and Job Actions to Compressor 3.5, we can now let Compressor handle our distribution chores for us, all from right inside Compressor.
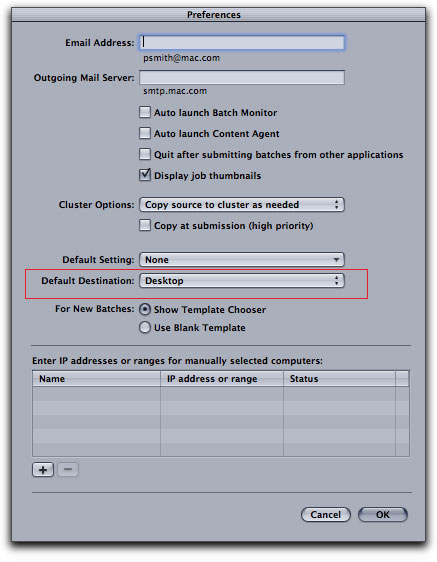
Before starting in, there is one setting I like to change in Compressor Preferences and that is the Default Destination, which I set to the Desktop.
There are two different workflows to utilize the new features in Compressor.
Send to Compressor - Job Action
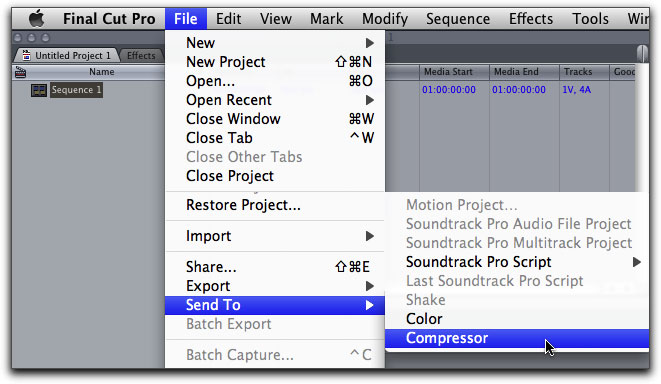
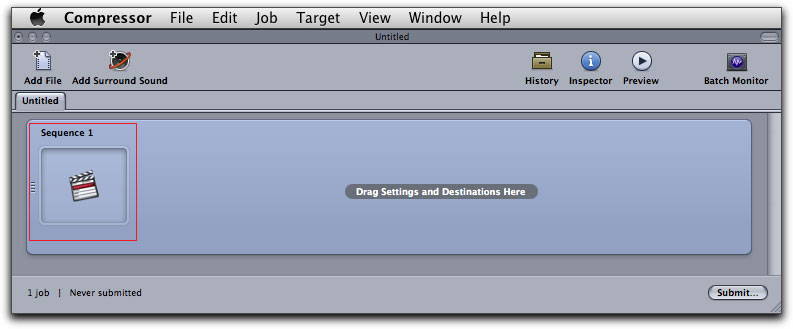
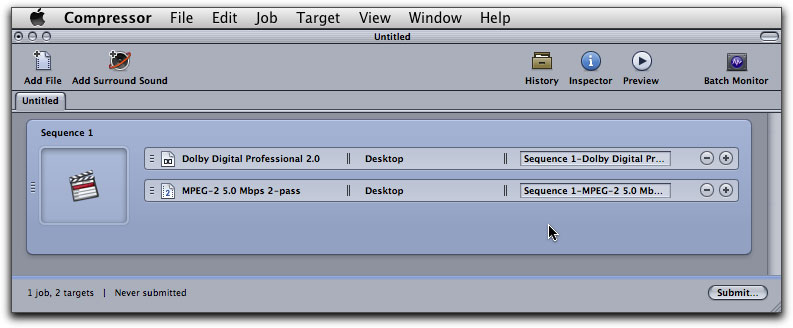
To use 'Send to Compressor', in FCP, select a Sequence in the Browser, select the clips or sequence in the timeline or set In and Out points in the timeline and then, from the File menu, select 'Send to Compressor'. This will launch Compressor, if it is not already open and place the video into a Job in the Batch window. Notice that the video sports the FCP 'clap stick' icon. Also note that there are no encode targets for video or audio applied to the Job. We need to do this ourselves. One of the main new features of Compressor, the Batch Templates browser, does not engage when using the Send to Compressor command.
As in the past, we need to drag our encode Preset into the Job in the Batch window.
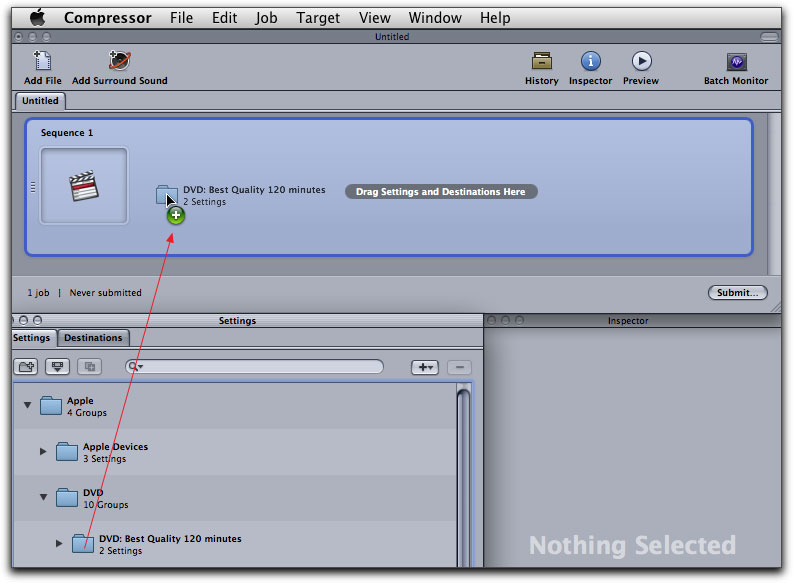
Our Preset is applied to the Job. This is the old way of working in Compressor and is familiar to us, however, we can still take advantage of one of Compressors new features, 'Job Actions'. Click on the Job in the Batch window to select (so that it's blue), this will activate the Inspector window.
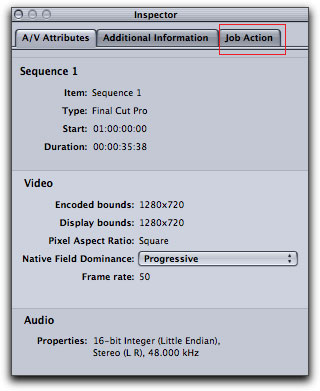
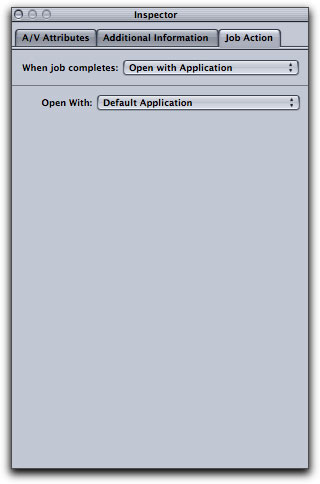
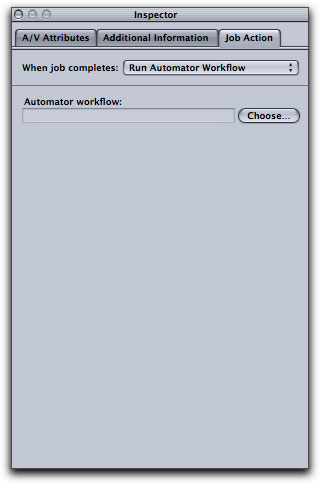
Before this upgrade, the Inspector displayed two tabs when a Job was selected in the Batch window, 'A/V Attributes' and 'Additional Information'. Now, there is a third tab, 'Job Action'. The Job Action tab contains the 'When Job completes' drop-down menu, which enables us to pick what we want Compressor to do after it has finished encoding. This means that we can let Compressor finish the project for us; burn to disc, add to iTunes or even publish to the web.

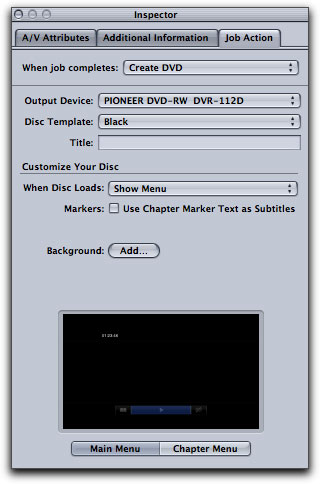
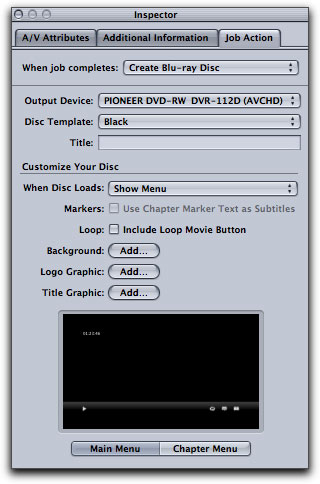
Selecting one of the Job Actions causes the Inspector to reflect what it is that we have asked it to do and will provide an interface for us to enter any information that might be required. As you can see below, with two of the options, we can have Compressor actually author and then burn DVDs and Blu-ray discs right from this interface. The options available to us for authoring DVDs is both very simple and basic. One main menu, chapter menu and only one audio and video track. No slideshows, subtitles, foreign language tracks, motion menus or disc ROM content. If you need you create a more advanced DVD, with additional features, you would set 'When Job Completes' to 'Do Nothing' and then move the encoded files into DVD SP as you have done in the past.
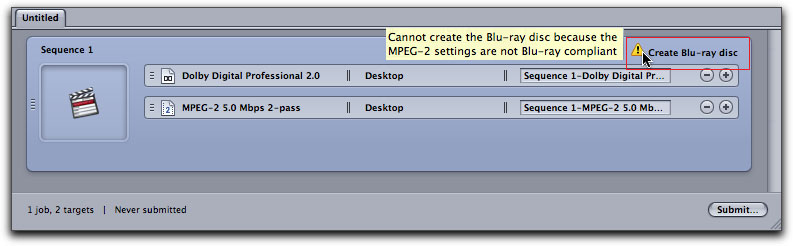
If you select a Job Action that is not compatible with the encode settings that you have applied to the Job, you will get a yellow Alert sign in the Job. Placing your cursor over the alert will produce a comment that will detail what is incorrect.
When you have provided the Inspector with all of the information that it requires, in the Batch window, click on Submit and let Compressor go to work.
The new way - Batch Templates
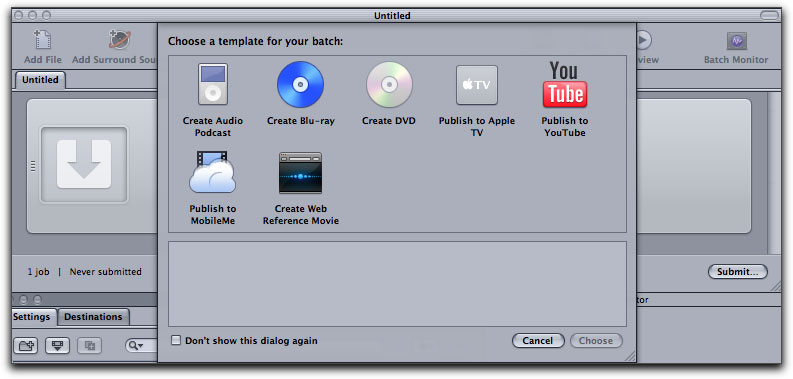
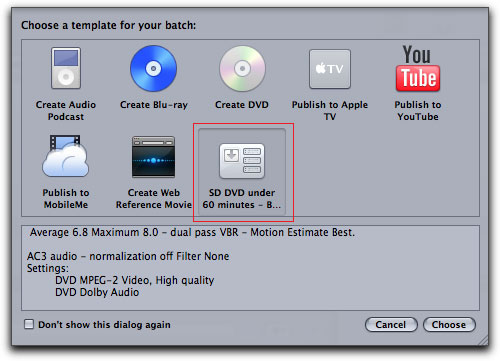
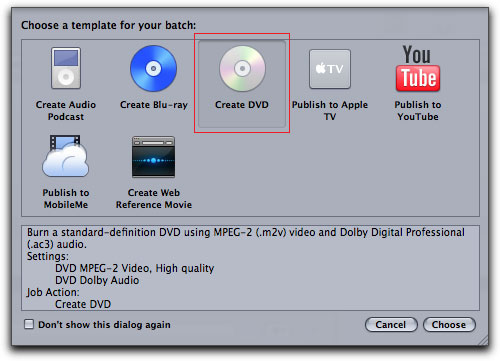
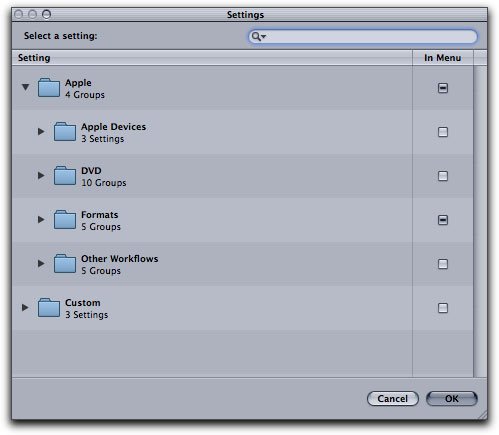
When we launch Compressor, it opens in the normal fashion, except that now, after opening, we get a new Batch Template browser window. This window contains 7 Batch Templates that allows us to choose the encode process that we want Compressor to perform and then also, the Job Action (Distribution), what we want Compressor to do, once the files have been encoded.
You can also modify any one of the Batch Templates and then save it as a Custom Template by selecting the Job in the Batch window that you have modified and, from the File menu > 'Save as Template'. If you have a Job Action assigned, or have modified a Job Action, then it will be saved as part of the custom template.
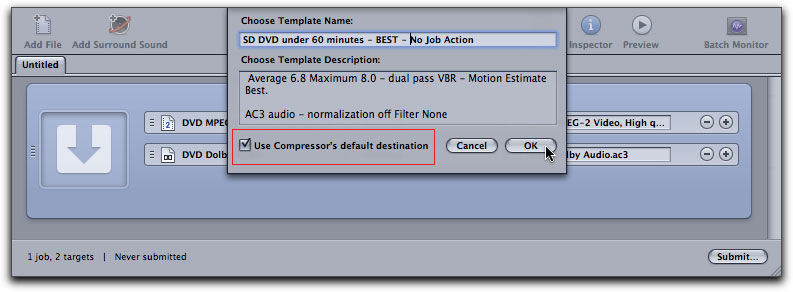 If you check the 'Use Compressor's default destination' option, the new custom Template will be placed in with the 7 stock templates for easy selection.
 Apple describes the different Batch Templates as:
- Create Audio Podcast: Use this template to create an AAC audio file suitable for podcasting and add it to the iTunes library.
- Create Blu-ray: Use this template to create BD H.264 video and Dolby Digital Professional (.ac3) audio files and automatically burn them to a Blu-ray disc or an AVCHD disc (AVCHD discs can be played in Blu-ray Disc players that are compatible with the AVCHD format).
Note: Blu-ray output options are available only on computers that have Final Cut Studio installed.
- Create DVD: Use this template to create a standard definition DVD using MPEG-2 (.m2v) video and Dolby Digital Professional (.ac3) audio and automatically burn it to a disc.
-
Publish to Apple TV: Use this template to create a video file suitable for viewing on Apple TV and add it to the iTunes library.
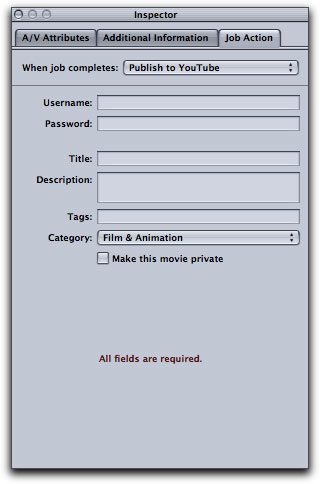
- Publish to YouTube: Use this template to create a video file suitable for viewing on YouTube and upload it to a YouTube account.
-
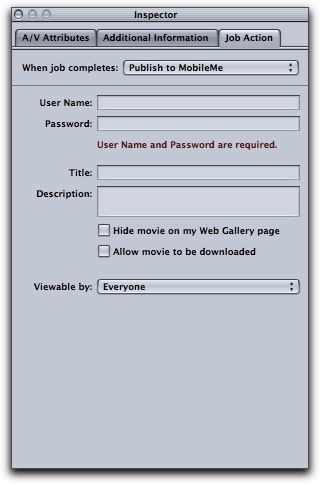
Publish to MobileMe: Use this template to create a video file suitable for viewing on MobileMe and upload it to a MobileMe account.
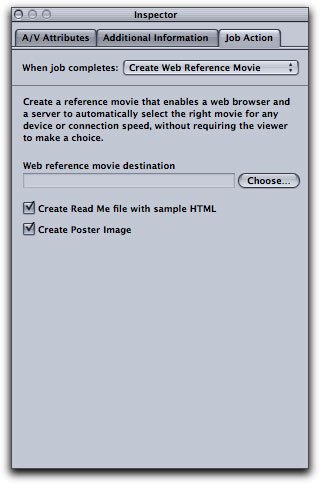
- Create Web Reference Movie: Use this template to create a reference movie that enables a web browser and a server to automatically select the right movie for any device or connection speed, without requiring the viewer to make a choice.
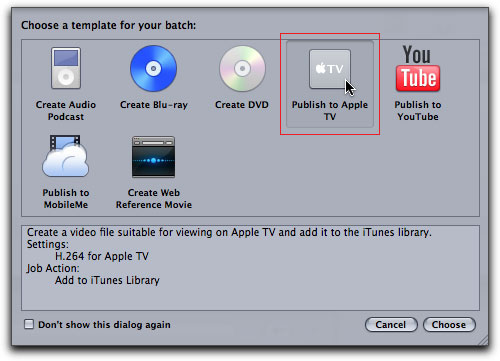
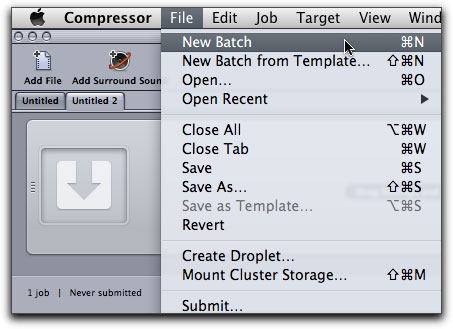
After launching Compressor, I have selected the 'Publish to Apple TV' template. In the lower portion of the window, Compressor tells us what it is going to do; encode to H.264 and then the Job Action will be to add it to the iTunes Library. After making a selection, click on the Choose button. You can open the Batch Template window at any time, from the File menu > New Batch.
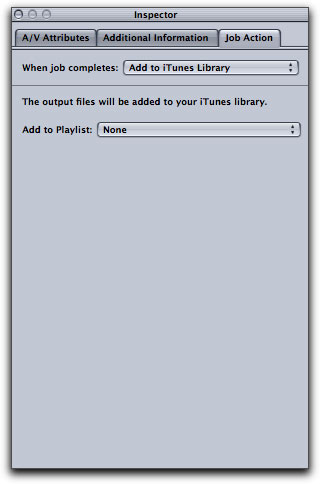
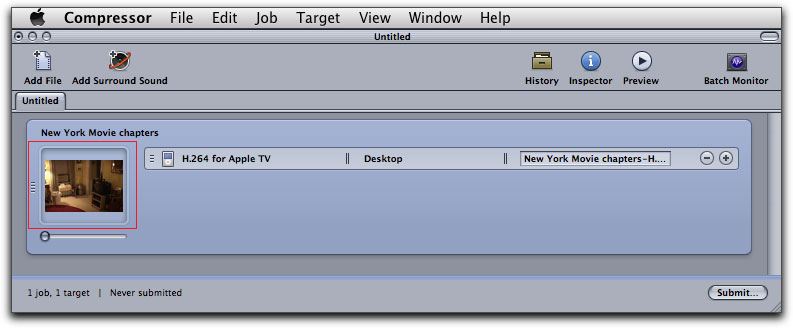
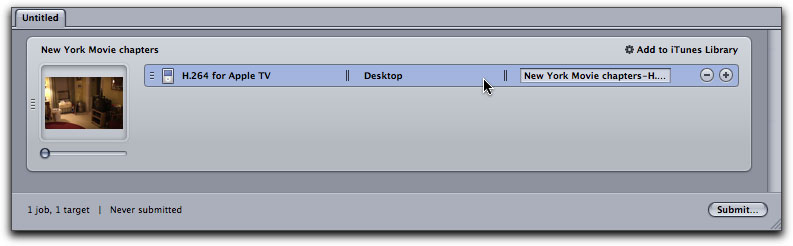
After selecting a template, a new Job will open in the Batch window and place both the encoding target (H.264 for ATV) for the template and the Job Action associated with that template (Add to the iTunes library), into the Job. In the Batch window, click on the Job to select it, or click on the Job Action 'Add to Itunes Library', this will cause the Inspector to display the 'Job Action' tab.
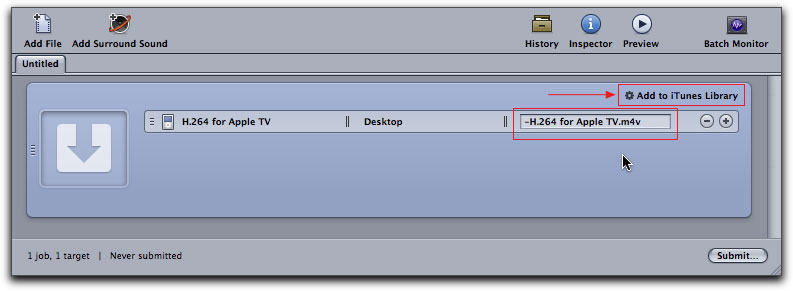
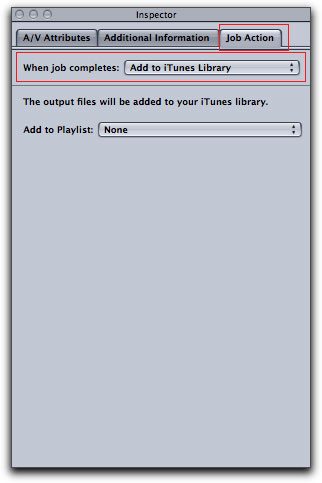
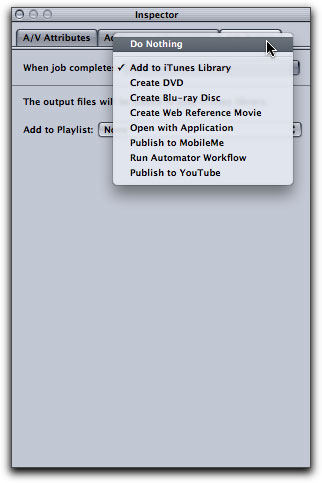
In the Inspector window, click on the Job Action tab. As you can see below right, the Job action will 'Add to the iTunes library', you even have the option of selecting which play list to add the file to. You can easily change the Job action by clicking on the 'When Job completes 'drop-down menu and select another option, below right.
With the encoding target and Job action added to the Job we now need to provide Compressor with the media file we want it to work on. Control click (right click) on the source media window, select Source and then File.
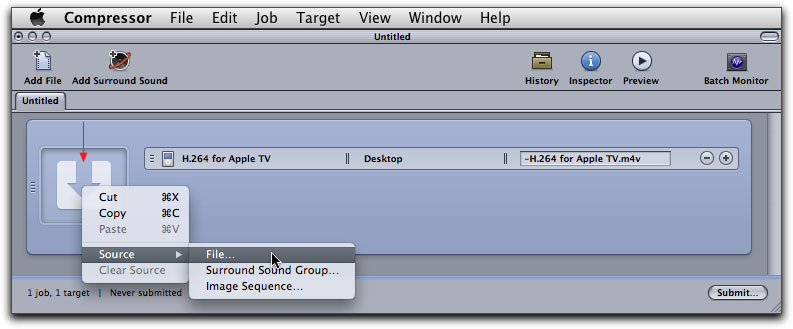
This will open a Finder window, navigate to the file you want and click on the Open button.
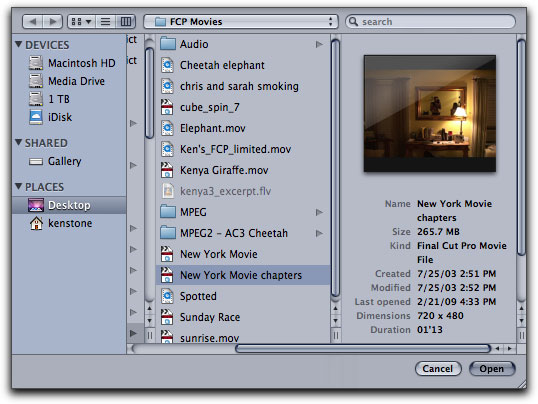
This will load the file into the Job in the Batch window.
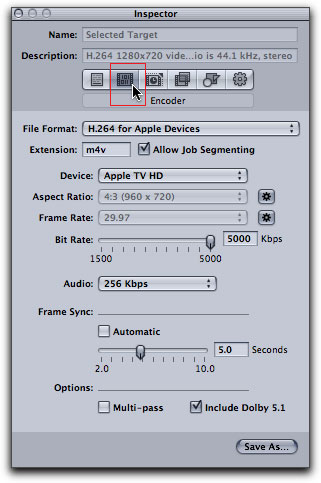
There may be instances where you might need to adjust some of the encode settings. To do this, select the encode target in the Job.
The Inspector window now reflects the encode target, click on the encode tab in the Inspector to display the various encode options. Compressor has a new feature, 'Auto Detect', which gives it the ability to look at the media that is to be encoded, its type and duration and then choose the appropriate encode settings for that media. In other words, it is no longer necessary for us to enter any encode settings, Compressor will do it automatically for us. When using Batch Templates, you will notice, that in the Inspector, many of the settings and menus are grayed out, this is because Compressor defaults to 'Auto Detect', and has configured the settings for us. You can click on the gear icon to switch from 'Auto Detect' to manual, where you can make changes to the settings. More on this in just a bit.
When you are ready, click on the Submit button. I have set the Job Action to place the finished project in iTunes, but I set the 'Add to Playlist' to None. Compressor put the finished ATV movie into the Movie section in iTunes. Remember that I said that I like to set the Compressor Prefs 'Destination' to my desktop. Well, Compressor also created a copy of the project, which it placed on my desktop as well.

Auto Detect - Automatic Mode
In the past, when working with Compressor, it was always required that we calculate and then set all of the encoding parameters in the Inspector ourselves. Working with DVDs we used a Bit Budget. For web delivery we set frame size, bit rates, frame rate, key frames, quality, audio compression, connection speed and other controls. For iTunes, Podcasts and ATV we could use QT Pro, iTunes and a host of other apps. There were always so many variables that we often referred to encoding as a 'black science'.
All this has changed with Compressor 3.5, which now has the ability to look at the media type and duration and then look at the Job destination and calculate the encode settings for that Job, automatically. We no longer need to know the required specifications for YouTube, Mobile Me, iTunes, SD DVDs or even Blu-ray. Compressor will handle all of this for us. Combine this ability with the new Job Action features and Compressor becomes fully automatic, first encoding and then delivering the final product for us. It even has a built in FTP client for automatic uploading of files to the internet. Interesting to note that we can always switch back to manual mode and do all the settings ourselves if needed.
I want to take a look at the 'Auto Detect' function in Compressor, so I am going to open the Batch Template window and choose 'Create DVD'.
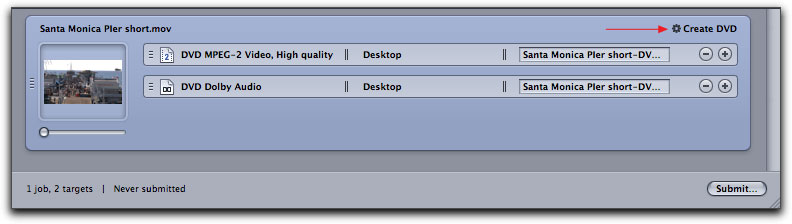
This loads the MPEG 2 and audio AC3 encode targets into the Job in the Batch window. I have added my source video, a short 16 minute video to the Job. Notice that the template I chose has a Job Action assigned to it, in this case, 'Create DVD' (which also includes the burn process).
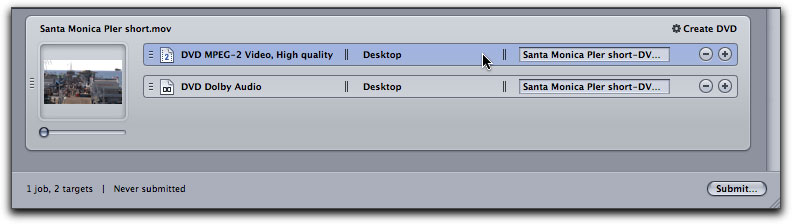
I have selected the MPEG2 target in the Job.
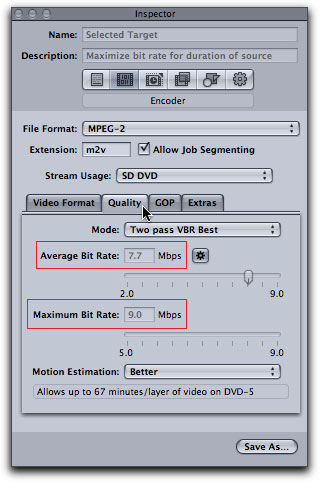
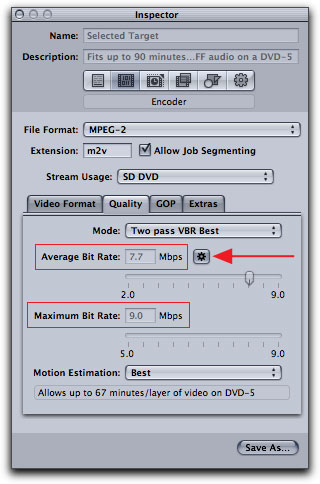
In the Inspector > Quality tab, we can see that the Average Bit Rate and Maximum Bit Rate settings are set to Average 7.7 and Max 9.0, but the settings are grayed out. Compressor is using Auto Detect and it has calculated these two rates for us based on the duration of the source video and the amount of available space on the blank DVD disc.
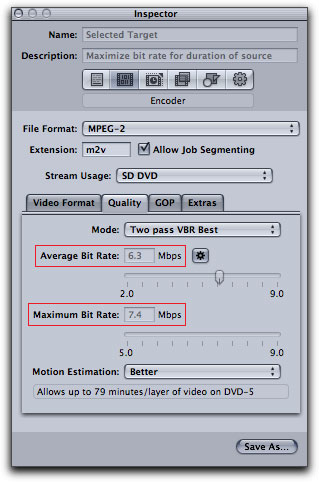
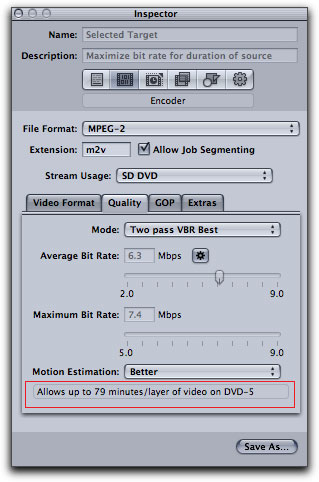
I am now going back to the Job and change the 16 minute source video to a new video that is 1 hour and 32 minutes in duration. Selecting the MPEG 2 target in the new Job and looking in the Encode tab of the Inspector, below left, I can now see that Compressor has indeed changed the Average and Maximum bit rates to reflect the longer source video. The Average bit rate is now 6.3 and the Maximum is 7.4. If you want to have manual control of the encode settings, click on the small gear icon, red arrow below center. When the gear icon has been selected, the Inspector leaves the Auto Detect mode, as demonstrated by the fact that the Average and Maximum bit rates are no long grayed out and we can now make changes to these settings. I always leave the Mode setting at 'Two Pass VBR Best', but I change the Motion Estimate from 'Better to 'Best'.
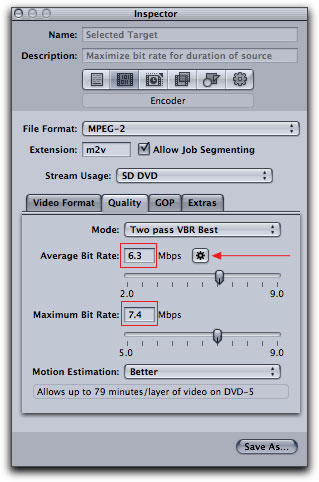

When clicking on the gear icon, to switch between manual and Auto Detect, the gear icon changes its look, but only slightly. The Auto Detect version, below left, has gray shading around the gear. In manual mode, below right, the area around the gear is white. Can you see the difference? It's probably easier to look at the bit rates, if they are grayed out then you are in Auto Detect mode, if the bit rates are not grayed out, then you are in manual mode.


I have been testing the Auto Detect ability of Compressor for SD DVDs. I used several different videos of varying lengths and check the bit rate settings that Compressor assigns, then used my Bit Budget to check the Compressor settings. The settings do appear to be correct.
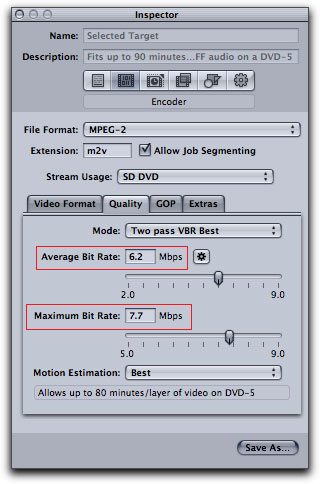
I wanted to test the Auto Detect function when using 'Send to Compressor' from FCP. As I mentioned earlier, FCP will send the video to Compressor and place the video into a new Job. However, the Batch Template window does not open using this method, so it is necessary to drag an encoded Preset (target) into the Job in the Batch window. I sent a short 16 minute video from FCP to Compressor and then applied the 'DVD Best Quality 90 minutes' Preset. As shown below left, the Average and Maximum bit rates reflect the 'Best Quality 90 minutes' Preset I picked, Average 6.2 and Maximum 7.7. We can tell that Auto Detect is not engaged as the bit rates are not gray out and we can change them if needed. I then clicked on the gear icon, red arrow below right. This engages the Auto Detect function and Compressor looks at the duration of the video and the amount of space available on a DVD-R (5) and sets the Average and Maximum bit rates. You can tell that Compressor is in Auto Detect mode as the bit rates are grayed out. As my video is very short, 16 minutes, Compressor has increased the bit rate settings accordingly which are now at 7.7 and 9.0.
There is one item in the Inspector that does not seem to work properly. With the MPEG2 target selected in the Job and with the Encode and the Quality tabs selected in the Inspector, at the very bottom of the window is the, 'Allows up to xxx minutes/layers of video on DVD-5'. As shown below, the Inspector shows that for this movie, I can get up to 79 minutes, however my movie is 92 minutes, yet Compressor assigned the bit rates and my Bit Budget confirms that they are correct. If you check the Summary tab in the Inspector, it states two different time amounts, depending on whether AC3 or AIFF audio is used. I remember from past versions of Compressor that this 'Allows up to' never seemed to display correction durations so I would tell you that I shall simply continue to ignore this settings, you might want to do the same.
Final Cut Pro's backdoor to Compressor
We can use the 'Send to Compressor' command from the File menu in FCP, to move video to Compressor. This places the video into a new Job, but we must work with the Compressor Presets, as there is no Batch Template option available. We can manually enter our settings, or by clicking on the gear icon in the Inspector, we can let Compressor, in Auto Detect mode, do the settings for us.
If we launch Compressor, we do get the Batch Template window, but we need to bring our video into Compressor by using the 'Open' command from the Compressor File menu. The problem with this is that the video that we bring into Compressor must be a QuickTime movie, we can not select a FCP Project.
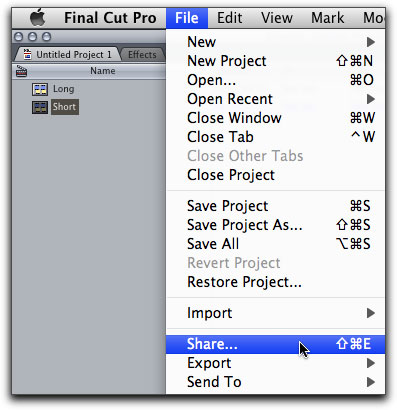
But there is a way to have the best of both worlds from right inside FCP. We have access to the Batch Templates along with the appropriate Job Actions (publish and deliver our project) and the ability to either export out from FCP or to 'Send to Compressor' with a Template and Job Action attached. To do this, select a sequence in the Browser or select clips or set In and Out points in the timeline and then from the File menu > Share.
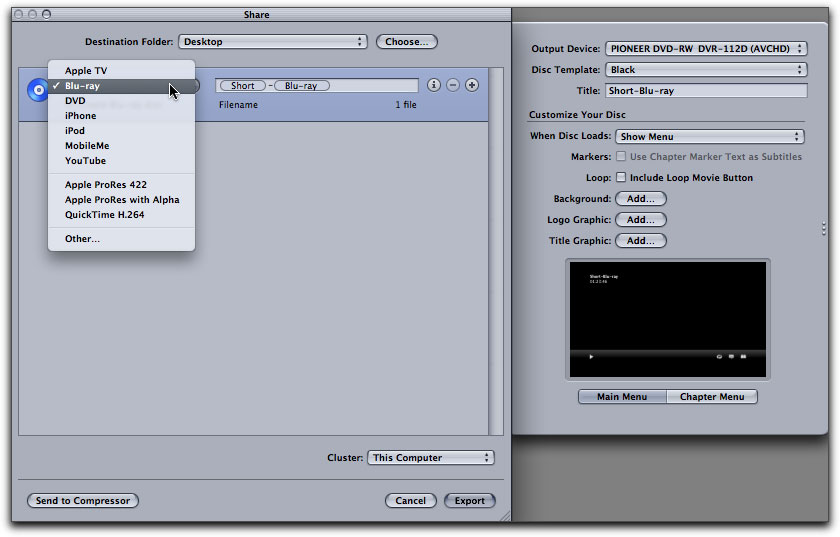
The Share window opens. There is a template drop-down menu from which you can choose the type of encode process that you want. At the top of the menu are the same seven templates we see in the Batch Template browser in Compressor. In addition, there are other options that we can choose, such as ProRes 422.
Selecting 'Other' from the list opens the Compressor Preset window and makes all of the Compressor Presets available.
With each of the Templates is a specific Job Action which we can utilize or not, depending on our requirements. Just below the menu drop-down is the Job Action box, place a check in the box to engage the Job Action, in this case, "Publish to YouTube'.
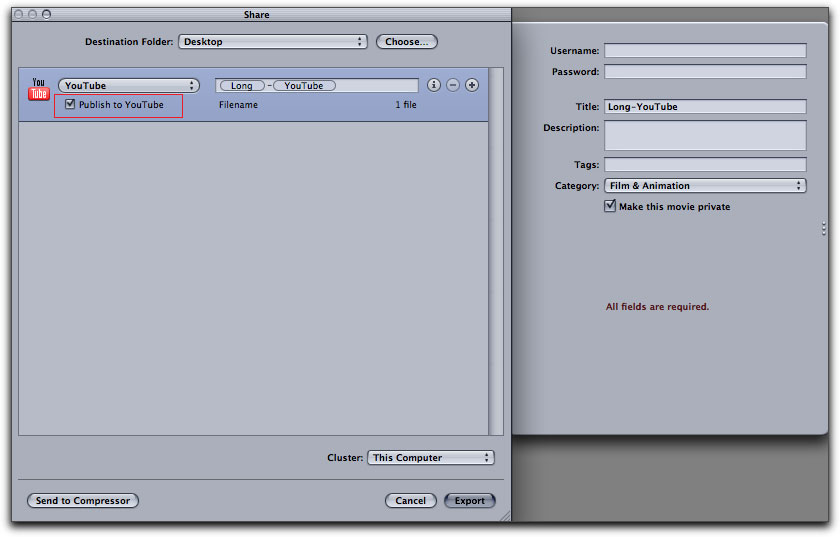
There are two options at the bottom of the Share box; 'Send to Compressor' and 'Export'. If you want Share to perform the tasks for you, i.e. publish to the internet or burn a disc, click on Export. If you need to take the video into Compressor for further work, click on the 'Send to Compressor'. Share in FCP is like a mini application, and as this is a Compressor article, Share in FCP 7 will be covered later in its own article.

Last Thoughts
I know that this sounds strange, but I have always liked Compressor and it has always worked well for me. Aside from being able to encode for DVDs and transcode codecs, which I do often, I have found that when it comes to converting frame sizes or frame rates, that Compressor with it's 'Optical Flow' technology does an amazing Job.
The Compressor 3.5 upgrade adds a lot of facility to the program, features that make our work simpler and faster. Batch Templates make common tasks easy and Job Actions go a step further, by distributing or publishing our work for us and all in one shot. Additionally, we now have the ability to author and burn Blu-ray discs, both red laser AVCHD and blue laser Blu-ray (BD H.264) discs. Three new codecs have entered the ProRes 422 family; ProRes 422 Proxy, ProRes 422 LT and ProRes with Alpha 4444.
There is one issue that concerns me. Higher maximum bit rate settings really help when encoding difficult parts of our video, like transitions or rapid motion. In the past, because many DVD players have problems playing back higher bit rates, and because we can add elements like subtitle streams that increase the over all bit rate (you are playing back audio, video and subtitles all at the same time) we have used a maximum bit rate of around 8.0. What concerns me, is that, when encoding for SD DVDs, using the 'Auto Detect' feature, and if the video is short, Compressor sets the maximum bit rate at 9.0. Because the DVDs that are created are very simplistic, consisting of one main menu, chapter menu and only one audio and video track, with no chance to add additional streams, Apple has pushed both the average and maximum bit rates up. Personally, I think that a maximum bit rate of 9.0 might be too high and could create problems for some during playback. Be sure to test your DVDs and if you get reports of playback problems, you'll need to lower the bit rate settings.
Considering that Compressor is such an essential tool, it's great that it has acquired significant new abilities and got easier to use, both at the same time.
Enjoy,
--ken
[Top]
copyright © www.kenstone.net 2009
are either registered trademarks or trademarks of Apple. Other company and product names may be trademarks of their respective owners.
All screen captures, images, and textual references are the property and trademark of their creators/owners/publishers.