May 26, 2008
Updated 1-3-2011
By Ken Stone
For quite sometime now, people have been posting to the Discussion boards regarding problems attempting to produce good quality standard definition DVDs when working with HDV video. HDV video does not encode well to MPEG 2. There are two ways that we can work with HDV video and get high quality standard definition DVDs. Both processes involve transcoding from HDV to Apple ProRes 422. The first process happens during capture. The second process can be used if you have already captured HDV video into FCP.
Capturing HDV Into ProRes Via FireWire.
In FCP 6.0.2 we can Import HDV footage as Apple ProRes 422 via FireWire. It is necessary to go into Audio/Video settings and build a proper Preset. While we can make the necessary changes in the Audio/Video settings, for some reason, there are no HDV to Apple ProRes 422 Easy Setups to do this in FCP.
Up until now at least ... Andrew Balis, at Moviola, has built a set of 12 Easy Setups for the different flavors of HDV and for different cameras. For the link to these Easy Setups and an accompanying article by Andrew please look to the end of this article.
Export HDV video from the timeline as ProRes 422.
So now we can import HDV as ProRes 422 via FireWire and continue working to completion in the ProRes codec. But what if you already have HDV clips in FCP and your goal is to produce a standard definition DVD. As many have experienced, when you encode HDV video to MPEG 2, the results can be very disappointing. You could select your clips in the Browser and then Batch export to ProRes 422, but this is a cumbersome process and if you have already edited your HDV clips into the timeline, you'll have to redo your work. However, there is an easier workflow enabling you to convert your HDV timeline clips to ProRes 422 for MPEG 2 encoding which will produce the quality DVDs that you would expect.
I will be working with HDV video shot by Steve Douglas on his last trip to Kenya. He shot with the Sony A1-U, 1080i 60, 1440 x 1080.
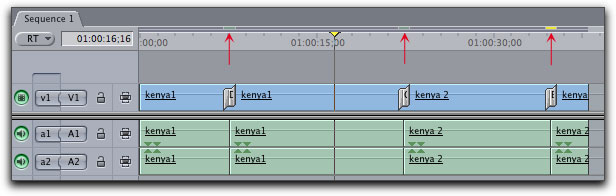
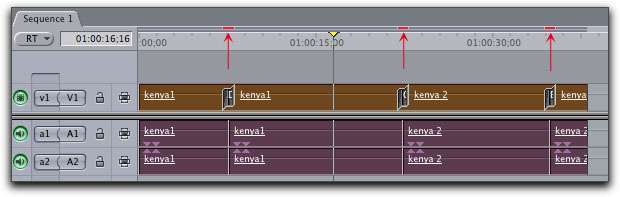
I have placed four HDV clips in the timeline and added three Dissolve transitions. Note the colored 'RT' render bars over the transitions, below.
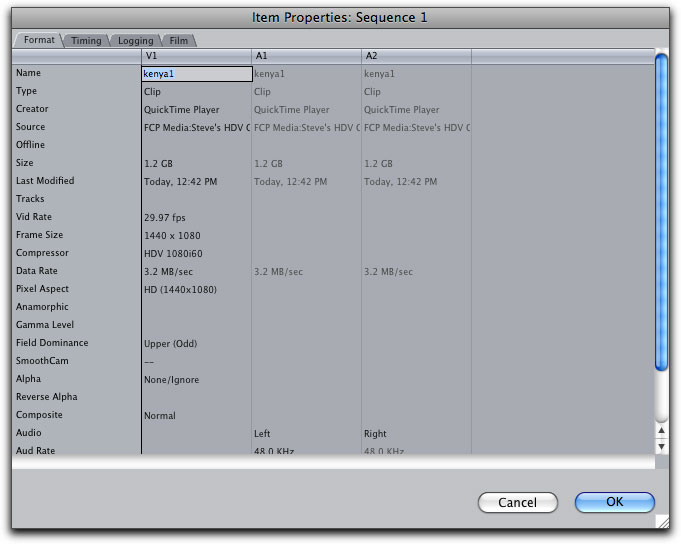
If you check Item Properties on the clips in the timeline, you will see that they are HDV.
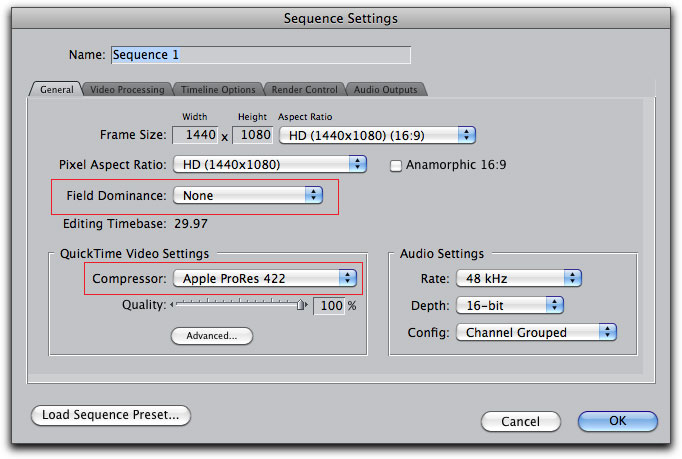
When you have finished editing and are ready to MPEG2 your HDV video, do this. Open the FCP Sequence Settings window and set the 'Field Dominance' to None. Then set the Compressor type to ProRes.
Now, select all the clips on the timeline.
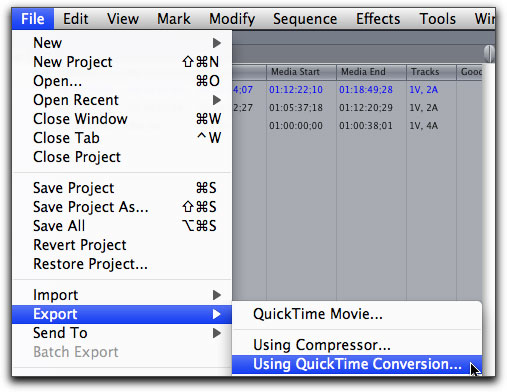
With the clips selected go to the File Menu > Export > QuickTime Conversion.
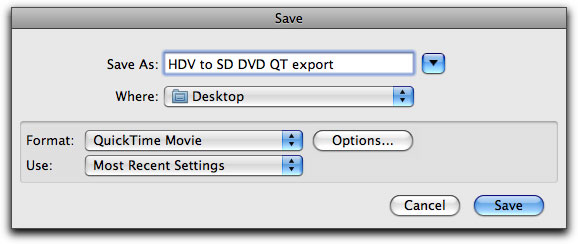
In the Save box, name your export, leave format as QuickTime Movie and Use: Most Recent Settings, click on the Option button.
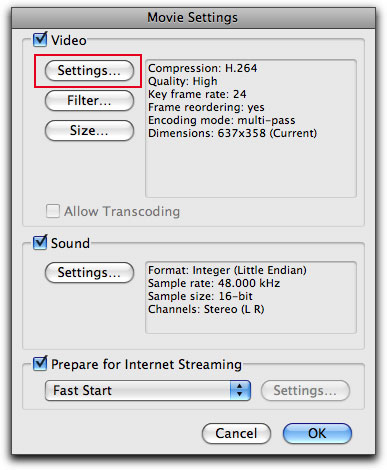
This will open the Movie Settings box, click on the Settings button.
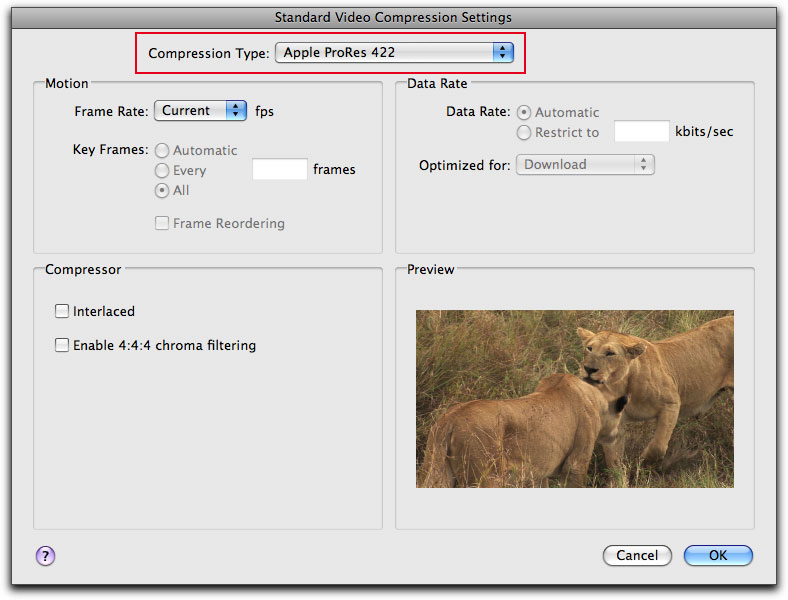
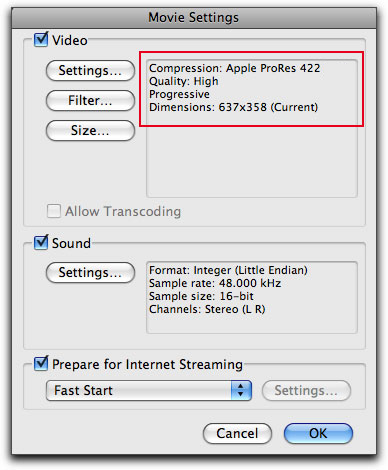
In the 'Compression Type' drop-down select Apple ProRes 422, Sometimes called ProRes 422 SQ (standard quality) In the Motion section, leave Frame Rate as Current. Note that all other settings are grayed out. Click Okay.
This will return you to the Movie Settings box where you can see the Apple ProRes 422 (SQ) settings. Some of the other settings may look strange, leave them as they are.
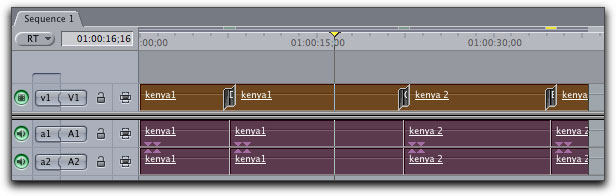
During this process you will notice that the colored render bars over the transitions in the timeline have turned to red indicating that they will be fully rendered/encoded in the Apple ProRes 422 codec for the QT export.
When the export has completed you will have the exported file on the desktop. If you have worked with HDV before, you'll know that rendering in the HDV codec first requires a lengthy 'conform' process. When we export QT in the Apple ProRes 422 codec, there is no 'conform' process to go through. Note that while the exported QT file is ProRes 422, the video on the timeline will remain HDV video and is not changed by the export process.

On to Compressor
Launch Compressor and drag the QT ProRes 422 export into the Batch window.
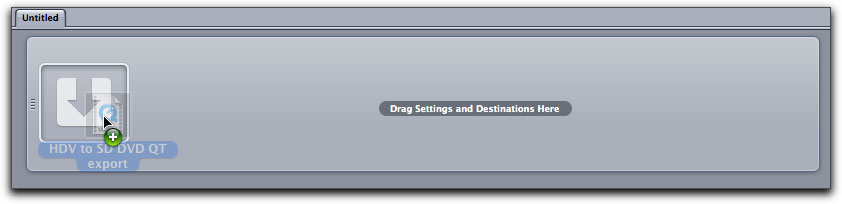
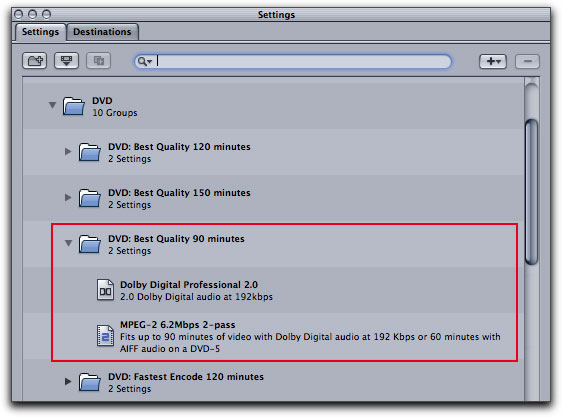
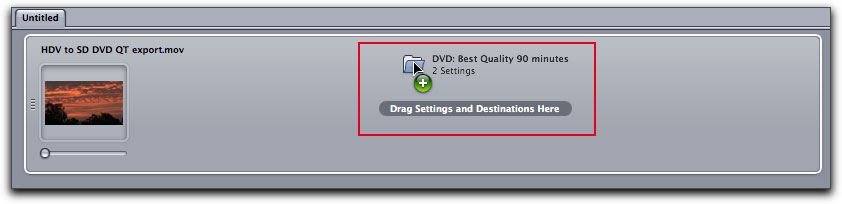
Then select the appropriate SD DVD Preset, in this case, DVD: Best Quality 90 minutes.
And drag into the Batch window.
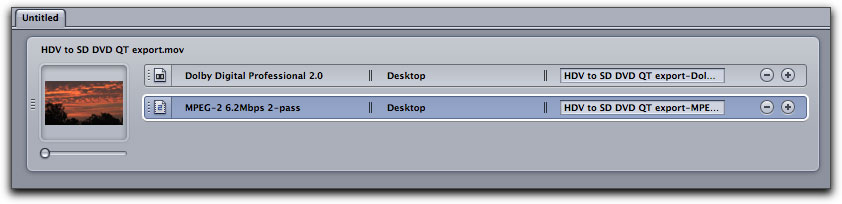
Select the MPEG 2 setting in the Batch window.
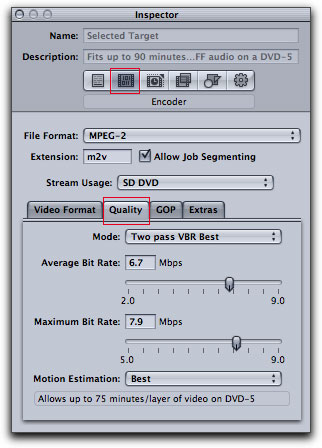
In the Inspector window, select the Encoder pane > Quality tab. You can adjust your Bit Rate settings, Mode and Motion Estimation.
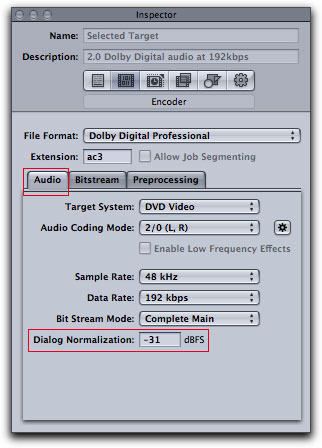
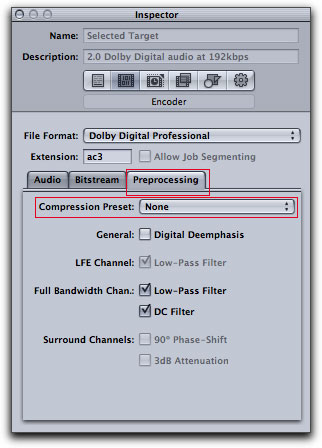
Next, select the 'Dolby Digital Professional 2.0' setting in the Batch window. In the Inspector, select the Audio tab and set 'Dialog Normalization' to -12 to match your FCP audio -12 peak, or set to -31, which turns Normalization off, probably the better choice. Still in the Inspector, select the Preprocessing tab and set 'Compression Preset' to None.
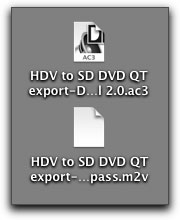
Go ahead and hit 'Submit' in the Batch window. When the encode process is done, you'll have two files, MPEG2 and Dolby AC3, ready for DVD SP.
You are now ready to move these two files into DVD Studio Pro. When working in DVD SP remember that you are working with standard definition DVD.
As promised, here is the link to the FCP HDV Easy Setups, Capturing HDV Into ProRes Via FireWire. Special thanks to Andrew Balis and Moviola for creating these HDV Easy Setups for us.
Enjoy,
--ken
[Top]
copyright © www.kenstone.net 2008
are either registered trademarks or trademarks of Apple. Other company and product names may be trademarks of their respective owners.
All screen captures, images, and textual references are the property and trademark of their creators/owners/publishers.