
October 27, 2008
Panasonic's HPX170
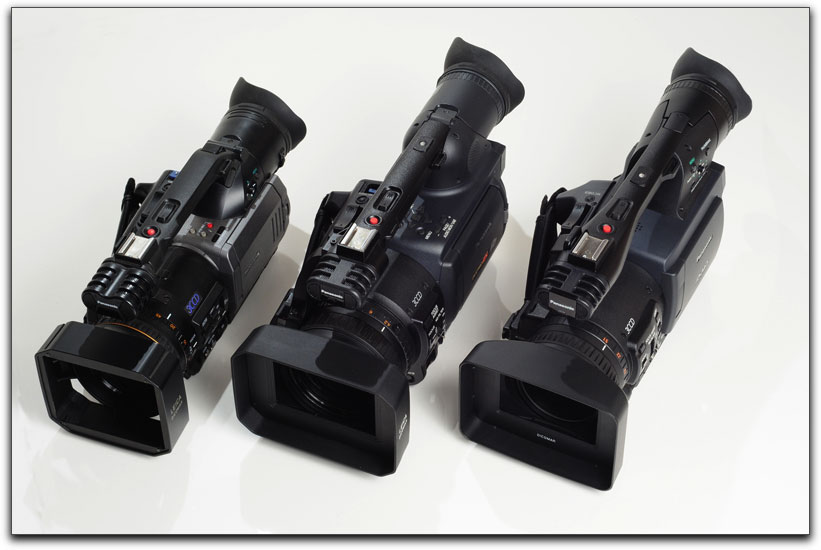
Evolution: A Story In Three Acts
Panasonic's Camcorder Progression To The HPX170
By Dan Brockett
In this article, we will take a look at Panasonic's latest page in the P2 camcorder script, the HPX170. The HPX170 features dozens of changes from its predecessor, the HVX200. Some of the changes are large and noteworthy and others are small and subtle. In order to understand why the HPX170 is such a significant component in the evolution of Panasonic's prosumer camcorder line, it may prove helpful to take a look back at Panasonics most successful camcorders from the past few years. One component that makes the Panasonic prosumer camcorders fairly unique is how the company seems to listen to and implement user requests more closely and some would say more responsively than any of its competitors. Other manufacturers seem to go through the more traditional method of engineering test units of prospective new models, obtaining user feedback through focus groups and a small group of selected users, then tweaking the results but essentially putting out cameras that they want to fit specific marketing strata with the features that they want rather than including features that the users have requested. Panasonic seems unique in this aspect in that their camcorders have notably implemented their most innovative features almost exactly as users have requested them. This approach has been quite successful for Panasonic and for their customers.
This working collaboration between end user and manufacturer began with the development of the AG-DVX100.
Act I - The AG-DVX100
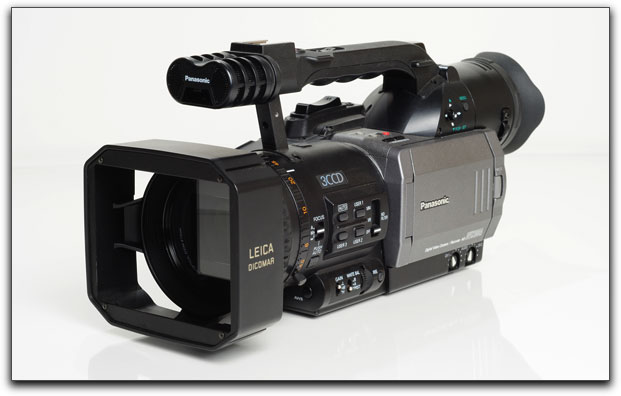
On October 10, 2002, Panasonic introduced the AG-DVX100 to the U.S. market. What made the DVX100 such a significant product was that it was the first low-cost professional camcorder capable of shooting 24-frame progressive footage. It was also the first low cost camcorder with a CineGamma function that extended the camera's dynamic range to create pictures with the characteristics of film. In 2001, users had been requesting an affordable, true 24P camcorder for quite some time but Sony, Canon and JVC had not deemed the feature important enough to implement in their lineups. The development of this innovation was a direct result of user feedback and requests from on-line discussion boards and tradeshow attendees. The DVX100 was a rousing success and utterly redefined the under U.S. $5,000.00 camcorder market and catapulted Panasonic to the forefront of the prosumer and professional camera market.
With the introduction of the DVX100, Panasonic took a significant step toward bringing unique features that indie filmmakers and eventually many more users were requesting. The AG-DVX100 was so successful that it was updated twice, adding and refining more features as the DVX100A, then even more advanced user requested features were included on the DVX100B. As of the date of this article, the AG-DVX100B is still included in Panasonic's current product lineup even though the original DVX100 was introduced six years ago. Six years of product line life for a prosumer camcorder is almost unheard of. In my opinion, the way that some new companies are evolving their products lines, RED comes to mind, are at least somewhat in debt to Panasonic for developing this new (for the electronics market) method of bringing products to their customers.
For me personally, another significant fact was that with the introduction of the DVX100, Panasonic introduced a small, inexpensive camcorder that implemented fairly decent audio quality. I wrote an article for this website in 2002 DV Camcorder Audio that detailed the sound quality of the then current crop of small prosumer camcorders. Written just before the DVX100 went on sale, I observed that all of the comparable models available at that time were burdened with uniformly terrible audio quality. Thankfully, the DVX100 turned out to feature significantly better audio quality than any of the other comparable camcorders of that era. This factor alone led me to purchase my own DVX100A because I had been very unsatisfied with the audio quality I was hearing on my Sony and Canon prosumer camcorders of that era.
I purchased a DVX100A when the model was introduced and used it to shoot many successful projects. I was always blown away by the picture and sound quality of the DVX and it remains one of the best camcorders I have ever owned. I still use the DVX today to occasionally shoot web and corporate SD projects because I love the look of the footage and I enjoy how easy the DVX makes handheld shooting because of its small size and weight. I thought that the DVX100A was perfect but as time wore on, I began to wish that an HD version was available. In the meantime, as the productions I was working on migrated to HD, I was resigned to shoot most of 2005 with the Sony HVR-Z1U; an HDV camcorder that was lacking in several areas, although overall, it was and still is capable of shooting very nice interlaced HD footage.
Act II - The AG-HVX200
The Panasonic HVX200 was effectively a bombshell dropped on the industry when it was introduced in late 2005. The HVX200 was the first viable, low cost HD camcorder that used solid-state P2 media. The HVX200 was the first low cost camcorder that implemented Panasonic's DVCProHD codec. Before the HVX was introduced, the only camcorders that utilized the codec were high-end broadcast units like Panasonic U.S. $65,000.00 AJ-HDC27H Varicam (Panasonic recently reduced the price by $20,000.00 to $45,000.00). The HVX200 was also notable that it was the first solid-state media camcorder that could shoot variable frame rates. The HVX's much more expensive sibling, the VariCam does run at exactly 23.976 fps, adding 2:3 pulldown to create a 59.94 data stream
on tape or firewire. The method used in the HVX is the same as the VariCam, since the technology was inherited from the VariCam (and Cinelike-D is inherited from the VariCam's famous Film Rec
technology). The HVX also added the ability to do pN (native frame
rate) recording, thus doing away with pulldown. To say that the HVX200 was groundbreaking would be an understatement; the features that the HVX introduced were unprecedented at the time in a small, low cost camcorder. The HVX made a splash in the market and was subsequently a huge success for Panasonic.
One of the advanced design features of the HVX200 was that it was specifically conceived to appeal to DVX100 users making the transition to HD. The HVX200 was, in essence, a Hi-Def version of the DVX100. It featured a Mini DV tape transport so that the user could still deliver an SD Mini DV tape to clients who had not yet moved to HD. It also gave the user the unique capability of shooting HD to P2 cards, while still being able to later dub the HD material to SD Mini DV tape, including down converting variable frame rate footage in-camera. The menus and user interface for the HVX were fairly similar to the DVX100 so that users transitioning between the two cameras had a fairly short learning curve.
Based upon my extensive experience shooting with the HVX, these are what I would consider to be some of the best features of the camera:
The Look
In the 1990s, I shot quite a bit of 16mm and Super 16mm film. In my mind, the HVX200, with proper lighting, composition and camera movement is quite like a digital version of a Super 16 camera. While the resolution of film is much higher than HD, the overall look and feel that I obtain shooting HVX200 footage is very similar to the look and feel of Super 16 when transferred to video. The color, latitude and even grain in the HVX picture remind me a lot of shooting 200 ASA Super 16mm film.
Cine Gamma/Cine-Like Matrix Technology
In comparison to other prosumer cameras, many feel that the HVX200 is consistently capable of producing some of the most attractive looking footage out of any of its competitors. This is a direct result of Panasonic's Cine Gamma and Cine-Like Matrix technology and how the camera processes color, lights and darks.
The gamma curves control how brightness information is distributed in the picture. The HVX200 has eight different gamma presets, HD Norm, SD Norm, News, High, Low, B-Press, Cinelike-D and Cinelike-V.
Of particular interest to users trying to obtain a true film look, when using Cinelike-D (D is for Dynamic Range), the overall contrast is flattened and latitude is stretched, the lights and mid-tones are suppressed and more headroom is provided. CineLike-D can provide the most latitude that the camera is capable of. Cinelike-D gives you the most room to manipulate your image in post, but the images on television will be flatter because of the widened contrast.
Cinelike-V (V is for Video) is optimized for sharper contrast, resulting in more punch in the contrast, which will look better on television but will not give you as much latitude for a film out.
Cine-Like Matrix is one of four Matrix settings in the HVX200. Using the Cine-Like Matrix results in color palette that is strongly saturated. The idea behind the setting is to produce richer, more film-like colors.
P2 Media/DVCProHD Codec
If you have only used a tape-based workflow, you will find the solid-state workflow used with the HVX to be a revelation. Yes, P2 cards seem expensive, but I feel that the advantages far out weigh the negatives. If you shoot a lot, P2 cards actually are not more expensive than tape since they are reused over and over. It is also refreshing to have the camera begin recording with no pre-roll, no waiting for the tape transport to get up to speed. When you hit the record button on the HVX, you are recording instantly, pre-roll is a thing of the past.
The PreRec Mode function is amazing. If you are trying to shoot the beginning of a speech or a race or some event that you are not absolutely sure when the event will begin, the PreRec Mode function records up to three seconds of HD footage in a buffer before you even hit the record button, ensuring that you can record for up to seven seconds of SD footage or three seconds of HD footage before you tell the camera to begin recording. It is, in effect, a time machine.
The DVCProHD codec is also a marvel of efficiency. The DVCProHD bandwidth requirement and overhead on your computer is very small, it is easy to work with and looks excellent. I regularly shoot and edit with the DVCProHD codec. It looks quite good for almost all material. The only time I feel the need to move to the Pro Res 422 codec is for projects with heavy graphics and compositing or projects that will be viewed on large screen projection. For normal production, I find the DVCProHD codec to be totally acceptable. So do other broadcast outlets like Discovery HD. They
have certified DVCProHD for unlimited acquisition, editing and delivery, making DVCProHD a contemporary of HDCAM, not of lower-end, more compressed codecs like HDV.
Ergonomics
I find the overall ergonomics of the HVX to be pretty easy to deal with, once you get used to them. The HVX200 is a fat, short length design that works well when it is braced against your body or arms. The HVX is pretty easy to hold reasonably steady if you stuff it into your torso. It is not easy to handhold away from your body or up to your eye as you would a small consumer camcorder. As far as menus, navigation and controls, once again, coming from a DVX100, the HVX is quite easy to get used to. If you are coming from another brand of camera, it is still reasonably easy to learn to navigate and shoot with. The HVX200 offers just enough adjustment and menu items to give you good control over the camera and your images, it does not offer nearly as many parameters and adjustment as a professional broadcast camcorder does.
Variable Frame Rates
The more that I shoot with the HVX, the more I find myself utilizing variable frame rates. The slow motion that the HVX records is superb, the motion truly looks as good as Super 16mm film to me, especially at 48fps and 60fps. I also shoot quite a bit of time-lapse and very low frame rates. One of my favorite looks is shooting the HVX at 2 fps with a 350-degree shutter. The result is time-lapse footage with a smeary, blurred look on all objects in motion with a clear and crisp look on all of the stationary objects in the same frame. My only wish is that Panasonic would have implemented variable frame rate speed ramping; allowing in-camera speed ramps like the Varicam is capable of. Perhaps someday?
Versatility
The HVX200 is a unique camera especially in the area of versatility. There has never been a camcorder that can shoot MiniDV in standard definition, DVCPro50 in standard definition and an entire range of hi-def sizes and frame rates as well. The HVX200 is also the only camcorder ever made that can shoot in Hi-Def and then down convert the footage in-camera to NTSC/PAL and dub the footage to MiniDV tape. The HVX200 makes almost all other cameras a significant compromise in the area of versatility when compared. If you are indecisive about which format to shoot, the HVX is the ideal solution because it basically shoots almost all of them.
Weaknesses
After heaping so much praise upon the HVX, I also feel it appropriate to also share some of its shortcomings. I began shooting with the HVX200 in March, 2006 and I have since then used it to shoot many different kinds of projects. Documentaries, interviews, EPK, behind-the-scenes, tabletop, commercials, broadcast, sports, single frame animation and just about every other type of shooting situation that you can think of. In late 2006, I wrote an article for this website, detailing my experience in using the HVX200 to shoot a multi-camera comedy television pilot for Fox How To Shoot a Network TV Pilot. During my time using the HVX200, I have finally been able to deduce where the HVX falls short, although to be honest, all camcorders have compromises, especially at the under U.S. $10,000.00 price point. These are some of the shortcomings that I have discovered while using the HVX that are sometimes annoying or a hindrance to my workflow or productivity.
Camera Speed, Noisy Darks, Softness
One of the main complaints about the HVX200 is that it is fairly slow, especially when paired with 35mm adapters that lose even more light. Most users rate the HVX200 at around ASA 320, which is not really that slow, unless you are coming from a camcorder like many of the standard definition DVX100,
PD-170 type camcorders that are rated in the area of ASA 500 to 640, depending on the model. HD camcorders that use 1/3" CCDs are squeezing many more pixels onto a small chip, so each of the pixel sites are smaller, hence less light gathering ability. The HVX is faster than the Sony Z1U that I was using before it, but it is not nearly as fast as the DVX100 I was shooting with before the Z1U.
Another common complaint about the HVX is that it has noisy darks. This is highly subjective, but many users felt that the HVX could have done better in suppressing noise in the dark areas of the picture. Personally I feel that the HVX does have a grittier, organic feel to the image and the perceived noise doesn't bother me, but many users feel differently. Some have gone as far as implementing software noise reduction programs to "clean up" the footage. While running all of your footage through a noise reduction plug-in is time consuming, I have seen some noticeable improvements in footage from those with the patience to use this workflow.
Some users feel that the HVX200 also has a distinct softness to the image that some of its competitors do not have. This is also very subjective. I have shot some footage that looked soft where the focus was slightly off, which is easy to do with the HVX's inadequate LCD. I have also shot plenty of footage with the HVX that I feel looks extremely sharp. Some feel that the default detail settings on the HVX are extremely low, resulting in a less than sharp image. Others feel that because the HVX200 uses 960X540 CCD imagers, paired with pixel-shift technology to obtain it's 720p and 1080i picture, that the picture is not as sharp as it could be. I personally find the picture quality of the HVX very appealing but it is not as sharp as some other competitors, particularly the Sony PMW EX1. The EX1 uses native 1920X1080 half-inch CMOS imagers so it makes sense that the picture appears sharper. In my opinion, the only time I have noticed a sharpness issue is when HVX footage is blown up to large screen theatrical projection. On consumer sets and smaller projection setups, I have never considered the HVX200 footage too soft.
Lens
While the Leica-branded lens on the HVX is not a bad lens, I feel that it is somewhat hindered by it's infinitely spinning focus ring and overall, its perceived lack of sharpness and lack of professional
feedback and feel. I should clarify though that even though the HVX200 and the HPX170 do feature an infinitely spinning focus ring, it is possible to do repeatable focus moves with precision due to the
fact that the LCD and viewfinder focus displays on distance are accurate and repeatable. This ability does make the focus ring superior to many of the other cameras in the HVX's price class. The iris control for the lens is situated somewhat farther away from the lens than it should be and is controlled separately by a small wheel on the left-hand side of the HVX body. For most shooters, having the iris control physically on the lens as it is on professional broadcast lenses, is preferable to a separate smaller iris controller located elsewhere. The lens on the HVX200 could be more professional in its implementation.
Analog Component Output Connection
Before I owned the HVX200, I had never heard of a D4 connector. Hopefully, I will never own another camcorder that uses this poorly implemented connector. While it does lock to prevent the analog output cable from being accidentally disconnected from the HVX body, the connection is loose, sloppy and awkwardly located on the right side of the HVX body. If you jiggle the cable on the HVX, the picture will intermittently drop out and come back on. For those of us who rely on analog component picture monitoring, this connector is truly a compromise. The other major compromise with the monitoring on the HVX is that when using the analog component connector, the output from the RCA composite and S-VHS video connection is automatically shut off. If you shoot many interviews, as I do, the footage often need to be sent out for transcription. On the HVX, if you are using the D4 connection to check focus/exposure on an HD monitor and would also like to send the secondary NTSC/PAL signal to an SD monitor or to a DVD or VHS recorder to make a transcription or backup analog copy of your footage, you cannot because each of the HVX's analog video outputs cancels the other out, it is only possible to use one or the other at a time.
Viewing Recorded Clips Shot in Differing Formats
When viewing clips in the HVX's thumbnail mode, if you have several clips recorded in differing formats, you cannot play each clip back without putting the camera back into Cam mode and switching the camera to the shooting mode for each individual clip. This is inconvenient, time-consuming and cumbersome. I typically shoot in 720/24PN mode. When I am shooting time lapse mode, the PN native frame rates are not able to record time lapse so I must switch the camera over to 720/30P or 720 60P modes to shoot time lapse. Then when I would like to review the footage during the shoot, I must toggle the camera back and forth between 720/24PN and 720/30/60P modes to view the regular motion and the time lapse shots. What a bother!
The LCD Screen
The LCD screen on the HVX200 is realistically too low resolution for use in a Hi-Def camcorder. It can be difficult to focus with because it is a standard definition screen being used on a Hi-Def camcorder. The HVX200 does feature a focus enhancement aid, which magnifies the pixels to 1:1 in a center-delineated area of the LCD. The focus enhancement works fine but can be difficult to use quickly with moving subjects. There are various technical reasons why this SD LCD screen was used in the HVX200, one of which is to support standard definition playback. Some competitors like the Sony EX1 do not support standard definition acquisition so they are able to use a higher resolution LCD screen on the EX1, which looks much clearer than the LCD used on the HVX200. For users with 35mm adapters that flip the image, there is no way to have the HVX200 flip the LCD display.
Menu Navigation Button Orientation
Even though one of the design aims of the HVX200 was to emulate the feel of shooting with the DVX100, one area that Panasonic fell short in was the implementation of the menu navigation buttons. The DVX100 had a set of four buttons and a joystick located on the left hand side of the eyepiece of the camera. Most users felt that the location and orientation of the buttons worked well. When the HVX200 was designed, the decision was made to eliminate the mechanical joystick level, replacing it with inset/rubberized directional buttons. The entire menu navigation cluster was moved from the left hand side of the eyepiece to the main body of the camcorder, on the top deck of the HVX200, located underneath the carrying handle. The main problem is that when the orientation of the buttons was re-located to the top deck, the orientation of the "up" button remained the same, even though the axis that the buttons were re-located on was changed. On the DVX100, the up direction of the joystick was intuitive because it was literally pushed up. On the HVX200, the up orientation ended up feeling as if it were to the right from behind the camera, rather than up. The same result was shared with all of the buttons, up became left, left became down, etc. The bottom line was that if you were used to operating a DVX100, the new orientation of the navigation buttons was all off, everything felt backward.
Plastic Headphone Jack
While the build quality in general on the HVX200 was excellent, these are three separate components that were of substandard build quality. The DVX100 had a heavy-duty metal headphone jack. The jack felt as if it could take hundreds of insertions and still would retain a tight, snappy feel without the headphones feel as if they were sagging or were ready to fall out. Not so on the HVX200, which featured a flimsy plastic headphone jack. I found this baffling, a plastic versus metal headphone jack might save about a penny or two during manufacturing but it was definitely a bad choice for a $5,995.00 MSRP camcorder.
Plastic Battery Tabs
Another build quality issue on early HVX200s was that the battery tabs that held the camcorder battery to the body were made of plastic and were too thin. Many users complained of broken battery tabs and Panasonic addressed these users and cameras with a warranty fix and redesigned and supposedly reinforced the battery tabs on later model HVX200s. The redesign apparently worked as I have rarely heard about broken battery tabs on HVX200s in the past year or so. A camcorder like the HVX200 should have metal battery tabs in my opinion but at least they have the issue under control. I spoke to a Panasonic authorized repair center and the technician felt that the problem was more due to the fact that the Panasonic CGD-54 large capacity batteries that most users pair with the HVX200 stick out significantly beyond the back plate of the camcorder. When the camcorder with the battery sticking out is put into a carrying case, if the edge of the battery sticks out too far and pressure is put on the battery, it makes sense that the battery tabs are likely to break. I learned to never transport my HVX200 with battery attached and never experienced the battery tab issue.
Four Pin Firewire Jack
The HVX200 implemented a tiny and fragile four-pin Firewire output jack. I don't fault Panasonic for the rapid failure of many four-pin Firewire jacks, the design of the four-pin Firewire jack itself is defective and fragile but it was a bad choice for a camcorder. I have a $4,500.00 Sony DSR-40 DVCAM deck in my edit bay that uses the same fragile four-pin jack but that is an editing deck where the connection is rarely changed once the deck is setup with an edit system. For a camcorder where the Firewire connection is constantly being plugged in and unplugged for various shoots and P2 card offloading, the fragile four-pin Firewire connector was a terrible choice.
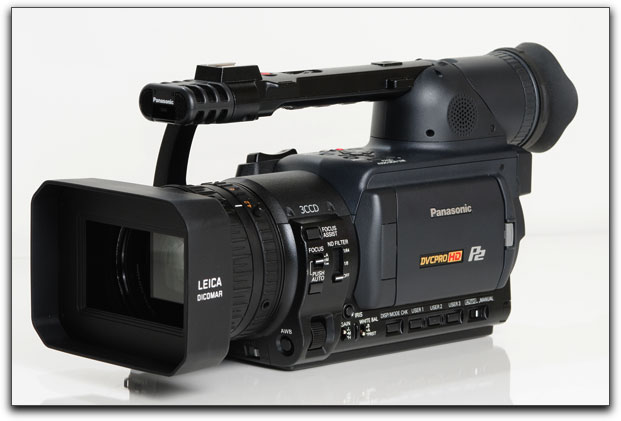
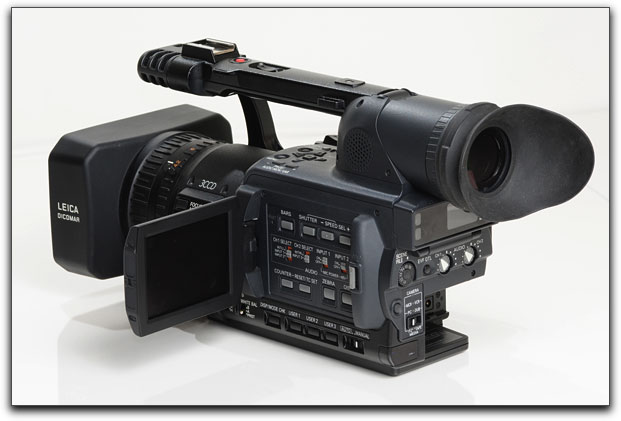
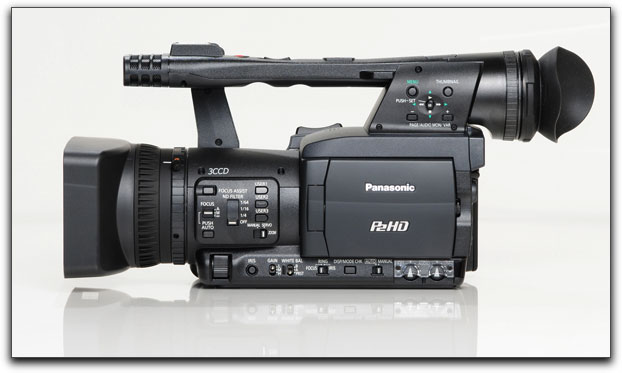
Act III - The AG-HPX170
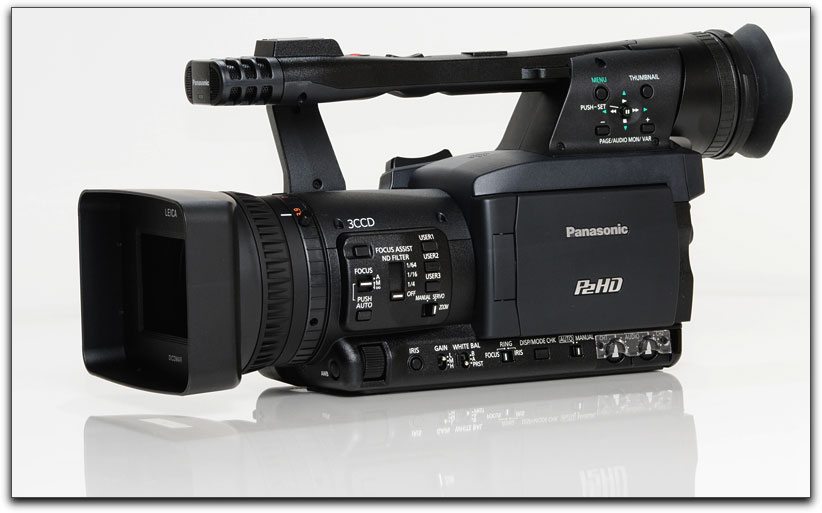
Panasonic introduced the HPX170 at the 2008 National Association of Broadcasters show in Las Vegas on April 13, 2008. The HPX170 seemed to be an ideal evolution of the Panasonic prosumer camera lineage. In this section of the article, we will explore at the HPX170 from end to end. We will explore the improvements that Panasonic implemented from suggestions and feature requests that were taken directly from HVX200 users. We will cover features and differences between the HVX200 and the HPX170 from a user standpoint, noting differences, similarities and even the most minute or small differences between the two. We will also compare picture quality and characteristics to determine if the HPX170 retains the unique image characteristics that have made the HVX200 such a resounding success in the marketplace.
Foreign Market Versions
The HPX170 is Panasonic's model number for North American markets. Other territories sell variations on the model number like the HPX171 in Europe. In other areas, there may be additional model numbers as well. All of these variants are physically the same camera although the version that Panasonic sells as the HPX171 in 50Hz territories is switchable between 50Hz and 59.94Hz operation, while the North American version, the HPX170 is not. There has been discussion that Panasonic USA may implement a program to enable this function in U.S. market cameras for an additional fee but the details on this program are not yet in place as of the writing of this article.
For those of you who are envious that other markets can purchase a dual standard version of the camera, keep in mind that the retail costs in those territories are always significantly higher than in North America and those markets run their own promotions and do not usually receive the free 16GB P2 card or the Barry Green book like we do here in North America. Plus, cameras like the HPX171 will not have a Panasonic USA warranty, if they need service, they must be serviced in their country of purchase/warranty.
Physical Differences
Weight
When lifted, the 4.19lb HPX170 feels positively petite in comparison to the 5.5lb HVX200. This is most noticeable when shooting handheld or when trying to balance the HPX170 with a 35mm adapter rig. There are two schools of thought about weight and camcorders. One schools says that the heavier the camcorder is, the easier it is to steadily handhold. Smaller, lighter camcorders are more difficult to hold steady. I believe this with one caveat, a heavier camcorder is easier to hold steady IF it is shoulder-mounted. My old Sony BVWD600 Betacam weighed around 24lbs with battery and tape and was very easy to hold steady WHILE mounted on the shoulder.
In the case of the HVX200 and the HPX170, the second school of thought says that the 170 is easier to handhold and keep steady than the HVX200 for longer periods of time because most people use HVX/HPX class camcorders held away from the body, not with an optional shoulder mount. Holding less weight away from your body is considerably easier. I still much prefer shooting handheld with my DVX100 over my HVX200 for this reason. I can shoot with the DVX longer and have never had sore wrists with it, whereas I have been exhausted when shooting handheld for long periods with my HVX200. The DVX100 weighs 3.7lbs, a mere half pound lighter than the HPX170. In my book, the significantly lighter weight of the HPX170 is a very good thing for handheld and Steadicam shooters.
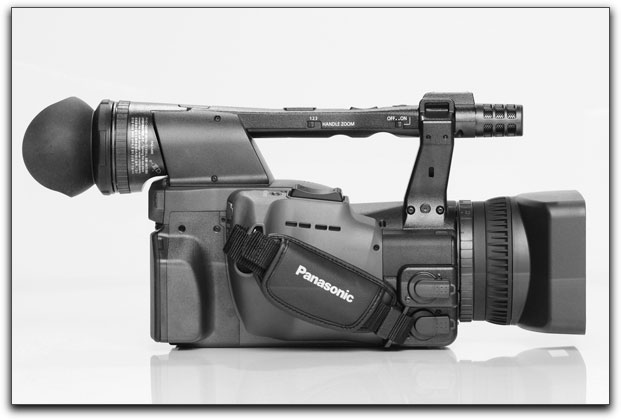
Size
The HPX170 is physically narrower and slightly taller than the HVX200 but it is slightly longer also. The dimensions of the HPX170 are 7 1/8'' high x 6 1/8'' wide x 15 3/4" long. The HVX is 7-1/16" high x 6-5/8" wide x 15-3/8" long. The HPX170, largely because of its weight, simply feels smaller but in reality, it is very close in size.
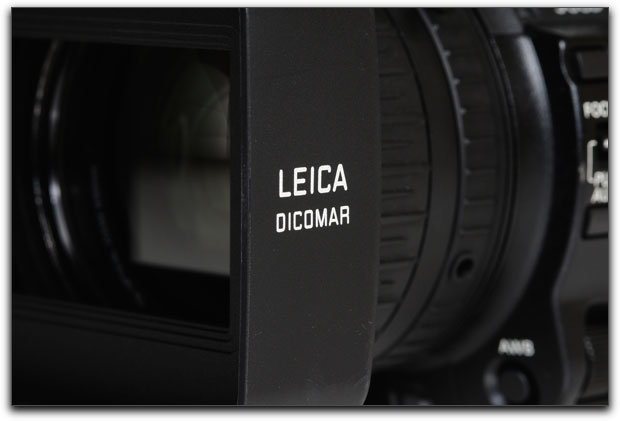
Lens
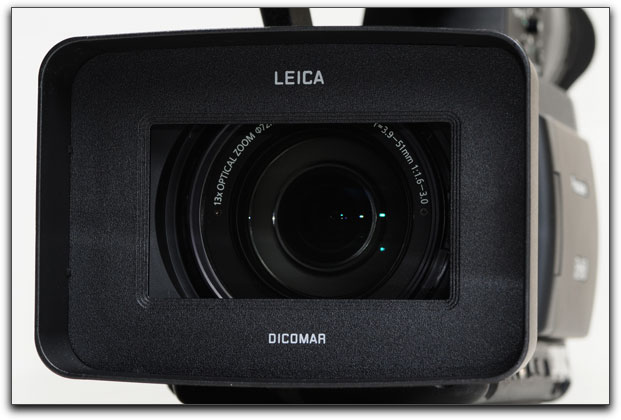
Panasonic classifies the lens on the HPX170 a "Leica Dicomar" lens, just as it did with the HVX200. The lens is undoubtedly built under license from Leica, it is probably not manufactured in Germany at the Leica factory, but it is somehow reassuring to know that Leica probably at least had a hand in the optical design of the lens. The lens diameter on the HVX200 is 82mm. The lens diameter on the HPX170 is 72mm. The focal length of the HVX200 is 4.2 mm to 55 mm. The focal length of the HPX170 lens is slightly wider and shorter on the telephoto end of things, 3.9mm to 51mm.
In 35mm terms, the HPX170 lens is a 28mm equivalent field of view, the widest field of view of any fixed lens HD camcorder. In my experience, a wider-angle lens is almost always more useful for most shooters. In professional work, it seems that we are expected to photograph scenes in tighter, more cramped spaces more often than we are expected to record images of subjects that are farther away from the camera. An add-on telephoto lens can always be added on to the HPX170 if longer reach is desired although I personally have always found that add-on lenses tend to degrade the image.
The lens hood has been changed from the HVX200. The HVX lens hood attaches to the camera's bayonet mount and is secured with a small, manual set screw. The HVX lens hood also is silk screened with the name "Leica Dicomar" on the left hand side. The HPX170 lens hood is affixed to the lens bayonet like the HVX hood is, but there is no set screw to keep the hood affixed to the camera. There is a small notch mechanism that you feel positively click as you mount the hood to the lens on the HPX170. In preliminary shooting, the lens hood on the HPX170 does seem to stay in place. My HPX170 rides around in a Ogio video backpack and does not fit very well into the backpack with the lens hood in place so I must remove the lens hood each time I put the HPX170 back into the backpack. Hopefully the locking notch mechanism will not wear out after repeated cycles of removal and mounting of the hood to the lens.
On the HPX170, moving back from the lens hood, the first item encountered is the new focus ring. The focus ring on the HVX200 is a wide, flat ring with alternate sized raised lines molded into the ring for focusing with gloves or wet, cold fingers. The focus ring on the HPX170 is a throwback to the DVX100, with a more conical design, much like the focus ring was on the DVX.
It seems that the new/old conical design might be tactilely more responsive when you cannot look for the ring and have to locate it by feel only. Asymmetrical surfaces are easier to remember with muscle memory so in my book, the new focus ring is an improvement.
The down side is that the HPX170 still features an infinitely rotating focus ring with no hard stops and no calibration markings on the ring itself. I feel that this design is fine for consumers but in order to make the HPX170 more professional, a better implementation of the lens would be a huge improvement. Most camera operators would prefer a lens with more of a professional design in its interface with a true mechanical linkage with the focus and iris controls rather than "fly-by-wire" electronic linkage that Panasonic uses on the HVX and HPX170. Also, the damping on the focus ring, while okay, is more vague than the lens focus ring on other camcorders like the Sony EX1. In my experience, the lens on the Sony is more of a hybrid between a prosumer and a professional lens. Panasonic would do well to consider upgrading the lens interface for the next iteration of the HPX170. From what I have read, Fujinon was largely responsible for developing the lens on the EX1. Leica, who excels at creating high quality still photography lenses, has less experience in developing and designing video camera lenses. This would be a case where imitation would be a sincere form of flattery, hint, hint Panasonic.
Moving back from the lens focus ring, the next item encountered on the HPX170 is the zoom ring. Basically this feature is unchanged from the HVX, it features a small knurled knob that can be grasped to perform manual zooms. I find the damping on the zoom ring on the HPX170 to be slightly improved over the HVX200, it is lighter and easier to finesse subtle zooms. On occasion, I do like to use manual snap zooms and I find myself obtaining a smoother result with the slightly less resistant ring on the HPX170. The zoom on the HPX170 reminds me more of the smoother zoom control ring on the DVX100.
Servo/Manual Zoom Control
Moving to the front panel of the body on the HVX200, one encounters the servo/manual zoom control switch on the right and the white balance button that alternates between switching the camera between 3200k and 5600k white balance and setting manual white balance and black balance presets. On the HPX170, the white balance button remains in place on the left but the servo/manual zoom control has been relocated to the left operating panel behind and below the ND switch.
I have a mixed impression of the relocation of the control. I always found its original location on the HVX with the control on the lower right of the front deck, far away from any other control to be a bit strange and out of the way. After reaching for it thousands of times over the past few years of shooting on the HVX and the DVX, I find myself going to the same location when shooting with the HPX170 and of course, the control isn't there. I feel that in time though, I will find the new location on the left hand control cluster to be more convenient and logical. Panasonic always has a tough balancing act when changing locations of well-used controls on its prosumer cameras because users of former models get used to the old locations.
Left Hand Upper Control Cluster
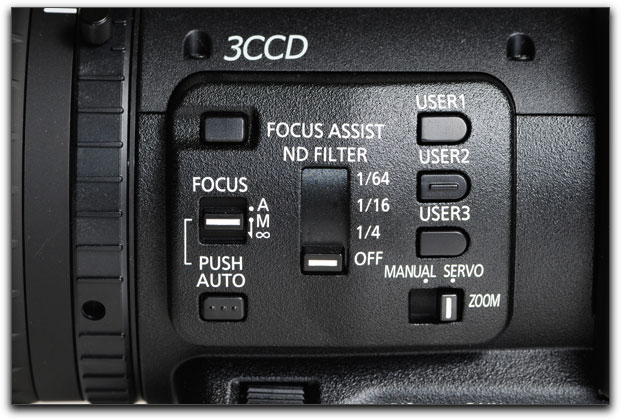
This is an area on the HVX and HPX170 that is littered with oft-used controls like focus, NDs, etc. There have been significant changes made in the layout and function of these controls on the HPX170. The first control is the focus assist. On the HVX200, pushing the focus assist brings up a box in the center of the LCD/viewfinder that is magnifying the image to native 1:1 HD resolution to help focus the image sharply. While the feature works well, it has always been complained about on the HVX because it shuts off after a pre-determined amount of time. If you are actually rotating the focus ring, the focus assist stays on, but if you stop manipulating the focus, it shuts off automatically. When operating handheld, it can be a nuisance to keep turning on the focus assist as you track moving subjects.
The HPX170 retains the same focus assist button, located in the same place but it functions differently in several ways. On the HVX200, the focus assist tool would time out and turn off on its own. On the HPX170, when you push the focus assist button, the magnified window now stays on until you shut it off by pressing the focus assist button again. That is a big improvement over the HVX but it gets better. Not only does the HPX170 feature the magnified center portion of the picture as the HVX200 does, on the HPX170 you have the option to also see two other focusing aids on the screen at the same time, a focus bar that grows in the length as the image comes into focus and a live histogram display that spreads out and shows more waveforms as the image comes into focus. The live histogram focus aid was lifted from the HPX500 and is a welcome addition to the HPX170 while the focus bar is new on this model. The combination of the three tools makes focusing the HPX170 much easier and more accurate than the HVX200.
The HPX170 manual/auto focus switch and auto focus button stay in basically the same location as they were on the HVX, but they too have been expanded in functionality that I will elaborate on in the menu section of this article.
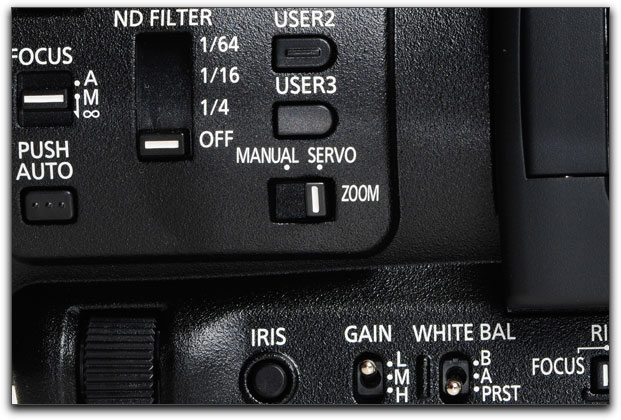
The HPX170 adds an additional switch position on the ND control switch. The HVX200 has settings for off, 1/8ND and 1/64ND. The HPX170 splits the difference between the 1/8 setting by adding a 1/4ND and a 1/16ND and still retains the same 1/64ND as the HVX200. The extra ND position is a nice option for those of us who prefer to fine-tune our exposure more easily with the internal ND filters.
The User buttons on the HPX170 have been relocated to this left hand forward cluster from the underside of the LCD (when folded into the body) where they resided on the HVX200. There have also been additional functional options added to the User buttons that I will explore in greater detail in the menu section of this article.
The last control in this section is the aforementioned servo/manual zoom control switch that was relocated to the lower side panel of the HPX170 from the bottom of the front lens panel on the HVX200.
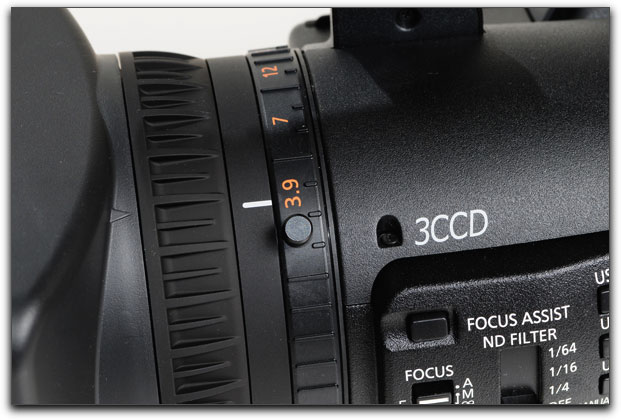
Left Hand Lower Control Cluster
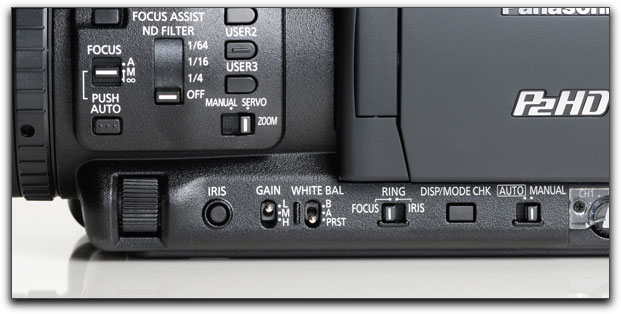
The lower control cluster is still full of controls but things have been shifted around from the HVX200 to the HPX170. Beginning at the front, the iris adjustment knob is still in roughly the same location that it was on the HVX, but on the HPX170, the knob itself seems to have changed in the serrations on the barrel. The HPX170 serrations are larger and coarser than the ones on the HVX200. Moving rearward, the auto/manual iris control button has been moved down in location from the HVX and seems to be slightly larger and less recessed than it was on the HVX.
Next in line come the gain and white balance preset controls, which look to have been largely unchanged from the HVX to the HPX170.
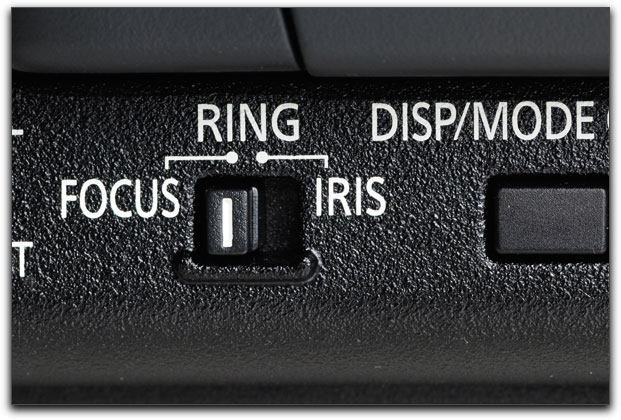
The next switch, moving toward the back of the camcorder is a new manual two-position switch that is very interesting in function. Users of 35mm adapters are required to focus the cameras lens on the ground glass in the 35mm adapter itself. Owners of HVX200s then carefully Gaffer tape the focus ring on the lens so that it is not accidentally shifted in focus while shooting. This new control on the HPX170 lets the operator decide if the cameras focus ring will control focus, or, with the flip of a switch, the cameras iris control. By putting the switch in the iris mode, the cameras focus is locked and never strays from staying in sharp focus on the 35mm adapters ground glass. This also gives the operator a large ring on the lens barrel to adjust iris with, rather than just the small iris control on the left-hand side of the camera. This control was implemented at the request of HVX owners using popular 35mm lens adapters like the Red Rock M2, Cinevate Brevis and the Letus Extreme. This is an excellent feature that works well when shooting with 35mm adapters.
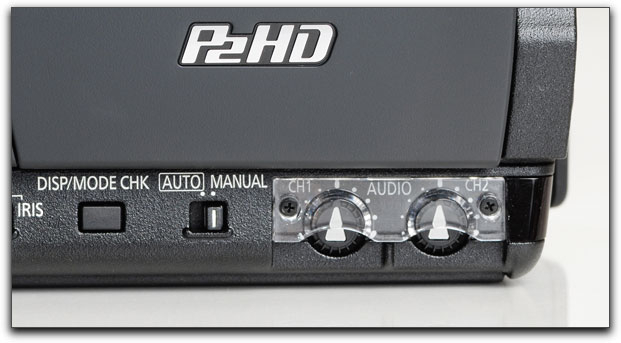
Going down the side of the lower control area, the next two buttons are the display/mode check button which has been reduced in length but increased in width from the older design on the HVX and the auto/manual mode button, also resized and relocated on the HPX170.
The last two controls on this area are the audio level controls. These controls on the HPX170 have migrated from the rear deck on the HVX200, back to their original location on the DVX100. They also sport a clear plastic cover which makes accidentally adjusting them while shooting almost impossible. Yet the controls are still easily settable if you are deliberately trying to adjust them. Personally I find the new/old location for the audio controls much improved from their location on the HVX200 for the simple reason that as I age, my eyes get worse at reading small controls in the dark. The audio controls on the HVX always seem to be in the dark on interiors, whereas the audio controls on the HPX170 seem to always be getting some reflected and or direct light from the lights on the
set, therefore making it easier for me to set audio levels without a flashlight. The audio input knobs also glow in the dark, another nice touch. Simple, but it is the little things that matter as well.
The LCD Screen

Moving up from the lower left control cluster, we encounter the HPX170s LCD screen. The main physical improvement is that on the HVX200, the LCD screens latch required two hands to unlatch it and flip out the LCD screen for usage. Panasonic has re-engineered the latch so that it can now be opened by a single hand, no second hand required. Once the screen has been opened and the camera powered on, I am also struck by how much the perceived sharpness of the LCD has been improved over the HVX200. The detail control on the HPX170 LCD is more enhanced than it was on the HVX200, resulting in a more usable tool. The HPX170 screen is not as clear as the Sony EX1/EX3 LCD screen but it is a significant improvement over the screen on the HVX200. It's the same physical screen but the detail has been tweaked enough to make it more useful for focusing than the LCD was on the HVX200.
Buttons and Controls Under LCD
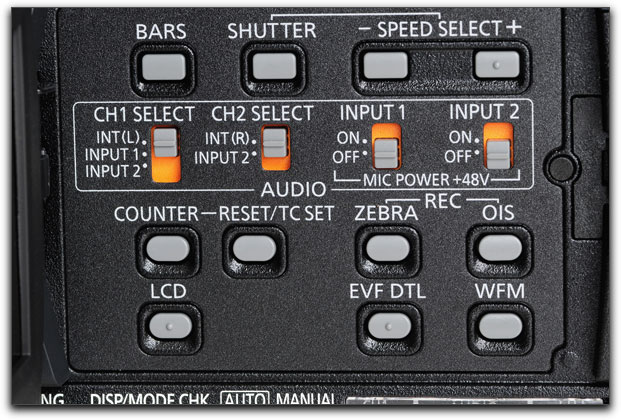
Underneath the HPX170s LCD, the buttons and controls for color bars, shutter, shutter speed, audio input routing, phantom power, zebras, optical image stabilizer, counter, reset/TC set all remain basically the same as they were on the HVX200, although the new buttons are physically smaller and rounder than they were on the HVX. There are three new buttons located under the LCD on the HPX170.
If you have the menu item set to "BL", each press of the LCD button switches backlight brightness in the following order: Normal (standard), Low (dark), High (bright). Depending on the user preset,
the button can also rotate the image for 35mm adapter users and it can alternate the display between overscan and underscan modes.
The second new button is the EVF DTL button. This button has the same functionality as the EVF DTL button had that was located on the rear deck of the HVX200 but as noted above, the amount of detail available has been boosted significantly from the HVX200, thereby making focusing easier and the LCD more useful.
The last new button in the area is the WFM button. The HPX170 is, to my knowledge, the first under $10,000.00 camcorder to include a built-in waveform and vectorscope. The addition of the waveform/vectorscope is a very useful feature that should really be standard on all professional camcorders. Stand-alone HD waveform/vectorscopes sell for tens of thousands of dollars. It is impressive to see both tools implemented here on the HPX170. The first push of the button superimposes a live waveform display on the LCD of the camera, while the electronic viewfinder remains clear so the waveform can be used constantly while using the viewfinder for composition and focusing. The second push of the button replaces the waveform with a superimposed vectorscope on the LCD. The third button push in the sequence clears the screen. A user menu also lets you choose if you want to see only the waveform, only the vectorscope or both in sequence.

Without going into an entirely separate, detailed article, a waveform monitor is used as a visual representation of the video levels in a given signal. It is extremely useful for setting brightness levels in your picture and for picking out spots that are too hot and for checking overall video level balance between the darkest and brightest object in your picture. Conversely, it can also be used to check black levels if you decide to lower the pedestal in the menus of the HPX170. Waveform monitors are used in broadcast to determine that a video signal is legal to broadcast.
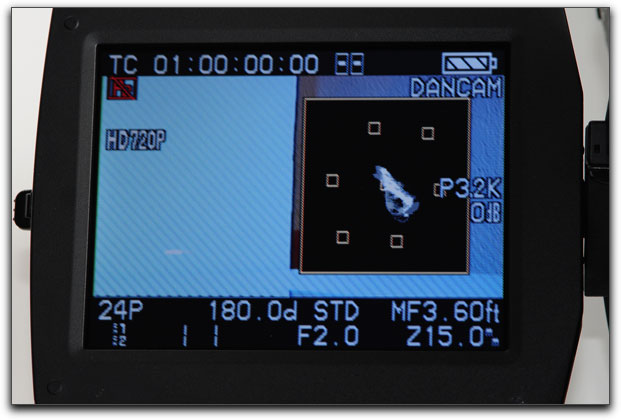
The second function of the button, the vectorscope gives a visual representation to the colors in your picture. If you have ever had training in design, photography or graphic arts, the vectorscope is sort of an electronic representation of a color wheel, mapping the primary color content in the picture into vectors (the small square boxes in the scope each stand for a color). Since the boxes in the vectorscope display are too small to be labeled as they are on a traditional stand alone unit, it will behoove you to memorize which colors each of the boxes signify. Beginning in the upper left position they are, red at 11:00, Magenta at 1:00, Blue at 3:30, Cyan at 5:00, Green at 7:00 and Yellow at 9:30. With some practice and usage, you will find the vectorscope useful for checking white balance and you will learn that most flesh tones, regardless of race, look most accurate when the vectorscope is pointing between yellow and red, with a bias toward red. The vectorscope in Final Cut Pro has a flesh tone line but the HPX170 vectorscope does not, but with some practice using the FCP scope, you can get a bearing for where it would be located on the HPX170 vectorscope.
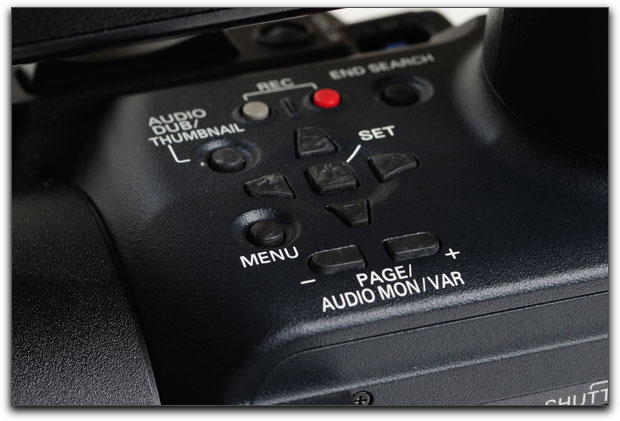
Menu Navigation Buttons/Joystick

Moving upward from the LCD screen itself, we encounter the menu buttons and joystick navigation control. This entire cluster has been relocated from the upper panel where the rubberized buttons used on the HVX200 resided. Panasonic has gone back to a mechanical joystick to navigate through the menus on the HPX170; the same physical control that as used on the DVX100. Overall, I feel that this location and the switch back to a physical joystick from the rubberized buttons on the HVX200 is a positive move. The controls are easier to access and easier to view than they were on the HVX200. The directions that the joystick navigates in are more intuitive than they were on the HVX200. My only hesitation is that I am not sure of the plastic joystick on the HPX170 will be as robust as the rubberized buttons were on the HVX200. Time will tell.
Upper Deck
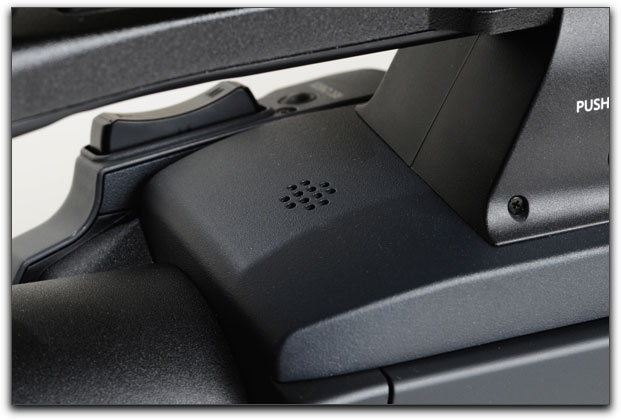
Since the controls on the HVX200s upper deck have been relocated to the left upper side panel on the HPX170, there are no controls here on the HPX170. The only change is that tiny speaker that used to be located on the upper left of the viewfinder area has been moved to the upper deck on the HPX170.
Handle
The handle on the HPX170 is basically the same as the handle was on the HVX200 except the design is slightly larger and more curved. The zoom control, cold shoe, 1/4 20 mounting hole and microphone are basically unchanged from the HVX, although a new feature is a small on/off button has been added that enables or disables the handle record button.
Rear of Camera
The rear deck of the HPX170 is basically completely different than the rear deck of the HVX200. From the top of the camera, below the viewfinder, the first item encountered is the SD memory card slot. The slot functions the same way that it did on the HVX200, but it has been relocated here at the rear of the camera instead of on the right hand side where it resided on the HVX.
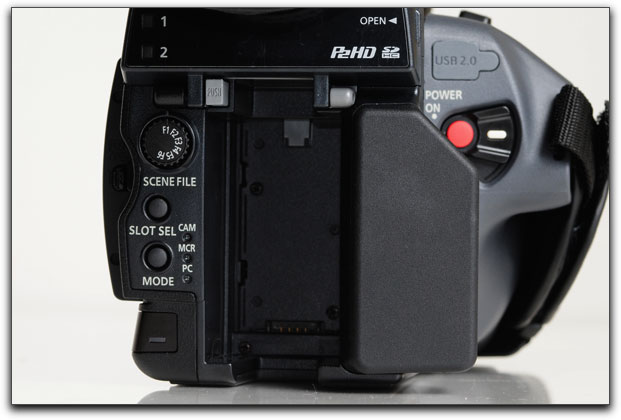
Card Slots
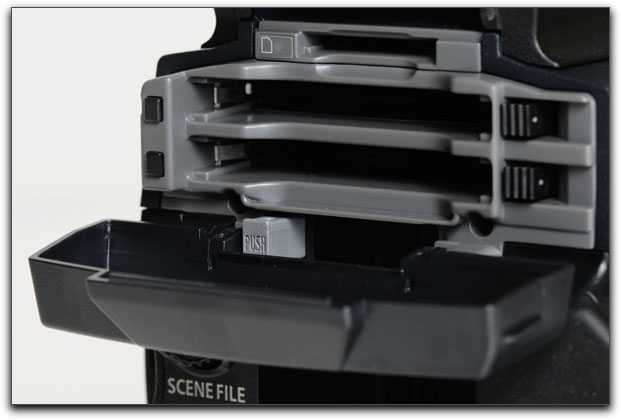
Below the SD memory card slot are the two P2 slots. The slots themselves are pretty much the same as they were on the HVX200 but the eject button has changed to a folding design. The color status indicator lights function in the same way as they did on the HVX200. The P2 slot door has changed. The HVX200 P2 slot door felt heavier duty and I was pulled down from the center top of the door. The new P2 slot door on the HPX170 is smaller, lighter and is pulled down from the right middle of the door instead. It does not feel as solid as the P2 door on the HVX but time will tell if it will stand up to the rigors of users.
Scene File Dial

The scene file dial on the HPX170 remains functionally the same as it was on the HVX200 but it looks to have changed slightly cosmetically. It is now surrounded by what seems to be a more protective bezel to mitigate accidentally changing the scene file while operating the camcorder
Slot Sel Button
The slot selection button has replaced the Media (P2/Tape) switch that was found on the HVX200. It is a nice shortcut to be able to reverse the order that the P2 slots record in with the touch of a button. On the HVX200, you would have to pop out one of the cards to make the other card the first recorded P2 cards unless you had slot select assigned to one of the user buttons. This implementation is cleaner and more professional.
Mode Button
This button remains the same as the button on the HVX200 in both location and function.
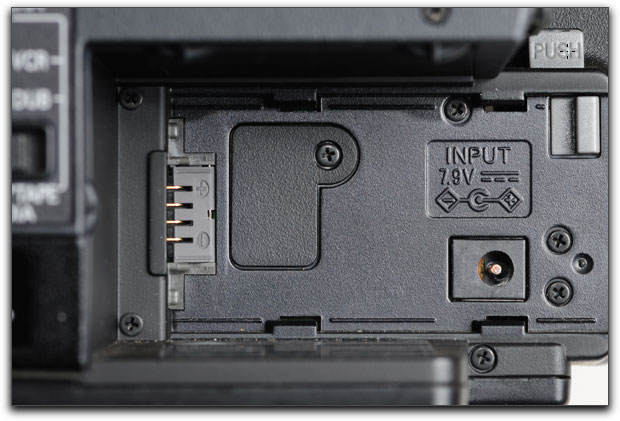
Battery Release/Battery Orientation
One of the few negatives with the early HVX200s was a problem with the battery tabs breaking off of the camera body. Panasonic addressed and acknowledged this issue and provided warranty service to those experiencing this problem. The later batches of HVX200s seemed to have a new and improved battery tab design, although the tabs remained made of plastic. Why Panasonic could not have made the battery tabs on the HPX170 out of metal instead of plastic is beyond me but the new tabs do seem fairly rugged. The battery orientation is once again vertical as it was on the DVX100 versus the horizontal orientation on the HVX200. The battery release is in a much easier to reach and more intuitive location on the HPX170.
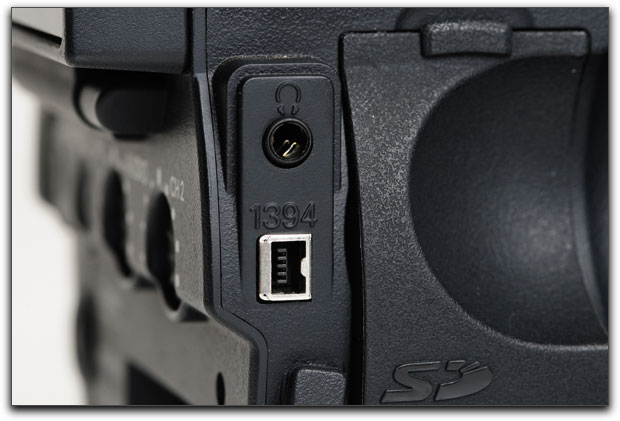
Input/Output Jack Pack
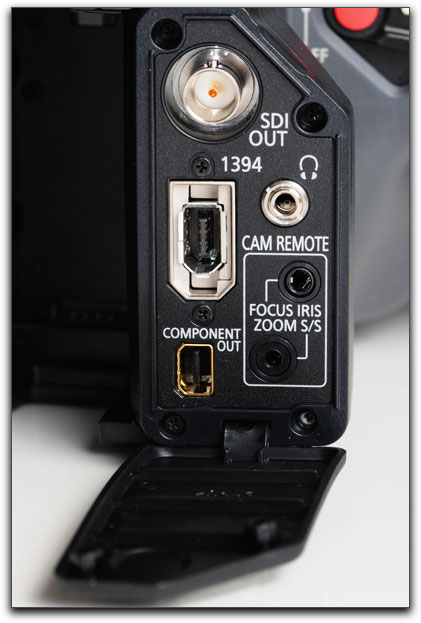
Most of the input and output jacks on the HVX200 were sort of randomly located all over the camcorder. The analog component D4 connector was up in the front of the camcorder, located near the SD analog outputs and the XLR inputs. On the HPX170, most of the input and output jacks, with the exceptions of the RCA analog outputs and the XLR inputs, have been located in a single cluster at the rear of the camera. The entire cluster of inputs/outputs is covered by a black rubber cover that is attached to the HPX170 body so that it cannot be easily misplaced.
SDI
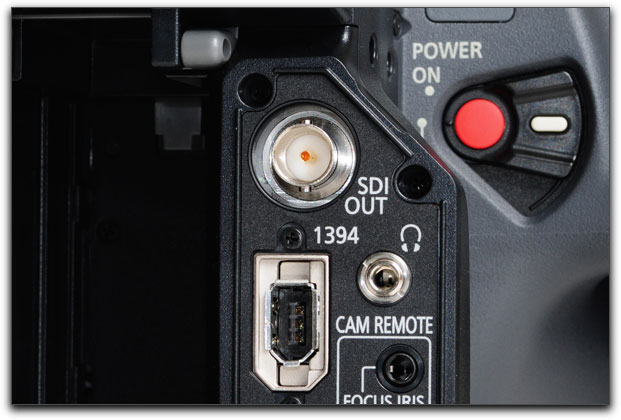
One of the most requested features from HVX200 users was the implementation of an SDI output. Panasonic has finally implemented a true, high-end SDI output on an inexpensive prosumer camcorder. It is a full realization of the SDI spec, unlike some competing camcorders that only pass video signal through the SDI output. The HPX170 passes video, audio and time code through the SDI output and even has included sophisticated SDI metadata functions and error detection and handling that I will cover in more depth in the menu portion of this article.
Firewire
Located directly below the SDI output is a six-pin Firewire 400 connection. One of the major shortcomings of the HVX200 design and of most other prosumer camcorders was the implementation of a four-pin Firewire 400 connection. The six-pin is much more robust and more reliable than the four-pin is. This is a great improvement and really will help the long-term reliability of connecting the HPX170 to Firewire drives, computers or decks.
Headphone Jack
The metal headphone jack on the HPX170 is much improved over the plastic headphone jack on the HVX200. I have seen several HVX200s over the past few years that had broken and sagging headphone jacks. The HPX170 headphone jack looks almost identical to the headphone jack that was on the DVX100. The headphone jack is a small and seemingly insignificant feature that is actually incredibly important in recording quality audio and it is pleasing to see Panasonic go back to it after the misstep of the plastic headphone jack on the HVX200.
Component Video Out
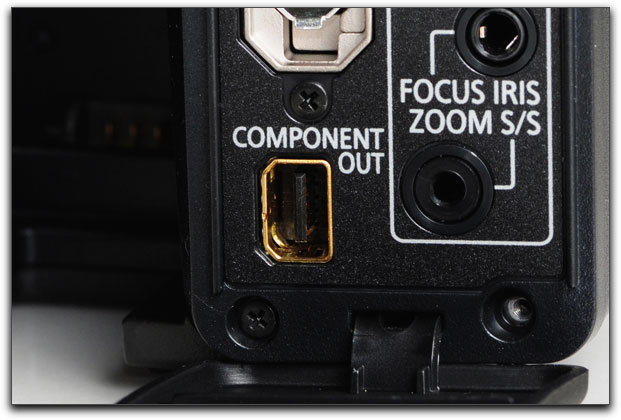
The HVX200 had a substandard component video output connection called a D4 connector. While the D4 connection locked to prevent the cable from being pulled out of the camera, the D4 connector was flimsy and loose fitting. Jiggling the cable would result in the video signal to the monitor cutting out intermittently. It was, for lack of a better term, a bad experiment that did not work well. Thankfully the D4 connector has been eliminated on the HPX170, replaced by a small snap-in component video output connector. This connector does not lock but it is solid and does not cut out when the cable is jiggled. It is also located at the rear of the camera, a much safer and more streamlined location than the HVX200s side mount for the component output. Most pros using higher end monitors will prefer the SDI connection from the HPX170 but for those with analog input monitors, this new connector is a significant improvement over the HVX200s connector.
Cam Remote Jacks
The focus, iris and zoom control jacks have been moved from the right side of the HVX200, to the rear panel of the HPX170. This location is more protected than the previous location on the side of the camera. In the past couple of years, several companies including Varizoom, Manfrotto and Bebob have all introduced various zoom, focus and iris controllers for the HVX200 that will function just as well with the HPX170. If you shoot a lot of long events or with a jib arm, separate zoom, focus and iris controls can really help to smooth your moves and enhance focusing.
The Jack Cover
There have been some complaints voiced from several HPX170 owners I have spoken with about the fact that Panasonic decided to utilize a single large rubber cover to protect all of the jacks on the rear of the HPX170. The main reasoning for the complaints is that if you are shooting in adverse conditions such as dust, sandstorms or mud and want to monitor with headphones, you are leaving the SDI, Firewire, component and camera remote jacks also exposed to the elements when you plug the headphones into the HPX170.
Other camcorders have implemented segmented or separated rubber plugs and covers for smaller groups of jacks or in some cases, even separate covers for single jacks. My suggestion is that if you do plan on bringing your HPX170 into adverse conditions when shooting, simply drill a hole through the cover for the headphone jack alone. In this way, the rubber cover will stay in place and will be protecting all of the other jacks while you are still able to utilize the headphone jack. If needed, some silicone sealant could be used to make the headphone jack hole air, dust and moisture resistant by rigging a male to female 1/8" stereo audio connection to the cover and sealing it with the soft silicone. Yes, it is a hack, but it would work if you found yourself in tough conditions while needing to monitor audio with headphones.
USB Connection
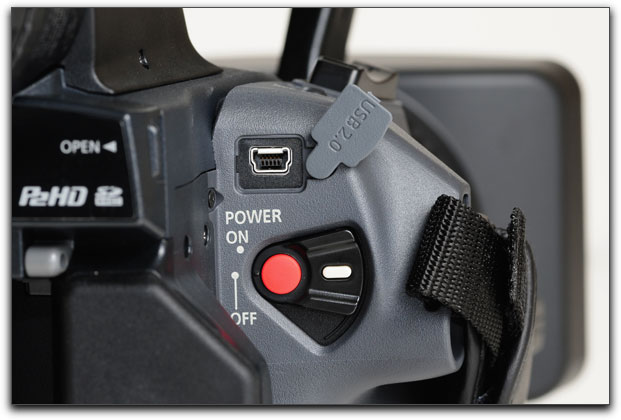
It seems that the USB 2.0 connection on the HPX170 has been orphaned and located on it's own above the HPX170s power switch. In analyzing the construction of the HPX170, it honestly looks as if the designers simply ran out of room at the rear jack pack area and they ended up just sticking the USB connector wherever they could make it fit. But I could be wrong. Functionally, the USB connection will work fine where it is not located, but I honestly preferred the location that Panasonic used on the HVX200 better, it was less out in the open. The location it is in now will probably work fine; it just seems a little bit out on its own.
REC Check Button
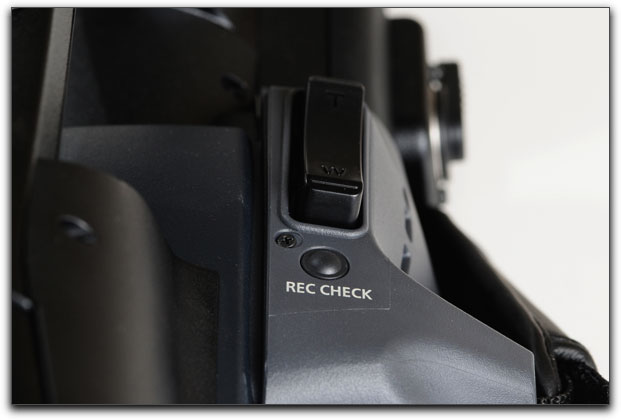
The record check button is located in about the same location that it was on the HVX200. It functions in the same way, pressing it after recording a shot will instantaneously play back the last two seconds of your last shot. This is a very useful feature that I rarely see users taking advantage of. It is useful for answering that nagging question, "did I cut too soon?" or "did I miss the last part of that shot?"
Zoom Control
The zoom control on the HPX170 is located in the same spot as it was on the HVX200. It seems to function identically to the HVX even though the HPX170 has a new lens. While fairly slow zooms can be accomplished, the zoom mechanism starts and stops abruptly. It would be nice for Panasonic to take a cue from professional lenses in the next generation of this camcorder. Professional lenses can begin and end a very slow zoom with a feathered and smooth response. This is a very useful for creating smooth and subtle moves that are not possible with the lens on the HVX or the HPX170.
Right Side Audio Video Terminal
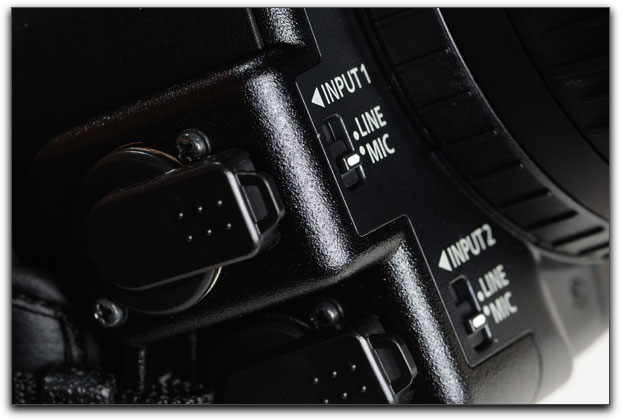
Continuing down the right side of the camcorder from the power record/switch, the XLR inputs and RCA audio and video outputs are visible. The XLR connections each feature their own "easy-to-lose" tm plastic covers to keep particulate out of the jacks when not in use. The RCA audio and video connectors are located above the XLR connections. Notice that the HPX170 has lost the Y/C (S-VHS) connector that the HVX features? As users, we are greedy and some of us would have put a Y/C output to good use but it seems that space was needed so the Y/C output from the HVX had to be eliminated. Not a major loss since Y/C is analog and cannot support HD anyway. Rounding the corner to the front of the camera, the audio input select switches are located in the same place and function identically to the switches on the HVX, allowing users to choose between line or microphone level audio inputs.
Bottom Plate
Other than the size difference, the bottom plate and tripod mounting holes appear to be identical between the HVX200 and the HPX170.
Wireless Remote Control
The wireless remote control appears to be identical between the HVX200 and the HPX170
Menu Differences
Thankfully Panasonic has not changed the basic menu layout and functions very significantly from the HVX200. After navigating the operational menus on competing cameras like the Canon XL-H1 and the Sony EX1, I feel that the Panasonic menu system is the easiest and most straightforward to navigate in its class and price range, by far. If you had never touched a camcorder before and spent one day with the DVX100 camera menus and the owner manual, I would be confident that you could function successfully with the menus on the HPX170 almost instantly. That says something about the evolution of the products in the Panasonic prosumer camcorder line. The menu system and categorization was intelligently designed and applied. For the sake of brevity, I am going to mainly touch upon the main changes in the menus from the HVX to the HPX170. If you need a complete overview of every menu item and how it functions, I once again recommend consulting Barry Green's book.
If you are coming to the HPX170 from an HVX, there are a few new items in the HPX170s menus to familiarize yourself with but trust me, it will all make sense. There are also some pleasant surprises for you as well as far as some options that have been added that are not apparent until you dig through the menus and experiment.
If you are new to the HPX170 and are coming from a broadcast camera, you may find that some items that you are used to tweaking may be missing or have been simplified. Such is life when you compare a $52,000.00 camera with a $5,200.00 camera.
If the HPX170 is your first professional camera, I highly recommend carefully reading Barry Green's excellent, "The HVX and HPX170 Book" that Panasonic is shipping with every U.S. market HPX170 bought from an authorized U.S. dealer. If you are in a non-U.S. market, I highly recommend purchasing Barry's book; it is worth every Euro, Yen or Pound if you really want to learn the finer points of your new HPX170/171.
Menu #1. Scene File
In the HPX170 menu 1, the first thing that strikes me as new is that one of the more significant items in this menu has been moved to the first item in the list, the Load/Save/Init function. This is where your scene file is saved and it makes a lot of sense that Panasonic has moved it from the end of the menu on page three on the HVX to the first item in the menu on page one on the HPX170. Good move.
All of the rest of the items on the first menu page operate in the same manner as they did on the HVX, no changes.
COLOR TEMP ACH BCH
On page two of this menu, we do encounter two new line items, Color Temp Ach and Color Temp Bch. These two menu items allow you to separately offset the phase of the color temp for the A and B white balance presets by a factor of -7 to +7. Nice new feature!
MASTER PED
Also new on this page is the adjustment scale for Master Pedestal. It now goes from -100 to +100 on the HPX170, allowing much more subtle and fine adjustment. The HVX version only had a scale of -15 to +15. Finer control is always a positive.
DRS
Continuing down the list, we encounter a new menu item labeled DRS. This is a new feature called Dynamic Range Stretching. This feature is also present on some of Panasonics top end broadcast cameras, it is encouraging to see that Panasonic continues to trickle down innovations from their high-end products to their low-end when possible. DRS provides exposure compensation, lightening up shadow areas and lowering highlights. Interestingly, my new Nikon D300 has a very similar feature. There are four settings for DRS on the HPX170, Off, 1, 2 and 3 and basically, the higher the number, the more boost to darks and more reduction of highlight levels in the picture. A good analogy would be, If you are audio inclined, DRS does to picture what a compressor does to audio. Unfortunately DRS is only available in 60 frame modes, meaning 720/60P, 480/60i and 1080/60i. The HPX170 must also be switched into Video Cam mode to use the feature.
Proceeding on through the rest of this menu, all other items appear unchanged.
Menu #2. Camera Setup
The two menu items in this menu remain unchanged from the HVX200 to the HPX170, other than the HPX170 obviously doesn't have the option, "Setup Tape", as the HVX200 does.
Menu #3. SW Mode
I used to think that SW Mode stood for "Software Mode", but in actuality, it stands for "Switch" which allows you to map how the physical switches on the HVX and HPX170 function.
The next three items allow you to assign multiple functions to any of the three user buttons located on the left-hand upper control cluster. What changed with the HPX170 are the choices of user presets. On the HPX170 the user presets are listed as Rec Check, Spotlight, Backlight, Blackfade, Whitefade, ATW, ATWLock, Gain 18dB, D.Zoom, Text Memo, Shot Mark, Lvl Meter, Last Clip, Pre Rec, F. Rate +, F. Rate. -. I have further broken down the User functions that have been changed or are new on the HPX170.
The HVX200 has a user preset called focus ring, which allowed you to control iris only using the HVXs focus ring. The problem for 35mm adapter users was that this preset only worked when the HVX was in auto focus mode. This limitation made the function useless for 35mm adapter users. As we covered in the physical layout section of this article, the HPX170 now has a dedicated switch for assigning the focus ring to control iris. The big difference is that the mode can be used in manual focus mode on the HPX170, making this feature very useful for 35mm adapter users. Since the HPX170 has the new dedicated switch, this item is absent from the choices available on the HPX170.
D. ZOOM
Another new user button preset only found on the HPX170 is D. Zoom or digital zoom. Yes, this is the same digital zoom that your consumer camcorder features, it digitally magnifies the picture from the CCD imagers by a factor of 2x, 5x or 10x. Not sure why Panasonic decided to add this feature to a professional camcorder.
TEXT MEMO
The Text Memo preset is a variation of the Index/Memo user preset found on the HVX200. This button allows HPX170 owners to attach a memo to the metadata on a P2 clip. The text memo can be assigned from the cameras SD card or on the HPX170; it can be entered via a software keyboard included in the HVX170s thumbnail menu. Pretty slick option.
The HVX200 had a user preset called slot select that lets you choose which P2 slot will be recorded to but since the HPX170 has a separate button on the rear panel for this function, the option is absent on the HPX170 menu.
LVL METER
The HPX170 includes a user preset called Lvl Meter. This allows the user to monitor the audio input levels for channels 3 and 4 instead of 1 and 2. Since you cannot set the levels for channels 3 and 4 manually, I find this feature to be of limited value, but it is available if you want to see what audio levels channels 3 and 4 are recording.
LAST CLIP
The HPX170 includes a Last Clip user preset. This allows you to delete the last clip shot without having to access the cameras thumbnail mode as you had to on the HVX200 to delete a clip. This is a very handy function that was requested by many users.
PRE REC
This allows HPX170 users to assign the Pre Rec function that records signal into a 3 second cache for when you need to record an event beginning but you are not sure exactly when the event will begin.
F. RATE + and F. RATE -
These two user presets allow you to adjust the frame rate that the HPX170 will shoot in without having to go into the camera menus. This is a very handy preset that many users requested from Panasonic.
FOCUS ASSIST
Focus assist is a menu item only present on the HPX170. It allows you to view the focus bar only or the focus graph only or both when the focus assist button is pushed. The two new focusing tools are a major help in achieving and holding sharp focus, especially for moving subjects.
MF ASSIST
Manual focus assist is also new to the HPX170. When this function is turned on, the LCD display changes from "MF" to "MA", the amount of rotation needed from the focus ring is reduced by 50% and the auto focus is engaged to help to fine tune your manual focusing. This setting is very useful for run & gun situations with moving subjects.
WFM
WFM stands for Waveform. This menu item allows the HPX170 user to select whether pushing the WFM switch underneath the LCD screen will engage the waveform monitor only, the vectorscope only or both in succession.
LCD
LCD is the last item in this menu. The HPX170 adds three settings, LCD Rev, which flips and reverses the LCD image for users that are using a non-flip 35mm adapter. Overscan assigns the LCD display to only show the over scanned safe zone that consumer televisions will see. LCD BL toggles through three backlight brightness settings on the HPX170s LCD screen.
Menu #4. Auto SW Mode
The four menu items in this menu remain unchanged from the HVX200 to the HPX170.
Menu #5. Recording Setup
All of the menu items in this menu remain unchanged from the HVX200 to the HPX170 with the exception of the addition of a Time Stamp setting that has been added as the last menu item on the HPX170. This function allows you to "burn in" the time and or date information into the video permanently. The only use for this that occurs to me would be for legal video where a digital superimposed date is required. Once the image is recorded, the date/time is non-removable. I would be willing to bet that more than one user will accidentally record date/time on their video with the function and will be disappointed that they did not read the manual to turn this feature off.
The only other differences between the HVX and HPX170 in this menu is that the HPX170 does not have any of the tape functionality settings that the HVX200 has since the HPX170 does not have a tape deck.
Menu #6. AV In/Out Setup
Most of the items in this menu have changed from the HVX200.
CMPNT/SDI SEL
CMPNT/SDI SEL gives you options on whether you would like the HPX170s SDI and analog component out to output video unconverted (Auto), 1080i or 480i.
SDI Out
SDI out gives you two choices, Off or On (enables the SDI output). You must switch SDI off in order to use the HPX170s component analog outputs.
SDI Metadata
SDI Metadata provides time code, embedded audio and other information. This function is totally separate from the HPX170s metadata.
SDI EDH
SDI EDH is SDI error detection and handling. This allows the HPX170 to embed optional error detection and handling in the SDI stream that it outputs.
DOWNCON MODE
Downconvert mode lets you control how the HPX170 will down convert HD to NTSC/PAL via SDI, composite or component outputs. Unlike the HVX200, which only allowed squeezed down converted HD video, the HPX170 allows you to output squeezed, letterbox or side crop modes. This option is very handy for using 4:3 monitors with the HPX170.
TEST TONE
Test tone generates a -12dB test tone that will accompany color bars. Unlike in the days of analog tape, test tone is not needed to actually calibrate input levels on digital file transfers, but it is still handy for checking audio output into headphones and audio systems when editing.
INT MIC
Int Mic is a setting that allows the HPX170 user to shut off the cameras internal microphones. The HVX200s internal microphones record all of the time to channels 3 & 4, there is no way to switch the microphones off.
Menu #7. Display Setup
The first three items in this menu, ZEBRA DETECT1 and 2 and MARKER remain the same as the HVX200.
SAFETY ZONE
The HPX170 adds two different safety zone markers that were absent on the HVX200 menu, 13:9 and 14:9. Both of these settings are useful if shooting footage for European or other territory broadcasters that require delivery for a mixed-mode broadcasting environment. All BBC programming has been required to deliver in 14:9 for years. The theory is that 14:9 footage will not look too distorted no matter which aspect ratio television it is viewed on.
FOCUS BAR
On the HPX170, the focus bar menu item allows the focus bar to switched on or off in the HPX170s viewfinder and LCD.
P2 CARD REMAIN
Unique to the HPX170, this item shows the total amount of time remaining on either both P2 cards or just the current card, depending on how the menu is set.
REC COUNTER
This item offers the ability to have the counter re-set itself for clip recorded or to show cumulative since the last time the counter was reset. CLIP resets the counter to zero each time that the HPX170 begins recording.
All other functions in this menu have not changed from the HVX200.
Menu #8. Card Functions
The three menu items in this menu remain unchanged from the HVX200 to the HPX170. The scene files from the HVX200 are not readable on the HPX170.
Menu #9. Other Functions
All menu items in this menu remain unchanged from the HVX200 to the HPX170 with the exception of the addition of Menu Init, which is only available on the HPX170.
MENU INIT
This menu item restores all six of the HPX170s factory original scene files with one click. This feature is a nice fail safe for when you want to go back to square one.
Thumbnail Screen Differences
If you have shot with an HVX200 before, working in the thumbnail mode will be second nature to you. If you have not shot with an HVX200 before, I recommend that you sit down with the HVX or HPX170, a P2 card or two and the owner's manual in order to gain knowledge about how the thumbnail mode works. I feel that between the owner's manual and Barry Green's HVX/HPX170 book, it would be redundant to include a full thumbnail mode tutorial here. Instead, I will focus upon the differences in the operation of the HPX170 versus the HVX200 when in thumbnail mode.
Changing Playback Mode
On the HVX200, if you are playing back thumbnails that have been recorded at different raster sizes and or frame rates, you must put the camera back into camera mode and change the cameras shooting mode to match the clip that you want to playback. This, as you might imagine, is a bit clunky and inconvenient when viewing a P2 card that is recorded in multiple formats. The HPX170 has a much simpler and quicker solution. You place the cursor on the thumbnail clip that you want to
playback, push down on the joystick, wait one and a half seconds and the HPX170 automatically switches its playback mode to match the clips format. Brilliant!
The thumbnail menus and functions on the HPX170 are fundamentally the same as the HVX200 with the few exceptions as noted below.
CLIP PROPERTY
The HPX170 can access the clip property function through a single button shortcut. On the thumbnail display, press the DISP/MODE CHK button to display the clip property display.
SETUP
This function will display the user clip name as the clip's data instead of showing timecode or whatever else you might have chosen.
PLAYBACK RESUME
On the HPX170, the playback resume menu item controls whether playing back a clip will resume where you left off the last time it was viewed, or whether it will playback from the beginning of the clip. On the HVX200, all clips are always played back from the clip start.
RE-CONNECTION
When viewing or working with clips that span from one P2 card to another, it is sometimes required that the two portions of the spanned clip are re-connected so that the editing application will see the two spanned clip as one continuous clip. The HPX170 adds this feature that was not present on the HVX200
EXCH.THUMBNAIL
On the HVX200, each clips thumbnail is always the first frame recorded. The exch. thumbnail function allows HPX170 users to reset the thumbnail.
CARD STATUS
The HPX170 allows you to see an individual P2 card's property including any name assigned by the user. The appropriate card is highlighted and you press PAUSE/SET to view the property.
MEMO (User)
If you recall, there was an option in the HPX170s User Buttons to assign TEXT MEMO. If you want to assign data into the user fields, the HPX170 features a software keyboard that allows you to enter the data using the camera itself rather than having to enter the data using a computer.
Differences In Image Between the HVX200 and the HPX170
The big story about the HPX170 is that Panasonic modified the existing CCD chipset and the DSP (Digital Signal Processing) from the HVX200. Everyone has been wondering, "How much better does the HPX170 look than the HVX200?" The answer is noticeably better. The other question on people's minds has been, "Does the HPX170 still have that distinct and unique Panasonic look and feel (some have referred to as Mojo) to the images?" In my opinion, the HPX170 easily matches and surpasses the look of the images from the HVX200.
A new chipset is included in the HPX170 as well as a new updated version of the HVX200, the HVX200A. With the HPX170/HVX200A, Panasonic have modified the CCD block and the DSP has been tweaked to generate cleaner, smoother, more organic images with a significant reduction in aliasing artifacts when compared to the original HVX200. Although the basic technology used in the CCDs and DSP has not radically changed from the HVX200, it has been tweaked and massaged to produce better images. Like HVX200, the CCDs' 960x540 pixel-shifted output is combined in the DSP to form a 1920x1080 progressive image, from which all recorded and output formats are obtained.
The HPX170 images are markedly improved over the HVX200. The picture the HPX170 outputs is smoother and more refined than the HVX200. Panasonic rated the HVX200 at an ASA speed of 320. The HPX170 goes a half stop better with an ASA rating of 500. Available light shooting is once again easier, not only from the increased speed of the camera, but also because of the smoother, cleaner signals the camera outputs, you can use more gain with less noise and grain penalty. On the HVX200, I rarely used anything more than 3dB of gain. With the HPX170, I still see cleaner pictures when using 6 or even 9dB of gain. The darks are cleaner with less noise and skin tones, in particular, look more flattering and less harsh to me with the HPX170.
Obtaining "The Film Look"
One of the primary reasons for the popularity of the DVX100, HVX200 and now, moving forward, the HVX200A and the HPX170, is that many users and viewers feel that the Panasonic cameras are capable of obtaining the elusive look of motion picture film better than most of the competing camcorders in their respective price ranges. Based upon my six years of combined experience shooting the DVX100, HVX200 and now the HPX170, I tend to agree. Here are some simple guidelines to obtain more filmic looking footage when shooting with the HPX170. Not all of the recommendations are available in the camera; some of the suggestions are based upon shooting style.
Light Cinematically
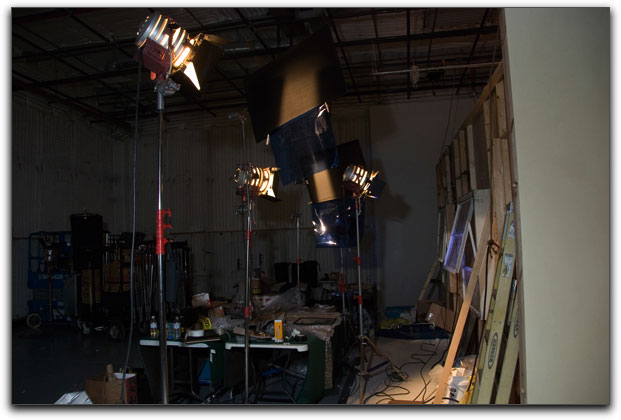
This will sound obvious but the most important action you can take to create filmic images is to light cinematically. You rarely see feature films that are only lit with available light, which is the lighting that many beginning videographers shoot under. I don't want to say that available light cannot look amazingly cinematic, it can. But most people do not have the schedule, patience and resources to search out and wait for the available lighting conditions to appear cinematic. In most cases, you need to create cinematic lighting. Exactly how to light is beyond the scope of this article but there are hundreds of information resources on the Web and in bookstores and libraries on how to properly light.
Move the Camera Cinematically
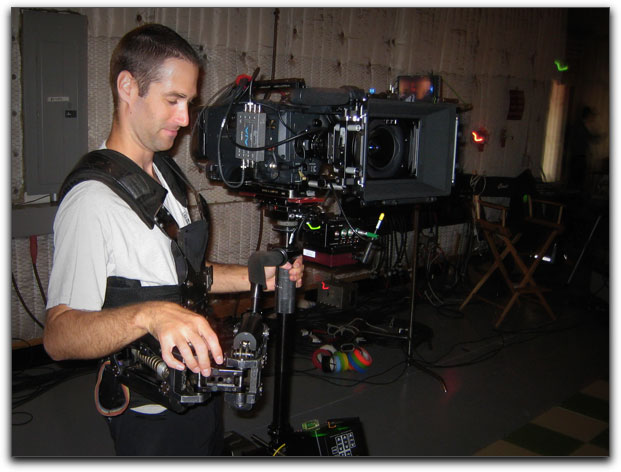
Most new users first instinct with the HPX170 is to grab the camera and start shooting handheld. With a camera as small and light as the HPX170, your chances of shooting with smooth, cinematic movement are very small. Unless you are very skilled at handheld operating, your footage will end up looking jerky and unprofessional, the antitheses of the film look. The first step is to make sure that if you buy an HPX170, can you really afford it? An HPX170 is not really a camcorder; it is the camera portion of a production package. A production package includes grip, lighting, audio, camera and camera support. To obtain the film look, you really need a production package, not just a camcorder. What is camera support? The first component of camera support is a good tripod. Do the math, the HPX170 is an almost U.S. $6,000.00 camcorder, how much will a quality tripod cost for the HPX170? Here is your first hint, a lot more than U.S. $200.00. Your second hint is to decide how you want to create your images. If you only plan on shooting locked off still compositions and stationary talking head interviews, great, go ahead and sign up for that bargain basement low-end tripod.
Tripods
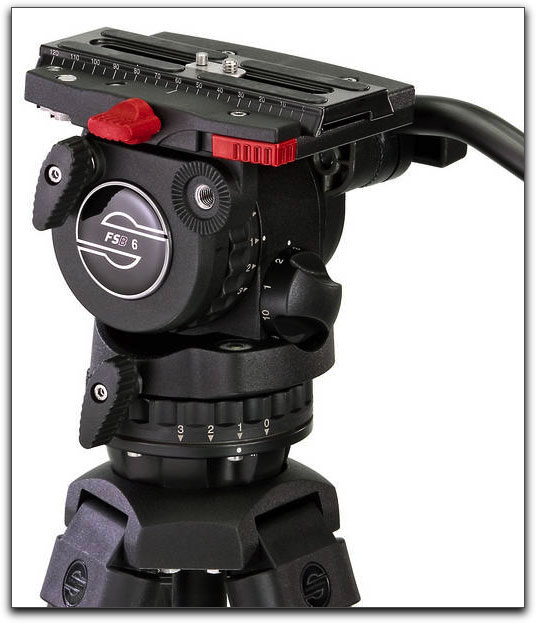
In order to pan and tilt the HPX170 smoothly, you need a professional grade tripod. Once again, a complete breakdown of all tripods recommended for the HPX170 is beyond the scope of this article but suffice it to say if you buy the most popular brand of video tripod, which shall remain nameless, you should know that this brands two lowest end models in particular, are physically unable to perform smooth pans and tilts because of excess stiction. Stiction is friction generated in the head that inhibits smooth starts and stops in the movement of the head, it causes the "bump" that you see when you begin and end a pan or tilt. All non-professional and some tripod heads sold as "professional" but that really aren't that professional tend to exhibit this phenomenon of stiction. As a final hint, if you have purchased or are planning to purchase an HPX170, you should also plan on a minimum of U.S. $1,000.00 for a decent tripod and U.S. $2,000.00 or more for a really good tripod. Shocked? You shouldn't be, a good tripod will outlast the HPX170 and possibly your next two or three cameras after that if you take good care of it. If you want the film look, it is almost impossible to obtain without a tripod capable of smooth, even and well-modulated movement. Good tripods cost money and great tripods cost a lot of money. The tripod that I use with the HPX170 cost almost half the price of the camera itself, about $3,000.00. The HPX170 is already the third camera I have used it for, it was well worth the cost.
Dollies, Steadicam, Jib/Cranes
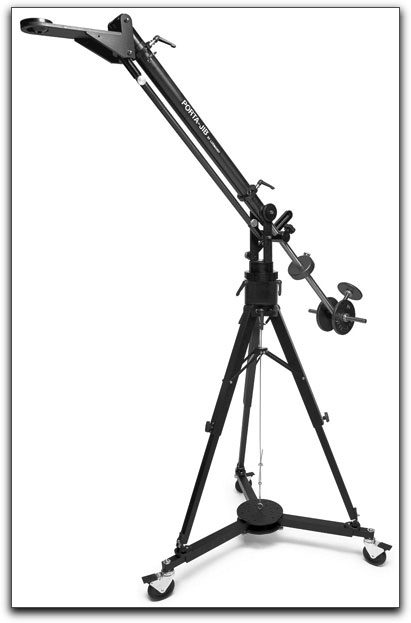
Other factors to consider beyond your tripod are different ways of moving the camera. Film and the film look have a visual vocabulary that most of us are aware of but may not be conversant in. The giant crane shot, moving the camera down over a main street to land on the main character of the story establishes a character in visually rich location with a without a single edit. The Steadicam tracks the hero as he chases the bad guy through a dark and claustrophobic hallway in a seedy hotel. The camera rides on a dolly for a walk and talk as two characters enjoy a conversation as they walk down a sidewalk. Most filmmakers do not use zooms to change framing of a subject or to follow a subject; they typically physically move the camera instead. A good camera dolly is needed to obtain the film look. Steadicam and Steadicam-like rigs are popular as are jibs and cranes. Unless you a real do-it-yourselfer, I recommend renting these devices rather than buying them because the high quality models in all three categories of camera movement cost as much or considerably more than the HPX170 itself. If you are handy, you can find plenty of on-line sites and information on building your own versions of dollies, Steadicam and Steadicam-like devices and even jibs and cranes.
Setup Your Camera Correctly
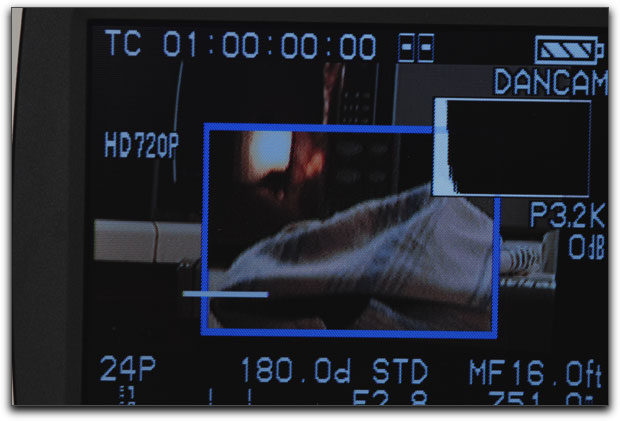
If you have heeded my advice for the first two points we have discussed, lighting cinematically, moving the camera cinematically, then you are well on your way to creating the film look. The next step is to set up your HPX170 to obtain the best possible film look. If you have purchased your HPX170 in the U.S. from an authorized Panasonic dealer, in the box you will find a copy of Barry Green's "The HVX and HPX170 Book". At the back of the book is a CD that included 24 scene files. Several of these scene files are setup to emulate the film look and are easy to load, modify and save. I highly recommend trying them out and seeing if they obtain the film look that you are imagining.
For those of you in non-U.S. territories who have not purchased the Barry Green book or if you have not yet purchased an HPX170, here are a few tips and pointers to setting the camera up in order to obtain the most filmic images possible.
Format and Frame Rate
My recommendation is, unless you are shooting for large video screen projection or a film out, shoot 720/24PN format. This format has several advantages over the other HD formats that the HPX170 has. The first consideration is a practical one. The 720/24PN format gives you the longest recording times of any HD format when shooting P2 cards. A 16GB P2 card like the one that is included with the HPX170 will record 42 minutes of 720/24pN format video versus 17 minutes of 720/60P or any of the 1080 formats. If you are trying to obtain the maximum resolution that the camera is capable of, the 1080/24pA mode takes up more space than 720/24pN, but it will also yield about a 20%
more detailed picture and will also result in less compression. Shooting with 720/24pN has significant cost and space benefits, but 1080/24pA does have a few things to recommend it too. It all comes
down to space needed versus quality needed.
Secondly, 24 frames per second is the standard and default 35mm film frame rate and has been for many decades since the dawn of sound film. Simply put, 24 fps looks filmic.
Third, to me, part of the film look is the ability to shoot variable frame rates. The HPX170 has the most flexibility in frame rates when shooting in 720/24PN mode. It is possible to shoot variable frame rates in other format settings but if you want true slow motion, 720/24PN is your best choice.
For those of you who must deliver a 1080 final edited master, you can still shoot in 720/24PN, perform editing in 720 format and then cross convert your footage to 1080 upon final output. The end result looks superb and most people, short of a video engineer cannot tell the difference.
Gamma Setup
As I covered earlier in the article, the HPX170 features seven different gamma options in the scene file settings. I recommend that you set your camera up to use the CINELIKE-D gamma if you plan on heavy postproduction and or color correction with your picture. CINELIKE-D gives you the flattest picture and the most latitude to experiment, push and play with the signal in post without it falling apart. The disadvantage is that CINELIKE-D has more image noise than CINELIKE-V
If you do not plan on doing a lot of postproduction tweaking and color correction, I recommend you setup the HPX170 with the CINELIKE-V gamma setting, which is optimized for television display. It increases contrast and gives you a bright, punchy look that works well for many users without having to perform elaborate color correction. The downside of CINELIKE-V is that it does not give you as much image latitude as CINELIKE-D.
Matrix Setup
The HPX170 features four different Matrix settings, NORMAL, ENRICHED, FLUO and CINE-LIKE. This one is simple, I recommend CINE-LIKE Matrix to obtain the most film-like images.
The bottom line with the HPX170 is that the settings above are simply recommendations. The beauty of the camera is that with six scene file settings on the camera and as many as you would like to have saved to an SD card or computer file, your choices for looks and variations of looks is almost unlimited. When you first setup your HPX170, my suggestion is to use these recommendations and or the scene files included in Barry Green's book. Once you have the basic operation and menus down, begin to experiment. There are actually websites where you can trade and download other HPX170 users "recipes" for scene files. Because the scene files are based on a standardized text format, it is easy for users to save, modify and exchange different scene files. It is also reassuring to know that the HPX170 factory original scene files are also always just a menu item away.
Shutter Speed
If you have setup your HPX170 as I have detailed here and you have well-lit scenes with well-composed shots, you may be satisfied with the film look that you are obtaining. The final touch in obtaining the look that you want may be dependent on which shutter speed you use. The HPX170 displays shutter speeds in one of two methods, either in degrees of shutter exposure as film cameras use or in fractions of a second as video and still cameras use. The most typical shutter speed used on film cameras shooting at 24 frames per second would be a 180-degree shutter. This translates on the HPX170 as a 1/48th of a second shutter. If you need more sensitivity in low light situations, you always have the option of a 1/24th of a second shutter as well but you may find the images too smeary in all but lockdown shots with little movement.
If you are shooting sports or a high contrast, high movement subject, feel free to experiment with higher shutter speeds, if you have the amount of light needed to use higher speed shutter speeds. The fight scenes in the film Gladiator, directed by Ridley Scott and photographed by John Mathieson, were photographed with a higher speed shutter to obtain the ultra dynamic, almost surreal look to the movement. Just beware that using shutter speeds higher than 1/48th of a second on the HPX170 may give the footage more of a video look since high-speed shutter seems to be less commonly used on film cameras as witnessed by how unusual this scene in Gladiator looked and how many people ask how it was accomplished.
Screen Grab Comparisons
The differences between the images that the HVX200 produces in comparison to the HPX170 are both subtle and obvious at the same time. The images show that in bright or daylight conditions, the differences between the two cameras are very subtle. With some color correction, the HVX images are almost identical to the HPX170 images.
In the following images, both cameras were matched to try to obtain the filmic look that we discuss in the previous section of this article. The camera scene file setup is as follows:
- 720/24PN
- 180 degree (1/48th of a second) shutter
- F 4.0 to F 4.8
- Detail = +1
- Vertical Detail = +1
- Detail Coring = 0
- Chroma = +2
- Chroma Phase = 0
- Color Temp = 0
- Master Pedestal = 0
- Auto Iris Detail = 0
- New Gamma = Off (on HVX200)
- Gamma = Cinelike V, Cinelike D (I shot both gammas so you could compare)
- Knee = Auto
- Matrix = CineLike
- Skin DTL = Off
- All scenes shot with 5600k WB pre-set
Daylight Scene
 HVX Sunlight Cine V
 HVX Sunlight Cine D
 HPX170 Sunlight Cine V
 HPX170 Sunlight Cine D
In the images above, the HVX200 and the HPX170 were aimed at a scene of a garden sculpture hanging on a wooden fence. The scene was shot at 11:00 AM on a bright Fall day in direct sunlight. Notice the differences between the HVX Cinelike V and D. The colors in the wooden fence in HVX Cinelike V shot in particular are more vivid than the Cinelike D, but more fine detail is seen in the Cinelike D image.
Overall, if you compare the images between the HVX and HPX170 in this scene, the differences are subtle. The HVX seems to a have a slightly warmer and greener cast to my eye but your mileage may vary.
Window Light Scene
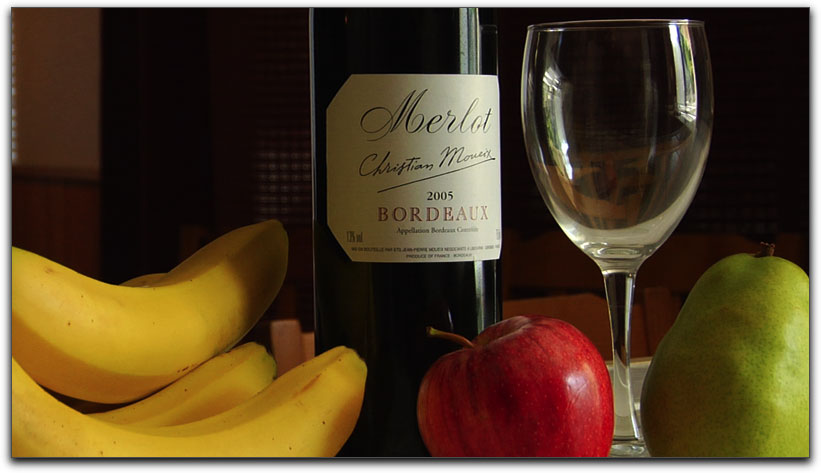 HVX Window light Cine V
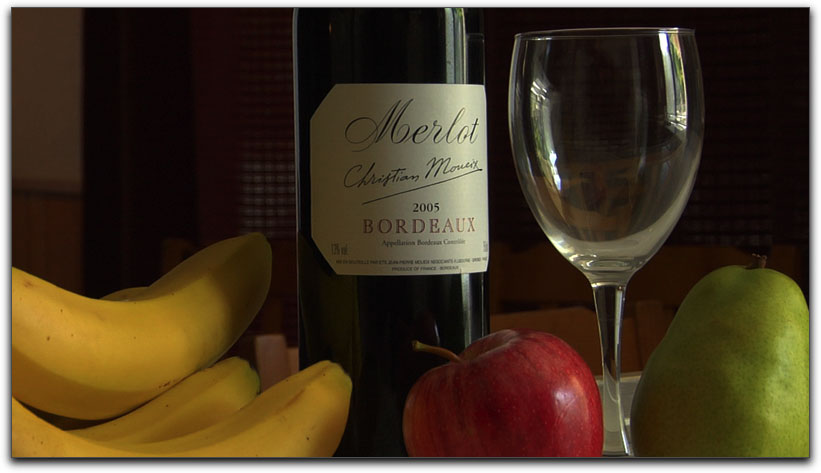 HVX Window light Cine D
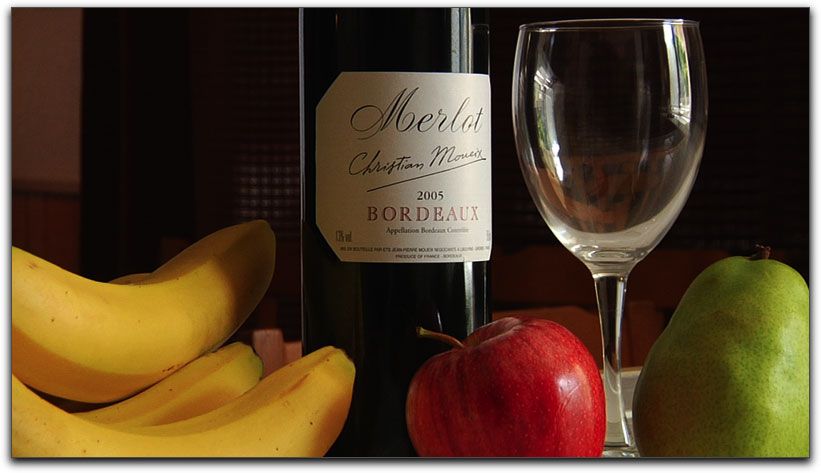 HPX170 Window light Cine V
 HPX170 Window light Cine D
In the images above, the HVX200 and HPX170 were aimed at a tabletop scene. The scene was lit with window sidelight. Check out the differences between how the HVX200 and the HPX170 resolve the white wine bottle label. Also, notice the differences in how the detail in the Apple's skin are resolved between the Cinelike V and Cinelike D between the models of camera?
The basic images here are close in look, but overall, I see clarity in the HPX170 image that seems to be absent on the HVX200 image. I also like how the HPX170 renders the wine label more of a true white whereas the HVX renders it more of a parchment color. Notice the difference in grain in the white label between the HVX Cinelike D and Cinelike V?
Candlelight Scene
 HVX Candle light Cine V
 HVX Candle light light Cine D
 HPX170 Candlelight light Cine V
 HPX170 Candlelight light Cine D
In the images above, the HVX200 and HPX170 were aimed at a scene lit solely by candlelight. In my opinion, this scene reveals more of the differences between the two cameras. The difference between the two cameras becomes apparent in the grain structure. If you look at the area below the plastic Pumpkin's mouth on the HVX200 on the Cinelike V, notice how the area becomes basically just an orange blob with no detail? It is improved in the HVX200 Cinelike D setting, but compare the HVX images with the HPX170 images. I see a lot more detail in the HPX170 Pumpkin images in both of the Gamma settings than the HVX200.
The images overall show less noise in the HPX170 images to my eye. The HVX200 images of this scene seem coarser and less detailed than the 170 images.
Lens Wobble?
I recently took delivery of my own HPX170. Since the first few buyers have received their HPX170s, a possible issue with the camera has surfaced. The DVX100, the HVX200 and the new HPX170 all have lens mechanisms that are shock mounted in the body of the camera. The purpose of the shock mounting is to provide some give if the lens is ever whacked against a hard surface. Without this shock mounting, if the lens were screwed directly into the chassis of the camera, a good sharp jolt could actually crack the lens housing and or the body of the camera. This design feature has been in place since 2002 with the introduction of the DVX100.
Evidently some early buyers have encountered an issue with the HPX170 that has become known as "lens wobble". The lens of the HPX170 (and all DVXs and HVXs) mounts to the body with a horizontal and vertical pin, allowing the lens to have a tiny amount of lateral movement, but no vertical movement. The lateral movement is normally regulated with small blocks of foam inside the body of the HPX170. On some HPX170s from Panasonics initial product shipment, some of the units have exhibited lateral movement that some of the users of the camera have found to be excessive to the point where it affects the picture. The test has been to place the HPX170 on a heavy-duty tripod and lock the head to prevent panning. You then zoom your camera in all of the way on a specific object and manually focus on the object. On some HPX170s, when you attempt to manually focus, the image shifts abruptly from one side to the other. This is a result of excess lateral movement of the lens assembly inside the body of the HPX170.
As of the writing of the article in mid October 2008, the U.S. Product Line Business Manager for the HPX170 has contacted Panasonic in Japan for an analysis of the issue and a procedure for correcting the lens wobble. Panasonic has identified the problem and will take care of the repair under warranty, paying for shipment of the HPX170 to and from Panasonic repair centers so this has really become a non-issue for early adopters. Future shipments of HPX170 will have the fix already
implemented.
It is common for first generation deliveries of new camcorders to exhibit minor issues, many other models from all of the camcorder manufacturers have exhibited initial issues that are not apparent to the manufacturer and are not noticed until users receive the cameras. In my opinion, the lens wobble issue is a very minor inconvenience, not a significant structural or operational issue once corrected. It should also be noted that not all of the first batch of HPX170s exhibit lens wobble. My HPX does not seem to have this issue.
Curtain Call
My Experience With The HPX170
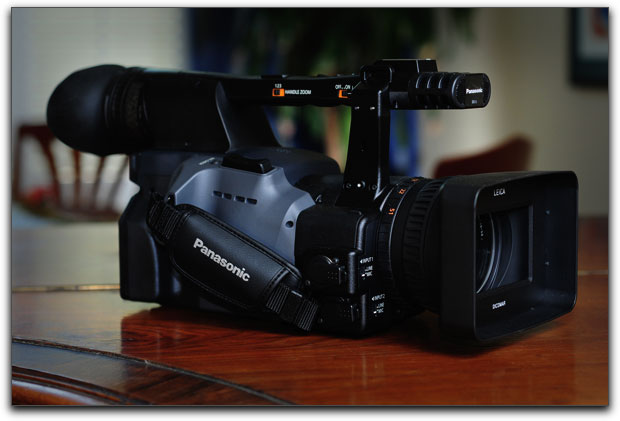
I have only had the HPX170 in my possession for a mere two weeks. So far, I have only photographed one project with it although I have shot numerous tests with it. My first impressions are that the HPX170 is a more evolved, smoother and more refined version of the HVX200. The new features are all welcome additions to the operator and the improved picture quality makes the camera a dream to shoot with. Over the past month, I have often been asked of my opinion of the HPX170 from other HVX200 owners. I would say that if you like the HVX200, you will love the HPX170. For those of you who have been on the fence about purchasing an HPX170 or waiting for other vaporware camcorders that may ship someday, my advice would be to jump in feet first and generate some income while enjoying the picture quality and operational features that the HPX170 offers.
It is late 2008 and we are faced with numerous choices in the under $10,000.00 camcorder segment that is literally morphing and changing almost weekly. Nikon and Canon have both released Digital SLRs that shoot fairly high quality Hi-Def video through excellent Nikon and Canon stills lenses to CMOS sensors that are much larger with much more shallow depth of field capability than the HPX170. The Nikon and Canon DSLRs are much less expensive than the HPX170. Testing and reviews have shown that while both cameras are capable of shooting fairly high quality moving images, both of these cameras are still photo cameras that shoot Hi-Def, they are not really motion picture cameras. They both have CMOS rolling shutter artifacts, very limited audio options, ergonomic restrictions and operational limitations when shooting video. The HPX170 is ready for prime time as far as professional work. The RED Scarlet has been completely scrapped and will eventually re-emerge as something completely different in specification and execution at some unknown date. The HPX170 is ready to be purchased today.
Assuming that you are a professional and find the look, features, price, P2 workflow appealing, I see no reason to not audition an HPX170, it is probably the most operator friendly camcorder on the market. It is easy to handhold, small and light, yet it offers professional features that make it unique and desirable. You should be able to pay for an HPX170 with one or two projects and if something more desirable hits the market, it should be able to retain a fairly healthy re-sale, just as many HVX200 owners have in selling their used HVXs recently. Even used DVX100s still hold a fairly healthy resale value in comparison to other brands on the market. That a video camera can hold over 70% of its original value after several years speaks volume about the evolution of the Panasonic camcorder line.
I find the HPX170 to be an appealing choice, it will generate a sizeable amount of income for my company over the next few years. The HPX170 suits my needs quite admirably; it may serve your needs as well. I don't know about you, but I can't wait to see what Panasonic brings us for the fourth act in this P2 show.
Dan Brockett is an independent television producer based in Los
Angeles, Ca. Dan's most recent projects include documentaries for
four DVD releases of Paramount Pictures Audrey Hepburn: The
Centennial Collection and Warner Bros. Special Edition of Howard
Hawks Rio Bravo. Dan is also known for shooting and producing two top
rated episodes of A&E's Biography. Dan is currently in development on
multiple television projects for 2009. He can be reached at dan@biglittlefilms.com.
[Top]
copyright © www.kenstone.net 2008
© 2000 -2008 Ken Stone. All rights reserved. Apple, the Apple logo, Final
Cut Pro, Macintosh and Power Mac
are either registered trademarks or trademarks of Apple. Other
company and product names may be trademarks of their respective
owners.
All screen captures, images, and textual references are the property and trademark of their creators/owners/publishers.


