August 24, 2009
Cinematic Storytelling with Panasonic's New AG-HPX300 Camera.
By Dan Brockett
The HPX300 Is Born
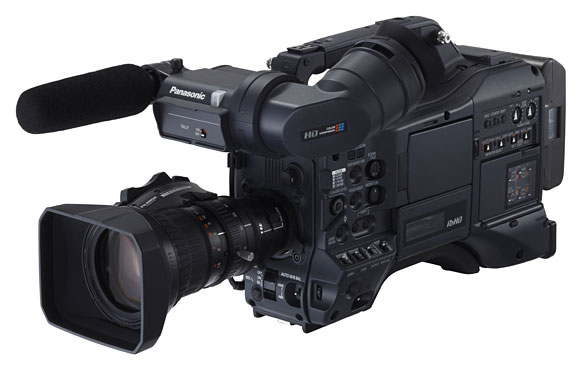
Panasonic's newest professional camera, the HPX300, is the rarest of the rare, a brand new, category defining and sophisticated video tool. With a size, weight and cost that neatly positions it in between the prosumer AG-HVX200A/HPX170 and the professional AG-HPX500 2/3" CCD camera, the HPX300 is an entirely new tier in the Panasonic pro camera lineup. Panasonic obviously took a page from the Apple playbook, keeping the any details about the existence of the HPX300 completely under the radar before they were ready to debut it just a few short months ago. The introduction of the HPX300 was a complete surprise, there was nothing more than a few vague rumblings about a new Panasonic P2 camera in the pro video community for only a couple of months, many discounted it as no more than a vague rumor.

The Real Production World
For once, the grapevine was right. In a sign of the changing times, besides the standard press release, Panasonic actually posted an introduction video about the AG-HPX300 on You Tube on March 31, 2009.
After reading about the specifications and watching the You Tube clip, I immediately thought about writing an article about the HPX300 for www.kenstone.net. Rather than writing a technical review article as I had for the AG-HPX170 in October of 2008,
I felt that it might be prove to be more interesting experience to acquire an HPX300 and to keep a production diary about shooting a real project with it.
I contacted Panasonic to pitch the idea of shooting the first commercial project with the AG-HPX300. They liked the idea and loaned me the HPX300 to shoot the project with.
Why Real World Experience Is Better
You may not be aware of how camcorder reviews happen. Typically when new cameras are released, prior to the official product release to retailers and buyers, the manufacturers loan prototype models to select users, writers and journalists for review. The challenge to this product introduction methodology is that the resulting articles are usually rather dry since they are usually a result of said writer just playing with the camera in their studio and taking measurements. While these initial review articles contain all kinds of interesting specifications and measurements, they typically lack any real world experience gained from using the camera on a working set under a deadline for a project with a paying client.
As someone who has reviewed many pieces of gear under test conditions, I am aware of how different it is to shoot test charts and random b-roll on your own casual schedule than to use the camcorder on a professional set with the challenges and pressure of shooting with crews, actors, a director and clients. I was excited to see how the camera would perform under real world conditions when the last thing on my mind as a DP and crewmember would be to worry about all of the technical minutiae behind every function of the camera. I would have a few days to setup and test the camera, then the shooting week would be upon me and I would have to try to make the camera perform at its best. No pressure, no, non at all.
The Assignment
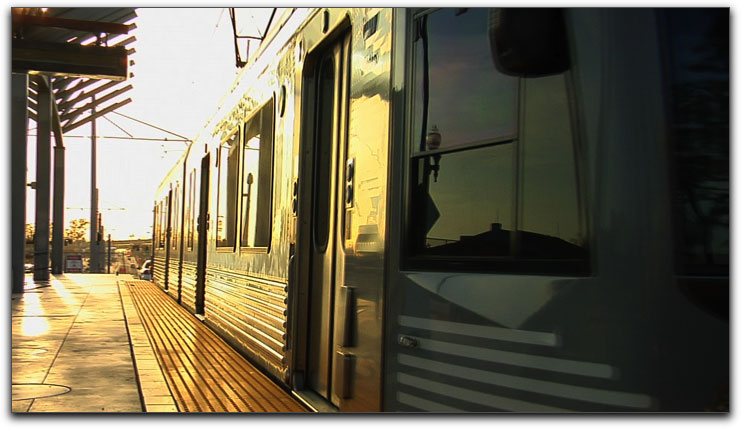
Producer Laura Stuart-Dawson and director Jane Simpson and of Triplane Film + Video approached me about serving as DP on a public awareness video they were producing for the Los Angeles Metropolitan Transportation Authority, also known as LA Metro. Los Angeles has an ever-growing public transportation system, overseen by LA Metro. The Metro Gold Line Eastside Extension (or as it became known to us, MGLEE) is a new $898 million dollar light duty railway with eight new stations serving diverse LA neighborhoods such as the L.A. Arts District, Little Tokyo, Boyle Heights and East L.A..
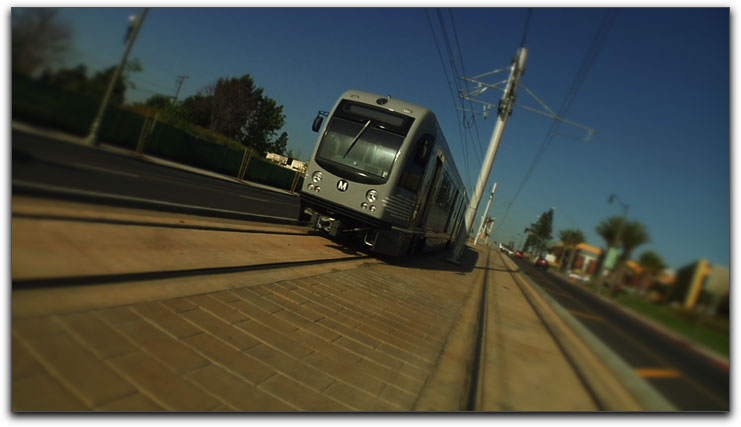
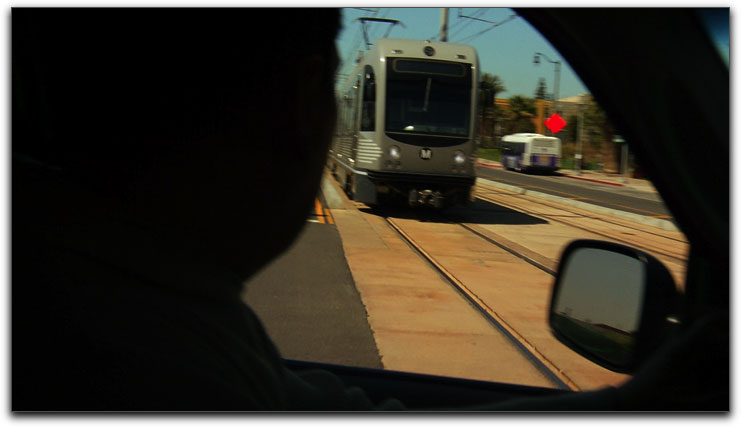
While some of the alignment is underground, along much of its six-mile length, the train will share the street with cars, pedestrians and bicyclists. While trains running down busy streets seem to be a fairly commonplace occurrence on the east coast of the U.S., in East Los Angeles, pedestrians and cars safely sharing the streets with trains is a new situation. Triplane's job was to develop and produce a dynamic and cautionary rail safety video that would speak to the community of the Eastside Extension.
Starting with a pulsing overview of the communities served by the extension, the video segues into a series of scenes that dramatize people taking risks around trains, with fatal results. The reenactments stop short of any actual collision, but make the point clearly that foolish behavior like trying to outrun a train, running a red light, jaywalking, are all dangerous because a train cannot stop fast enough.
The video closes with alternate scenarios showing the right way to cross a street and obey signs, with a final tour on the Gold Line and places to go all over Southern California. The scenarios seem like simple premises but they still presented a lot of logistical challenges. More about how we staged these shots later.
One of the greatest challenges for this production was the fact that the line was still under construction, with opening day a few months away. Our picture train was not under power, but was instead pushed and pulled by a huge Brant truck. In addition, construction was ongoing even on shoot days. Our crew had to get creative to avoid seeing construction signs, cones, etc. Some solutions included simply asking the rail people for permission to move a sign; other solutions had to be resolved in post with visual effects.
The Aesthetic Game Plan
 I decided that I could get a much better idea about how the HPX300 works in real world situations by using the camera to shoot a real project for real clients. The process of using a new unproven piece of technology is not without risk or pitfall. What if the camera doesn't perform as advertised? What if the camera stops working in the middle of the shoot? The fact that the HPX300 that I was going to be using for the project was a prototype and not a shipping production unit was definitely weighing upon my mind but I had faith that the camera would be able to deliver the picture quality needed to give the director and I the look that we wanted to create. There is nothing like putting a little pressure on yourself, right? We also knew that our B-camera was going to be my HPX170 and our C-camera was going to be the director's own HVX200 so we also had hopes that the HPX300 would be able to match the looks of the two smaller cameras, only with more clarity and more bit more polish.
During pre-production meetings with the project team, I learned that the director had a very specific look and feel in mind for the video. One of the largest production challenges we would face would be that during the production schedule was that the train line would still be under construction. We had to shoot the video in such a way that we would not show the torn up streets, construction crews and signage that would be present. To me, this suggested that we would not be able to use many wide shots, because most wide shots would reveal construction clutter. A further challenge would be that we would need to shoot b-roll on other train lines that were up and running to seamlessly intercut with our footage we were shooting in East L.A. Everything about the project was pointing toward shooting with a mixed media jigsaw puzzle approach, an approach that the director and I had used successfully on several other projects for LA Metro in the past.
 The Fujinon 17x lens that shipped with the HPX300 would, in theory, be perfect for the overall look that we were trying to achieve. The director wanted me to shoot a lot of long focal length shots to visually separate the talent from the backgrounds, from the cluttered, construction-filled environment so the additional focal length on the Fujinon would allow us to isolate the talent and most importantly, to compress distances between the talent and the trains that were coming into frame to meet them.
In achieving our goal of a mixed media aesthetic, we decided that shooting multiple video cameras and even using motion sequences from a still camera would be integral to giving the project a feeling of movement, tension and conflict between the "victims" and the trains. We knew that in order to capture our audience long enough for them to absorb the important message of the video, we would need to create something that was visually arresting. With no dialogue and primarily a simple, yet action driven concept script, the visuals had to really be eye catching. Of course we had the added challenges of a relatively modest budget and shooting on a train line that was still under construction. That was okay; we were all up for the challenge.
Visual Storytelling
The finished video will be shown to the community primarily in a custom, high-end mobile theater that LA Metro was using to bring the message to the community. The video will also be shown on the web and possibly will be distributed on DVD so the finished project must translate to all exhibition mediums. East Los Angeles is a largely Hispanic community so some of the questions I had during our pre-production phase were mostly centered around if the video would be scripted and shot in English or Spanish or both? It was decided that the video would have more universal appeal if it were not scripted in English or Spanish.
Unlike most corporate videos, the video would not feature any spokesperson, dialogue or voiceover. Since the video needed to appeal to everyone from four-year-old kids to ninety-year-old seniors who might be more fluent in English, or Spanish or even some other languages, it was decided that the scenarios would strictly be presented in a cinematically visual style with a professionally scored soundtrack. A sound designer would also be enlisted to create and enhance the sound effects. The idea of shooting a corporate project in this way was immensely appealing to me.
How often do we, as filmmakers, have a chance to tell stories in a purely visual sense? This seemed to be a perfect opportunity to put the HPX300 through its paces. The success or failure of the project would be largely dependent on if the images would have " the look" that would be able to capture the audiences attention. We all knew that we were being given a rare opportunity to convey a message that was important to the community.
Visual Effects In Reverse
 One of the challenges that came to mind early in the project was the question of how we would be able to stage and shoot the scenes of the actors being hit by the train. The client did not want this video to be too graphic or melodramatic so we did not need to worry about showing the actors actually being hit by the trains, or the aftermath, but we did need to make it look as if the actors were about to be hit in order to visually sell the cautionary tale aspect in each scenario. So how do you safely shoot actors being hit by trains with a limited visual effects budget, no stunt people and no stunt coordinator or team? We also had to stage cars being hit by the trains as well as they exceeded a limit line at intersections. Hmm...actors, cars, trains and collisions or at least intimated collisions.
The brilliant solution came from our director, Jane. She suggested that we could stage the sequences with the actors on the tracks with the train placed very close the actor. Upon a signal, the train would be driven backwards, away from the actor. I made the suggestion that if we shot these scenes at higher than normal frame rates, we could use speed ramps applied in Adobe After Effects, Apple Motion and in Final Cut Pro to visually accelerate the train toward the actor once the shot was ran in reverse.
We were planning on shooting this project mostly at a 24 frame per second frame rate since we were trying to make the images look as cinematic as possible. By shooting these scenes at 48 fps and 60 fps, the net result would be slow motion when played back at 24fps, but the increased amount of frames that we would have to work with would, in theory, allow for smoother and much more realistic looking speed ramping once the footage was reversed and the playback rate increased. The shots of the actors standing on the tracks with the train next to them, when ran backwards, dosed liberally with speed ramp effects and cutaways, reaction shots and close ups could probably sell the imminent collisions pretty well. Or so we hoped.
The High-Tech Way Of Doing It
Even though the director came up with what seemed to be a brilliantly simple solution to some of our visual challenges on how to create the collision shots, the backwards footage gag is really one of the earliest film visual effects, having been used by silent film directors and stars including Hal Roach, Charlie Chaplin, Buster Keaton and Harold Lloyd. Many of my favorite physical gags from the era of silent films were accomplished in the same way, by shooting actions in reverse, then projecting the film forward and at higher speed.
The opposite side of the coin was that we also needed to show some collisions with the trains and with cars in a few of the scenarios. We could try to shoot the sequences the same way, by reversing the train and having it back up away from the car. The challenge here became that in order to have a frame wide enough to contain the car and the train, it was almost impossible to avoid distant background elements of traffic, pedestrians and other movement. It would become very tough to sell the backwards-ran-forward effect if the cars and people in the background were then moving backwards once we reversed the footage to make the train move forward.
Fortunately, we were lucky to have the presence of A-list visual effects supervisor Chris Dawson on set with us during the shoots. Chris recently worked on the visual effects for "Fast and the Furious" and really knows what he is doing. If you have never shot with a visual effects supervisor on set, I highly recommend the experience. As a DP, it is very liberating to see problems and challenges in the frame, point them out to the visual effects supervisor and be told, "No problem, we can make that work".
I am not a visual effects compositor but I do understand enough about visual effects work to understand the terms that Chris would use to describe how he would basically be tearing apart and re-building the shot using different plates and parts of plates. He planned on utilizing soft edged mattes and wipes to isolate background elements. He was planning on rotoscoping out background items, construction signs and clutter.
 UPS Delivers A Present
Four days before the first shooting began, UPS delivered the prototype HPX300 that Panasonic had sent. Not only did the HPX300 arrive in an ATA hard-shell shipping case, but within the case Panasonic thoughtfully included the MC200G on-camera microphone. We were not recording dialogue during the shoot but it never hurts for the sound designer on a project like this to have ambient sound as reference or to tweak and use.
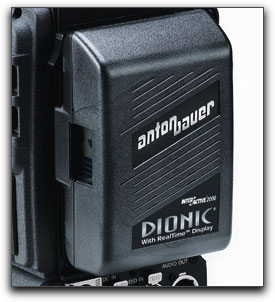
Also included with the HPX300 was two of the Anton Bauer Dionic 90 Lithium Ion batteries and an Anton Bauer combination single position charger and AC adapter for the camera. I used to use Anton Bauer batteries when I owned a Sony Beta SP camera and they really are the best battery system on the market. They are not inexpensive but are generally a good value because they are so reliable and feature state of the art run times. This brings up one of the first features about the HPX300 that I really was impressed with, the power consumption. The HPX300 only consumes a mere 18 watts, allowing for run times of around four hours with the diminutive Anton Bauer Dionic 90s. This is impressively low power consumption for a camera of this size.
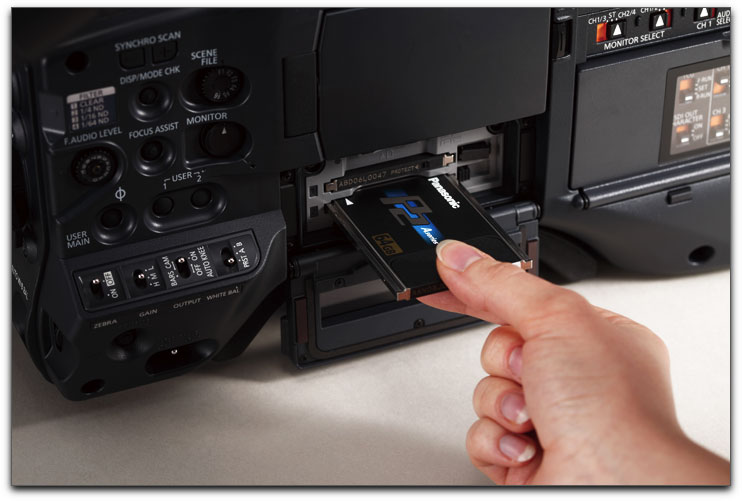
The P2 Drill
Panasonic also included six 16GB P2 cards with the HPX300 to use on the shoot, which was a nice touch. We were planning on having P2 technician, Gonzalo Lubel on set to manage our P2 cards so we felt confident that the six 16GB cards for the HPX300, along with my six P2 cards that I own for my HPX170 and Jane's two P2 cards we would have for the C camera, which was not going to be rolling for every setup, would be adequate for our needs.
I wrote in an article a few years ago on a TV pilot shoot that I was the technical producer on that having a dedicated P2 tech, especially on multiple camera shoots, is a very smart decision. You can read about that experience here. We learned as we shot, that for our shooting style on this project, the fourteen P2 cards that we had for our three cameras was just barely adequate, primarily because I made the decision to roll a lot more high frame rate shots than we had originally anticipated, but more on that later.
Getting To Know You
I spent the first afternoon I had the HPX300 exploring all of the menus and settings. My first concern after unpacking the camera was to determine if my Sachtler DV-6SB head and Miller Solo DV tripod would be adequate to support the HPX300 or if I would have to rent a heavier duty tripod for the project. I bought the Sachtler/Miller combo a few years ago when I first bought my HVX-200. The DV-6SB head is rated from 2 to 20 lbs and the Miller legs are rated to hold up to 44lbs but you have to realize that tripod and head weight ratings should always be approached as nothing more than a suggestion. The question always boil down to determining if the head and tripod can really work well with a given weight load.
My HPX-170, when fully loaded with rods, rod mount, follow focus, matte box, Letus Extreme 35mm adapter, battery, two P2 cards and two glass 4x4 filters weighs in at 16 to 18lbs, depending on which Nikon lens I am using on the Letus Extreme. The Sachtler DV-6Sb can handle the HPX170 loaded, but just barely.
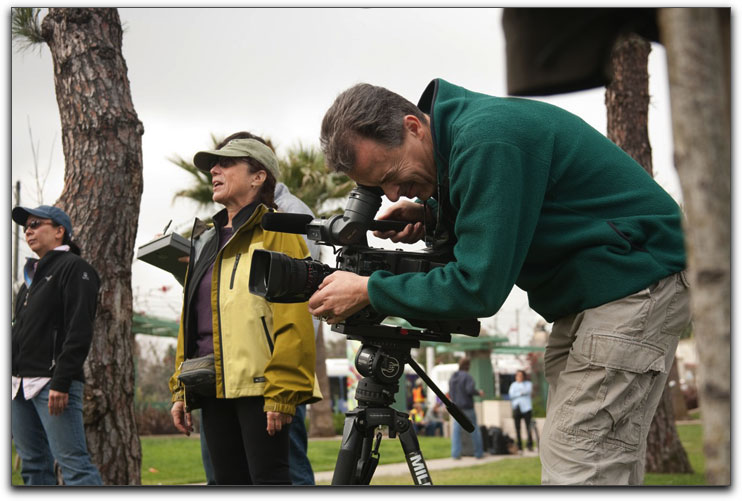
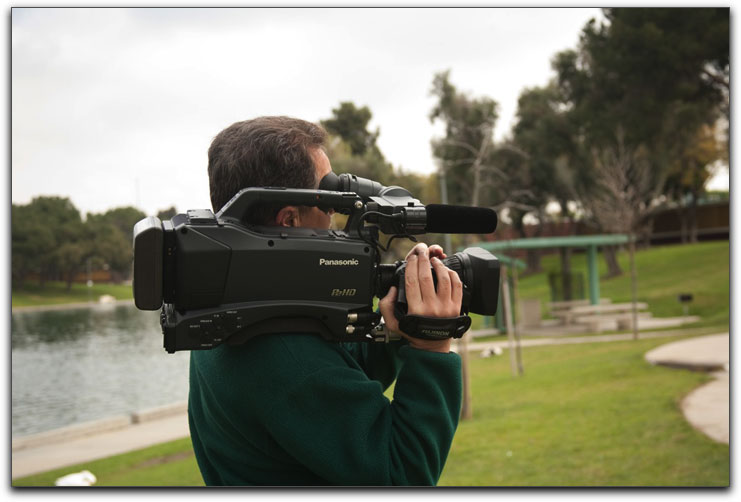
As I unpacked the HPX300 and put a battery on it and hoisted it to my shoulder, I was quite surprised by the camera's very light weight. The HPX300 body weighs a mere 7lbs 9oz. The Anton Bauer Dionic 90 battery weighs another 1lb 7oz. so the camera and battery combined come in right at 9lbs. This is a very light setup, yet the balance is really, really nice, it has that great shoulder mount broadcast camera feeling that is lacking in other cameras in the same price range. Upon mounting the HPX300 onto the Sachtler DV-6SB head, I was pleasantly surprised at how well it balanced. I set the 5-step tilt adjustment to 4 and set the 10-step counterbalance setting on the Sachtler at 7 and the HPX300 balanced perfectly. Very impressive, I was going to be able to use my existing smaller tripod head.
You have to build camera support into your budget when moving from prosumer to professional video gear. This cameras ability to function perfectly with a $2,500.00 tripod setup can be considered a large savings over having to purchase a tripod with a significantly higher weight capacity. The next tier in pro tripods and heads is almost double the cost of my setup, more in the U.S. $5,000.00 range. If you already own a typical prosumer camcorder and a professional high quality head and tripod, chances are that the HPX300 will work well with your present setup since it only weighs few pounds more than the typical (HPX170, EX1, XA-H1, etc.) types of cameras rather than the two to four times as much as a typical broadcast camera weighs.
Smaller and Lighter is Better
After years of hauling around a 22lb Sony Betacam, my mantra these days is smaller/lighter/less expensive. As far as the smaller portion of the equation, the HPX300 is really a whole new ballgame. It is much larger than the HPX170 obviously, but compared to cameras like the Sony F900 or the HPX2700, the HPX300 is rather small. It is no coincidence that the HPX300 brochure shows the camera being used by a petite female model. Sorry guys, if you are looking for a masculine, large camcorder, you will have to look elsewhere.
Think of the HPX300's size as a 3/4 version professional camera. It is larger than the Sony EX3 or the Canon XL-H1 but it is definitely smaller and lighter than cameras like the HPX500 or the Sony PDW350. I must say that as far as first impressions, the size, weight and feel of the HPX300 is absolutely perfect in my mind. Users coming from small prosumer cameras like the Panasonic HPX170 and the Sony EX1 will find the ergonomics of the HPX300 to be much superior. You cannot beat the shoulder mounted form factor for steady handheld shooting. Shooters coming from much larger and heavier cameras like the HDX900 or the Varicam will feel a whole new level of comfort when they mount the HPX300 to their shoulder.
The C.A.F.™ Factor
No matter if your clients are ad agencies, corporations, other production companies or whomever, an often talked about factor when choosing a camcorder to work with is what I like to term, the C.A.F.™ also known as the Client Acceptance Factortm. The C.A.F.™ with the HPX300 will be very high; this camera definitely appears to be a very professional tool.
While we would all like to be judged on our skills, creativity and body of work, the sad fact is that there are many clients who judge us and our ability based upon the cosmetics of our camera. With it's shoulder mounted magnesium body, pro battery, detachable lens and overall cosmetic appeal, the HPX300 screams "professional", it looks like a much more expensive camera than it really is. While this is not always a prime factor in which camera you should purchase, the HPX300's appearance and extremely low cost will be a factor for many upgrading from a prosumer palm-sized camcorder.
While I have only anecdotal evidence to support my contention, it can be easier to charge clients what we would all consider a healthier day rate when using a camera that looks like the HPX300 over a typical prosumer camcorder. Your mileage may vary and perhaps your clients could care less which camera you shoot with, I have several clients who are that way, they trust that I will provide them with a great finished product, they could care less about which tools I do it with. But I do have a couple of corporate clients who would be much more impressed with a camera like the HPX300 over my HPX170. Fact of life.
The Inner Workings
My next assignment was to sit down with the HPX300 and to really go through all of the menus and camera functions. I will not be detailing every menu item in this article because there will doubtless be many other articles in the trade magazines and websites that will go over every function with a fine-toothed comb. My impressions of the HPX300 menus and controls were that most of them were located right where they should be. If you have ever used the HVX200 or the HPX170, you will feel right at home with the menu system on the HPX300. There are some new features not present on the smaller cameras like the C.A.C. and different battery functions, depending on the brand and size of battery you are using, but overall, the menus follow the typical Panasonic layout.
One new operational feature that is a huge improvement over the buttons and joystick on the AG-HPX170 is the combination of the menu button and the menu wheel. The menu is nestled right in the main cluster of operational buttons in the lower left hand side of the main control area. The menu wheel is located at the lower front area of the camera, near the shutter control and the white balance setting switch. The wonderful thing that the location of these controls allows is that your left-hand thumb naturally pushes in the menu button, while your left index finger naturally gravitates to the menu wheel. This allows you to quickly and comfortably manipulate your way through the menu items in a much quicker and more intuitive way than is possible on the HVX200 or the HPX170. If you are coming from a broadcast camera, the locations of these controls will not be a big deal but if you primarily work with smaller cameras, you will find these controls a revelation.
Another factor that I found appealing as I explored the HPX300 was that I liked how all of the operational controls are grouped on the operator side of the camera. I suppose if you shoot features and have assistant camera operators who are changing out P2 cards as you shoot, having the P2 slots on the opposite side of the camera, as the other larger P2 cameras have, might work better but for me and how I shoot, having the controls and P2 slots right there where my eyes and hands are as I operate was very nice. In picking up the camera and shooting around my office, everything felt "right", all of the controls were located where they seemed they should be. Panasonic's engineers really did their homework in laying out the HPX300, it felt like a much more expensive camera. Years of shooting with mostly smaller sized prosumer cameras had dulled my memory of how important intuitive control of your camera is when shooting shoulder mounted.
Surf City
After going through all of the menus and functions and even reading through the HPX300 manual, I felt comfortable with all of the basic functions of the camera. The next thing to do would be to shoot some test footage. I had never shot any footage with the AVC Intra codec so I was eager to check out just how well this codec would perform in the real world. I thought about what locations and subjects I had available to me. I live in Ventura County, in Southern California.
Frankly, I am pretty jaded to my surroundings; there are not very many visually interesting locations near where I live so I decided to take the drive out to Ventura to a place called Surfers Point. I had thought that I would have a good chance to shoot surfers and wind sailers that Surfers Point is famous for. Unfortunately as I began my drive to Ventura, the sky became progressively grayer. One of the great myths about living in Southern California is that the weather is perpetually sunny and bright. Not true. While we do have our larger than average share of beautiful days, in the late winter and early Spring, we have our share of pretty ugly, dreary days as well. Nevertheless, I decided to proceed with my day of shooting at the beach.
Upon my arrival at Surfers Point, I decided to take a walk to scout the area before breaking out the camera. One of the nice features about Surfers Point is that it is a picturesque surfing and body boarding spot, but it also is skirted by the Ventura Pier and by a long boardwalk that has a constant supply of bikers, joggers, dog walkers and other moving subjects that I thought could also provide a nice counterpoint to the surfing action hopefully taking place in the water. There were a few surfers waiting for waves as I unloaded the HPX300 and my tripod and headed for the beach.
This was to be my first experience actually rolling any footage with the HPX300 so I checked over the camera settings before I began rolling footage. I setup the HPX300 using the B-Press gamma as that is my preferred gamma on my HPX170. B-Press has the lowest noise of any of the gamma settings. While I like the look of Cine-D and Cine-V for certain subjects, overall, I find B-Press to work well in many difference situations I end up shooting in. I also use the Cine-like Matrix setting as I like the enhanced colors.
RTFM
My first setting that I had a bit of trouble with was trying to figure out how and where to setup time code on the HPX300. On the HPX 170, setting time code is a simple matter of entering the number five recording menu and paging down to the second page of the menu to set the time code generator to begin at hour one. I always like my time code to begin at hour one when shooting each day because at a glance, you can easily tell how much footage I have rolled for an entire day. I could not locate the time code setting in the HPX300 menu, even after exploring all of the menus. A quick peek at the manual revealed that the HPX300 uses a dedicated physical three-position switch to set time code, put the camera into free run or record run. Wow! I had forgotten what it is like to have professional controls and a dedicated switch for functions like time code. Nice. You merely throw the switch to TC set and use the menu buttons to the left of the TC mode switch to quickly set the time code. Very professional, just like the bigger and more expensive cameras do it. After setting up the time code generator to hour one, I was ready to begin shooting.
The Big Deal With Full Raster
One of the most desired features of the HPX300 was for the camera to shoot a full raster signal. The smaller Panasonic camcorders and the larger HPX500 all utilize a 960x540 CCD chipset with 520,000 pixels on the smaller cameras and 620,000 pixel sensors on the HPX500's 2/3" CCD imagers. Panasonic brilliantly figured out a way to engineer this half of full HD raster chipset (960 times two = 1920 and 540 times two = 1080) to record a full HD signal by implementing a technology known as pixel shifting. The camera uses three 1/3" in 960x540 pixel progressive scan CCDs to capture the image. HD resolution is achieved by both horizontal and vertical spatial offset (aka pixel shift). The green CCD in the array is physically shifted 1/2 pixel biaxially to achieve up to 50% higher horizontal and vertical resolution. The end result of this technology can look very good as owners and users of the HVX200, 200a, HPX170 and HPX500 can attest to.
Other video cameras have recently been introduced that utilize a native 1920x1080 CMOS imager set in the HPX300 price range, the main competition are primarily the Sony EX1 and EX3. These new Sony cameras have been an interesting development as even Sony's $100k plus Sony F900 camera does not use a full raster imager. The EX1 and EX3 use three 1/2" CMOS imagers to achieve the full raster resolution and the resolution is impressive and frankly sharper than the lower end Panasonic cameras.
Keep in mind though that sharpness is just one component to how we perceive a picture and the apparent quality of the picture, there is a lot more to the equation that just sharpness. The HPX300 uses three 1/3" 3MOS (3MOS is Panasonic's name for their 3 CMOS array technology) imagers to also achieve a full raster 1920 x 1080 image. The question was in my mind, how good does the picture look with this new technology?
Rolling Shutter Artifacts?
The next component of how the HPX300 picture might look concerns it's implementation of a rolling shutter paired with the three 1/3" 3MOS imagers. The Sony EX1 and EX3 have been controversial amongst some users because of what have become known as rolling shutter artifacts. In most CMOS based video cameras on the market, the manufacturers have chosen to use a rolling instead of a global shutter because of various economic and design considerations. Rolling shutters are found on CMOS (Complementary Metal-Oxide-Semiconductor) video cameras. A rolling shutter sequentially records the image in rows from top to bottom, one after the other, so that not all parts of the image are recorded at exactly the same time. As the CMOS imager registers the image, the subject being recorded may actually have moved a bit from when part of one frame is recorded to when another part of the same frame is recorded.
This difference in movement can distort the image on very fast motion or when a camera sees quick flashes of light creating a variety of undesirable rolling shutter artifacts. CCD imagers found on most video cameras use what is referred to as a global shutter. A global shutter takes a single snapshot of what is in front of it so everything in the picture is imaged all at once. Rolling shutters sequentially record the image in rows from top to bottom, one after the other, so that not all parts of the image are recorded at exactly the same time. When fast motion and fast flashes of light are photographed, rolling shutters can cause skewing, where the image bends diagonally in one direction or another as the camera or subject moves from one side to another, exposing different parts of the image at different times.
"Jellocam" is a slang name for a rolling shutter effect common in handheld shots. The rolling shutter causes the image to wobble much like a plate or bowl of Jello. This can also show up particularly when CMOS rolling shutter cameras are mounted on vibrating or unsteady locations such as cars, motorcycles, ATVs, etc. CMOS rolling shutter artifacts can be minimized by adhering to the pan and tilt rates that are shown in the ASC Cinematographer Manual and Panasonic has posted this video on Vimeo that also details some strategies on minimizing rolling shutter artifacts.
How Rolling Shutter Affects The Competition
Since the HPX300 was Panasonics first professional camera that uses 3MOS imagers, I was curious to see how the rolling shutter artifacts would figure into real world shooting situations. Cameras with CMOS imagers with rolling shutters are becoming more and more common because CMOS imagers allow higher resolution at a lower cost than CCD imagers. CMOS imagers use less energy and cause less heat than CCD imagers. CMOS imagers are immune to smear, a common CCD imager artifact. Besides the Sony EX1 and EX3, the RED One, the Canon 5D MKII, the Canon line of HV and HF consumer camcorders and many other consumer camcorders all use CMOS imagers with rolling shutters. If you shoot with all any of these various cameras, you will see that even though they all are susceptible to rolling shutter artifacts, they are affected in varying levels. Take the RED One, while it does have rolling shutter artifacts, RED has been able to increase the rate at which the shutter scans, thereby reducing the amount of rolling shutter artifacts.
I have shot fairly extensively with the Sony EX1. The Sony EX3 is a similar model with more professional features than the EX1 but the EX3 uses the exact same CMOS imager and rolling shutter that the EX1 uses. Most EX1 shooters are aware of the rolling shutter artifacts and how to minimize them for most shooting situations. The more motion in the frame, the more skewing you will see in any CMOS imager camera that uses a rolling shutter. The longer the focal length you are shooting at, the more rapid the apparent motion of the subject and the camera becomes and the more exaggerated the skewing becomes. The artifacts are a fact of life at this point and are a limitation in any CMOS camera with a rolling shutter. It is up to the camera operator or DP to figure out how to minimize and mitigate the rolling shutter artifacts in any given situation.
Rolling Shutter and the HPX300
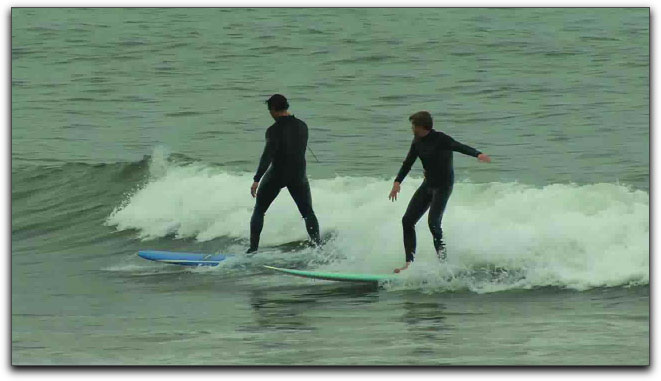
Seeing that we were planning on shooting much of our story with a long focal lens to isolate our actors from their environments, In shooting test footage, I wanted to make sure that I photographed subjects mostly with a long focal length. The surfers, bicyclists and joggers at Surfers Point would provide me with that opportunity. As I trained the camera on the first set of surfers catching waves in, I immediately noticed and appreciated the extra focal length that the HPX300s Fujinon 17x lens provided. I have shot surfers before with my HPX170 and frankly, the 170's 13x lens does not have enough focal length to photograph surfing very effectively unless you are right at the waterline and the surfers are fairly close to you unless you add an additional telephoto converter lens to the 170s lens. With the 17x lens that comes stock with the HPX300, I was able to stay back about twenty to thirty feet from the waterline and I was still able to grab shots that filled the frame with the surfers.
The location I had picked worked out well because when the surfers were waiting for their next set of waves, I could turn around and quickly grab shots of passing bicyclists, joggers and walkers moving down the boardwalk. All of these subjects were moving at various speeds so I could quickly shoot scenes with a lot of movement of the subject with the camera quickly panning along or wider compositions with the subjects moving through the stationary or barely moving frame. There were plenty of light poles, handrails and trees on the boardwalk so that skewing could easily be judged as I panned with the subjects.
I spent an entire afternoon, about four hours at Surfers Point photographing surfers and all of the activity behind me on the boardwalk. Unfortunately the sun never did break through so the colors and contrast on the subjects and the gray background and sky never did improve. I was still impressed with the colors even under the monotone sky. The clarity of the camera's AVC Intra 10 bit codec also was immediately apparent as I reviewed the footage after the shoot. I assembled some of the clips and posted them on my Vimeo page if you would like to look at the test footage from that afternoon.
In the beach footage, while I can see some slight skewing in some of the faster pans, I felt that overall, the skewing was less perceivable on the HPX300 while shooting in 720 24pN AVC Intra 100 than it is on the Sony when shooting 720 or 1080 footage. I did shoot some 1080 24p footage with the HPX300 though and interestingly, the 1080 footage seems to be more susceptible to skewing than when shooting in 720. More on this later.
Editing with AVC Intra
Probably the single most significant feature on the HPX300 is the inclusion of the AVC Intra codec. For those of you who have been asleep at the wheel and don't follow the evolution of video codecs (if you know about this stuff you are probably a total video geek and possibly don't have a life) AVC-Intra is a new video codec developed by Panasonic that is fully compliant with the H.264/MPEG-4 AVC standard and additionally follows the SMPTE RP 2027-2007[3] recommended practice specification. AVC Intra permits full resolution, 10-bit field capture of high quality HD footage and is considered the most sophisticated, state of the art video codec available in a portable camcorder. It is comparable to the codec used in Panasonic's $100k+ D5 high definition video decks.
From a practical user standpoint, AVC Intra takes everything that we like about the DVC ProHD codec and builds and expands upon it. DVCPRO HD is a great codec but it is 8bit and is not a full raster format. If you shoot DVCPRO HD in 720P footage with an HPX170, the files that you see in your FCP browser are not full raster 720P, which would be 1280 X 720, they are an anamorphic version of the format and come into FCP (or any other editing system) at 960 x 720. The same is true with 1080 footage in DVCPRO HD format, it comes into your editing system as 1440 x 1080 with an anamorphic raster that expands the picture to fill up 1920 x 1080. Not so with AVC Intra 100. When you shoot AVC Intra 100 with the HPX300, your 720p is a full 1280 x 720 and your 1080 footage comes into FCP (or any other editing program) at a full 1920 x 1080, hence the term, "full raster".
Do You Want To Double Your P2 Card Capacity?
AVC Intra is so efficient that it also gives you the option of shooting a more compressed version of the codec called AVC Intra 50 that ends up being basically the equivalent of DVCPRO HD as in the raster sizes are the same with the horizontal anamorphic raster like DVCPRO HD uses, but the AVC Intra 50 codec doubles your storage capacity with P2 cards. Imagine shooting 84 minutes of HD video to a 16GB P2 card! This is possible with AVC Intra 50. Panasonic claims that the AVC Intra 50 codec is comparable to DVCPRO HD in quality but the color sampling in AVC Intra 50 drops to 4:2:0 from DVCPRO HDs color sampling of 4:2:2.
The AVC Intra 50 codec was primarily aimed at news shooters where longer run times are sometimes a necessity. I shot some of my test footage at AVC Intra 50 and to be honest, it looked very similar to me to DVCPRO HD but I did not try any keying or compositing where the 4:2:0 color sampling would have came into play. In my mind, if you absolutely need the maximum capacity you can obtain from your P2 cards, AVC Intra 50 looks great, but for crucial footage or footage where the absolute best quality is needed, I would still recommend shooting at the AVC Intra 100 setting. Kudos to Panasonic for giving users a choice. There are many users who care more about squeezing the maximum recording time from P2 cards than about having the ultimate picture quality. When shooting with the HPX300, you have a choice, ultimate image quality or good picture quality with doubled shooting times.
Editing A Mixed Timeline
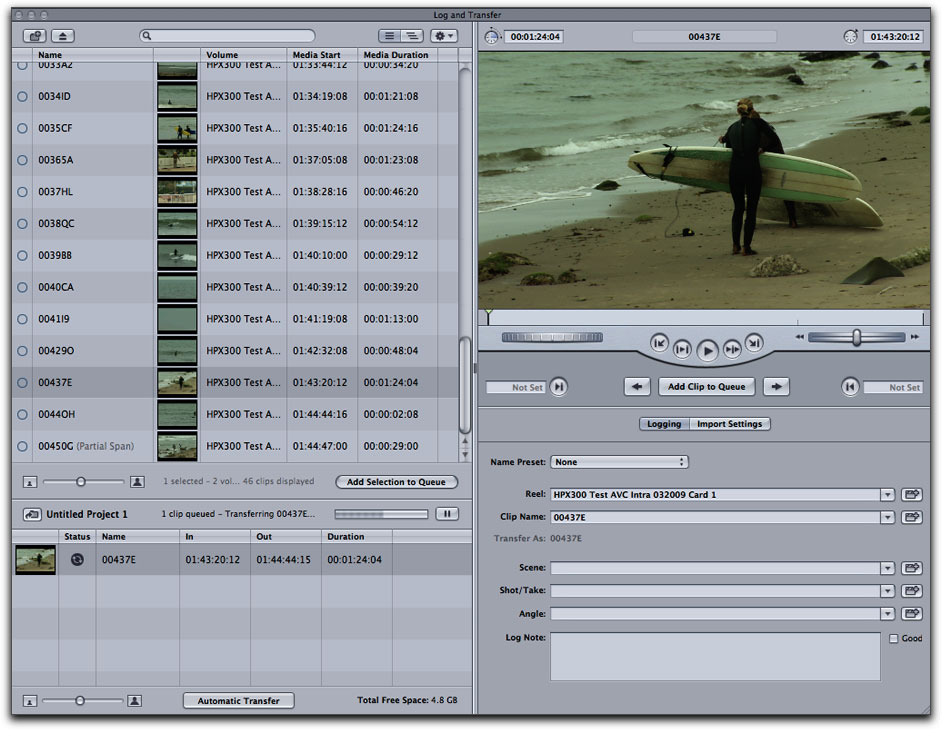
When I arrived back to my office after shooting all afternoon at Surfers Point, I loaded the P2 cards to a FireWire 800 drive for storage. Once the cards were downloaded to the drive, I decided to cut together the test footage piece that I have provided a link to above on my Vimeo page. Since I had never worked with AVC Intra footage, I was curious as to how my system would handle it. I booted up FCP 6.05 on my 2.2Ghz Santa Rosa MacBook Pro and opened log and transfer. I was able to quickly locate the footage and proceeded to import it into FCP. The procedure was quick, simple and painless, FCP brought in each clip without a fuss, converting each clip to Pro Res 422 as it transferred. It should be noted that since I worked with the HPX300, Apple released FCP 7.0 which features native AVC Intra ingest so using AVC Intra is now easier than it was just a few months ago.
So far, from an editor standpoint, I really liked this workflow. No extra boxes to check or configurations to worry about, FCP was basically treating the AVC Intra footage the same as it would regular DVCPRO HD footage from my 170. A word of caution, for those of you who are behind the times and still are editing on G4s and G5s or any other flavor of Power PC Mac, it is time to upgrade to an Intel Mac if you have any interest in working with AVC Intra footage. You must have an Intel Mac if you need to ingest AVC Intra footage. There are some third party conversion utilities that can convert AVC Intra to other editing codecs, but if you want to use FCP to do this, time to step up to an Intel Mac.
Once the selected clips were loaded into FCP, I decided to begin editing my sequence by dropping a 1080 24pN clip onto the timeline, allowing FCP to configure the sequence settings for 1080 24pN. After that, I was able to freely include 720 24pN clips in AVC Intra 100, 50 and DVCPRO HD with no slowdown in working, all other format clips showed up on the timeline with a green render bar, allowing me to edit in real time. The most impressive part of the entire editing experience was that I was editing the footage from a Costco $134.95 one terabyte FireWire 800 drive. No RAID was needed and I experienced no dropped frames, stutters or glitches. Pretty amazing that such a low cost and simple setup could handle what is actually a state of the art video codec, in a mixed format timeline.
Granted, my edit was very simple with just cuts and a few dissolves, but it was impressive that my low-tech system worked so well with this new codec. This should be encouraging to those of us who cannot afford a state of the art fiber channel RAID system, lower speed and lower tech hardware seem to function fine with the AVC Intra/Pro Res codec, at least for simple edits, as long as you have an Intel Mac. Like everything else, I am sure that if I had pushed this system with multiple layers, composites and keys, I could have easily began to see dropped frames, but most of you are aware that if you are going to edit more complex and sophisticated visuals that you need a faster processor, more RAM and faster drives.
Preparing For The Shoot
After posting the Surf City footage on Vimeo, I decided to really begin to tighten up the details for the upcoming LA Metro shoot. Panasonic provided the prototype HPX300 with a very nice rod support mounted to the camera. I asked them to include a rod mount so that I could use my own matte box and 4X4 filters. I knew that since we were going to be shooting almost the entire project in bright daylight, I wanted to use a circular polarizer on all of the cameras.
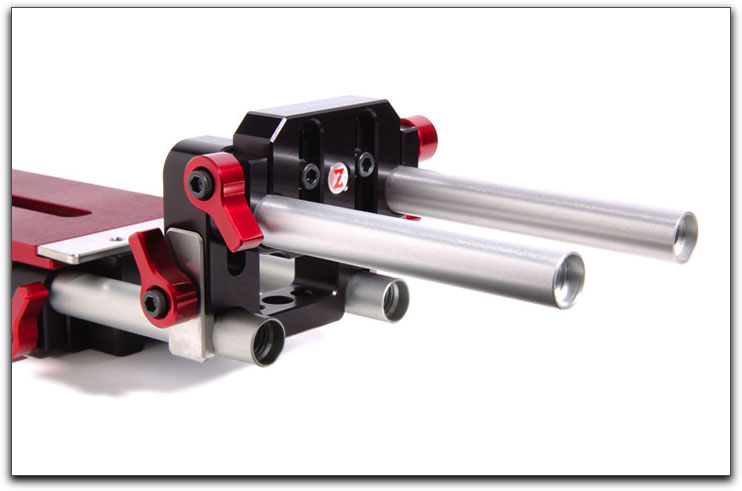
I tried fitting different length rods to the 300 and then tried to mount my Cinevate matte box to the camera. Unfortunately, the height of the matte box was physically too high to line up with the lens height of the HPX300. I lowered the height adjustment on the matte box to its lowest level and the matte box was still too high by about two inches to fit the HPX300. Curses!
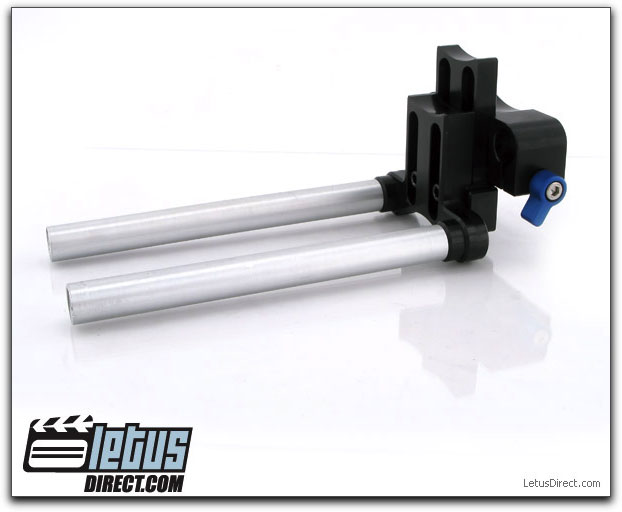
There are simple yet not inexpensive methods to lower the height of a matte box or follow focus using an L bracket that mounts an additional set of short rods at a lower height than the main rods. You then mount the matte box at a lower height and everything lines up perfectly. These brackets are available from manufacturers like Letus and Zacuto but I was reticent to purchase one since I did not own the HPX300 and the L bracket setup is not needed on my own HPX170. The L brackets retail for $199.00 for the Letus and $330.00 for the Zacuto version.
I own a nice package of 4x4 glass filters for my Letus Extreme rig that I was hoping to utilize with the HPX300 but since I could not use my matte box without purchasing additional parts, I needed to come up with a different game plan for filtration. I knew that since we were shooting in bright daylight for most of the shooting days, I wanted to use a circular polarizer. The stock Fujinon 17x lens that comes with the HPX300 uses an 82mm diameter filter so I ordered a B+W slim line glass circular polarizer. After I sent the HPX300 back to Panasonic, I figured that with a 72mm to 82mm step up ring, I could then utilize the B+W circular polarizer on my HPX170. The 82mm circular polarizer arrived the day before our first shoot. I now had a camera, batteries, P2 cards, filters and a working tripod setup. The next step was to begin shooting the LA Metro project.
The Farmers Market
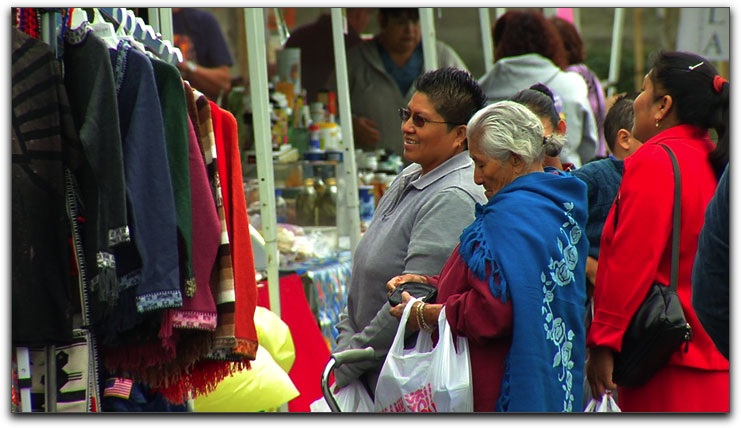
The first shooting day on the LA Metro project looked to be a fairly simple one. In the script, the first accident scenario is a young couple that is leaving Street Fair. The main logistical challenge was that we were shooting a few months after the actual LA Fiesta footage that we needed to use. How could we locate the young couple in our script at the LA Fiesta without staging our own Fiesta? We did not have the budget, time or resources to stage our own Fiesta. It is not all that unusual for the director of a project like this one to also be the project's editor. In our case, we were lucky that Jane, the director was also the project's editor. She was able to come up with a clever way that we could show the young couple leaving what looked to be the LA Fiesta Street fair through the magic of editing.
We were able to obtain footage that was shot by an L.A. based news station of the actual LA Fiesta. One challenge of using this footage was that it was shot on Beta SP in the 4x3 aspect ratio. We were shooting the project on HD, which as you probably know, is always 16x9 aspect ratio. A bit of research revealed that the park at the East Los Angeles Civic Center that we were going to be shooting at hosts a Farmers Market that takes place every Saturday morning. Many Farmers Markets feature the same kinds of blue pop up canopies that are also common at events like the LA Fiesta Street Fair. A game plan was coming together on how we could locate the young Latino couple leaving the LA Fiesta Street Fair.
How Do You Shoot Actors Without The Actors?
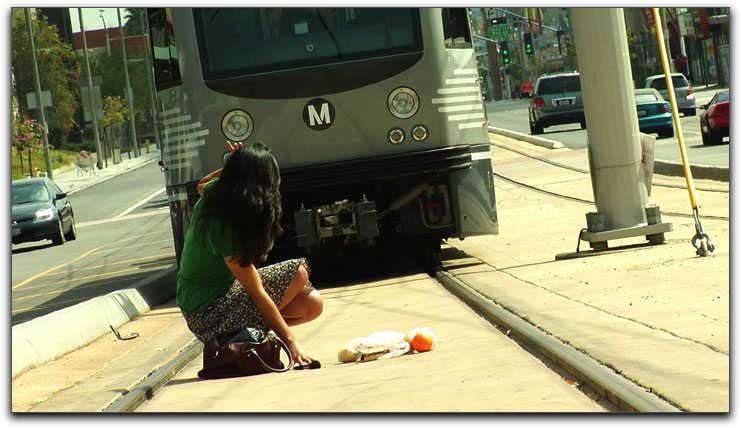
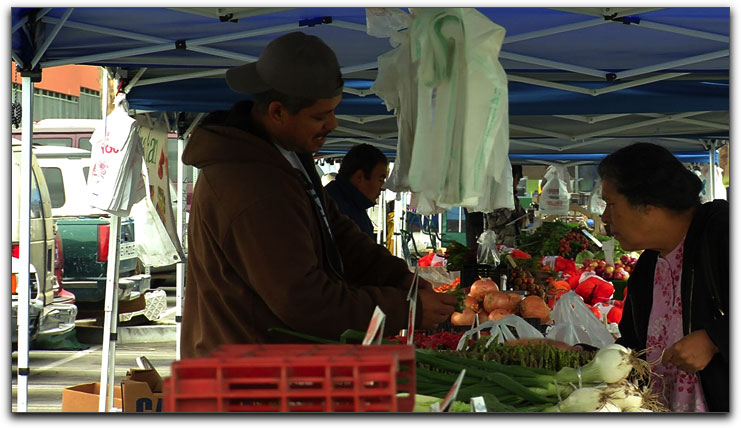
The next challenge of the Farmers Market shoot was that we did not have our talent available for the shoot day. The two actors portraying our young Latino couple were only booked for a solid day of shooting with us the following weekend. Our priority became figuring out how we could tie the couple visually to the Farmers Market when we did not have the couple available the same day as we were shooting the Farmers Market. The solution came to us in the form of a prop. Jane had figured out that if we could shoot a wide shot of a vendor stall, we could move in for some close ups of a pair of hands picking up and seeming to buy a specific prop. Later on, when we would have the young couple on set, we could show the same prop in the girl's hands, therefore tying her to the stall at the Farmers Market. We decided that a small diary with an image of Frida Kahlo embossed on it would work well, the vendor we were shooting at had the small hard covered diary in their stall, so we purchased it and shot the purchase transaction in close up with the hands exchanging money for the diary and putting the diary into a bag.
The rest of the Farmers Market shoot was quite an interesting challenge. We arrived at the Farmers Market at around 9:00 AM on a Saturday morning. The weather was a bit overcast but began to brighten up as the morning wore on. We mainly wanted to shoot b-roll/atmosphere to give a feeling of being at a street fair, fruit, vegetables, signs, etc. It was important for me to not shoot too many faces, as we needed to obtain signed releases from anyone appearing on-camera. Our producer Laura was running around, trailing me, obtaining signed releases from the few people that I did photograph at the market. LA Metro was kind enough to provide us with one of their staff, a woman from one of the client groups we were producing the video for to act as a liaison between the production team and the Farmers Market organizers. I was able to utilize the DRS (Dynamic Range Stretch) function while grabbing shots of our talent buying produce and speaking with the vendors underneath their blue canopies. The DRS function allowed me to better handle the difference between the fairly dim lighting underneath the blue pop-up canopies and the harsh daylight outside of the canopies.
Let's Talk About C.A.C.
One of the sequences that the director wanted were abstract shots of the market aisles that made it look as if the Farmers Market was very crowded with customers. I was able to walk down to the end of the main aisle at the Farmers Market and shot the entrance area about 80 yards away with the Fujinon 17X lens at full zoom. It was very easy to obtain a fairly shallow depth of field when shooting with the Fujinon at the longest focal length. This is a good segue to discuss the HPX300's C.A.C. function. What is C.A.C.? C.A.C. stands for chromatic aberration compensation. What is chromatic aberration? Combine HD's higher resolution and enhanced picture detail with a low cost stock HD zoom lens and the result is an ugly color fringing artifact found to some degree in all zoom lenses, but is more noticeable on lower cost zoom lenses usually.
Chromatic aberration commonly manifests in overexposed light sources, such as headlights or along the horizon line at dusk. Chromatic aberration compensation (C.A.C.) significantly reduces the ugly color fringing that would otherwise be apparent in this scene. The HPX300 features built-in C.A.C. Look Up Tables (LUTs) that are programmed to interact with the stock Fujinon 17X lens as well as a host of other third party C.A.C. HD lenses. The HPX300 menu system let's you dial in each C.A.C. lens with it's own individual C.A.C. menu settings. I can testify that I saw very little chromatic aberration in the images that I photographed at the Farmers Market. The C.A.C. function is a big step forward in making lower cost cameras and lenses perform at a higher level of quality.
The HPX300 Monitoring System Raises The Bar
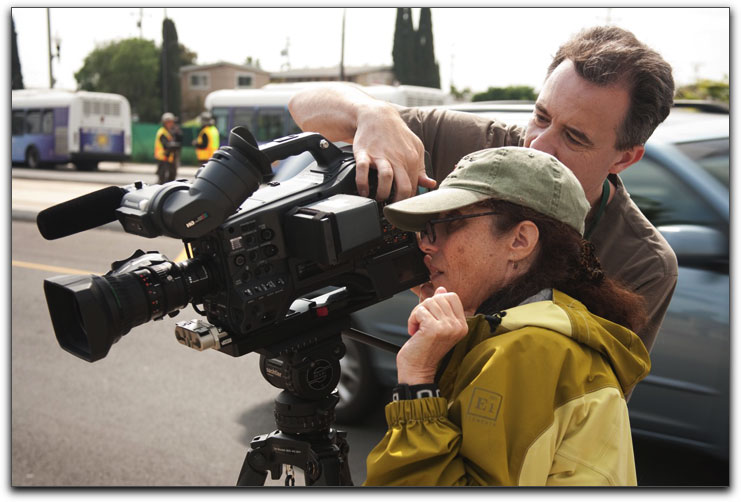
We spent about four hours shooting b-roll at the East L.A. Farmers Market. Based upon what I was seeing in the HPX300's viewfinder, I was pretty satisfied with the images. The proof in the pudding always becomes apparent once you see the images on an HD monitor. I can't tell you how many times I have liked what I have seen when shooting and then upon reviewing the footage on a high quality monitor, have been disappointed by what I photographed. The images were smooth; the colors in the footage were nicely saturated. I grabbed plenty of shots of brightly colored vegetables and fruits in the vendor stalls. The new viewfinder technology used in the HPX300 viewfinder is called LCOS (liquid crystal on silicone). While the viewfinder is a bit small at less than half an inch before the magnifier element, more importantly, it is crystal clear and quite high resolution. It is also color, which I find to be cool feature after years of living with the black and white CRT viewfinders on Sony's Betacams.
While shooting the Farmers Market footage, I also had a chance to use the HPX300s flip out LCD screen for several sequences. The AG-HPX300's LCD monitor is a 3.2-inch panel with a 16:9 aspect ratio. With approximately 921,000 dots (1920 x 480), this LCD screen boasts higher resolution than the LCD monitors in any previous models of on-camera I have used. The image is vibrant and crystal clear. To be totally up front, this is the only HD camcorder I have used that I feel confident that my focus is dead-on WITHOUT using any sort of focus enhancement function.
In a throwback to the days of analog Betacam SP camcorders, you can just grab the HPX300 and confidently focus with just the viewfinder or LCD with no second-guessing. It is difficult to explain the freedom that this gives you as a camera operator. With my HPX170, I can sometimes judge focus with just the LCD screen but I usually double check it with the focus enhancement tool because at times it is difficult to tell if something is really in focus, especially in wider focal length shots. With the HPX300, I never had to do that.
Almost Perfect...But Not Quite
A few weeks after I wrapped shooting this project, I had a chance to work on another shoot, this time using Panasonic's flagship HD camera, the HPX3000. The HPX3000 retails for almost six times the price of the HPX300. While the HPX3000 is obviously a higher quality and more capable camera than the HPX300 is, I was struck that the top of the line HPX3000, because it is based upon older technology, features an LCD screen that doesn't seem a lot better than the LCD screen on the HPX170. I really missed not having the LCD screen from the HPX300. My only beef with the HPX300 screen is that it features a high gloss finish. You will find in daylight, even when using a Hoodman sunshade, you will see your own reflection in the LCD of the HPX300. The high gloss finish on the LCD screen on the HPX300 essentially turns the LCD into a mirror in high contrast, bright conditions.
If only Panasonic could combine the resolution and stunning clarity with the matte finish of the LCD used on the current crop of Panasonic broadcast cameras. Oh well, I guess there is always something to complain about. It is a minor quibble though; the new screen is a huge improvement in resolution over the older screen. I give the monitoring system on the HPX-300 a 9.5 out of possible 10.
On To The Rest of The Shoot...
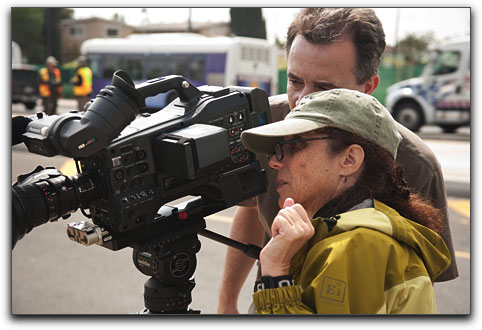
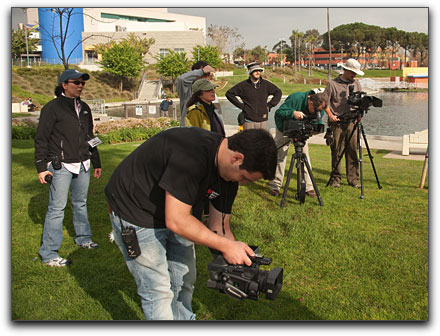
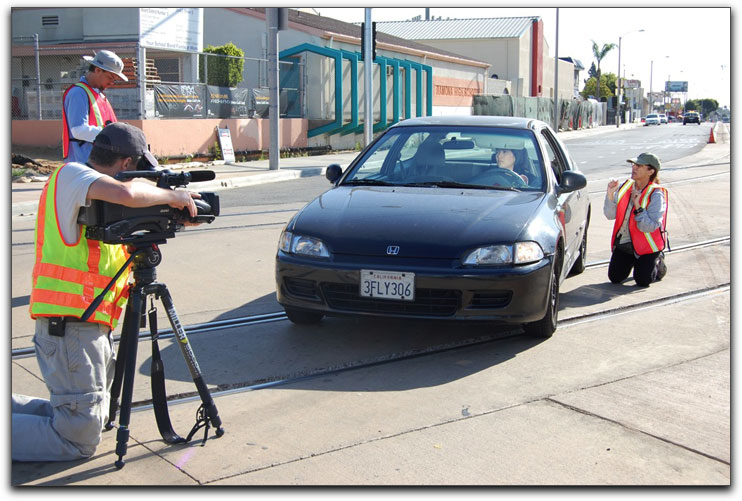
The next step was the first day of the "big shoot" days. We shot the Farmers Market scenes with just the director, the producer and myself. When I say big shoot, by corporate video standards, this portion of the project was fairly ambitious in scale. We were slated for a fairly large crew, a decent number of actors and background actors and we had the added challenge of shooting in real locations on fairly crowded streets in East Los Angeles. We were going to be working with the California Highway Patrol to close some streets for certain scenes, we were going to be shooting actors running across streets and lastly, we were going to be coordinating scenes with the actors working with real trains. In going over the shoot schedules with the 2nd A.D., I discovered that we were scheduled for eighteen setups for the first shoot day. Eighteen setups is a pretty ambitious schedule although at least we didn't have lines of dialogue and sound to worry about.
BTS Drama
Okay, here is where I am going to let you in on some of the real behind the scenes drama that I went through with this project. It's nice to think that projects like this always come off without a hitch and that everything runs perfectly smoothly with us experienced professionals.
Hit the rewind button and go back two weeks. I was the director of photography for this project. I had retained the services of an experienced camera operator to serve as my b-camera operator two weeks before the project. We'll refer to this camera operator as camera op #1. I had hired and worked with this camera operator in the past on several other projects and he had always proven to be reliable, creative and hard worker. We had several phone conversations about the project, the logistics of the project and whom we would hire as our key grip and dolly grip. We agreed on two qualified grips to help us with our lighting.
Strike One
Hit the Fast Forward button to one week later. I received a mysterious e-mail from Camera Op #1, stating that he "might have a scheduling conflict" and he would let me know if there was going to be an issue with it. I called him and we discussed it and he said he would let me know. A day later, I received another e-mail from Camera Op #1 stating that he would have to "pull out of the shoot" because of this "scheduling issue". Okay, fair enough, this would not be the first time I have ever had a crew member pull out of a shoot for mysterious, unexplained reasons. Typically the crew pulls out at the last minute because they get an offer for a longer shoot, and therefore they can make more money. Camera Op #1 never did let me know what the mysterious reason was that he pulled out of the shoot, but at least I had about a week to locate another operator.
The next pressing issue on agenda was to locate a replacement camera operator. Fortunately the key grip that we were planning on hiring also was a pretty decent camera operator. I had worked with this key grip on a project the year before and I had seen his work. He was a talented camera operator who we can refer to as Camera Op #2. I had the same exact conversations with Camera Op #2 as I had with Camera Op #1. We promoted our dolly grip to our key grip and we then found a new dolly grip. We put together our grip and lighting package. Everything seemed to be going along fine.
Strike Two
As the day before the shoot dawned, I checked my e-mail that morning. Lo and behold, I received a terse and short e-mail from Camera Op #2, stating that he "had a family emergency he had to deal with" and that he could not make the shoot. Wow. No B-camera operator the day before the first day of shooting. I am a pretty calm and methodical sort of person but I was beginning to get that sick feeling in my stomach that things were going wrong. As the DP on the project, the producer had entrusted me to make sure that we had the crew positions that I needed to shoot this project and that the crew were reliable, competent and talented. I tried calling Camera Op #2. No answer on his cell phone or at his home phone. Thinking quickly, I called the key grip we had hired, Jeff Samuelson and asked him if I promoted him to B-camera operator to key grip, could he land us another key grip with less than 24 hours notice. Jeff agreed that he could easily provide us with a talented key grip, so I let him go so that he could make the necessary calls.
The clock was ticking with less than 18 hours until the call time for our first day of shooting with the full crew. I still had some of my own gear that I needed to drop off to the transportation department in West Los Angeles for the production and I had to pickup our dolly and some other grip gear in Burbank, then make it home to see if my newly promoted b-camera operator had been successful in securing us a new key grip. With less than 14 hours until our call time, I hit the road.
Logistical Realities and Beating the Clock
Normally on shoots of this size, a production assistant would be driving a van and picking up all of the non-grip gear like pop-up tents, director chairs, ice chests, etc. In order to help the production save some budget and to have enough budget to allocate elsewhere, I was providing the production with some of my company's own generators, a table, a pop-up tent and some miscellaneous grip gear of my own. So I had to rendezvous with the production assistant driving the production van to give my gear contribution to him so that he could combine my gear with some of the rented gear that the production would need. All of this gear would be transported in the shoot using our production van. So I needed to drop off my gear at the rendezvous point, about 65 miles away from my house. I then had to proceed to Matthews Studio Equipment in Burbank, Ca. to pickup some grip gear that my friends at Matthews were going to loan us to evaluate for this project. After dropping off my gear in West L.A., I hopped back onto the 405 to head north toward Burbank.
What Was That Boom?
On my way through Burbank, as I transferred from the 134 freeway to the 5 freeway north, I heard a loud bang as I drove under the freeway overpass to get onto the 5 freeway. The loud sound had sounded like a backfire so I didn't really give it a second thought. As I merged onto the freeway and gained speed as I merged into the fast lane, I suddenly realized that loud sound that I had heard had been the rear tire of my truck exploding! The traffic was pretty heavy but people were pulling up next to me to point and let me know that my rear tire had blown out. I had to cut across all four lanes of the 5 freeway and tried to make my way to an off ramp. I navigated my way to the off ramp but by then, the remains of my rear tire were shearing off and I didn't want to drive on my bare wheel and damage it so I had to pull over off of the freeway off ramp.
I rolled up my sleeves and dug into the owner's manual for my truck to determine how to safely change the tire. After changing the tire, I proceeded to Matthews Studio Equipment. I pulled in to the Matthews loading dock and began loading up our grip package. In our case, we were probably going to be focusing more on flagging and cutting light and re-directing sunlight using reflectors. With a small crew and eighteen setups on our first day, we really would not have much time to setup a generator, run cable across busy streets and we did not really have the budget for HMIs.
Trying Out Some New Gear

I met the owner of Matthews Studio Equipment, Ed Philips, through Matthews Vice President of Sales and Marketing, Bob Kulesh, when I was writing a story about Matthews for a magazine. Matthews new RED Dolly intrigued me and I felt that this production would be an ideal situation to put the new dolly through its paces. We had a small crew, limited resources and our script had several shots in it where a easy to maneuver, lightweight dolly could really work well. Philips and Kulesh generously offered the use of the new RED Dolly for our production and even offered to loan us some of the other grip equipment needed to pull off this shoot. We requested some 4x4 reflectors, some 8x8 frames for silks and reflectors and some miscellaneous low and medium roller stands and sandbags. Philips and Kulesh generously provided us with all of the gear we needed. We knew that with such a small crew that we would not have time and resources to light scenes, but we knew that we could modify and re-direct the sunlight in several scenes so the Matthews gear turned out to be just the ticket for our needs. More on the Matthews gear and how it performed later in the article.
Upon returning home from Matthews, I called Jeff Samuelson, our newly promoted B-camera operator to see if he had been successful in securing a key grip. He had been and gave me the contact information for the new key so I could call him and book him for the next three days of shoots. It had been a hell of a day.
March 26, 2009 - Day One of Three
We had checked the weather for the first day of the shoot. Partially cloudy with clearing later in the day was the forecast. As I woke up that Thursday morning, I realized with my first phone call before hitting the road that my voice was disappearing. I had slept fine that night, I was exhausted and I felt fine that morning but as I croaked good morning to our P2 tech, Gonzalo Lubel, who was going to be riding to the first location with me, I realized that there was no denying it, I was getting sick and more importantly, I was losing my voice. Of all of the days to get sick, the first day of a production, a day with eighteen setups, and a new crew that had not worked together mostly and plenty of logistical challenges, this was not a good day to get sick and a worse day to lose my voice.
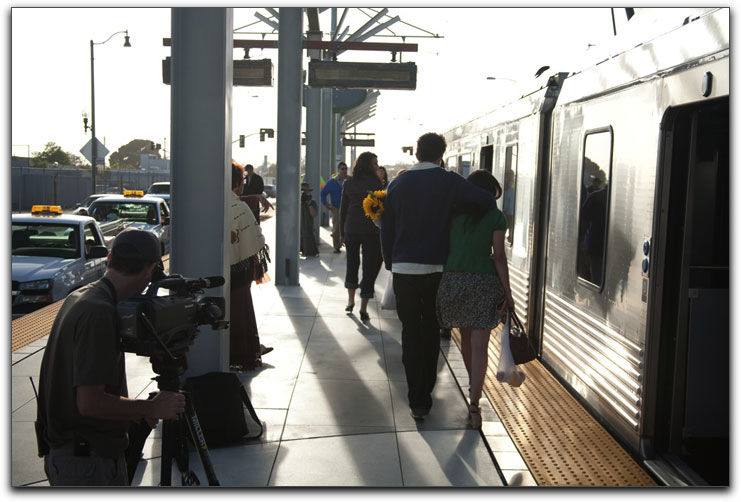
We arrived at the set early and unloaded the gear and readied for our first setup. Our shooting schedule called for a sequence of a young couple leaving the Farmers Market together, heading through a park and running across 3rd Street to try to beat the train to the train platform. This was the "wrong way to do it" scenario. Later on in the day, we would shoot the "right way to do it" scenario. We were going to be rolling three cameras on our first shoot day, since we felt that we needed the most coverage of this particular scene over the others in the script. This first scene with the young Latino couple was going to serve as the opening scene in the video so we wanted it to look especially good.
Our P2 Technician
I have written about the P2 workflow in the past. On productions rolling multiple P2 cameras like this one, it is always to your advantage to have a dedicated P2 technician on set. Our P2 Tech, Gonzalo, setup a P2 dumping station underneath a pop-up tent utilizing a dual core 2.2 GHz MacBook Pro and stack of hard drives. Our workflow was going to be that Gonzalo would hang out on the set with us. As the camera operators filled up the P2 cards on their cameras, Gonzalo would take the filled P2 cards to the P2 area and offload them to two separate hard drives. I am a big believer that with solid state media like P2, SxS or CF cards, it is never a good idea to erase any card until the media has been dumped to at least two hard drives and the footage is played back and verified that both copies are there and playable.
Gonzalo also carefully logged each card he downloaded on a written log sheet. I always recommend keeping careful records of each card downloaded, the time the card was downloaded, the card number and the scenes that were on each individual card. Keeping this log takes extra time and effort but I have found that it can answer questions later about if a particular card was downloaded or if a scene or footage was missing.
When shooting with multiple cameras, I always advise having a dedicated P2/SxS/CF card technician. It is too easy to lose track of footage if you are shooting and trying to manage the media at the same time. The more cameras you shoot with and the more cards that each camera shoots increase the chances of losing or mis-labeling footage. You need a person whose only task if to manage and keep track of your media. Losing footage is one of the most frustrating things that can happen in production.
Getting The First Sequence Into The Can
After unpacking all of the gear for the shoot and setting up the three cameras, we carried all of the gear to a park across the street from our base camp. Our first scene featured our young Latino couple, strolling away from the Farmers Market, through the park and out the front gate to the street that the young couple would jay walk across to get to the train platform.
Unfortunately, the morning of our shoot, the skies were cloudy and gray with no highlights and very low contrast. I was concerned that the shots would not match with footage we were going to be shooting later that day and that week. In the spring in Southern California, it is typical that we have gray and cloudy weather in the morning, then the fog and haze burn off in the afternoon and we finish the day with bright sun. We began to block the sequence and I figured out where I wanted to locate all three of the cameras.
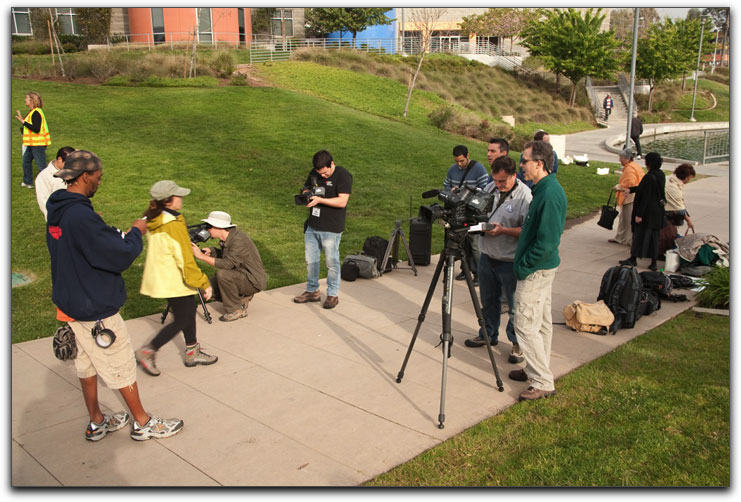
As we began to rehearse the sequence, I realized that in order to get the framing I wanted, I was zoomed all of the way in on the HPX300's Fujinon 17x lens. I didn't see any chromatic aberration in the images and even though the ambient light in the scene was pretty subdued, the images looked great. I checked with the other two camera operators on their shots to make sure that we weren't duplicating our efforts. A few tweaks and we were ready to roll cameras.
I had to track with the couple as they walked toward me and as you may know, being at full zoom on a 17x zoom lens means that every little twitch and bobble will show up in the shot. Professional cameras like the HPX300 lack the OIS (optical image stabilization) feature that the HVX200 and HPX170 have so I had to be extra careful that my shots were smooth enough. I was once again pleasantly surprised at how my Sachtler/Miller combination functioned with the HPX300. As long as I was smooth and deliberate, the shots looked great.
After three takes, the director was happy with what she saw in the camera monitors, we re-framed for mediums and close-ups. At this point, the young couple was strolling past the three cameras toward the entrance of the park from the street. We shot the mediums and close-ups again without pausing. Everything was going smoothly, the shots looked great, the actors looked perfect. Since we were moving extremely fast, we decided to forgo our generator to power our unfortunately AC-powered only HD monitors. We were just cuing up selected snippets to show the director on the camera LCDs after each take. This wasn't ideal but we were moving so quickly that the hassle of moving the monitors, monitor tables and generator after each sequence would have really slowed us down. I was really digging how easy it was on the HPX300 to instantly pull up a clip that I just shot to review it for movement, framing and to make sure that we were not seeing things that we didn't want to at the edge of the frame.
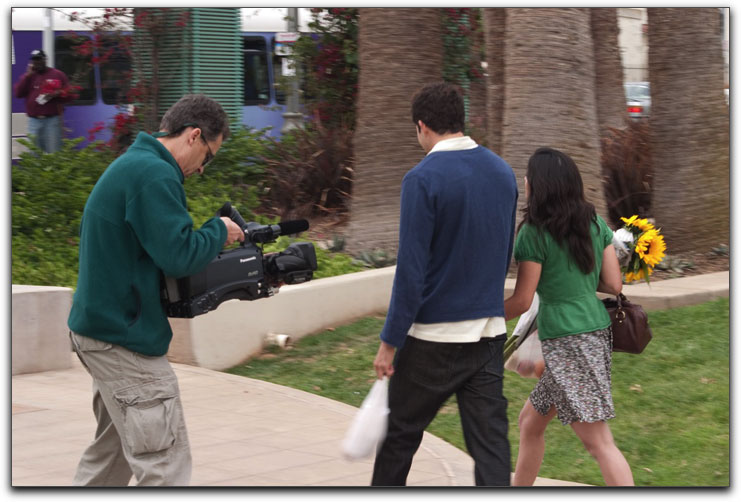
Into The Street
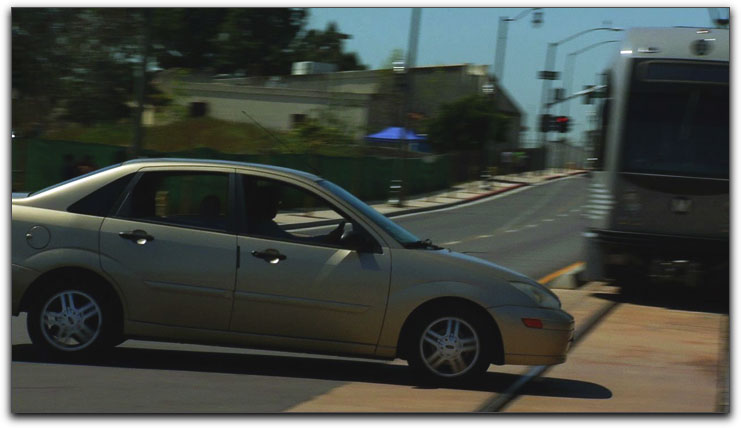
It was now around 10:30 AM and we had shot all of the sequences necessary to track our young couple from the Farmers Market, through the park and out the front entrance of the park to the street they were going to cross to meet their fate. I met with the other camera operators and the director blocked out this logistically trickier sequence. The director wanted see shots of the couple jaywalking across the street, trying to beat the train by crossing the tracks as it headed toward the train platform up the street. The idea was that the couple was so busy talking and playing around that they never even noticed the train coming up the street as they decided to cross the tracks.
We decided to locate one camera behind the couple, one camera across the tracks to get a shot of the couple heading toward the tracks and one camera will track with the couple as they ran across the street. I elected to take the handheld shot tracking the couple across the street. The heavier weight and top mounted handle and controls on the HPX300 meant that I should have been able to record steadier footage that the other two lighter cameras. This is one of the most significant advantages of the shoulder mounted, heavier form factor of the HPX300 over smaller, lighter, non-shoulder mounted prosumer cameras. Heavier cameras generally equate with smoother shots.
We also decided that this was a good time to begin mixing up the frame rates on the three cameras. I am an enthusiastic user of the variable frame rate settings on the P2 cameras, I usually shoot variable frame rates on most projects other than interviews. This project was shot entirely at 720/24pN as our base frame rate. We decided that since I was doing the handheld shot, tracking the actors as they ran across the street, my camera would shoot at 48fps. I set the HVX200 to 32 fps for a slight smoothing of the motion of the couple and we left the HPX170 at 24fps so would will have the all-important ambient sound on that cameras material.
Ready, Set...Action!
We lined up the first take and I followed the young couple close behind them with the HPX300 mounted on my shoulder. The only tricky part of this shot was that I stepped down off of the curb into the street, then, near the end of the shot, I had to hop over the concrete curb that separated the train tracks from the main portion of the street. Have you ever tried shooting, framing, focusing, riding iris with a camera on your shoulder as you follow a running subject, all of the while trying to not trip on curbs and concrete barriers? I did and it was fun but a challenge. My biggest fear was tripping and dropping the HPX300 to the ground.
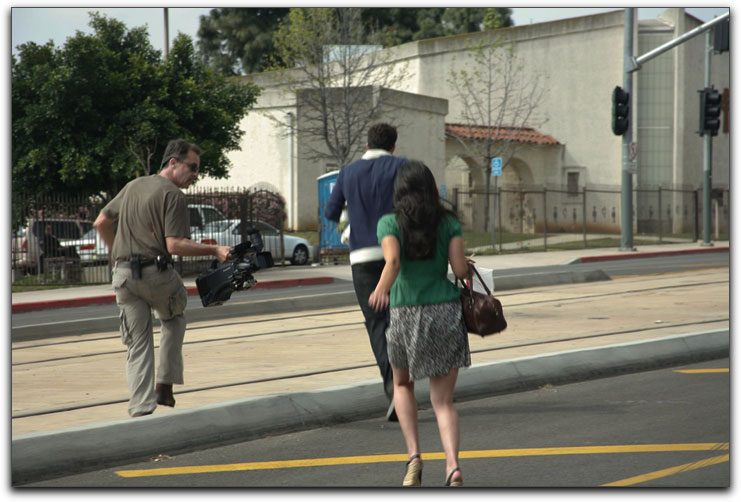
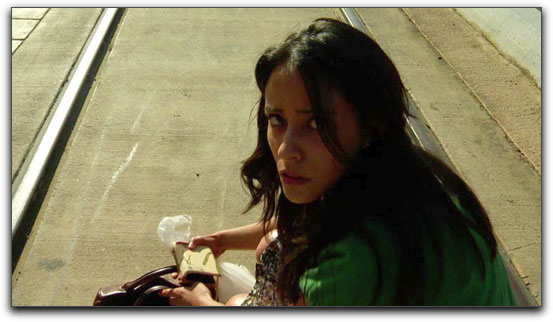
After reviewing the first take, I liked the result but all we were seeing from the tracking camera was the backs of the actors. We saw them holding hands and then they became separated at the end of the scene when the female actor accidentally dropped her bags from the Farmers Market on the tracks. She stooped down to pickup the contents of the bags and looked up to see a train, bearing down on her and honking it's warning horn. We cut to the boyfriend who was further up the tracks. He called for her and realizes that she is not there and turns around. He sees her crouch down to pickup the contents of the bag, then sees the oncoming train behind her. He screamed her name, she looked up and saw the train and "cut"! End of scene. Remember, we couldn't show anyone actually getting hit by the trains; we just insinuated the impending collision in each scenario.
As we re-cued the actors, crew, background players and train, I decided that on this take, rather than running behind the actors, I was going to hold the camera backwards, much like a Steadicam operator rotates the camera backwards during a "dance move" to try to track the actors so that we could see their faces and expressions as they made their way across the street and over the tracks. This shot required several compromises, the main one being that the cameras LCD finder was on the left hand side of the camera and since I had the camera reversed in my hands and it was pointing backwards behind me. I wasn't able to see what I was shooting as I had to watch where I was running. I guessed on the camera to subject focus distance, I put the zoom at its widest angle and we went for it. I ran in front of the actors, trying to avoid getting in their way or tripping and the actors gave a very good performance. We ran across the street, hopped across the concrete barrier and cut.
Once again, I was able to bring the camera over to the director and immediately review the footage. We looked at the take, decided that while it was good, we wanted to have another take, just for safety. As good as the viewfinder and LCD screen on the HPX300 are, there is always the possibility of overlooking some small detail in the frame that you didn't notice, especially on moving shots. We did a third take and cut, all that was left to do was to shoot some close-ups and reaction shots as the actress crouched down on the tracks.
Our young male actor playing the boyfriend provided a great reaction shot as he yelled at his girlfriend to watch out for the impending train bearing down on her. After another hour of shooting, the sequence was complete. Moving on.

HPX300 Lessons Learned From Day One
I was initially concerned that I might see too many CMOS artifacts and "Jellovision" during this first shooting day. I had ran some tests when I shot with the HPX300 at Surfer's Point and I noticed that the CMOS artifacts seemed to be much less prevalent when shooting in 720 mode versus in 1080 mode. Fortunately since we knew we were going to be shooting a lot of variable frame rate shots, we decided to photograph the entire project in 720p. I also knew that I was going to be shooting the actors with a lot of long lens shots as well. The longer the apparent focal length and movement within a frame, the more CMOS artifacts become apparent.
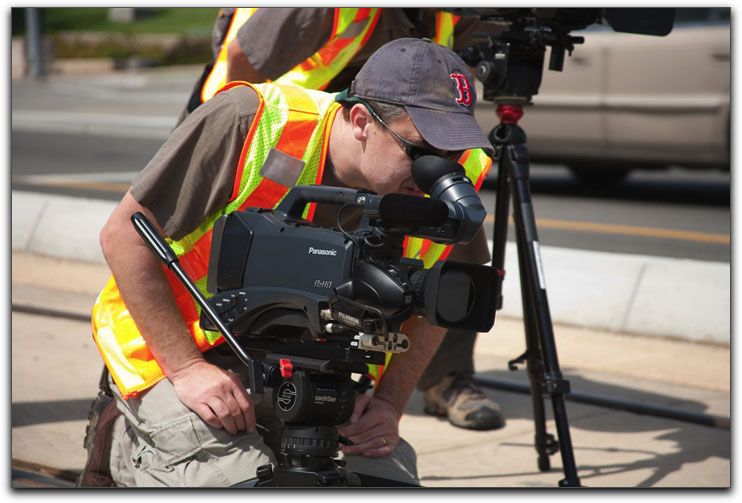
After reviewing the footage we shot on the first day at my office on an HD monitor, I noticed remarkably few scenes with any kind of skewing or Jellovision and the scenes that I did notice it in, the effect was actually pretty subtle, nothing that the typical viewer would ever notice. Personally, I think that the mania and paranoia around CMOS artifacts is overblown. Can you see CMOS artifacting on shots with the HPX300? It depends on a lot of factors but most of the shots that you do notice it in, the camera is being moved in such a way as the shot would probably be unusable from an aesthetic standpoint. In other words, if you go on a long focal length and whip the camera around, sure you will see rolling shutter artifacts. But how often do you move the camera like that during real production? Not very often, except for whip pans. How often do you use whip pans? I don't use them very often.
Here were my notes after reviewing the first day of shooting with the actors and full crew.
- The color and clarity of the footage is remarkable. The AVC Intra codec is a definite winner
- This lens is pretty great for a stock, essentially free lens. The only thing I don't like is that it breathes a lot during focus changes, not the best lens for rack focuses. But the C.A.C. function and overall look of the lens is beautiful
- It took me a while to get used to them but the controls on the HPX300 are more intuitive than on the smaller cameras like the HPX170. The 170 is ergonomically the best prosumer camera on the market but the more professional HPX300 is slightly better
- The new viewfinder and LCD have resulted on the first shoot I have ever done with an HD camera where I didn't really miss not having an HD monitor on set. I could actually see what was in focus and the contrast, framing and color of what I was photographing were all pretty close to what I saw while shooting. Very liberating.
- I am pretty impressed with the performance of the 1/3" 3MOS imagers in the HPX300. The noise was better than the HPX170 and of a much higher resolution. I wish that the HPX300 had a larger imager but I understand that would have raised the cost significantly.
The Next Shoot Day
I drove back to East L.A. and arrived at the set. The scenes we were going to be shooting for the first half of the day involved a car at a large four-way intersection creeping over the limit line and colliding with a train coming up behind the car. The train track curved left over the street at this intersection.
The sequence would show what could happen to you and your car if you get impatient and creep over the line.
Car Collision
I discussed the shots for this sequence with the director and the camera operators. This sequence required us shutting down a fairly busy intersection so we would have to work fairly quickly. Fortunately, it was a Saturday though, so some of the sheer pressure of commuter traffic was absent. Matthews Studio Equipment was kind enough to loan us a Matthews RED Dolly and after looking over the storyboards and script, I knew that this sequence would be one of the few in the script where we could really put the dolly to good use. Since we were not going to actually crash the train into the car, we had to make it look as if the train was going to collide with the car.
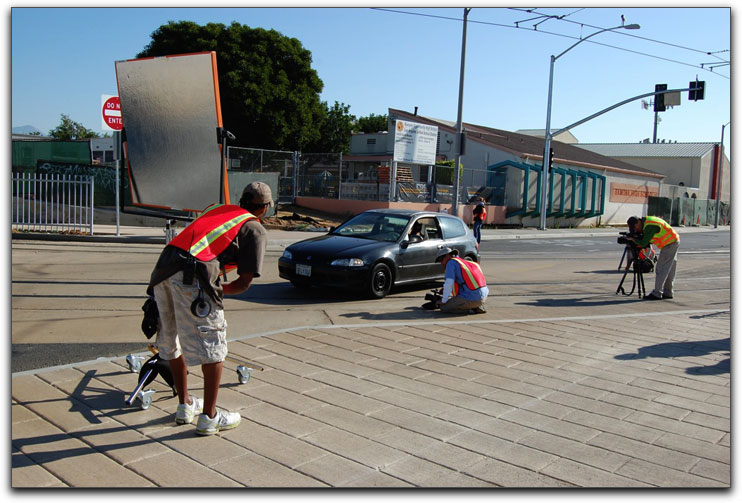
We began shooting the sequence with the driver of the car pulling up to the limit line in the intersection. We had several other drivers and cars for the scene. Our assistant director expertly staged the background action as we rehearsed the sequence. The sun was extremely bright on this day so I was glad that I had equipped the HPX300 with a circular polarizer. Polarizers basically minimize reflections, cut through atmospheric haze and enhance colors. The amount of polarizer effect that the filter has on the image is directly related to the filters angle to the main light source, the closer to 90 degrees the filter is in relation to the light source, the more polarization effect is seen.
Light It Up
In our case, of course, the primary key source was the sun. We utilized Matthews shiny board reflectors to function as fill sources. Normally, one would use HMI lighting to function as a fill source in bright sunlight but since we did not have the budget or time to deploy HMIs, we used the shiny boards to fill in the dark car interiors. They reflectors worked surprisingly well but there generally must be a grip available to position and continually adjust the light from the reflector as the suns position changes.

We mostly utilized the HPX300 on a tripod for this sequence up until we staged the collision with the train and the car. We needed a single continuous shot that would show the car creeping forward over the limit line and the train barreling toward the car in the background. One of the most interesting features of the Matthews RED Dolly is that the dolly can be deployed and used in so many different ways. The camera can be positioned on a tripod, or on a bazooka riser on the dolly or in any of several other ways. I was looking for a shot that would place the camera low, at street level. Matthews makes low angle mounts but we had not ordered one when we put in our order for the dolly so we decided to improvise. The small size and lightweight of the HPX300 proved to me that I could probably cradle the camera in between my legs while sitting on the dolly. This would allow me to still pan and tilt the camera at a low angle, while having my dolly grip propel the dolly away from the impending collision.
A Triumph
I will be the first to admit that the entire dolly setup looked a bit odd, because I was sitting on it with a camera in my lap. but in reviewing the footage, it gave us the exact shot that the director was looking for. We did not use dolly track, we only used the pneumatic tires that the RED dolly comes with to do the move. We did several takes, varying the timing between the car creeping forward and the train bearing down on the car. It really was crucial that while riding the dolly that the dolly grip move me quickly out of the way, the train was bearing down in us in real life.
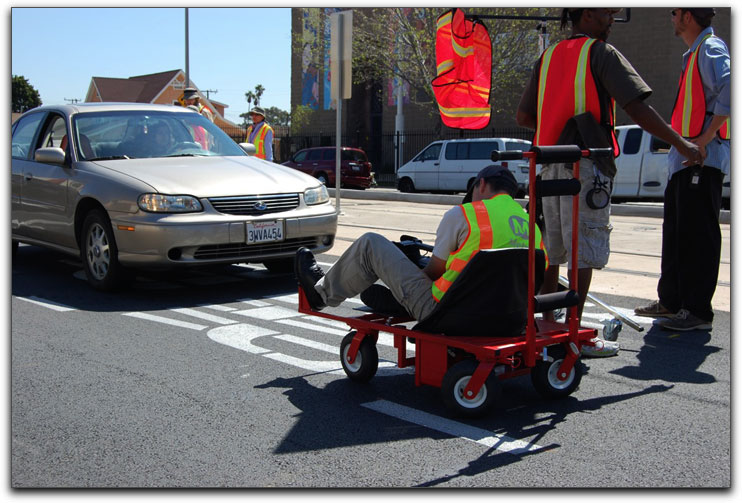
Fortunately, we executed these scenes safely the footage came out exactly as we had hoped. The HPX300 proved once again to be the ideal size and weight to get the job done. I could have executed these shots with either our B (the HPX170) or C camera (HVX200) but the increased weight, mass and image quality of the HPX300 proved that it was the right tool for the job.
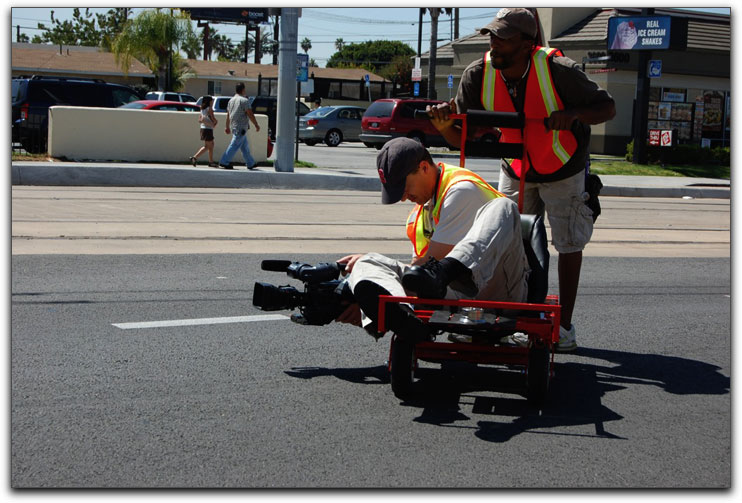
Making It To The End
The good news is that all three of the cameras were working perfectly, the crew was firing on all cylinders, the shots looked great and we were on schedule. We finished out the final day, shooting a pedestrian scenario in Japan Town, closer to downtown L.A. The HPX300 continued to work perfectly without a hitch. The battery life with the Anton Bauer Dionic 90 batteries that Panasonic had supplied was outstanding; each battery was lasting about half a day of shooting. As we wrapped up our last scene, I reflected back on the entire shoot. The HPX300 had been an excellent choice for this project. I had some concerns about shooting with a prototype of a brand new model of camera that I hadn't used before but the camera came through with flying colors.
Coda
A week after we wrapped up the last day of shooting, I checked in with Jane to see how the footage was looking and if the clients had any remarks about the rough cut. In viewing the footage on the timeline, it occurred to me that in a way, I was able to see Panasonic's technological progress with all of the scenes that we had rolled three cameras on. The HVX200 footage, while not as smooth and noise free as the footage from the other two cameras still looked very good. The footage from my HPX170 was distinguished from the HVX footage as smoother and less noisy, although at first glance, the HVX200 and HPX170 footage generally look pretty similar.
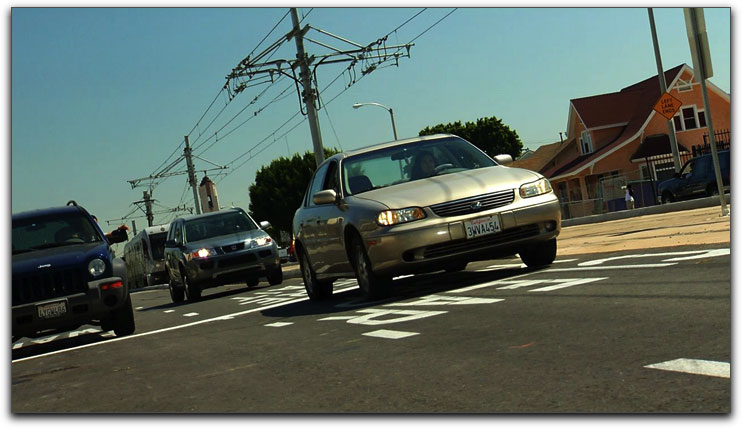
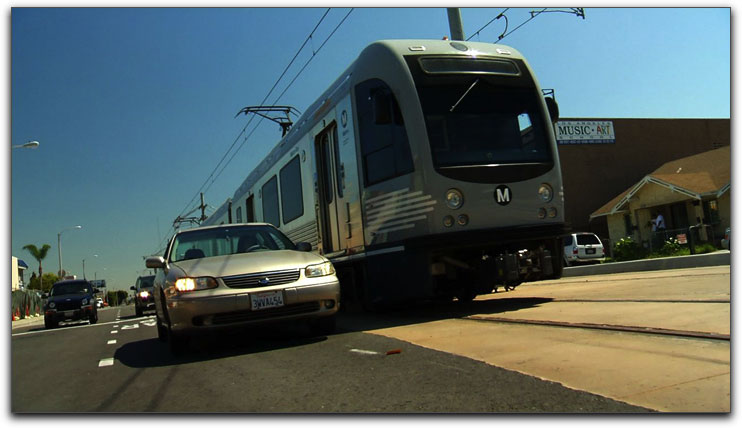
Is It For You?
From a business standpoint, the HPX300 is an amazing product. It is a lot of camera for the money; it will increase your client's perception of your ability because it will allow you to step up your game on all fronts with cleaner, clearer and smoother footage. From a practical aspect, the appearance of the HPX300 is more professional and serious than any prosumer camera. The 3MOS imagers do present some technical limitations but you must be an astute enough user to determine if the limitations will be a minor impediment or a major obstacle to your style of photography and the types of projects that you will use it on. Panasonic has released a FBC (flash band compensation) firmware update for the HPX300 that significantly reduces the artifacts presented by photographic strobes and camera flashes. It is encouraging to see manufacturers continually improve and address functionality with updates like this.
My ideal world would be one where I own the HPX300 as well as the HPX170. The HPX170 is a better choice for situations where you want to appear less conspicuous, the HPX300 screams, "I'm a professional, shooting professional stuff" whereas the HPX170 can sometimes slip under the radar as a larger consumer camera. But for sheer picture quality, the HPX300 is, in my opinion, the best professional camera on the market for under $11,000.00 MSRP. It has a superior codec, lens, form factor and image to anything in its class and with skill behind the controls, it is capable of shooting superb high-end footage that rivals cameras that cost many times more. The HPX300 radically redefines the value equation in professional HD cameras.
Acknowledgments and Thanks
I would like to thank the manufacturers and the participants in the production who graciously allowed me to keep this production journal, shoot photos and to put the HPX300 through its paces:
Jan Crittenden Livingston - Panasonic Broadcast and Television Systems
Ed Philips - Matthews Studio Equipment
Robert Kulesh - Matthews Studio Equipment
Jane Simpson - Triplane Film + Video
Laura Stuart-Dawson - Triplane Film + Video
Chris Dawson - BTS Photos
Don Maynard - Media Crafters, BTS Photos
Los Angeles Metropolitan Transportation Authority
Dan Brockett is an independent television producer based in Los Angeles, Ca. Dan's most recent projects include documentaries for four DVD releases of Paramount Pictures Audrey Hepburn: The Centennial Collection and Warner Bros. Special Edition of Howard Hawks Rio Bravo. Dan is also known for shooting and producing two top rated episodes of A&E's Biography. Dan is currently in development on multiple television projects for 2009. He can be reached at dan@biglittlefilms.com.