April 28, 2008
For use in Compressor and DVD Studio Pro.
By Ken Stone
When working in Final Cut Pro we can add Markers to our timeline. Adding markers to the timeline gives us the ability to 'export' special metadata along with our video. For example, when building a sequence in FCP that will be used in DVD SP, we can add Chapter markers to the timeline that will pass through on export to Compressor or directly to DVD SP, and will be available for us to use when authoring our DVDs. In addition to Chapter markers we can add Compression markers and Scoring markers for use in SoundTrack Pro.
There are some general rules for applying markers that we need to be aware of.
- There is a limit of 99 markers for any one project.
- Markers should not be placed within one second of each other.
- Do not place a marker at the very beginning of the sequence, (this is done automatically) or at the very end of the sequence.
- Markers that are inside a Nest will not export.
- Clip markers in a sequence will not be exported.
- You can not have more than one marker type at the same location in the timeline, i.e. compression and chapter markers.
There are two basic ways that we can export out of FCP to Compressor or to DVD SP. Directly from FCP to Compressor and Exporting from FCP as QuickTime and then into Compressor, (or DVD SP).
From FCP directly to Compressor
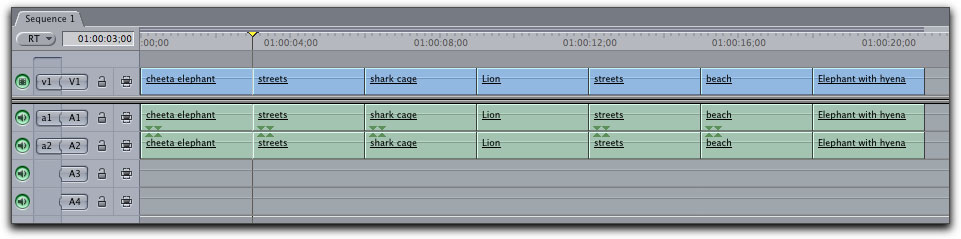
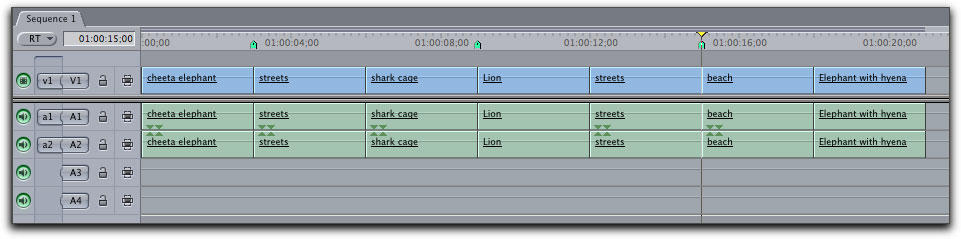
Let's start off with a timeline that has no markers added.
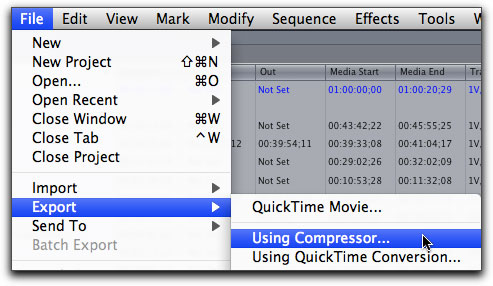
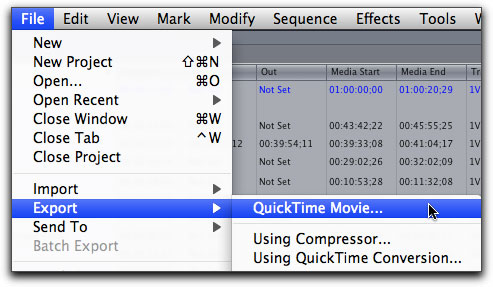
From the File menu, choose Export > Using Compressor.
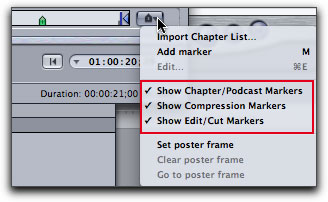
This will launch Compressor and our export will be displayed in the Compressor Preview window. To display the markers in the preview window, click on the 'Modify Marker Settings' drop-down and select the three Show items in the menu.
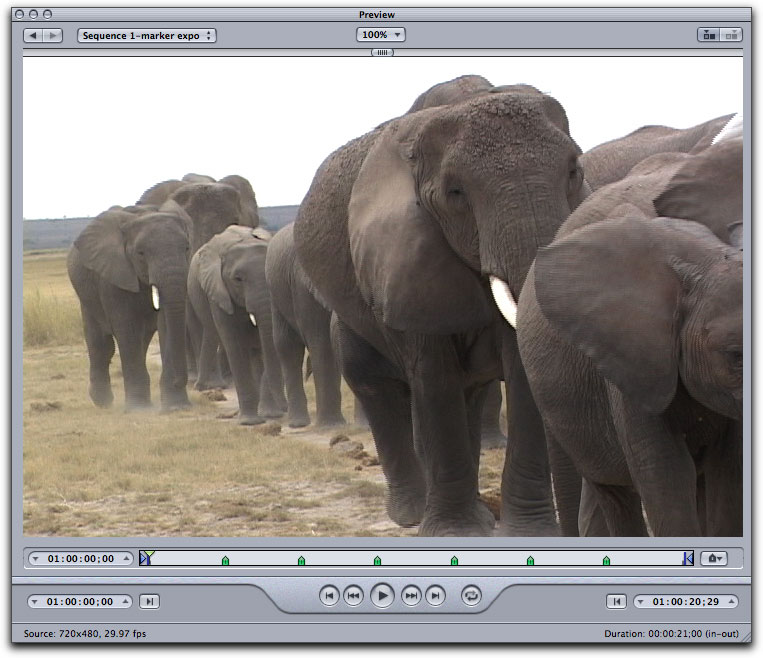
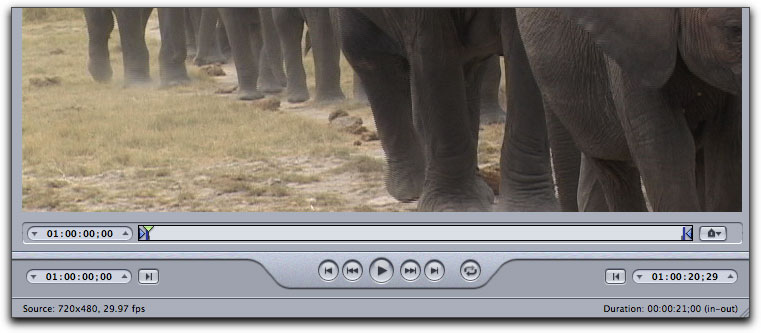
 While we can manually add markers to the timeline. On export, FCP will automatically add special markers called "Edit/Cut Markers", (which act as compression markers) that are placed at the start of every clip or edit point in the timeline. These markers, which are added on export, are used during the encode process. Each Edit/Cut marker tells the encoder to place an "I" frame at that location. In the Compressor Preview window, shown below, we can see the green Edit/Cut markers.
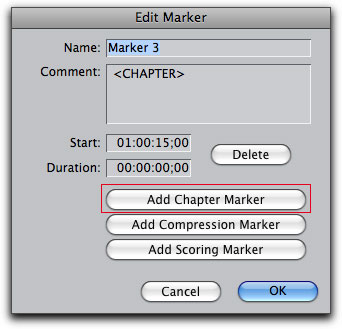
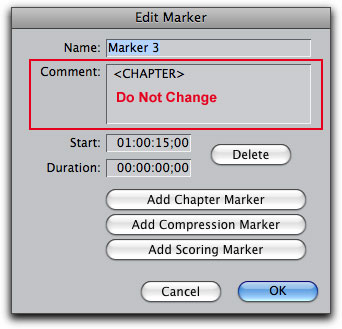
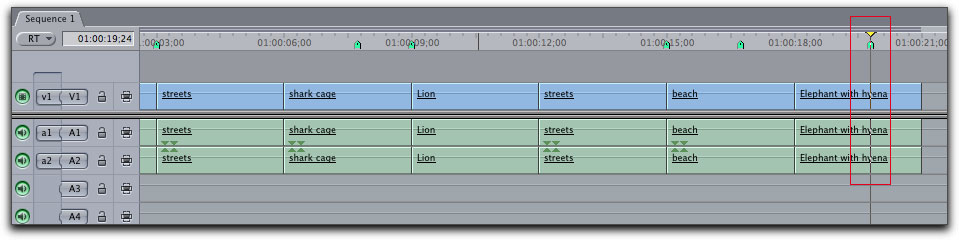
Going back to FCP, I have added three chapter markers to the timeline. You do not want to add a chapter marker at the very start of the timeline as FCP will do this for you automatically. To add a chapter marker to the timeline, place the playhead where you want the marker and then hit 'm' on the keyboard which will place a marker at the playhead position. Hitting 'm' a second time will open the 'Edit Marker' window. Click on the 'Add Chapter Marker' button (below left). You can name the marker in the 'Name' box, but do not change the <CHAPTER> in the 'Comment' box (shown below right). To navigate between markers on the timeline, use Shift or Option 'm' which will move you up and down the timeline.
You'll note that with timeline markers, FCP uses the color green for all markers types. However, in Compressor, different types of markers are of different color. Green for Edit/Cut markers, purple for Chapter markers and blue for Compression markers. Podcast markers are red.
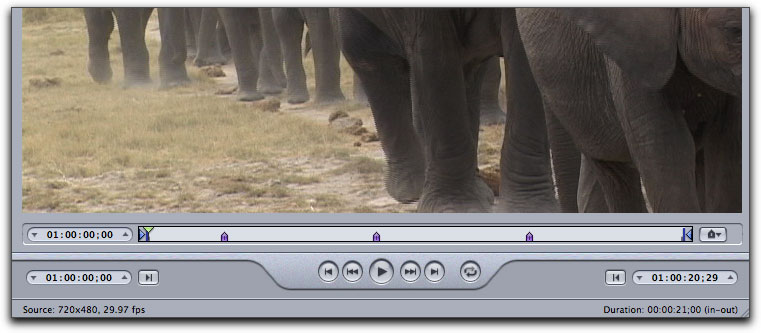
Now, when we export from FCP 'Using Compressor', the Compressor Preview window will show Edit/Cut markers in green and the newly added Chapter markers in purple.

While working in the FCP timeline, you may discover that there is an area inside a clip where there is rapid motion or some other element that you know will be difficult for the encoder to handle. In this case you can manually add a Compression marker to the timeline that can be used in the encoder to create an 'I' frame and therefore improve the quality of the video at that point.
I have moved the playhead to the problematic area, hit 'm' on the keyboard twice, selected 'Add Compression Marker' and named it 'Compression'.
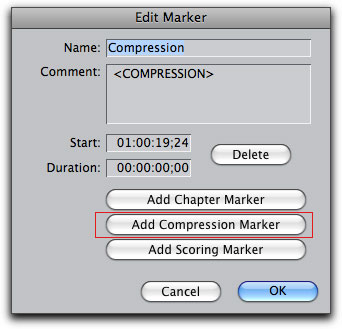
The Compression marker has been added to the timeline.
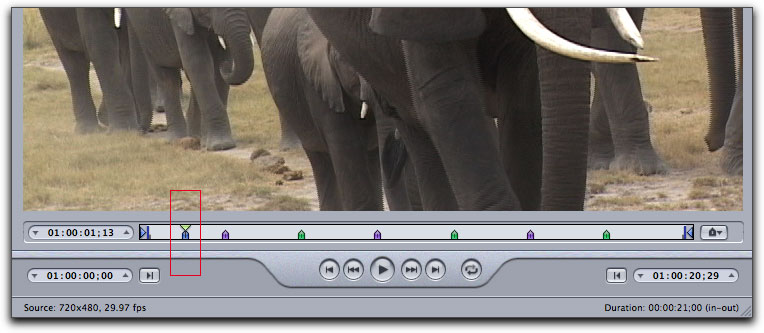
After exporting to Compressor, you can see that the Compression marker that I added manually in the FCP timeline, shows up in the Preview widow and is colored blue.
Exporting Using Compressor is very straight forward and all markers are included in the process automatically.
Exporting from FCP to 'QuickTime Movie'
There may be times when you want to export as a QuickTime movie, either as a Self Contained or Reference movie. For instance, when you export directly from FCP to Compressor, FCP is locked up for the duration of the encode process which can take a very long time. Exporting a QuickTime movie and then placing the export in Compressor will allow you to return to FCP and continue working while Compressor is encoding.
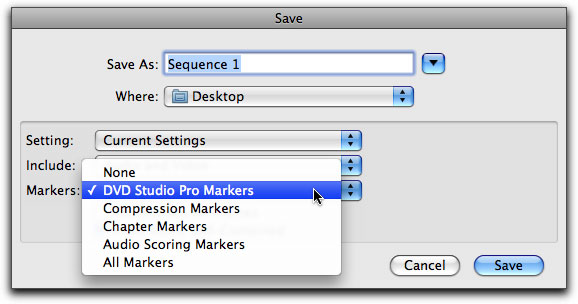
Exporting as QuickTime can be a little tricky. As you can see below, there are a number of options for marker export, but not all of them work as you would think. More importantly, in the Save box you must pick a Marker type, leaving Markers set to 'None' will mean that no markers, even Edit/Cut markers, will be included.
Selecting DVD Studio Pro Markers is the best option even though you are going into Compressor before going to DVD SP. With this option, Edit/Cut (green in color) and Chapter markers (purple in color) are maintained, as you can see below in the Compressor preview window. If you have manually added Compression markers to the FCP timeline, these too will pass through and will show up in the Compressor Preview window as blue markers.
If you choose 'Compression Markers' in the Save dialog box, the Edit/Cut markers show up, they are, after all, compression markers. Notice that if you select Compression markers, the Chapter markers on the FCP timeline will not be included, they are gone.

Now here is where it gets a little strange. If you choose 'Chapter Markers' in the Save box, the chapter markers will show up in the Compressor preview window, but, the Edit/Cut (compression) markers are nowhere to be found. Not good. We need to have a compression marker (I frame) at the start of each clip. Without them, the final encoded output will look awful.
But wait, it gets worse. If you choose 'All Markers', nothing shows up. Go figure!
So the lesson here seems to be, that when exporting from FCP to QuickTime, choosing 'DVD Studio Pro Markers' would be the best option as Chapter, Edit/Cut and Compression markers will be maintained through the entire process.
Exporting Scoring Markers
I have added three scoring markers to my FCP timeline.

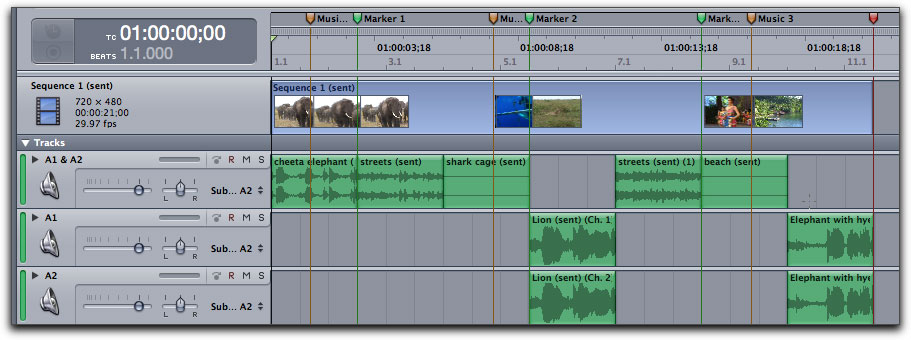
When you send the sequence to SoundTrack Pro, the Scoring markers will show up at the top of the timeline and will be orange in color. Notice that the three chapter markers from my FCP timeline also show up and are green in color.
A final note. Once in Compressor you can add both Compression and Chapter markers in much the same way you do in FCP. When you add a Chapter marker in Compressor it will be colored purple, just like Chapter markers from FCP. Compression markers added in Compressor will be blue in color, exactly the same as if you had manually added a Compression marker in the FCP timeline, see below. By default, all markers added in Compressor are Compression Markers. You'll have to Edit the Marker in order to change it to another type in the 'Modify Marker Settings' drop-down in the Preview window.
If you have worked with Compressor but are new to Compressor 3, I have Compressors' New Interface. If you are just starting to use Compressor or need to learn more about it, there is Up and Running in Compressor 3" by Brian Gary which is excellent.
Enjoy,
--ken
[Top]
copyright © www.kenstone.net 2008
are either registered trademarks or trademarks of Apple. Other company and product names may be trademarks of their respective owners.
All screen captures, images, and textual references are the property and trademark of their creators/owners/publishers.